Parts
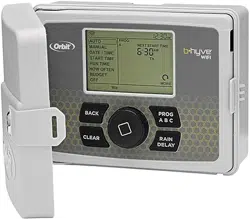
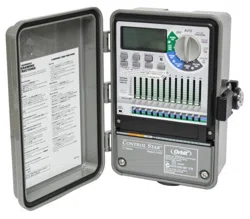
Sprinkler Timer

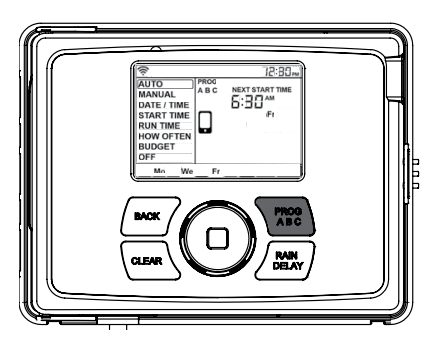
Timer Controls

Digital Display

B-hyve™ App
You will need to Install the B-hyve™ app and create an account on your smart device after the timer is installed.
Note: There is a wizard in the app to guide you through initial set up of your sprinkler timer. In addition, there are help icons throughout the app with more information and useful tips.

Installation
Selecting a Location
When choosing a location for your timer, consider the following:
- Choose a location near an electrical outlet.
- Locate it where there is a good Wi-Fi signal. Tip: You can check this using a smart phone. (Find a location that has a minimum of two bars.)
- Ensure operating temperatures are not below 32° or above 158° F (below 0° or above 70° C).
- Place it away from direct sunlight.
- Make sure there is 9" of space to the left of the sprinkler timer box, this allows the door to swing open after installation.
- There needs to be easy access to sprinkler wires (from valves).

Important: Timer is weather-resistant to UL-50 and ETL®Listings, but should not be placed in areas where continuous water could cause damage.
Tip: If replacing a timer, it is helpful to take a photo of the wires before you remove them from the old timer.
Mounting the Timer
Required Tools
- Small Flathead Screwdriver (included in hardware package)
- Wire Strippers
- Drill with 3/16” (4.8 mm) drill bit
- Level
Tip: Use the expanding anchors (included) for plaster, masonry or drywall installations.
- Install a No. 8 screw (included) into the wall, leaving the screw head protruding 1/8” (3 mm) from the wall.
- Hang the timer on the installed screw using the keyhole slot located in upper back cabinet.
- Level the timer and install the second screw in one of the pre-formed mounting holes located on lower back cabinet to secure the timer.

Wiring the Sprinkler Valves
- Strip 1/2” (13 mm) of plastic insulation off the end of each wire for both the valve and sprinkler timer wires.
- Connect one wire from each valve to a single “Common” (COM) sprinkler wire (usually white). Tip: It doesn’t matter which wire on the valve you connect as long as it is at least one per each valve.
- Connect the remaining wire from each valve to a separate colored sprinkler wire that will be connected to the terminal at the timer.
Note: If the distance between the sprinkler timer and valves is under 700' (210 m), use 20 gauge (AWG) wire to connect the sprinkler timer to the valves. If the distance is over 700' (210 m), use 16 gauge (AWG) wire.
Important: All wires should be joined together using wire nuts, solder, and/or vinyl tape. In wet environments like a valve box it is recommended to use Orbit Grease Caps to prevent corrosion of the connection and for protection from water infiltration.
Important: The wire can be buried in the ground; however, for more protection wires can be pulled through PVC pipe and buried underground. Be careful to avoid burying the wires in locations where they could be damaged by digging or trenching in the future.

Wiring the B-hyve Timer

- Strip 1/2" (13 mm) of plastic insulation off the end of each wire.
- Loosen screws on terminal.
- Push common wire into the common terminal and, using the included screwdriver, tighten the screw in the wire terminal to secure the wire.
- Insert and tighten remaining wires to corresponding terminal locations

Connecting Electrical Power
Once your B-hyve™ timer is plugged into the power source, it will automatically look to pair with your smart device. In the top left corner of the timer display the Wi-Fi icon will begin a graduated blinking sequence. This indicates that your timer is ready to pair with a smart device. See page 7 for details on how to pair timer.
If mounted in an outdoor location, shut the compartment door to keep the timer safe from weather damage.
- Indoor Locations—Insert the power cord into an 110V electrical outlet.
- Outdoor Locations—Insert the power cord into a 110 volt Ground Fault Interrupter (GFI) outlet.
Important: We recommend you consult an electrician for hardwired installations.

Activating Battery
- Timer includes one Lithium CR2032 battery.
- The battery will maintain your time and date in case of an AC power loss.
- Annual replacement is recommended to avoid loss of programming.
Note: The battery alone will not operate the valves in your sprinkler system. The sprinkler timer has a built-in transformer that must be connected to an AC voltage source.
WARNING: Risk of Fire, Explosion, and Electric Shock. Replace battery with Hitachi Maxell Ltd, Type CR2032 only. Use of a different battery has the potential for a risk of fire, explosion, and electric shock.
WARNING: Chemical Burn Hazard. Keep batteries away from children
WARNING: This product contains a lithium button/ coin cell battery. If a new or used lithium button/coin cell battery is swallowed or enters the body, it can cause severe internal burns and can lead to death in as little as 2 hours. Always completely secure the battery compartment. If the battery compartment does not close securely, stop using the product, remove the batteries, and keep it away from children. If you think batteries might have been swallowed or placed inside any part of the body, seek immediate medical attention.
Even used cells may cause injury.

Replacing the Battery
- To remove, lift on the edge of the coin cell battery. DO NOT use a screwdriver or other metal object.
- Insert a new CR2032 battery at an angle and press to click the battery into place
- Verify that the + side is up.
Note: A weak or missing battery can cause the time and date to be erased after a power failure. If this happens, you will need to install a fully charged battery
Important: If, for any reason, your program is lost, the factory installed fail-safe program will turn on each station every day for 10 minutes
WARNING: The timer must be disconnected from the supply mains when removing the battery.
WARNING: Danger of explosion if battery is incorrectly replaced. Replace only with the same or equivalent type recommended by the manufacturer. Dispose of used batteries according to the manufacturer’s instructions.
Note: Battery should be disposed of properly.

Programming
Connecting to Wi-Fi
Programming at the timer can be done whether you are connected to Wi-Fi or not. It allows the gardener who left their phone inside to run a manual cycle, or adjust programming as needed and keep dirty hands away from the phone. Otherwise, programming should be completed using the instructions included in the app.
- Install B-hyve App: If you haven’t already, install and create an account on yur smart device.
- Enter your Wi-Fi settings: The B-hyve™ timer will create its own network that will appear in your list of available Wi-Fi connections on your smart device. Connect to the Orbit Smart Home network and then return to the Orbit® B-hyve™ App
Note: You may need to delete the timer from a smart device. Go to settings to deauthorize the timer, after which it will ask for confirmation to remove the timer. Find Orbit_SmartHome_XXXX in your Wi-Fi list.
After returning to the app, you will see a list of available networks. Choose your network and then enter the password for the network to connect your timer to your Wi-Fi signal. When connected, the Wi-Fi icon on the timer will stop blinking and show solid lines.
Tip: You can re-pair your smart device with your B-hyve™ timer by turning the dial to “Off” and pressing the reset button on the back of the swing panel. The timer display will show “Pair.”
Note: Press the Reset tab on the back of the swing panel to clear any previous factory programming.
Program Button (ABC)
Your sprinkler timer provides the flexibility of using 3 independent programs (A,B,C). A program is where you store all of your sprinkler settings. It consists of a group of stations set to specific start times and run times. Multiple programs allow you to run different valves on different days with different run times. While many applications only require one program (A), using multiple programs can be useful for drip areas, newly planted lawn, or rotary sprinkler stations. Using programs to group stations with similar water needs will maximize irrigation efficiency.
For example: you could set your lawn zones to run on program A, your flowerbeds to run on program B and your garden to run on program C. Or, you can set up your zones to use smart watering and the timer will use local weather and on-site information to automatically set a watering schedule for you.
The PROG ABC button toggles between programs when setting up or modifying start times, run times, how often and budget.
- Press PROG ABC to turn on or off programs that have been set-up. A, B, C or Smart will illuminate to show programs that are active and will water.
- To water in smart mode only, the Phone icon is the only program that should be showing on the display
Note: If you do not see the program letter (A, B, C or the phone) in the display, that program will not water. Press PROG ABC until you see the program(s) that you wish to water.
Note: Always be aware of the program you are in (A, B, or C) when you are making changes.
Date/Time
If you are connected to Wi-Fi, the time and date will automatically be sent to the sprinkler timer. To set the date and time manually follow these instructions:
- Turn the dial until the selection box is on DATE/TIME.
- Press the dial. You will now see the Y (Year) flashing.
- Turn the dial until the current year is displayed.
- Press the dial to confirm the year. You will now see the M (Month) flashing.
- Repeat steps 1 & 2 to enter the month and day.
- After the day is confirmed, the time will start flashing.
- Turn the dial until the current hour is displayed. Note: Continue turning the dial to go between am and pm. It is important to verify that the am or pm selection is set correctly.
- Press the dial to confirm the hour.
- Repeat steps 5 & 6 for the minutes. Your Date and Time are now set.

Start Time
This is the time of day that your programmed watering starts, the first zone will begin watering at the 1st start time. You can set up to 4 start times. When a start time is set before the previous program has completed, that start time will be “stacked” or delayed, and will start upon completion of the previous program.
Tip: Only one start time is needed to run all of your zones.
- Turn the dial until the selection box is on START TIME.
- Press the dial. You will now see the hour dashes (--) flashing.
- Turn the dial until the desired start time hour is reached. Note: Continue turning the dial to go between am and pm.
- Press the dial to confirm the start time hour. You will now see the minute dashes (--) flashing.
- Turn the dial until the desired start time minutes are displayed.
- Press the dial to confirm the start time minutes.
Note: After pressing the dial, the timer will automatically advance to the 2nd start time. If additional start times are needed, repeat this process. Additional start times are helpful to avoid run off and allow time for the soil to absorb the water.

Example: Bill just planted new grass seed and wants to water three times per day. He sets START TIME 1 for 5 am, START TIME 2 for 12 pm, and START TIME 3 for 5 pm. He also sets HOW OFTEN to INT (interval) EVERY 1 DAYS (see section 3, HOW OFTEN). In AUTO mode the system will water 3 times per day. Once Bill’s sod is established he can CLEAR start times 2 and 3 and return to watering just once per day.
- Press PROG ABC to set up start times for additional programs and repeat the above steps.
Run Time
This is where you will set up how long of a watering duration each station will run. The station is the area or zone that will be watered by each valve.
- Turn the dial until the selection box is on RUN TIME.
- Press the dial. You will now see the STATION number flashing.
- Turn the dial until the zone number you want to program is reached.
- Press the dial to confirm the zone. You will now see the MINS flashing.
- Turn the dial until the desired duration for that zone is reached.
- Press the dial to confirm the duration run time. Note: Your timer will automatically advance to the next station and the MINS will be flashing.
- Repeat steps 5 & 6 for each zone you wish to set up. If you wish to set-up zones in different programs (A B or C), press the PROG ABC button until the desired program is displayed and repeat the steps. Note: Press the BACK button to return to the main lcd menu.

How Often
There are three options when determining how often (what days or intervals) the timer will water.
- Days of the week (Mon, Tues, Wed, etc.)
- Intervals (Every “X” number of days)
- Odd or Even Days
Days of the Week
- Turn dial until the selection box is on HOW OFTEN.
- Press the dial. You will now see Su (Sunday) flashing.
- Turn the dial until your desired day of the week is flashing.
- Press the dial to confirm your selection and a frame will appear around the selected day.
- Repeat this process until all of the desired watering days have a box around them.
- Press BACK to return to the main menu.
- Turn the dial to Auto and press the dial to select. You have programmed your timer!
- To remove a previously entered day, turn the dial to the day and press the dial to de-select the day.
- If you wish to erase all watering days, press the CLEAR button.

Intervals
- Turn dial until the selection box is on HOW OFTEN.
- Press the dial. You will now see Su (Sunday) flashing.
- Turn the dial to INT.
- Press the dial to confirm. A frame will appear around INT and EVERY 1 DAYS will appear in the display. 1 will be flashing and is the default interval.
- Turn the dial to increase the number, press the dial when your desired number of days between waterings is reached. Example: An interval of 1 will water every day; an interval of 3 will water every 3rd day, etc.
- Press BACK to return to the main menu.
- Turn the dial to Auto and press the dial to select. You have programmed your timer!

Odd or Even Days
- Turn dial until the selection box is on HOW OFTEN.
- Press the dial. You will now see Su (Sunday) flashing.
- Turn the dial to ODD or EVEN. Press the dial to confirm. A frame will appear around ODD or EVEN. Example: Odd: 1st, 3rd, 5th, etc. Example: Even: 2nd, 4th, 6th, etc.
- Press BACK to return to the main menu.
- Turn the dial to Auto and press the dial to select. You have programmed your timer!

Auto
The timer should be in AUTO during the irrigation season and OFF in the winter months or the non-irrigation months.
Turn the dial to the AUTO position and press the dial or just leave it there to keep it in AUTO.
If the dial selection is left in any position other than OFF, it will revert back to AUTO after approximately 20 seconds.
To turn your timer OFF, turn the dial to OFF and press the dial or just leave it in the OFF position.
Tip: You can change it to off or auto in the APP.
Additional Features
Rian-Delay
The Rain Delay button can be used to delay your sprinkler timer from watering for a duration of 1 to 32 days. At the end of the selected rain delay amount of time, automatic watering resumes.
- Make sure the timer is set to AUTO.
- Press the Rain Delay button to automatically delay watering for 24 hours.
Note: If a longer Rain Delay is desired, press the rain delay button repeatedly or turn the dial until the desired number of delayed days is reached.
- While in rain delay mode, the timer will display the number of remaining rain delay days or hours.
- To cancel a rain delay, press the CLEAR button and the watering schedule will resume.
- To activate or deactivate the rain sensor terminals, press and hold the RAIN DELAY button for 5 seconds.
Note: This feature is helpful for bypassing the sensor if watering is needed before the sensor is dry and watering is resumed.

Budget
The water budgeting feature makes it easy to change all of your run times without having to change them one by one. This is perfect for adjusting all zones for seasonal changes.
Adjustment range is from 10% to 200% by increments of 10%. The default value is 100%, which means your timer will run each zone for exactly the number of minutes you entered as the run time. The budgeting will remain at the adjusted range until you change it.
- Turn the dial until the selection box is on budget.
- Press the dial. You will now see numbers flashing. Note: 100 is the default number.
- To adjust, turn the dial to the desired budget percentage. Adjusting budget will adjust all of the run times in a program by the percentage chosen. Example: If you have zones set up to water for 10 minutes and you adjust your budget from 100% to 150%, those same zones will water for 15 minutes without having to change each run time.
- Press the dial to confirm your selection. If you are setting up additional programs (A B or C), press the PROG ABC button until the desired program is displayed and repeat this process.
Manual
Your timer has the ability to allow you to manually water without disturbing the preset program. Manual is used to test zones or to run an extra cycle for a zone, program, or for all zones.
To water all zones
- Turn the dial until the selection box is on Manual.
- Press the dial. You will now see ALL show in the display.
- Press the dial again. You will now see 0 flashing.
- Turn the dial until the desired manual duration is reached.
- Press the dial to begin watering. Note: If the manual run time has not been set, the timer will not initiate manual watering and the screen will return to the current time.
To water a specific program(s)—A, B or C
- Turn the dial until the selection box is on MANUAL.
- Press the dial. You will now see ALL show in the display.
- Turn the dial until the program(s) you wish to water is showing (all ABC, or A, B, or C individually).
- Press the dial to begin watering the selected program.
To water a specific zone
- Turn the dial until the selection box is on MANUAL.
- Press the dial. You will now see ALL show in the display.
- Turn the dial past the A, B, C programs until STATION. Press the dial. You will see 0 and MINS appear in the display.
- Turn the dial until the station you want to run appears in the display.
- Press the dial. The 0 will flash once.
- Turn the dial until the number of minutes you want to run the station appears.
- Press the dial to begin watering the specified program.
Example: To manually water on zone 3 for five minutes, turn the dial to [MANUAL] then press the dial. Turn the dial until you see station 6 or 12, press the dial and turn it until you see station 3, then press the dial again. Turn the dial until five minutes shows in the display then press the dial.
Note: While your programmed manual station is running, you can program more than one specific zone using this process. Repeat the steps for zone selection and duration to water additional zones.
To stop manual watering press CLEAR.
Rain Sensor
Connect the rain sensor wires to the wiring terminal ports labeled “Sensor”.
Note: Refer to your rain sensor manual for specific wiring instructions.
Rain Sensor Bypass
This sprinkler timer is equipped with a sensor override “on/off”. This is for use during maintenance and repairs, so the sprinkler timer can be operated even if the rain sensor is in active mode. To override the sensor, press and hold the Rain Delay button for 5 seconds.
The display will show SENS and OFF or SENS and ON.
Important: If the rain sensor is “on” and no sensor is connected, the sprinkler timer will not operate. To resume sprinkler timer operation press and hold the Rain Delay button for 5 seconds or reconnect the jumper wire to the sensor terminals.
Pump Start & Master Valve
This sprinkler timer allows a master valve or pump start relay to operate whenever a station is on.
Note: If you are activating a pump from this timer, you must purchase a Pump Start Relay. From the pump start relay (or master valve); connect one wire to the “Pump” terminal and the other wire to the “Common” terminal.
Term Definition
START TIME - The time the program begins watering the first programmed station.
VALVE - Supplies water to a specific station or area. The opening and closing of the valve is accomplished through electrical current supplied by the sprinkler timer.
MASTER VALVE - Typically located at the main water source. Turns on and off water for the entire irrigation system when not in use.
MULTIPLE START TIMES - A controller feature that allows a program to be operated multiple times on the same watering day.
OVERLAPPING PROGRAMS - When a “Start Time” is set for a program before the previous program has completed.
PROGRAM (A, B, OR C) - Individual programs as set by the user. Each program operates independently. If one program overlaps the other the programs will be “stacked.” After the first program finishes the next program will begin.
RAIN DELAY - A feature that postpones the running of a scheduled watering program for a specific duration.
SOLENOID - The electrical part on an irrigation valve that opens and closes the valve.
SPRINKLER TIMER - A device which instructs the station valves to operate.
STATION - A grouping of sprinklers operated by a single valve which is controlled by the timer.
WATERING BUDGETING - Adjusts your overall watering program as a percentage of total watering duration.
Troubleshooting
One or more valves do not turn on
- Faulty solenoid connection
- Wire damaged or severed
- Flow control stem screwed down, shutting valve off
- Programming is incorrect
Stations turn on when they are not supposed to
- Water pressure is too high
- More than one start time is programmed
- AM/PM is incorrect
One station is stuck on and will not shut off
- Faulty valve
- Particles of dirt or debris stuck in valve
- Valve diaphragm faulty
All valves do not turn on
- Transformer defective or not connected
- Programming is incorrect
Timer will not power
- Transformer not plugged into a working outlet
Valves continue to turn on and off when they are not programmed
- More than one start time is programmed with overlapping schedules
- Excessive pressure
Display says Fault and flashes a zone number
- Short in the wire
- Short in the solenoid
Specifications
Rated input:
- Australia—240V AC 50/60Hz 0.15A
- Europe—230V AC 50/60Hz 0.15A
- USA—120V AC 60Hz 0.15A
Max load:
- AUS & EU - 24V AC 1 Amp 50/60 Cycle
- USA—24V AC 750 mA 60Hz
Temperature Operating Range:
- Operating: 32-167° F (0-75° C)
- Storage & transport: 32-176° F (0-80° C)
Humidity Operating Range:
- Operating: 0–80%
- Storage & transport: 0–90%
- Altitude: 6,500' (2,000 meters)
IPX5 Rating
Installation Class II
Over Voltage Category II