Loading ...
Loading ...
Loading ...
18 49-80520-9
INSTALLATION INSTRUCTIONS
Installation Instructions
7
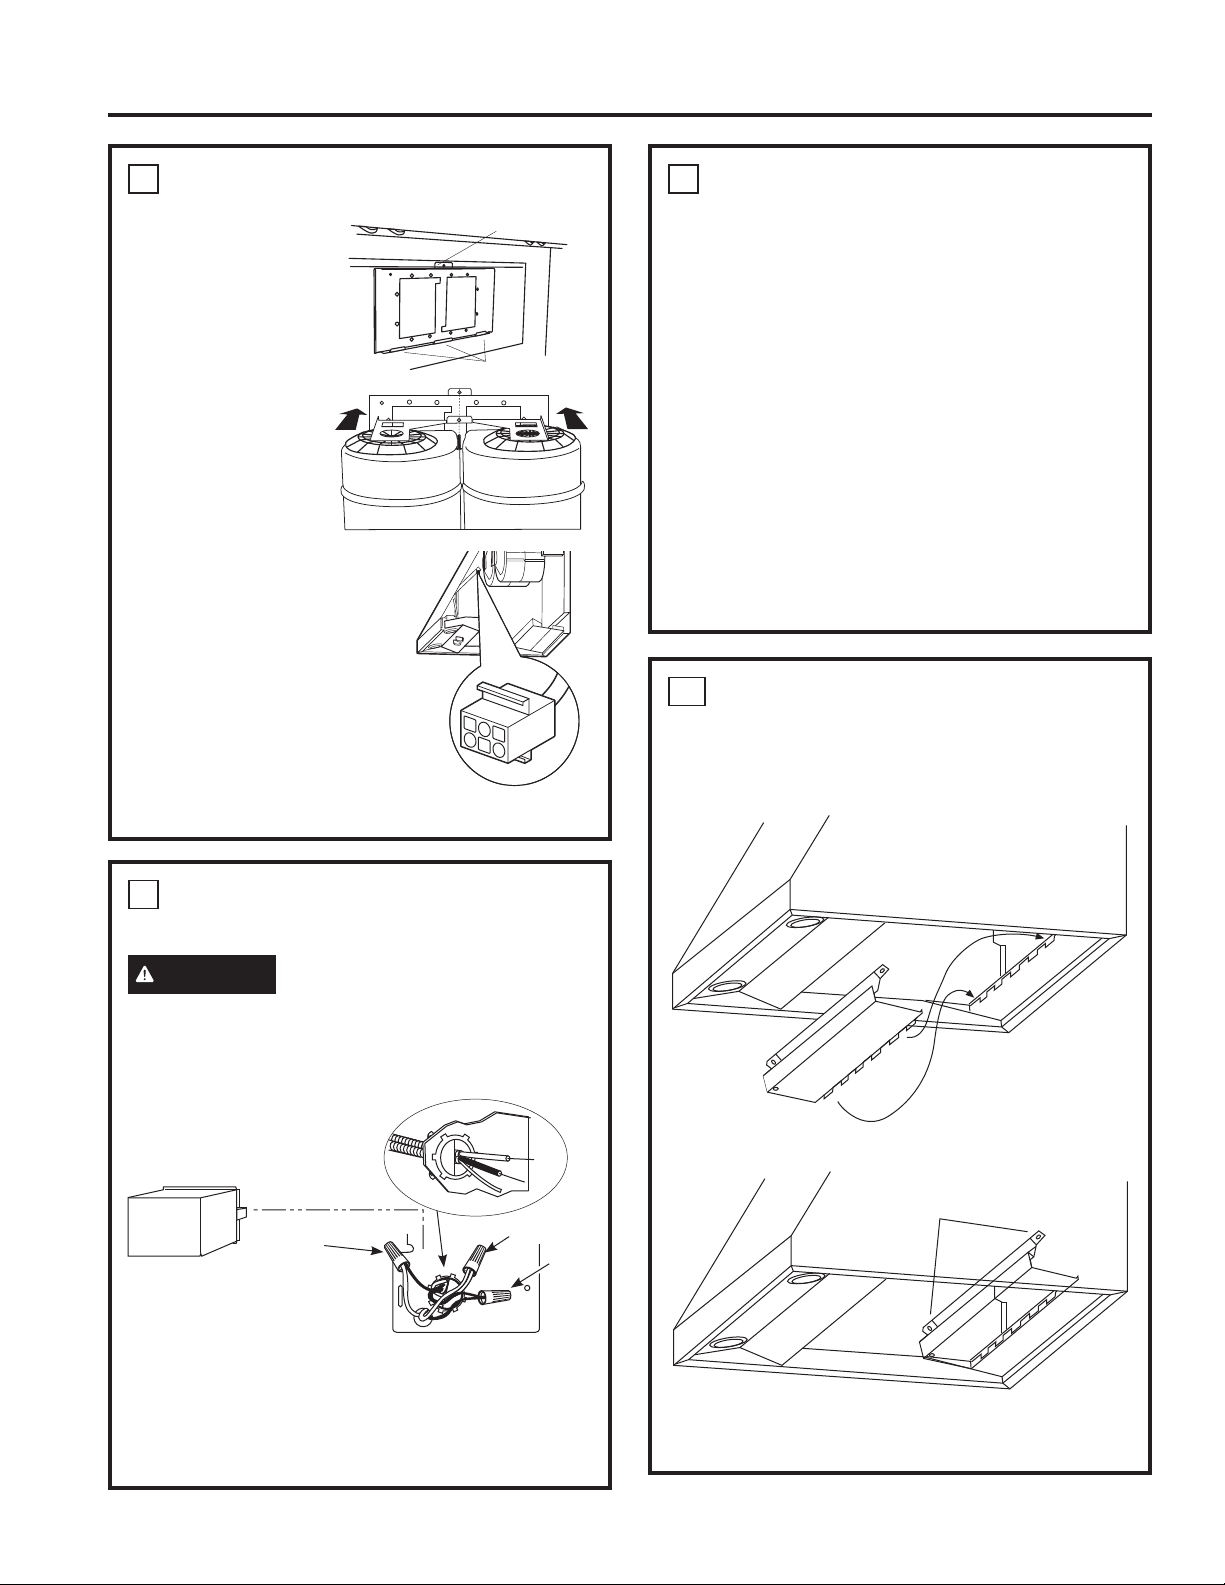
INSTALL MOTOR
• Align and engage the
slots in the blower
assembly to the 3
hooks at the rear of the
exhaust opening.
• Rotate motor upwards
until it aligns with the
attachment screw
location.
• Secure the motor to
attachment bracket
at the front of the
opening with washer
and screw provided.
• Plug the motor connector into the
mating hood connector. Seethe
illustration for the hood
connector location. Touch
the hood to locate and make the
connection.
IMPORTANT: Hold the connector
so the two square corner terminals
are at the top as you position the
connector to plug it in.
9
INSTALL DUCT COVERS
To install the 12” duct cover alone:
• Place the 12” section of the decorative duct cover
on top of the hood.
• Secure the cover on the top of the hood with 4
screws provided.
To install the 2-piece duct cover:
• Place the 2-piece duct cover on the top of the
hood.
• Secure the bottom cover to the top of the hood
with 4 screws provided. See illustration, page 16.
• Extend the inside section upwards to meet the
ceiling and ceiling bracket
• Secure the duct cover to the bracket with the 2
small Phillips screws provided.
10
INSTALL FILTER SUPPORT
• Tip filter support into the rear of the hood.
• Insert support tabs into the slots at the rear of the
hood.
• Secure the support to the hood with screws as
shown.
8
CONNECT ELECTRICAL
Verify that power is turned off at the source.
WARNING
If house wiring is not 2-wire with
a ground wire, a ground must be provided by the
installer. When house wiring is aluminum, be sure
to use UL approved anti-oxidant compound and
aluminum-to-copper connectors.
• Use wire nuts to connect incoming ground to
green, white to white, and black to black.
• Push wires into junction box and replace cover.
Be sure wires are not pinched.
Motor Attachment
Bracket
Motor Hooks
Ground
A Remove
Junction
Box Cover
B Check that White, Black
and Green Hood Wires
are Threaded thru Small
Hole in Bracket.
D Use UL Listed Wire Nuts
C Insert Power
Conduit thru
Strain Relief
and Tighten
Black
White
Insert Tabs into Slots
Install 2 Screws
Loading ...
Loading ...
Loading ...