W11209379
1
LEARN MORE
In an effort to conserve natural resources, this refrigerator includes a condensed User Guide. A complete User Instructions
manual for your model can be downloaded at www.whirlpool.com/manuals.
For future reference, please make a note of your product model and serial numbers. These can be found on the inside wall
of the refrigerator compartment.
Model Number __________________________________ Serial Number __________________________________
Register your refrigerator at www.whirlpool.com. In Canada, register at www.whirlpool.ca.
Para una version de estas instrucciones en español, visite www.whirlpool.com.
User Guide
Top Mount Refrigerator
You can be killed or seriously injured if you don’t immediately
You
can be killed or seriously injured if you don’t follow instructions.
All safety messages will tell you what the potential hazard is, tell you how to reduce the chance of injury, and tell you what can happen if the
instructions are not followed.
Your safety and the safety of others are very important.
We have provided many important safety messages in this manual and on your appliance. Always read and obey all safety messages.
This is the safety alert symbol.
This symbol alerts you to potential hazards that can kill or hurt you and others.
All safety messages will follow the safety alert symbol and either the word “DANGER” or “WARNING.”
These words mean:
follow instructions.
DANGER
WARNING
IMPORTANT SAFETY INSTRUCTIONS
To reduce the risk of fire, electric shock, or injury to persons when using the refrigerator, follow basic precautions, including
the following:
WARNING:
SAVE THESE INSTRUCTIONS
■ Plug into a grounded 3 prong outlet.
■ Do not remove ground prong.
■ Do not use an adapter.
■ Do not use an extension cord.
■ Disconnect power before servicing.
■ Replace all parts and panels before operating.
■ Remove doors from your old refrigerator.
■ Use nonflammable cleaner.
■ Keep flammable materials and vapors, such as gasoline, away from
refrigerator.
■ Use two or more people to move and install refrigerator.
■ Disconnect power before installing ice maker (on ice maker kit ready
models only).
State of California Proposition 65 Warnings:
WARNING: This product contains one or more chemicals known to the State of California to cause cancer.
WARNING: This product contains one or more chemicals known to the State of California to cause birth defects or other reproductive harm.
2
PROPER DISPOSAL OF YOUR
OLD REFRIGERATOR
IMPORTANT: Child entrapment and suffocation are not problems of the
past. Junked or abandoned refrigerators are still dangerous – even if
they will sit for “just a few days.” If you are getting rid of your old
refrigerator, please follow these instructions to help prevent accidents.
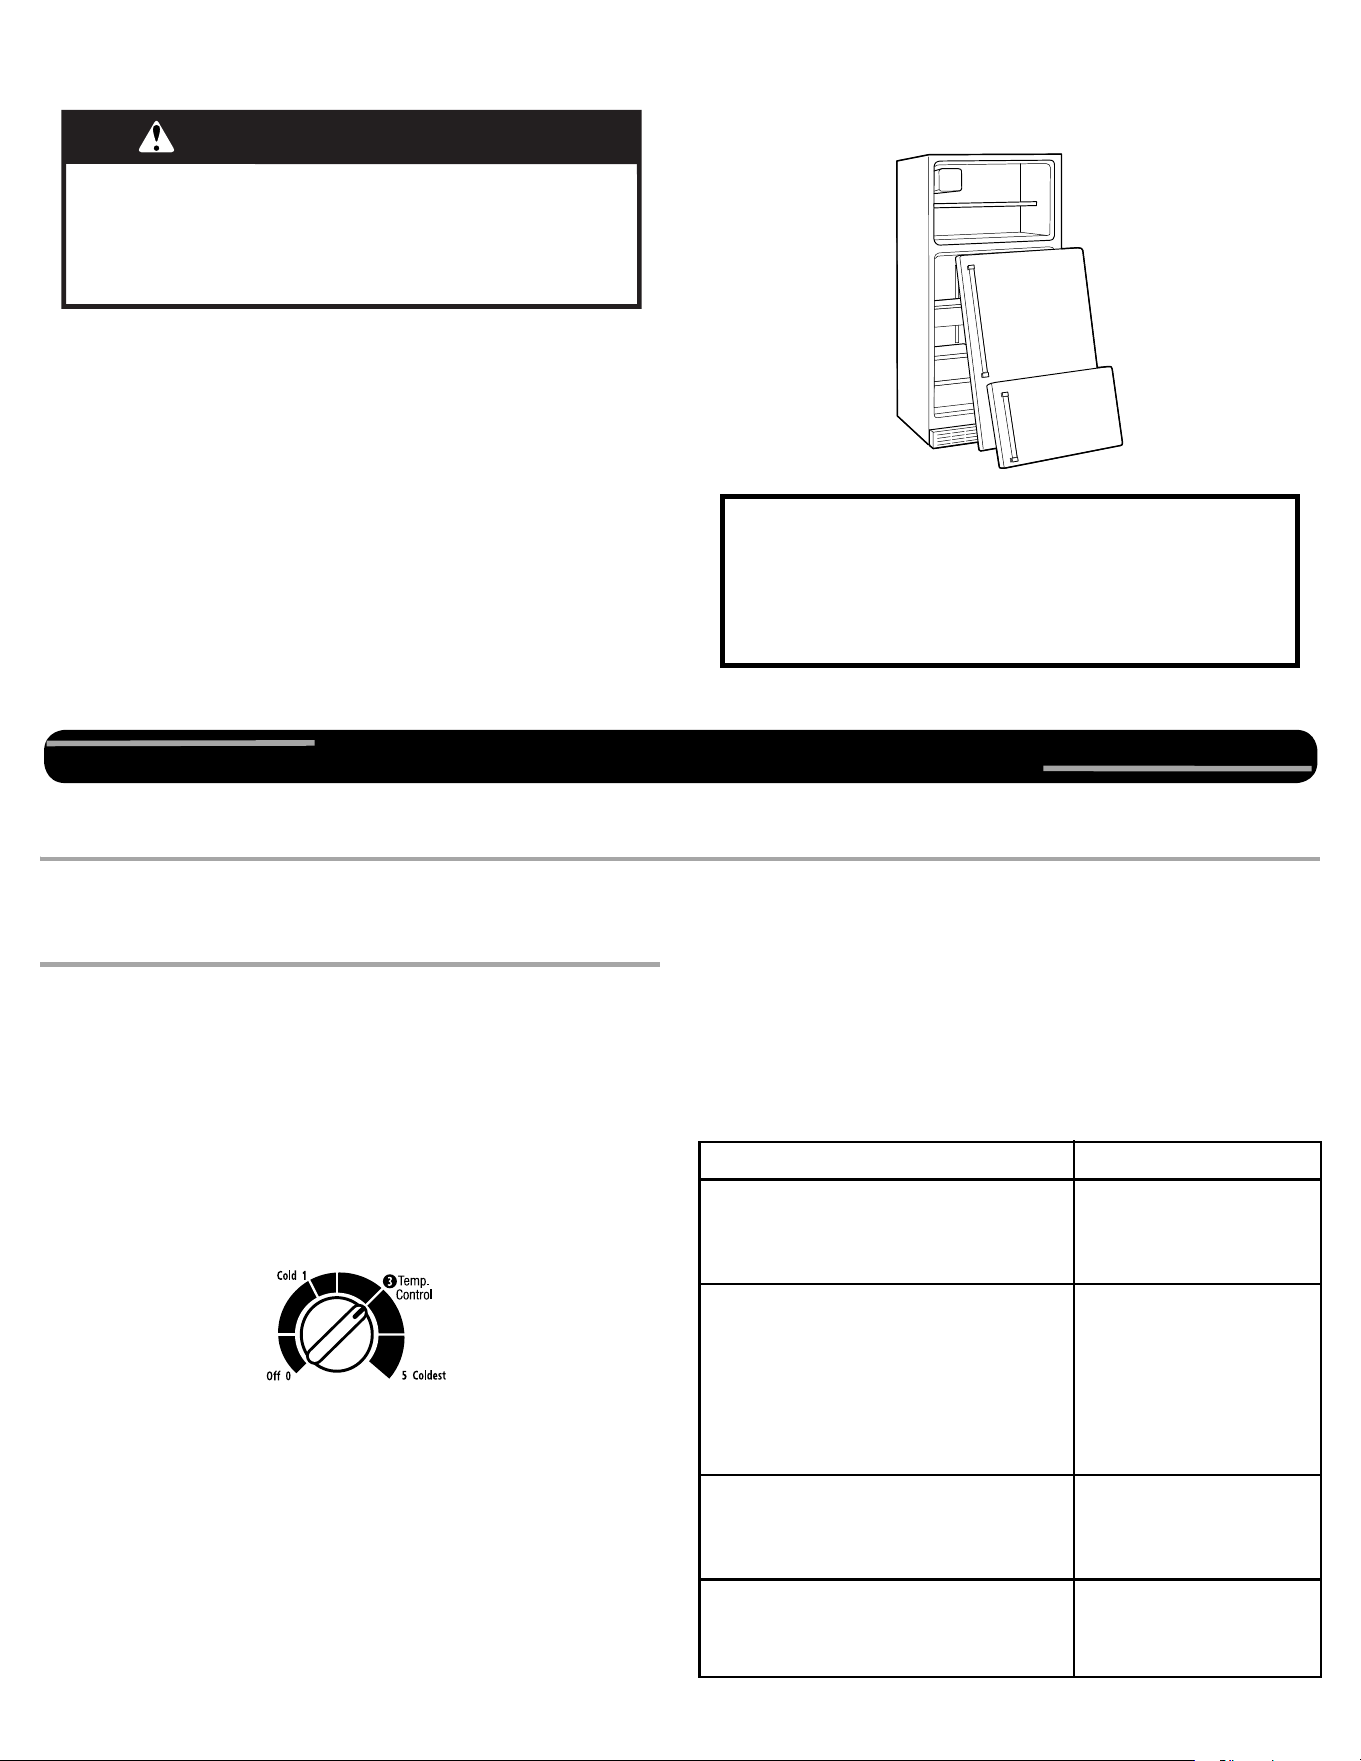
Before You Throw Away Your Old Refrigerator or Freezer:
■ Take off the doors.
■ Leave the shelves in place so that children may not easily climb
inside.
Using the Controls
Your refrigerator has two controls that affect the temperature. The
Temperature control is located at the top front of the refrigerator
compartment and the Airflow control is located on the back wall of the
freezer compartment.
Temperature Control
The Temperature control regulates the coldness of the air flowing into
the compartments.
For your convenience, your refrigerator controls are preset at the
factory. When you first install your refrigerator, make sure that the
controls are still preset to the mid-setting as shown.
NOTE: To turn off your refrigerator, turn the refrigerator control to the
word OFF. Turning the Temperature Control to OFF stops cooling in the
refrigerator and freezer compartments, but it does not disconnect the
refrigerator from the power supply.
Mid-setting “3”
IMPORTANT:
■ Give your refrigerator time to cool down completely before adding
food. It is best to wait 24 hours before you put food into the
refrigerator.
NOTE: Adjusting the Temperature Control to a higher (colder)
setting will not cool the compartments any faster.
■ If you add food before the refrigerator has cooled completely, your
food may spoil.
Adjust the Temperature Control
The mid-settings should be correct for normal household usage. The
controls are set correctly when milk or juice is as cold as you like and
when ice cream is firm.
If the temperature is too warm or too cold in the refrigerator or freezer,
first check the air vents to be sure they are not blocked.
If you need to adjust temperatures, use the settings listed in the chart
below as a guide. On models with two controls, adjust the refrigerator
temperature first. Wait at least 24 hours between adjustments and then
recheck the temperatures.
WARNING
Suffocation Hazard
Remove doors from your old refrigerator.
Failure to do so can result in death or brain damage.
Important information to know about disposal of
refrigerants:
Dispose of refrigerator in accordance with Federal and Local
regulations. Refrigerants must be evacuated by a licensed,
EPA certified refrigerant technician in accordance with
established procedures.
OPERATING YOUR REFRIGERATOR
CONDITION/REASON: ADJUSTMENT:
REFRIGERATOR section too warm
■ Door opened often, large amount of
food added or room temperature
very warm
Adjust REFRIGERATOR
Control one setting
higher
FREEZER section too warm/ice not
made fast enough
■ Door opened often, or large amount
of food added or very cold room
temperature (can’t cycle often
enough)
■ Heavy ice usage
Adjust AIRFLOW or
REFRIGERATOR
Control one setting
higher
REFRIGERATOR section too cold
■ Controls not set correctly for your
conditions
Adjust REFRIGERATOR
Control one setting lower
FREEZER section too cold
■ Controls not set correctly for your
conditions
Adjust AIRFLOW or
REFRIGERATOR
Control one setting lower
3
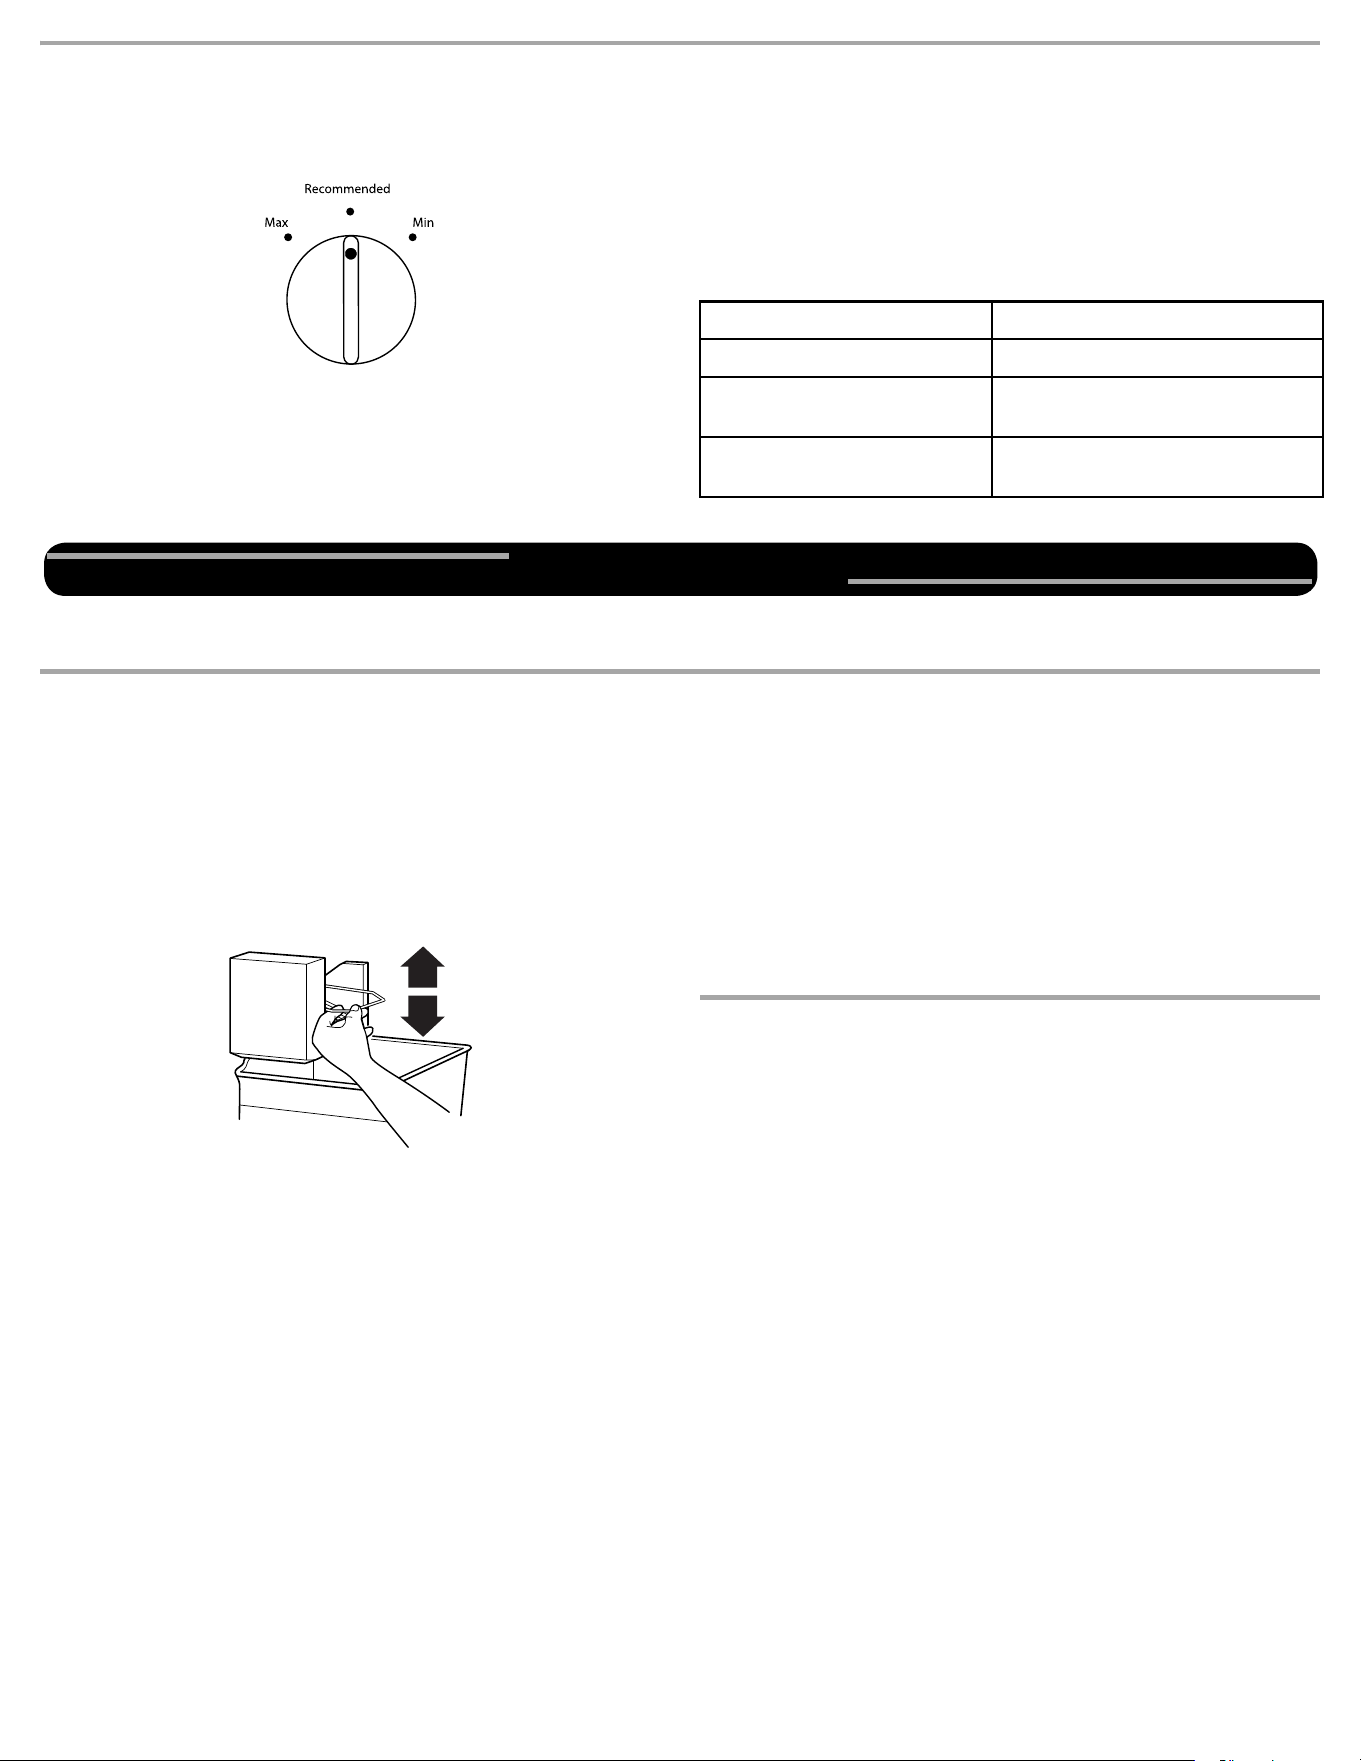
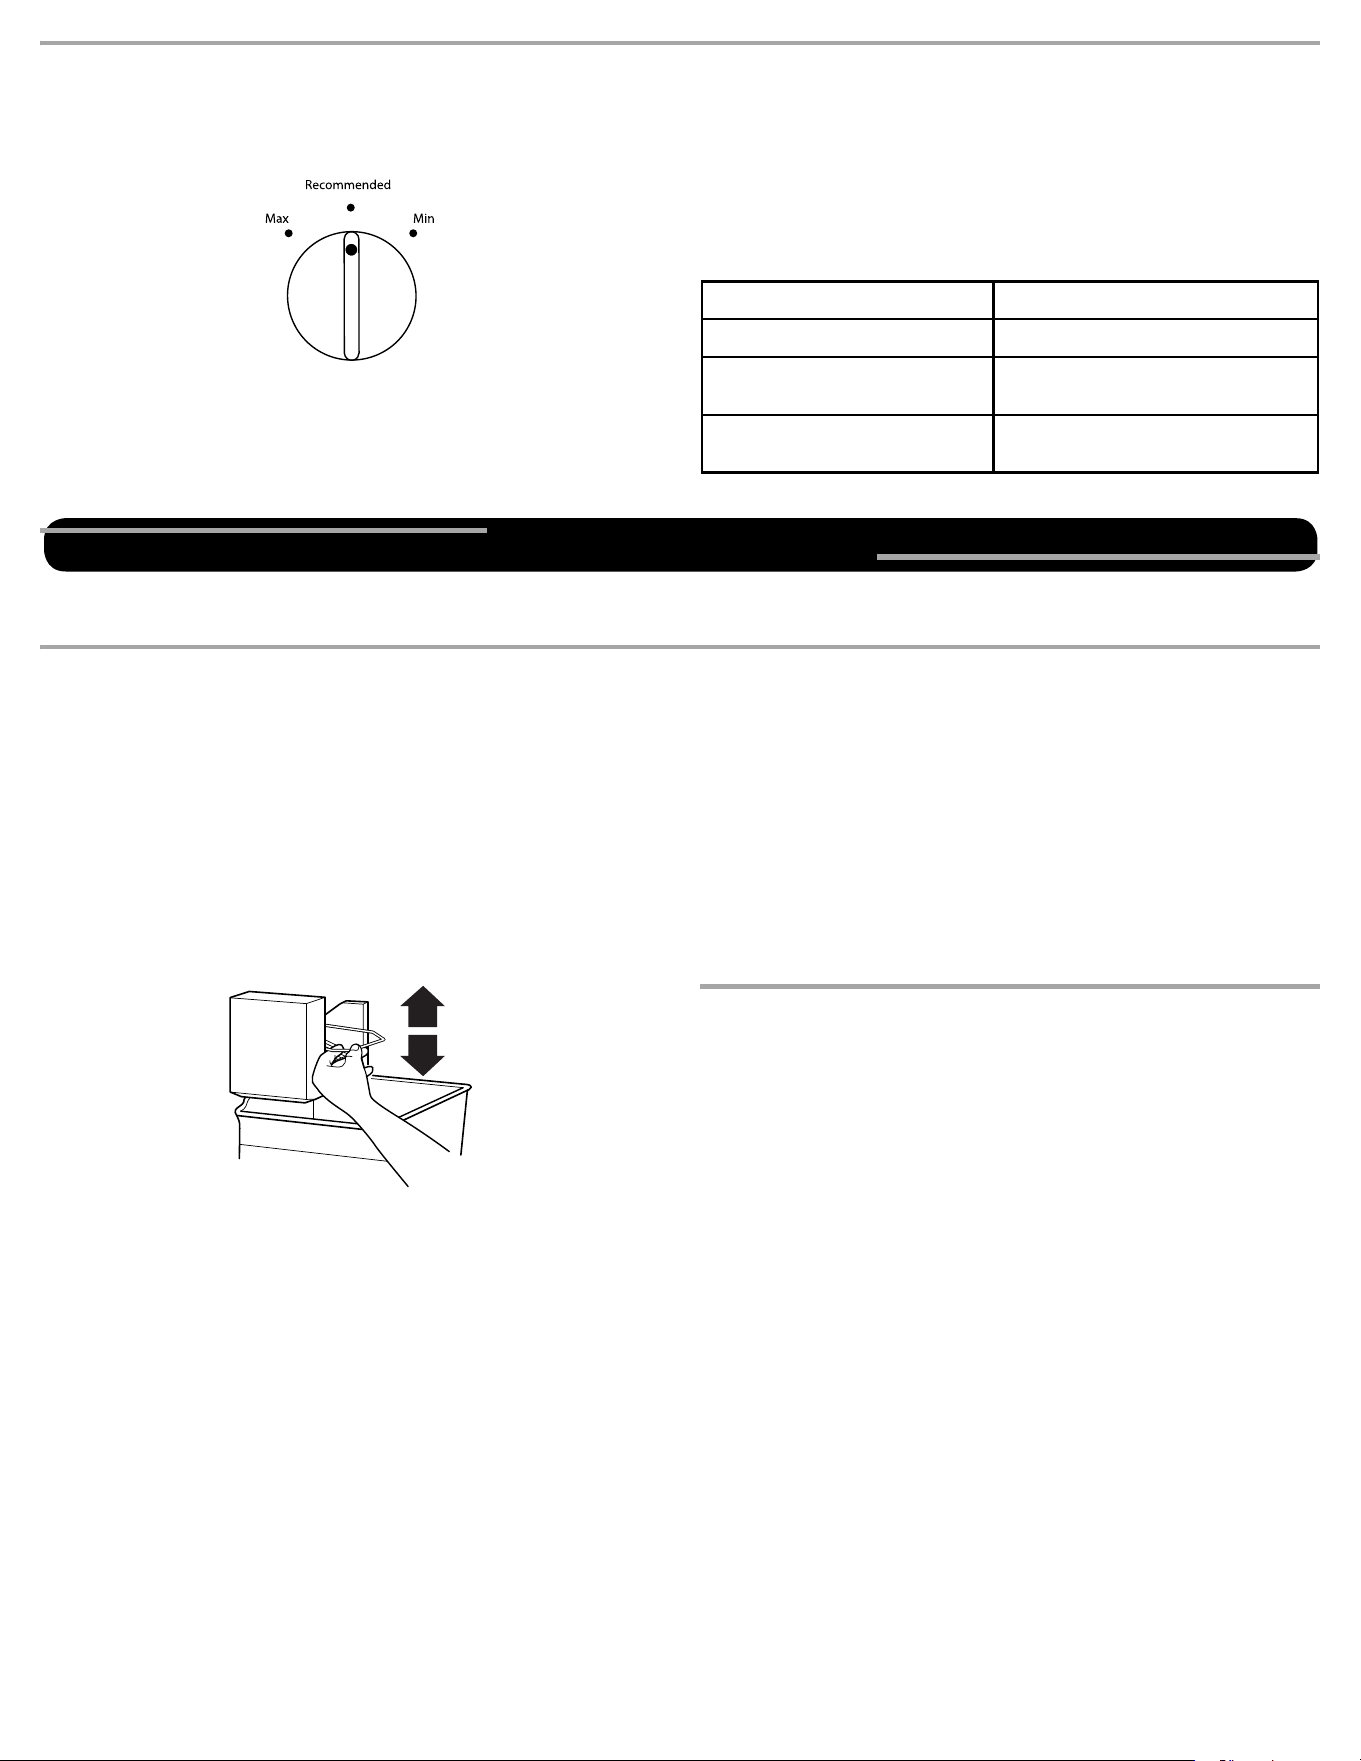
Airflow Control
The Airflow control regulates the amount of air flowing between the
freezer and the refrigerator compartments.
When you plug in the refrigerator for the first time, turn the Airflow
control to the Recommended setting.
Adjust the Airflow Control
If you want to temporarily increase the cold air flow to a specific
compartment, adjust the control.
■ Max - Increase airflow to the freezer
■ Min - Increase airflow to the refrigerator
IMPORTANT: Once the performance is achieved, return the Airflow
control to the Recommended setting to keep the refrigerator operating
at optimum efficiency.
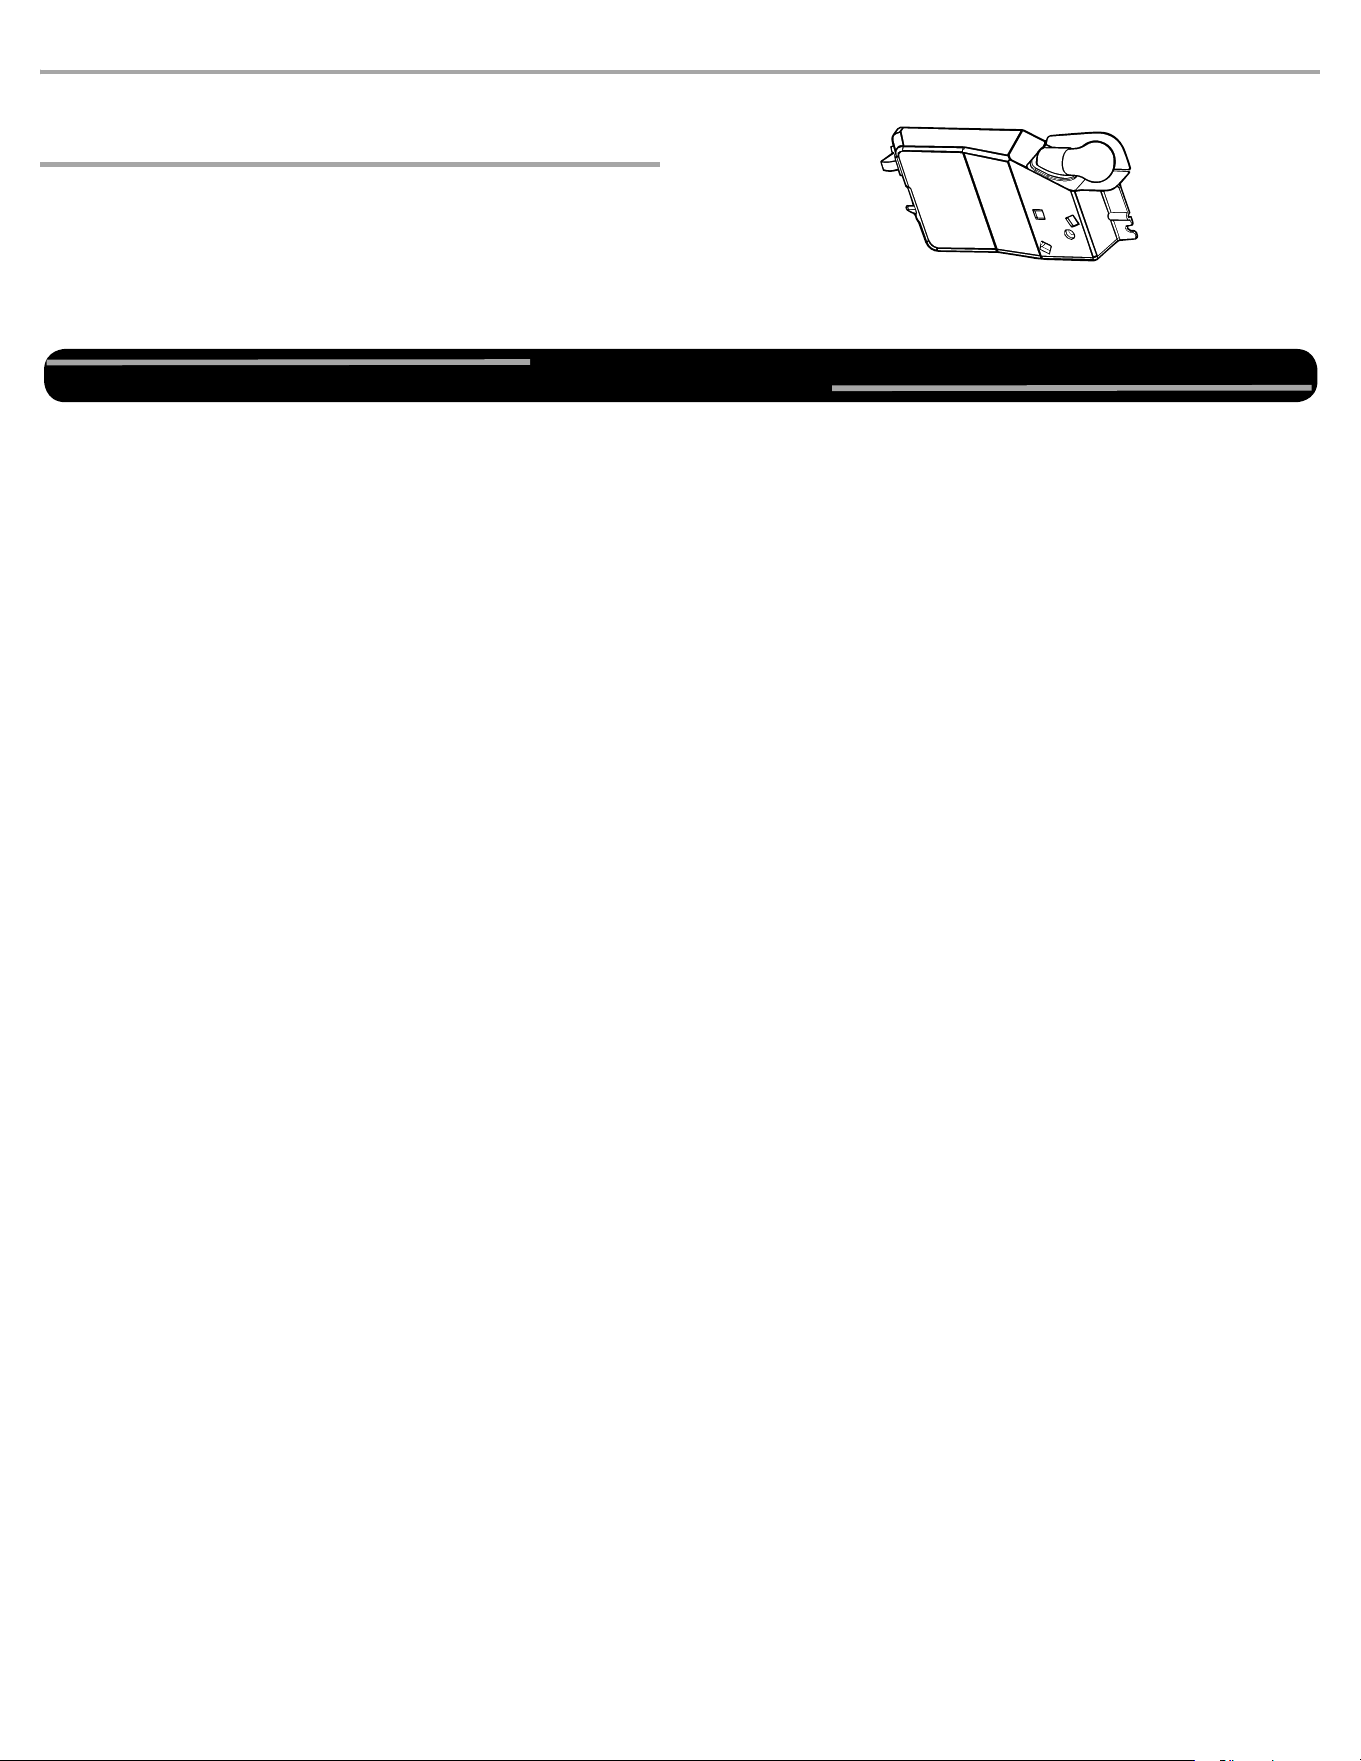
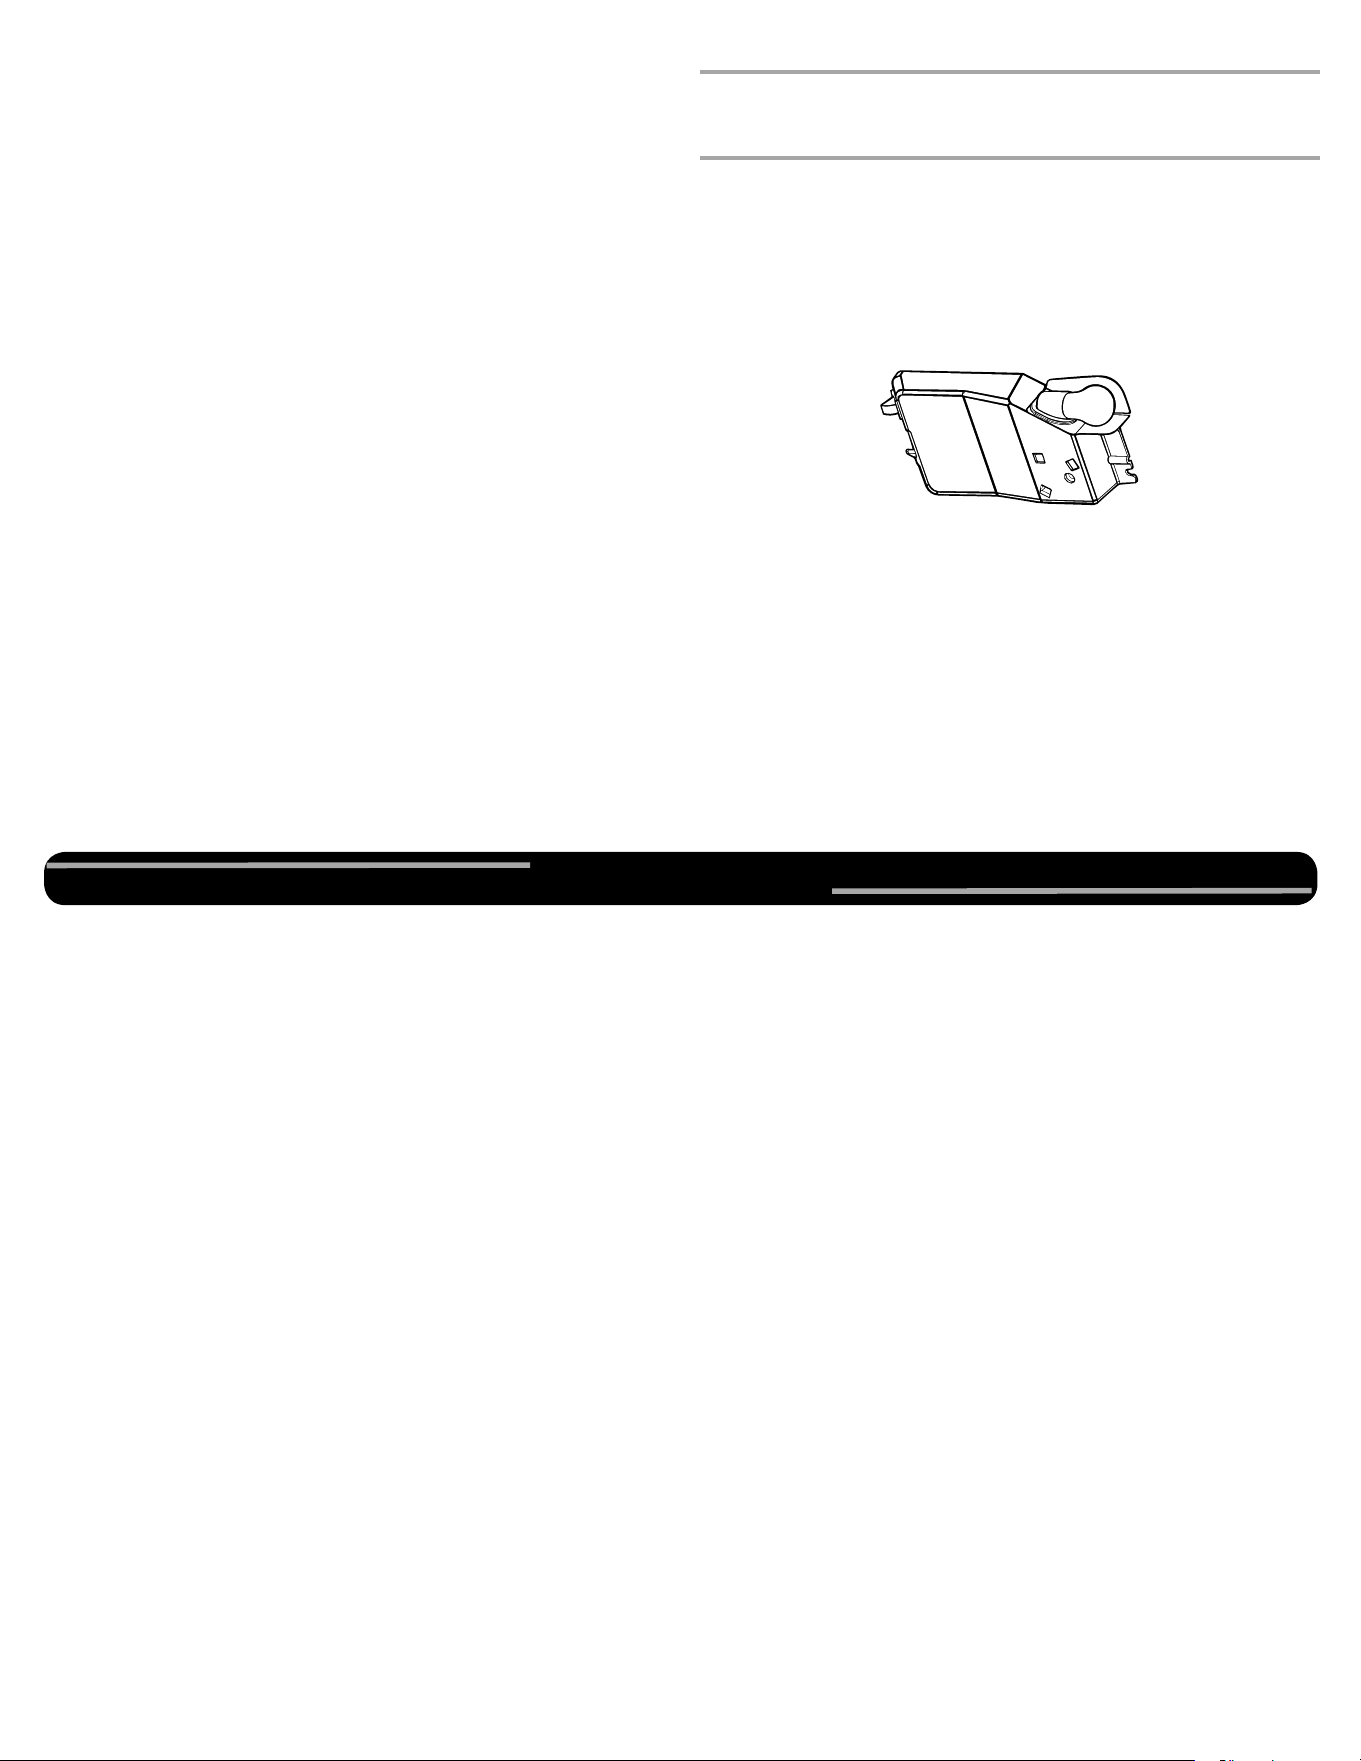
Ice Maker (on some models)
Turning the Ice Maker On/Off
NOTE: Do not force the wire shutoff arm up or down.
■ To turn on the ice maker, simply lower the wire shutoff arm.
NOTE: Your ice maker has an automatic shutoff. As ice is made,
the ice cubes will fill the ice storage bin and the ice cubes will raise
the wire shutoff arm to the OFF (arm up) position.
■ To manually turn off the ice maker, lift the wire shutoff arm to the
OFF (arm up) position and listen for the click to make sure the ice
maker will not continue to operate.
NOTE: Turn off the ice maker before removing the ice storage bin to
serve ice or to clean the bin. This will keep the ice cubes from dropping
out of the ice maker and into the freezer compartment. After replacing
the ice storage bin, turn on the ice maker.
Ice Production Rate
■ NORMAL Ice Production: The ice maker should produce
approximately 8 to 12 batches of ice in a 24-hour period. If ice is not
being made fast enough, turn the Freezer control toward a higher
(colder) number in half number steps. (For example, if the control is
at 3, move it to between 3 and 4.) Wait 24 hours and, if necessary,
gradually turn the Freezer control to the highest setting, waiting
24 hours between each increase.
■ MAXIMUM Ice Production (on some models): The ice maker should
produce approximately 16 to 20 batches of ice in a 24-hour period.
If your refrigerator has the maximum ice production feature, push
the switch to MAX.
Remember
■ Allow 24 hours to produce the first batch of ice. Allow 3 days to
completely fill the ice storage bin. Discard the first three batches of
ice produced.
■ The quality of your ice will be only as good as the quality of the
water supplied to your ice maker. Avoid connecting the ice maker to
a softened water supply. Water softener chemicals (such as salt)
can damage parts of the ice maker and lead to poor quality ice. If a
softened water supply cannot be avoided, make sure the water
softener is operating properly and is well maintained.
■ Do not store anything on top of the ice maker or in the ice storage
bin.
CONDITION/REASON: ADJUSTMENT:
Heavy ice use Max
Hot room temperature Max - To maintain ice making
production rate
Large quantity of groceries Min - To quickly chill food and
beverages
ICE AND WATER
4
Cleaning
Both the refrigerator and freezer sections defrost automatically.
However, clean both compartments about once a month to avoid
buildup of odors. Wipe up spills immediately.
IMPORTANT: Because air circulates between both sections, any odors
formed in one section will transfer to the other. You must thoroughly
clean both sections to eliminate odors. To avoid odor transfer and
drying out of food, wrap or cover foods tightly.
To Clean Your Refrigerator:
NOTE: Do not use abrasive or harsh cleaners such as window sprays,
scouring cleansers, flammable fluids, cleaning waxes, concentrated
detergents, bleaches or cleansers containing petroleum products on
plastic parts, interior and door liners or gaskets. Do not use paper
towels, scouring pads, or other harsh cleaning tool.
1. Unplug refrigerator or disconnect power.
2. Hand wash, rinse, and dry removable parts and interior surfaces
thoroughly. Use a clean sponge or soft cloth and a mild detergent
in warm water.
3. Wash stainless steel and painted metal exteriors with a clean
sponge or soft cloth and a mild detergent in warm water. Dry
thoroughly with a soft cloth.
NOTE: To keep your stainless steel refrigerator looking like new
and to remove minor scuffs or marks, it is suggested that you use
the manufacturer’s approved Stainless Steel Cleaner and Polish. To
order the cleaner, see the “Accessories” section.
IMPORTANT: This cleaner is for stainless steel parts only!
Do not allow the Stainless Steel Cleaner and Polish to come into
contact with any plastic parts such as the trim pieces, dispenser
covers or door gaskets. If unintentional contact does occur, clean
plastic part with a sponge and mild detergent in warm water. Dry
thoroughly with a soft cloth.
4. Clean the condenser coils regularly. Coils may need to be cleaned
as often as every other month. This may help save energy.
■ Pull refrigerator out away from the wall. See “Unpack the
Refrigerator.”
■ Vacuum coils when they are dusty or dirty.
■ Roll refrigerator back into place. Make sure to leave 1"
(2.5 cm) between the cabinet back and the wall.
■ Check to see that the refrigerator is level.
5. Plug in refrigerator or reconnect power.
Vacation and Moving Care
Vacations
If You Choose to Leave the Refrigerator On While You’re
Away:
1. Use up any perishables and freeze other items.
2. If your refrigerator has an automatic ice maker, and is connected to
the household water supply, turn off the water supply to the
refrigerator. Property damage can occur if the water supply is not
turned off.
3. If you have an automatic ice maker, turn off the ice maker.
NOTE: Raise the wire shutoff arm to OFF (up) position.
4. Empty the ice bin.
If You Choose to Turn Off the Refrigerator Before You
Leave:
1. Remove all food from the refrigerator.
2. If your refrigerator has an automatic ice maker:
■ Turn off the water supply to the ice maker at least one day
ahead of time.
■ When the last load of ice drops, raise the wire shutoff arm to the
OFF (up) position.
3. Turn off the Temperature control(s). See “Using the Control(s).”
4. Clean refrigerator, wipe it, and dry well.
5. Tape rubber or wood blocks to the tops of both doors to prop them
open far enough for air to get in. This stops odor and mold from
building up.
Moving
When you are moving your refrigerator to a new home, follow these
steps to prepare it for the move.
1. If your refrigerator has an automatic ice maker:
■ Turn off the water supply to the ice maker at least one day
ahead of time.
■ Disconnect the water line from the back of the refrigerator.
■ When the last load of ice drops, raise the wire shutoff arm to the
OFF (up) position.
2. Remove all food from the refrigerator and pack all frozen food in
dry ice.
3. Empty the ice bin.
4. Turn off the Temperature control(s). See “Using the Control(s).”
5. Unplug refrigerator.
6. Clean, wipe, and dry thoroughly.
7. Take out all removable parts, wrap them well, and tape them
together so they don’t shift and rattle during the move.
8. Depending on the model, raise the front of the refrigerator so it
rolls more easily OR raise the leveling screws so they don't scrape
the floor. See “Adjust the Door(s)” or “Door Closing and Door
Alignment.”
9. Tape the doors closed and tape the power cord to the back of the
refrigerator.
When you get to your new home, put everything back and refer to the
“Installation Instructions” section for preparation instructions. Also, if
your refrigerator has an automatic ice maker, remember to reconnect
the water supply to the refrigerator.
REFRIGERATOR CARE
WARNING
Explosion Hazard
Use nonflammable cleaner.
Failure to do so can result in death, explosion, or fire.
5
Changing the Light Bulbs
NOTE: Not all appliance bulbs will fit your refrigerator. Be sure to
replace the bulb with an appliance bulb of the same size, shape, and
wattage (no greater than 40 watts).
Refrigerator Light
1. Unplug refrigerator or disconnect power.
2. Reach behind the control panel and unscrew the bulb.
3. Replace the bulb with a 40-watt, appliance bulb.
4. Plug in refrigerator or reconnect power.
The following accessories are available for your refrigerator. To order,
contact us and ask for the Part Number.
In the U.S.A., visit our webpage www.whirlpool.com/accessories or
call 1-800-901-2042.
In Canada, visit our webpage www.whirlpoolparts.ca
or call 1-800-807-6777.
affresh
®
Stainless Steel Cleaner:
In U.S.A., order Part #W10355016
In Canada, order Part #W10355016B
affresh
®
Stainless Steel Wipes:
In U.S.A., order Part #W10355049
In Canada, order Part #W10355049B
affresh
®
Kitchen & Appliance Cleaner:
In U.S.A., order Part #W10355010
In Canada, order Part #W10355010B
Reversibility Kit:
Order Part # W10395148
ACCESSORIES
6
First try the solutions suggested here. If you need further assistance or more recommendations that may help you avoid a service call, refer to
the warranty page in this manual and scan the code there with your mobile device, or visit www.whirlpool.com/product_help. In Canada, visit
http://www.whirlpool.ca.
Contact us by mail with any questions or concerns at the address below:
In the U.S.A.:
Whirlpool Brand Home Appliances
Customer eXperience Center
553 Benson Road
Benton Harbor, MI 49022-2692
In Canada:
Whirlpool Brand Home Appliances
Customer eXperience Centre
200 – 6750 Century Ave.
Mississauga ON L5N 0B7
Please include a daytime phone number in your correspondence.
PROBLEM SOLVER
Electrical Shock Hazard
Plug into a grounded 3 prong outlet.
Do not remove ground prong.
Do not use an adapter.
Do not use an extension cord.
Failure to follow these instructions can result in death,
fire, or electrical shock.
WARNING
WARNING
Explosion Hazard
Use nonflammable cleaner.
Failure to do so can result in death, explosion, or fire.
If you
experience
Possible Causes and/or Recommended Solutions
The refrigerator
will not operate
■ Not connected to an electrical supply - Plug the power cord into a grounded 3 prong outlet. Do not use an extension
cord.
■ No power to the electrical outlet - Plug in a lamp to see if the outlet is working.
■ Household fuse blown or circuit breaker tripped - Replace the fuse or reset the circuit breaker. If the problem
continues, contact an electrician.
■ Control is not turned on - Turn on the refrigerator control. See “Using the Control(s).”
■ New Installation - Allow 24 hours following installation for the refrigerator to cool completely.
NOTE: Adjusting the temperature control(s) to coldest setting will not cool the refrigerator more quickly.
The motor seems
to run too much
Your new refrigerator may run longer than your old one. Energy efficient refrigerators run longer at lower, more energy
efficient speeds. Your refrigerator may run even longer if the room is warm, a large food load is added, the door is opened
often, or if the door has been left open.
The refrigerator is
noisy
Refrigerator noise has been reduced over the years. Due to this reduction in operating noise, you may notice unfamiliar
noises that are normal. Following are some normal sounds with an explanation:
■ Buzzing - heard when the water valve opens to fill the ice maker
■ Clicking/Snapping - valves opening or closing
■ Pulsating - fans/compressor adjusting to optimize performance
■ Rattling - flow of refrigerant, water line, or from items placed on top of the refrigerator
■ Sizzling/Gurgling - water dripping on the heater during defrost cycle
■ Popping - contraction/expansion of inside walls, especially during initial cool-down
■ Water running - may be heard when ice melts during the defrost cycle and water runs into the drain pan
■ Creaking/Cracking - occurs as ice is being ejected from the ice maker mold
The door will not
close completely
■ The door is blocked open - Move food packages away from door. Push bin or shelf back in the correct position. Make
sure the crisper cover is fully pushed in, so that the back rests on the supports.
The door is
difficult to open
■ Gaskets are dirty or sticky - Clean gaskets and contact surfaces with mild soap and warm water. Rinse and dry with
soft cloth.
7
Temperature is too
warm
■ New installation - Allow 24 hours following installation for the refrigerator to cool completely.
■ Door(s) opened often or not closed completely - Allows warm air to enter refrigerator. Minimize door openings and
keep doors fully closed.
■ A large amount of warm food has been recently added - Allow several hours for refrigerator to return to normal
temperature.
■ Check that the Temperature Control(s) are set correctly for the surrounding conditions - Adjust the controls to
one setting colder. Check temperature in 24 hours. See “Using the Control(s).”
There is interior
moisture buildup
NOTE: Some
moisture buildup is
normal.
■ Humid room - Contributes to moisture buildup in the refrigerator.
■ Door(s) opened often or not closed completely - Allows humid air to enter the refrigerator. Minimize door openings
and keep door fully closed.
The ice maker is
not producing ice
or not enough ice
■ The ice maker is not connected to a water supply - Connect refrigerator to water supply and turn water shutoff valve
fully open.
■ A kink in the line can reduce water flow - Straighten the water source line.
■ Ice maker is not turned on - Make sure the ice maker wire shutoff arm or switch (depending on model) is in the ON
position.
■ New installation - Wait 24 hours after ice maker installation for ice production to begin. Wait 3 days for full ice
production.
■ Large amount of ice recently removed - Allow sufficient time for ice maker to produce more ice.
■ Ice cube jammed in the ice maker ejector arm - Remove ice from the ejector arm with a plastic utensil.
■ A reverse osmosis water filtration system connected to your cold water supply can decrease water pressure -
See “Water Supply Requirements.”
The ice cubes are
hollow or small
NOTE: This is an
indication of low
water pressure.
■ The water valve is not completely open - Turn the water shutoff valve fully open.
■ A kink in the line can reduce water flow - Straighten the water source line.
■ A reverse osmosis water filtration system connected to your cold water supply can decrease water pressure -
See “Water Supply Requirements.”
■ If questions regarding water pressure remain, call a licensed, qualified plumber.
Off-taste, odor or
gray color in the
ice
■ New plumbing connections can cause discolored or off-flavored ice - Discard the ice and wash the ice storage
bin. Allow 24 hours for the ice maker to make new ice, and discard the first three batches of ice produced.
■ Ice stored too long can develop an off-taste - Discard ice. Wash ice bin. Allow 24 hours for ice maker to make new
ice.
■ Food odor transferring to ice - Use airtight, moisture proof packaging to store food.
■ There are minerals (such as sulfur) in the water - A water filter may need to be installed to remove the minerals.
If you
experience
Possible Causes and/or Recommended Solutions
8
11/14
WHIRLPOOL
®
MAJOR APPLIANCE
LIMITED WARRANTY
ATTACH YOUR RECEIPT HERE. PROOF OF PURCHASE IS REQUIRED
TO OBTAIN WARRANTY SERVICE.
Please have the following information available when you call the
Customer eXperience Center:
■ Name, address and telephone number
■ Model number and serial number
■ A clear, detailed description of the problem
■ Proof of purchase including dealer or retailer name and address
IF YOU NEED SERVICE:
1. Before contacting us to arrange service, please determine whether your product requires repair. Some
q
uestions can be addressed without service. Please take a few minutes to review the Troubleshooting
or
P
roblem Solver section of the Use and Care Guide, scan the QR code on the right to access ad
ditional
r
esources, or visit www.whirlpool.com/product_help.
2. All warranty service is provided exclusively by our authorized Whirlpool Service Providers
. In the U.S. and
C
anada, direct all requests for warranty service to:
Whirlpool Customer eXperience Center
In the U.S.A., call 1-800-253-1301. In Canada, call 1-800-807-6777.
If outside the 50 United States or Canada, contact your authorized Whirlpool dealer to determine whether another warranty applies.
ONE YEAR LIMITED WARRANTY
WHAT IS COVERED WHAT IS NOT COVERED
For one year from the date of
purchase, when this major appliance
is installed, operated and maintained
according to instructions attached to
or furnished with the product,
Whirlpool Corporation or Whirlpool
Canada LP (hereafter “Whirlpool”)
will pay for Factory Specified
Replacement Parts and repair labor
to correct defects in materials or
workmanship that existed when this
major appliance was purchased, or
at its sole discretion replace the
product. In the event of product
replacement, your appliance will be
warranted for the remaining term of
the original unit's warranty period.
YOUR SOLE AND EXCLUSIVE
REMEDY UNDER THIS LIMITED
WARRANTY SHALL BE PRODUCT
REPAIR AS PROVIDED HEREIN.
Service must be provided by a
Whirlpool designated service
company. This limited warranty is
valid only in the United States or
Canada and applies only when the
major appliance is used in the
country in which it was purchased.
This limited warranty is effective from
the date of original consumer
purchase. Proof of original purchase
date is required to obtain service
under this limited warranty.
1. Commercial, non-residential, multiple-family use, or use inconsistent with published user, operator
or
installation instructions.
2. In-home instruction on how to use your product.
3. Service to correct improper product maintenance or installation, installation not in accordance wi
th
electrical or
plumbing codes or correction of household electrical or plumbing (i.e. house
wiring, fuses
o
r water inlet hoses).
4. Consumable parts (i.e. light bulbs, batteries, air or water filters, preservation solutions, etc.).
5. Defects or damage caused by the use of non-genuine Whirlpool parts or accessories.
6. Conversion of products from natural gas or L.P. gas.
7. Damage from accident, misuse, abuse, fire, floods, acts of God or use with products not approved
by
Whirlpool.
8. Repairs to parts or systems to correct product damage or defects caused by unauthorized service,
alteration or modification of the appliance.
9. Cosmetic damage including scratches, dents, chips, and other damage to the applian
ce finishes unless
such d
amage results from defects in materials and workmanship and is reported to Whirlpool wi
thin 30
days.
10. Di
scoloration, rust or oxidation of surfaces resulting from caustic or corrosive enviro
nments including
but not limited
to high salt concentrations, high moisture or humidity or exposure to chemicals.
11. Food or medicine loss due to product failure.
12. Pick-up or delivery. This product is intended for in-home repair.
13. Travel or transportation expenses for service in remote locations where an authorized
Whirlpool
servicer is not ava
ilable.
14. Removal or reinstallation of inaccessible appliances or built-in fixtures (i.e. trim, decorative panels
,
f
looring, cabinetry, islands, countertops, drywall, etc.) that interfere with servicing, removal or
replacement of the product.
15. Service or parts for appliances with original model/serial numbers removed, altered or not easi
ly
de
termined.
The cost of repair or replacement under these excluded circumstances shall be borne by the
customer.
DISCLAIMER OF IMPLIED WARRANTIES
IMPLIED WARRANTIES, INCLUDING ANY IMPLIED WARRANTY OF MERCHANTABILITY OR IMPLIED WARRANTY OF FITNESS FOR A
PARTICULAR PURPOSE, ARE LIMITED TO ONE YEAR OR THE SHORTEST PERIOD ALLOWED BY LAW. Some states and provinces do not allow
limitations on the duration of implied warranties of merchantability or fitness, so this limitation may not apply to you. This warranty gives you
specific legal rights, and you also may have other rights that vary from state to state or province to province.
DISCLAIMER OF REPRESENTATIONS OUTSIDE OF WARRANTY
Whirlpool makes no representations about the quality, durability, or need for service or repair of this major appliance other than the representations
contained in this warranty. If you want a longer or more comprehensive warranty than the limited warranty that comes with this major appliance,
you should ask Whirlpool or your retailer about buying an extended warranty.
LIMITATION OF REMEDIES; EXCLUSION OF INCIDENTAL AND CONSEQUENTIAL DAMAGES
YOUR SOLE AND EXCLUSIVE REMEDY UNDER THIS LIMITED WARRANTY SHALL BE PRODUCT REPAIR AS PROVIDED HEREIN. WHIRLPOOL
SHALL NOT BE LIABLE FOR INCIDENTAL OR CONSEQUENTIAL DAMAGES. Some states
and provinces do not allow the exclusion or limitation
of incidental or consequential damages, so these limitations and exclusions may not apply to you. This warranty gives you specific legal rights, and
you also may have other rights that vary from state to state or province to province.
www.whirlpool.com/product_help
W11209379
®
/™ ©2014 Whirlpool. Used under license in Canada. All rights reserved. Printed in Mexico
W11209379
1
EN SAVOIR PLUS
Afin de conserver les ressources naturelles, ce réfrigérateur comprend un guide d’utilisation rapide. L’utilisateur trouvera un guide
d’utilisation téléchargeable complet (correspondant au modèle utilisé) à l’adresse
www.whirlpool.ca
.
Pour référence ultérieure, consignez par écrit les numéros de modèle et de série de votre produit. Vous trouvez les numéros de
modèle et de série sur la paroi interne du compartiment de réfrigération.
Les numéro de modèle____________________________ Numéro de série du produit ________________________
Enregistrer le réfrigérateur sur
www.whirlpool.com
. Au Canada, enregistrer sur
www.whirlpool.ca
.
Para instrucciones en español, visite
www.whirlpool.com
.
Guide d’utilisation
Réfrigérateur superposé
Risque possible de décès ou de blessure grave si vous ne suivez pas
immédiatement les instructions.
Risque possible de décès ou de blessure grave si vous ne suivez pas
les instructions.
Tous les messages de sécurité vous diront quel est le danger potentiel et vous disent comment réduire le risque de blessure et ce qui peut
se produire en cas de non-respect des instructions.
Votre sécurité et celle des autres est très importante.
Nous donnons de nombreux messages de sécurité importants dans ce manuel et sur votre appareil ménager. Assurez-vous de
toujours lire tous les messages de sécurité et de vous y conformer.
AVERTISSEMENT
DANGER
AVERTISSEMENT :
prendre quelques précautions fondamentales, y compris les suivantes :
Pour réduire les risques d'incendie, de choc électrique ou des blessures lors de l'utilisation du réfrigérateur,
IMPORTANTES INSTRUCTIONS DE SÉCURITÉ
CONSERVEZ CES INSTRUCTIONS
■ Brancher l'appareil sur une prise à 3 alvéoles reliée à la terre.
■ Ne pas enlever la broche de liaison à la terre.
■ Ne pas utiliser un adaptateur.
■ Ne pas utiliser un câble de rallonge.
■ Débrancher la source de courant électrique avant l'entretien.
■ Replacer pièces et panneaux avant de faire la remise en
marche.
■ Enlever les portes de votre vieux réfrigérateur.
■ Utiliser un produit de nettoyage ininflammable.
■ Garder les matériaux et les vapeurs inflammables, telle que
l'essence, loin du réfrigérateur.
■ Utiliser deux ou plus de personnes pour déplacer et installer le
réfrigérateur.
■ Débrancher le réfrigérateur avant l'installation de la machine à
glaçons (seulement pour modèles prêts à recevoir une machine
à glaçons).
2
MISE AU REBUT ADÉQUATE DE VOTRE
VIEUX RÉFRIGÉRATEUR
IMPORTANT :
L’emprisonnement et l’étouffement des enfants ne sont pas
un problème du passé. Les réfrigérateurs jetés ou abandonnés sont encore
dangereux, même s’ils sont laissés abandonnés pendant
“
quelques jours
seulement
”
. Si vous vous débarrassez de votre vieux réfrigérateur, veuillez
suivre les instructions suivantes pour aider à éviter les accidents.
Avant de jeter votre vieux réfrigérateur ou congélateur :
■
Enlever les portes.
■
Laisser les tablettes en place de sorte que les enfants ne puissent pas
y pénétrer facilement.
Utilisation des commandes
Votre réfrigérateur comporte deux commandes affectant la température. La
commande de température se trouve sur la partie avant supérieure du
compartiment du réfrigérateur, et la commande de circulation d'air se
trouve sur la paroi arrière du compartiment du congélateur.
Commande de température
La commande de température ajuste la froideur de l'air qui circule dans les
compartiments.
Pour vous accommoder, les commandes du réfrigérateur ont été
préréglées à l’usine. Au moment de l’installation initiale du réfrigérateur,
s’assurer que les commandes sont encore préréglées aux réglages
moyens tel qu’illustré.
REMARQUE :
Pour éteindre le réfrigérateur, tourner le réglage au mot
OFF (arrêt). Tourner la commande de température à OFF (arrêt) arrête le
refroidissement dans les compartiments de réfrigération et de congélation
sans toutefois déconnecter le réfrigérateur de l’alimentation électrique.
Réglage moyen “3”
IMPORTANT :
■
Donner au réfrigérateur le temps de se refroidir complètement avant
d’y ajouter des aliments. Il vaut mieux attendre 24 heures avant de
placer des aliments dans le réfrigérateur.
REMARQUE
: Tourner la commande de température à un réglage plus
haut (plus froid) ne refroidira pas les compartiments plus rapidement.
■
Si vous ajoutez des aliments avant que le réfrigérateur ne soit
complètement refroidi, vos aliments peuvent se gâter.
Réglage de la commande de température
Les réglages moyens indiqués à la section précédente devraient être
corrects pour l’utilisation normale du réfrigérateur domestique. Les
réglages sont faits correctement lorsque le lait ou le jus est aussi froid que
vous l'aimez et lorsque la crème glacée est ferme.
Si la température est trop tiède ou trop froide dans le réfrigérateur ou le
congélateur, vérifier d’abord les évents pour vous assurer qu'ils ne sont pas
bloqués.
S’il est nécessaire d’ajuster les températures, utiliser les réglages indiqués
au tableau ci-dessous comme guide. Sur les modèles à deux commandes,
ajuster d’abord la température du réfrigérateur. Attendre au moins
24 heures entre les ajustements, puis revérifier les températures
.
AVERTISSEMENT
Risque de suffoquer
Enlever les portes de votre vieux réfrigérateur.
Le non-respect de cette instruction peut causer
un décès ou des lésions cérébrales.
Renseignements importants à propos de la mise au
rebut des fluides réfrigérants :
Mettre le réfrigérateur au rebut conformément à la
réglementation fédérale et locale. Les fluides réfrigérants
doivent être évacués par un technicien certifié et agréé par
l’EPA conformément aux procédures établies.
UTILISATION DU RÉFRIGÉRATEUR
CONDITION/RAISON : AJUSTEMENT :
Section du RÉFRIGÉRATEUR trop tiède
■
Porte fréquemment ouverte, grande
quantité d’aliments ajoutée,
température ambiante très chaude
Tourner la commande du
RÉFRIGÉRATEUR au
chiffre plus élevé suivant
Section du CONGÉLATEUR trop tiède/
glaçons non préparés assez vite
■
Porte fréquemment ouverte ou grande
quantité d’aliments ajoutée ou
température ambiante très froide
(programme en fonctionnement trop
peu fréquent)
■
Usage intense de glaçons
Tourner la commande de la
CIRCULATION D'AIR ou
du RÉFRIGÉRATEUR au
chiffre plus élevé suivant.
Section du RÉFRIGÉRATEUR
trop froide
■
Réglages incorrects pour les
conditions existantes
Tourner la commande du
RÉFRIGÉRATEUR au
chiffre plus bas suivant
Section du CONGÉLATEUR trop froide
■
Réglages incorrects pour les
conditions existantes
Tourner la commande de la
CIRCULATION D'AIR ou
RÉFRIGÉRATEUR au
chiffre plus bas suivant
3
Commande de circulation d’air
La commande de circulation d'air ajuste la quantité d'air circulant entre les
compartiments du congélateur et du réfrigérateur.
Lorsque le réfrigérateur est branché pour la première fois, placer la
commande de circulation d'air au réglage recommandé.
Réglage de la commande de circulation d’air
Si une augmentation temporaire de la circulation d'air froid dans un
compartiment particulier est souhaitée, régler la commande.
■
Max (maximum) - Augmente la circulation d'air dans le congélateur
■
Min (minimum) - Augmente la circulation d'air dans le réfrigérateur
IMPORTANT :
Une fois la performance obtenue, replacer la commande de
circulation d’air au réglage recommandé afin que le réfrigérateur continue
de fonctionner avec le maximum d’efficacité.
Machine à glaçons
(sur certains modèles)
Mise en marche/arrêt de la machine à glaçons
REMARQUE :
Ne pas forcer le bras de commande en broche vers le haut
ou vers le bas.
■
Pour mettre la machine à glaçons en marche, il suffit d’abaisser le bras
de commande en broche.
REMARQUE :
Votre
machine à glaçons comporte un système d'arrêt
automatique. Au fur et à mesure de la fabrication de la glace, les
glaçons remplissent le bac d’entreposage de glaçons. Les glaçons
soulèvent le bras de commande en broche à la position OFF (arrêt)
(vers le haut).
■
Pour un arrêt manuel, soulever le bras de commande en broche à la
position OFF (arrêt) (vers le haut) et attendre le déclic pour s’assurer
que la machine à glaçons ne continuera pas à fonctionner.
REMARQUE :
Éteindre la machine à glaçons avant de retirer le bac
d’entreposage à glaçons pour servir des glaçons ou pour nettoyer le bac.
Ceci empêchera les glaçons de tomber de la machine à glaçons et dans le
compartiment de congélation. Après avoir réinstallé le bac d’entreposage,
mettre en marche la machine à glaçons.
Taux de production de glaçons
■
Production NORMALE de glaçons : La machine à glaçons devrait
produire environ 8 à 12 lots de glaçons par période de 24 heures. Si les
glaçons ne sont pas fabriqués assez rapidement, tourner la commande
du congélateur vers un chiffre plus élevé (plus froid) par étapes de un
demi-numéro. (Par exemple, si la commande est à 3, la déplacer entre
3 et 4.) Attendre 24 heures et, si nécessaire, tourner graduellement la
commande du congélateur au réglage le plus élevé, en attendant
24 heures entre chaque augmentation.
■
Production MAXIMALE de glaçons (sur certains modèles) :
La
machine à glaçons devrait produire environ 16 à 20 lots de glaçons par
période de 24 heures. Si votre réfrigérateur est doté de la
caractéristique de production maximale de glaçons, pousser le
commutateur à MAX.
À noter
■
Attendre 24 heures pour obtenir la première quantité de glaçons.
Prévoir un délai de 3 jours pour le remplissage complet du bac
d’entreposage. Jeter les trois premières quantités de glaçons
produites.
■
La qualité de vos glaçons sera seulement aussi bonne que la qualité
de l’eau fournie à votre machine à glaçons. Éviter de brancher la
machine à glaçons à un approvisionnement d’eau adoucie. Les
produits chimiques adoucisseurs d’eau (tels que le sel) peuvent
endommager des pièces de la machine à glaçons et causer une piètre
qualité des glaçons. Si une alimentation d’eau adoucie ne peut pas
être évitée, s’assurer que l’adoucisseur d’eau fonctionne bien et qu
'il
es
t bien entretenu.
■
Ne pas garder quoi que ce soit sur le dessus de la machine à glaçons
ou dans le bac à glaçons.
CONDITION/RAISON : RÉGLAGE :
Usage intense de glaçons Max (maximum)
Température de la pièce élevée Max (maximum) - Pour maintenir le
taux de production de glaçons
Grande quantité d’aliments Min (minimum) – Pour refroidir
rapidement aliments et boissons
GLAÇONS ET EAU
4
Nettoyage
Les sections de réfrigération et de congélation se dégivrent
automatiquement. Toutefois, nettoyer les deux sections au moins une fois
par mois pour empêcher une accumulation d’odeurs. Essuyer les
renversements immédiatement.
IMPORTANT :
Comme l’air circule entre les deux sections, toutes les
odeurs formées dans une section seront transférées à l’autre. Vous devez
nettoyer à fond les deux sections pour éliminer les odeurs. Pour empêcher
le transfert d’odeurs et l’assèchement des aliments, envelopper ou
recouvrir hermétiquement les aliments.
Pour nettoyer le réfrigérateur :
REMARQUE :
Ne pas utiliser de nettoyants abrasifs tels que les nettoyants
à vitre en atomiseurs, nettoyants à récurer, liquides inflammables, cires
nettoyantes, détergents concentrés, eaux de Javel ou nettoyants contenant
du pétrole sur les pièces en plastique, les garnitures intérieures, ou les
joints de portes. Ne pas utiliser d’essuie-tout, tampons à récurer ou autre
outil de nettoyage abrasif.
1.
Débrancher le réfrigérateur ou déconnecter la source de courant
électrique.
2.
Laver à la main, rincer et sécher les pièces amovibles et les surfaces
internes à fond. Utiliser une éponge propre ou un linge doux et un
détergent doux dans de l’eau tiède.
3.
Laver les surfaces extérieures en acier inoxydable ou métalliques
peintes avec une éponge propre ou un linge doux et un détergent doux
dans de l’eau tiède. Sécher à fond avec un linge doux.
REMARQUE :
Pour conserver à votre réfrigérateur en acier inoxydable
son aspect neuf et enlever les petites égratignures ou marques, il est
suggéré d’utiliser le nettoyant et poli pour acier inoxydable approuvé
par le fabricant. Pour commander le nettoyant, voir “Accessoires”.
IMPORTANT :
Ce nettoyant est pour les pièces en acier inoxydable
seulement!
Veiller à ce que le nettoyant et poli pour acier inoxydable n’entre pas en
contact avec les pièces de plastique telles que garnitures, couvercles
de distributeurs ou joints de porte. En cas de contact non intentionn
el,
netto
yer la pièce de plastique avec une éponge et un détergent dou
x
dan
s de l'eau tiède. Bien sécher avec un linge doux
.
4.
Nettoyer régulièrement les serpentins du condenseur. Il se peut que les
serpentins aient besoin d’être nettoyés tous les deux mois. Ce
nettoyage pourrait aider à économiser de l’énergie.
■ Éloigner le réfrigérateur du mur. Voir la section “Déballage du
réfrigérateur”.
■ Nettoyer à l’aspirateur les serpentins lorsqu’ils sont sales ou
poussiéreux.
■ Remettre le réfrigérateur en position. S’assurer qu’il y a un
espace d’au moins 1" (2,5 cm) entre l’arrière de la caisse et le
mur.
■ Vérifier l’aplomb du réfrigérateur.
5.
Brancher le réfrigérateur ou reconnecter la source de courant
électrique.
Entretien avant les vacances ou
lors d’un déménagement
Vacances
Si l'utilisateur choisit de laisser le réfrigérateur en
fonctionnement pendant son absence :
1.
Consommer tous les aliments périssables et congeler les autres.
2.
Si le réfrigérateur comporte une machine à glaçons automatique et
qu'il est raccordé à la source d'approvisionnement en eau du domicile,
fermer la source d'approvisionnement en eau du réfrigérateur. Des
dommages matériels peuvent subvenir si l'alimentation en eau n'est
pas coupée.
3.
Si la machine à glaçons est automatique, éteindre la machine à
glaçons.
REMARQUE :
Soulever le bras de commande en broche à la position
OFF (arrêt) (position élevée).
4.
Vider le bac à glaçons.
Si l'utilisateur choisit d’arrêter le fonctionnement du
réfrigérateur avant son départ :
1.
Enlever tous les aliments du réfrigérateur.
2.
Si le réfrigérateur a une machine à glaçons automatique :
■
Fermer l’approvisionnement d’eau de la machine à glaçons au
moins une journée à l’avance.
■
Lorsque la dernière quantité de glaçons est déposée, soulever le
bras de commande en broche à la position OFF (arrêt) (position
élevée).
3.
Éteindre la/les commande(s) de température. Voir “Utilisation de la/des
commande(s)”.
4.
Nettoyer le réfrigérateur, l’essuyer et bien le sécher.
5.
À l’aide d’un ruban adhésif, placer des blocs de caoutchouc ou de bois
dans la partie supérieure de chaque porte de façon à ce qu’elles soient
suffisamment ouvertes pour permettre l’entrée d'air à l’intérieur, afin
d’éviter l’accumulation d'odeurs ou de moisissure.
ENTRETIEN DU RÉFRIGÉRATEUR
AVERTISSEMENT
Risque d'explosion
Utiliser un produit de nettoyage ininflammable.
Le non-respect de cette instruction peut causer un décès,
une explosion ou un incendie.
5
Déménagement
Lorsque l'on déménage le réfrigérateur dans une nouvelle habitation,
suivre ces étapes pour préparer le déménagement.
1.
Si le réfrigérateur a une machine à glaçons automatique :
■
Fermer l’approvisionnement d’eau de la machine à glaçons au
moins une journée à l’avance.
■
Débrancher la canalisation d’eau de l’arrière du réfrigérateur.
■
Lorsque la dernière quantité de glaçons est déposée, soulever le
bras de commande en broche à la position OFF (position élevée).
2.
Retirer tous les aliments du réfrigérateur et placer tous les aliments
congelés dans de la neige carbonique.
3.
Vider le bac à glaçons.
4.
Éteindre la/les commande(s) de température. Voir “Utilisation de la/des
commande(s)”.
5.
Débrancher le réfrigérateur.
6.
Nettoyer, essuyer et sécher à fond.
7.
Retirer toutes les pièces amovibles, bien les envelopper et les attacher
ensemble à l’aide de ruban adhésif pour qu’elles ne bougent pas ni ne
s’entrechoquent durant le déménagement.
8.
Selon le modèle, soulever le devant du réfrigérateur pour qu’il roule
plus facilement OU soulever les vis de nivellement pour qu'elles
n'égratignent pas le plancher. Voir “Ajustement de la/des porte(s)” ou
“Fermeture et alignement de la porte”.
9.
Fermer les portes à l’aide de ruban adhésif et fixer le cordon
d'alimentation électrique au dos du réfrigérateur à l'aide de ruban
adhésif.
Lorsque vous arriverez à votre nouvelle habitation, remettez tout en place
et consultez la section “Instructions d’installation” pour les instructions de
préparation. D'autre part, si votre réfrigérateur a une machine à glaçons
automatique, rappelez-vous de raccorder l’approvisionnement d’eau au
réfrigérateur.
Remplacement des ampoules d’éclairage
REMARQUE :
Votre réfrigérateur ne pourra pas accommoder toutes les
ampoules pour les appareils ménagers. Veiller à remplacer l'ampoule par
une ampoule de même taille, forme et puissance (pas plus de 40 W).
Lumière du réfrigérateur
1.
Débrancher le réfrigérateur ou débrancher la source de courant
électrique.
2.
Passer la main derrière le tableau de commande et dévisser l’ampoule.
3.
Remplacer l’ampoule par une ampoule de 40 watts pour appareils
ménagers.
4.
Brancher le réfrigérateur ou reconnecter la source de courant
électrique.
Les accessoires de réfrigérateur suivants sont disponibles. Pour
commander, nous contacter et demander les numéros de pièces.
Aux É.-U., consulter notre page Web
www.whirlpool.com/accessories
ou
composer le
1-800-901-2042
.
Au Canada, consulter notre page Web
www.whirlpoolparts.ca
ou composer le
1-800-807-6777
.
Nettoyant et poli pour acier inoxydable affresh
®
:
Aux É.-U., commander la pièce numéro W10355016
Au Canada, commander la pièce numéro W10355016B
Lingettes pour acier inoxydable affresh
®
:
Aux É.-U., commander la pièce numéro W10355049
Au Canada, commander la pièce numéro W10355049B
Nettoyant pour appareil ménager et cuisine affresh
®
:
Aux É.-U., commander la pièce numéro W10355010
Au Canada, commander la pièce numéro W10355010B
Ensemble d'inversion du sens d'ouverture :
Commander la pièce n° W10395148
ACCESSOIRES
6
Essayer d'abord les solutions suggérées ici. Pour obtenir de l'aide ou des conseils qui permettront peut-être d'éviter une intervention de dépannage,
consulter la page de garantie de ce manuel et scanner le code QR avec votre appareil intelligent, ou consultez le site internet
www.whirlpool.ca
pour des
conseils qui vous permettront peut-être d'éviter une intervention de dépannage.
Vous pouvez adresser tous commentaires ou questions par courrier à l'adresse ci-dessous :
Aux États-Unis :
Whirlpool Brand Home Appliances
Customer eXperience Center
553 Benson Road
Benton Harbor, MI 49022-2692
Au Canada :
Whirlpool Brand Home Appliances
Customer eXperience Centre
200 - 6750 Century Ave.
Mississauga ON L5N 0B7
Dans votre correspondance, veuillez indiquer un numéro de téléphone où l'on peut vous joindre dans la journée.
RÉSOLUTION DE PROBLÈMES
AVERTISSEMENT
Risque d'explosion
Utiliser un produit de nettoyage ininflammable.
Le non-respect de cette instruction peut causer un décès,
une explosion ou un incendie.
AVERTISSEMENT
Risque de choc électrique
Brancher sur une prise à 3 alvéoles reliée à la terre.
Ne pas enlever la broche de liaison à la terre.
Ne pas utiliser un adaptateur.
Ne pas utiliser un câble de rallonge.
Le non-respect de ces instructions peut causer
un décès, un incendie ou un choc électrique.
Si vous rencontrez
les problèmes
suivants
Causes possibles et/ou solutions recommandées
Le réfrigérateur ne
fonctionne pas
■
Non raccordé à l'alimentation électrique -
Brancher le cordon d'alimentation dans une prise à 3 alvéoles reliée à la
terre. Ne pas utiliser de rallonge.
■
Pas d'alimentation au niveau de la prise -
Brancher une lampe pour voir si la prise électrique fonctionne.
■
Un fusible du domicile est grillé ou le disjoncteur s'est ouvert -
Remplacer le fusible ou réenclencher le disjoncteur.
Si le problème persiste, appeler un électricien.
■
La commande n'est pas allumée -
Mettre en marche la commande du réfrigérateur. Voir “Utilisation des commande”.
■
Nouvelle installation -
Attendre 24 heures après l'installation pour permettre au réfrigérateur de refroidir complètement.
REMARQUE :
Le fait de placer la/les commande(s) de température au réglage le plus froid ne refroidira pas le
réfrigérateur plus rapidement.
Le moteur semble
fonctionner
excessivement
Votre nouveau réfrigérateur fonctionnera peut-être plus longtemps que votre appareil précédent. Les réfrigérateurs
éconergiques fonctionnent plus longtemps à des vitesses inférieures, plus éconergiques. Le réfrigérateur peut fonctionner
encore plus longtemps si la température de la pièce est élevée, si une grande quantité de nourriture a été ajoutée, si la porte
est fréquemment ouverte ou si elle est laissée ouverte.
Le réfrigérateur est
bruyant
Le bruit émis par les réfrigérateurs a été réduit au cours des années. Les bruits de fonctionnement étant moins importants,
vous remarquerez peut-être des bruits inconnus qui sont en réalité normaux. Voici quelques sons normaux accompagnés
d'une explication :
■
Bourdonnement -
se fait entendre lorsque le robinet d'eau s'ouvre pour remplir la machine à glaçons
■
Cliquètement/crépitement -
ouverture ou fermeture des robinets
■
Pulsation -
les ventilateurs/le compresseur se règlent afin d'optimiser la performance
■
Cliquetis -
écoulement de liquide réfrigérant, mouvement des conduites d'eau ou d'objets posés sur le dessus du
réfrigérateur
■
Grésillement/gargouillement -
de l'eau tombe sur l'élément de chauffage durant le programme de dégivrage
■
Bruit d'éclatement -
contraction/expansion des parois internes, particulièrement lors du refroidissement initial
■
Bruit d'écoulement d'eau -
peut être entendu lorsque la glace fond lors du programme de dégivrage et que l'eau
s'écoule dans le plateau de dégivrage
■
Grincement/craquement -
se produit lorsque la glace est éjectée du moule à glaçons
7
La porte ne ferme pas
complètement
■
La porte est bloquée en position ouverte -
Déplacer les aliments sous emballage pour dégager la porte. Replacer le
compartiment ou la tablette en position correcte. Vérifier que le couvercle du bac à légumes est enfoncé complètement
de sorte que l'arrière repose sur les supports.
La porte est difficile à
ouvrir
■
Les joints sont sales ou collants -
Nettoyer les joints et les surfaces au savon doux et à l’eau tiède. Rincer et sécher
avec un linge doux.
La température est trop
élevée
■
Nouvelle installation -
Attendre 24 heures après l'installation pour permettre au réfrigérateur de refroidir complètement.
■
La/les porte(s) est/sont fréquemment ouverte(s) ou n'est/ne sont pas complètement fermée(s) -
Cela permet à
l'air chaud de pénétrer dans le réfrigérateur. Minimiser les ouvertures de porte et garder la porte complètement fermée.
■
Une grande quantité d'aliments chauds a été récemment ajoutée -
Attendre quelques heures pour permettre au
réfrigérateur de revenir à une température normale.
■
Vérifier que le réglage des/de la commande(s) de témpérature est adapté à l'environnement de l'appareil -
Ajuster les commandes à un réglage plus froid. Vérifier la température au bout de 24 heures. Voir “Utilisation des
commande”.
Il y a accumulation
d'humidité à l'intérieur
REMARQUE :
Une
certaine accumulation
d'humidité est normale.
■
Pièce humide -
Ceci contribue à l'accumulation de l'humidité dans le réfrigérateur.
■
La/les porte(s) est/sont fréquemment ouverte(s) ou n'est/ne sont pas complètement fermée(s) -
Cela permet à
l'air humide de pénétrer dans le réfrigérateur. Minimiser les ouvertures de porte et garder la porte complètement fermée.
La machine à glaçons
ne produit pas ou pas
suffisamment de
glaçons
■
La machine à glaçons n'est pas raccordée à l'alimentation en eau -
Raccorder le réfrigérateur à l'alimentation en
eau et ouvrir complètement le robinet d'arrêt d'eau.
■
Une déformation de la canalisation peut réduire le débit d'eau -
Redresser la canalisation d'eau.
■
La machine à glaçons est éteinte -
S'assurer que le bras de commande de la machine à glaçons ou l'interrupteur
(selon les modèles) sont bien à la position ON (marche).
■
Nouvelle installation -
Attendre 24 heures après l'installation de la machine à glaçons pour que la production de
glaçons commence. Attendre 3 jours pour que la production de glaçons soit complète.
■
Une grande quantité de glaçons a été récemment prélevée -
Accorder suffisamment de temps à la machine à
glaçons pour produire plus de glaçons.
■
Glaçon coincé dans le bras éjecteur -
Enlever le glaçon du bras éjecteur avec un ustensile en plastique.
■
Un système de filtration de l'eau par osmose inverse est raccordé à votre alimentation en eau froide peut
réduire la pression de l'eau -
Voir la section “Spécifications de l'alimentation en eau”.
Les glaçons sont creux
ou petits
REMARQUE :
Cela
indique une faible
pression de l'eau.
■
Le robinet d'eau n'est pas complètement ouvert -
Ouvrir complètement le robinet d'arrêt d'eau.
■
Une déformation de la canalisation peut réduire le débit d'eau -
Redresser la canalisation d'eau.
■
Un système de filtration de l'eau par osmose inverse est raccordé à votre alimentation en eau froide peut
réduire la pression de l'eau -
Voir la section “Spécifications de l'alimentation en eau”.
■
Pour d'autres questions concernant la pression de l’eau, contacter un plombier agréé qualifié.
Mauvais goût, mauvaise
odeur ou couleur grise
des glaçons
■
Des raccords de plomberie neufs peuvent entraîner une décoloration ou un mauvais goût des glaçons -
Jeter les
glaçons et laver le bac d'entreposage à glaçons. Accorder 24 heures à la machine à glaçons pour produire des
nouveaux glaçons et jeter les trois premiers lots de glaçons produits.
■
Des glaçons entreposés depuis trop longtemps peuvent développer un mauvais goût -
Jeter les glaçons. Laver le
compartiment à glaçons. Attendre 24 heures pour la fabrication de nouveaux glaçons.
■
L'odeur de certains aliments s'est transferrée aux glaçons -
Utiliser des emballages hermétiques et à l'épreuve de
l'humidité pour conserver les aliments.
■
L'eau contient des minéraux (tels le souffre) -
L'installation d'un filtre à eau peut être requise afin d'enlever ces
minéraux.
Si vous rencontrez
les problèmes
suivants
Causes possibles et/ou solutions recommandées
8
11/14
GARANTIE LIMITÉE DES
GROS APPAREILS
MÉNAGERS
WHIRLPOOL
®
ATTACHEZ ICI VOTRE REÇU DE VENTE. UNE PREUVE D’ACHAT EST
OBLIGATOIRE POUR OBTENIR L'APPLICATION DE LA GARANTIE.
Lorsque vous appelez le centre d'eXpérience de la clientèle, veuillez garder à
disposition les renseignements suivants :
■ Nom, adresse et numéro de téléphone
■ Numéros de modèle et de série
■ Une description claire et détaillée du problème rencontré
■ Une preuve d'achat incluant le nom et l'adresse du marchand ou du détaillant
SI VOUS AVEZ BESOIN DE SERVICE :
1. Avant de nous contacter pour obtenir un dépannage, veuillez déterminer si des réparations sont nécessaires pour
votre produit. Certains problèmes peuvent être résolus sans intervention de dépannage. Prenez quelques minutes
pour parcourir la section Dépannage ou Résolution de problèmes du guide d'utilisation et d'entretien, scannez le code
QR ci-contre avec votre téléphone intelligent pour accéder à des ressources supplémentaires, ou rendez-vous sur le
site http://www.whirlpool.ca.
2. Tout service sous garantie doit être effectué exclusivement par nos fournisseurs de dépannage autorisés Whirlpool
.
Aux É.-U. et au Canada, dirigez toutes vos demandes de service sous garantie au
Centre d’eXpérience de la clientèle Whirlpool
Aux É.-U., composer le 1-800-253-1301. Au Canada, composer le 1-800-807-6777.
Si vous résidez à l'extérieur du Canada et des 50 États des États-Unis, contactez votre marchand Whirlpool autorisé pour déterminer si une autre
garantie s'applique.
GARANTIE LIMITÉE DE UN AN
CE QUI EST COUVERT CE QUI N’EST PAS COUVERT
Pendant un an à compter de la date
d’achat, lorsque ce gros appareil ménager
est installé, utilisé et entretenu
conformément aux instructions jointes à ou
fournies avec le produit, Whirlpool
Corporation ou Whirlpool Canada, LP (ci-
après désignées “Whirlpool”) décidera à sa
seule discrétion de remplacer le produit ou
de couvrir le coût des pièces spécifiées par
l’usine et de la main-d’œuvre nécessaires
pour corriger les vices de matériaux ou de
fabrication qui existaient déjà lorsque ce
gros appareil ménager a été acheté. S’il est
remplacé, l'appareil sera couvert pour la
période restant à courir de la garantie
limitée d’un an du produit d’origine.
LE SEUL ET EXCLUSIF RECOURS DU
CLIENT DANS LE CADRE DE LA
PRÉSENTE GARANTIE LIMITÉE CONSISTE
EN LA RÉPARATION PRÉVUE PAR LA
PRÉSENTE. Le service doit être fourni par
une compagnie de service désignée par
Whirlpool. Cette garantie limitée est valide
uniquement aux États-Unis ou au Canada
et s’applique exclusivement lorsque le gros
appareil ménager est utilisé dans le pays où
il a été acheté. La présente garantie limitée
est valable à compter de la date d'achat
initial par le consommateur. Une preuve de
la date d’achat initial est exigée pour obtenir
un dépannage dans le cadre de la présente
garantie limitée.
1. Usage commercial, non résidentiel ou par plusieurs familles, ou non-respect des instructions de
l'utilisateur, de l'opérateur ou des instructions d'installation.
2. V
isite d'instruction à domicile pour montrer à l'utilisateur comment utiliser l'appareil.
3. Visites de service pour rectifier une installation ou un entretien fautifs du produit, une installation no
n
conforme
aux codes d’électricité ou de plomberie, ou la rectification de l'installation électrique ou de
la plomberie du domicile (ex : câblage électrique, fusibles ou tuyaux d'arrivée d'eau du domicile).
4. Pièces consomptibles (ex : ampoules, batteries, filtres à air ou à eau, solutions de conservation, etc.).
5. Défauts ou dommage résultant de l'utilisation de pièces ou accessoires Whirlpool non authentiques.
6. Conversion de votre produit du gaz naturel ou du gaz de pétrole liquéfié.
7. Dommages causés par : accident, mésusage, abus, incendie, inondations, catastrophe naturell
e ou
l'utili
sation de produits non approuvés par Whirlpool.
8. Réparations aux pièces ou systèmes dans le but de rectifier un dommage ou des défauts ré
sultant
d'une
réparation, altération ou modification non autorisée faite à l'appareil.
9. Défauts d'apparence, notamment les éraflures, traces de choc, fissures ou tout autre dommage su
bi
par
le fini de l'appareil ménager, à moins que ces dommages ne résultent de vices de matériau
x ou
de
fabrication et ne soient signalés à Whirlpool dans les 30 jours suivant la date d'ach
at.
10
. Décoloration, rouille ou oxydation des surfaces résultant d'environnements caustiques ou corros
ifs
incluant d
es concentrations élevées de sel, un haut degré d'humidité ou une exposition à des
produits chimiques (exemples non exhaustifs).
11. Perte d'aliments ou de médicaments due à la défaillance du produit.
12. Enlèvement ou livraison. Ce produit est conçu pour être réparé à l'intérieur du domicile.
13. Frais de déplacement et de transport pour le dépannage/la réparation dans une région éloignée
où
une compa
gnie de service Whirlpool autorisée n’est pas disponible.
14. Retrait ou réinstallation d'appareils inaccessibles ou de dispositifs préinstallés (ex : garnitures
,
pannea
ux décoratifs, plancher, meubles, îlots de cuisine, plans de travail, panneaux de gypse,
etc.)
qui entravent
le dépannage, le retrait ou le remplacement du produit.
15. Service et pièces pour des appareils dont les numéros de série et de modèle originaux ont ét
é
enlevé
s, modifiés ou ne peuvent pas être facilement identifiés.
Le coût d’une réparation ou d’un remplacement dans le cadre de ces circonstances exclues est à
la charge du client.
CLAUSE D'EXONÉRATION DE RESPONSABILITÉ AU TITRE DES GARANTIES IMPLICITES
LES GARANTIES IMPLICITES, Y COMPRIS LES GARANTIES APPLICABLES DE QUALITÉ MARCHANDE OU D'APTITUDE À UN USAGE
PARTICULIER, SONT LIMITÉES À UN AN OU À LA PLUS COURTE PÉRIODE AUTORISÉE PAR LA LOI. Certains États et provinces ne permettent pas
de limitation sur la durée des garanties implicites de qualité marchande ou d'aptitude à un usage particulier, de sorte que la limitation ci-dessus peut ne
pas être applicable dans votre cas. Cette garantie vous confère des droits juridiques spécifiques et vous pouvez également jouir d’autres droits qui
peuvent varier d’une juridiction à l'autre.
EXONÉRATION DE RESPONSABILITÉ DANS LES DOMAINES NON COUVERTS PAR LA GARANTIE
Whirlpool décline toute responsabilité au titre de la qualité, de la durabilité ou en cas de dépannage ou de réparation nécessaire sur ce gros appareil
ménager autre que les responsabilités énoncées dans la présente garantie. Si vous souhaitez une garantie plus étendue ou plus complète que la
garantie limitée fournie avec ce gros appareil ménager, adressez-vous à Whirlpool ou à votre détaillant pour obtenir les modalités d'achat d'une garantie
étendue.
LIMITATION DES RECOURS; EXCLUSION DES DOMMAGES FORTUITS OU INDIRECTS
LE SEUL ET EXCLUSIF RECOURS DU CLIENT DANS LE CADRE DE LA PRÉSENTE GARANTIE LIMITÉE CONSISTE EN LA RÉPARATION PRÉVUE
PAR LA PRÉSENTE. WHIRLPOOL N’ASSUME AUCUNE RESPONSABILITÉ POUR LES DOMMAGES FORTUITS OU INDIRECTS. Certains États et
certaines provinces ne permettent pas l’exclusion ou la limitation des dommages fortuits ou indirects de sorte que ces limitations et exclusions peuvent
ne pas être applicables dans votre cas. Cette garantie vous confère des droits juridiques spécifiques et vous pouvez également jouir d’autres droits qui
peuvent varier d’une juridiction à l'autre.
http://www.whirlpool.ca
W11209379
®
/™ ©2014 Whirlpool. Utilisé sous licence au Canada. Tous droits réservés.
Imprimé au Mexique