Loading ...
Loading ...
Loading ...
Anti-tip device
102
Complete all necessary connections
for the range. Read the “Electrical
connection”, “Gas connection”, and
“Plumbed water connection” chapters
for more information.
The range can be damaged if it is
lifted using the cover, the trim or the
door handle.
Open the oven door and hold the
appliance by the front of the oven
cavity.
Lift the range and move it with the
help of the rear wheels.
Slide the range into position, guiding
the middle of the appliance onto the
anti-tip device. Slide the appliance all
the way back to the wall.
The range can be aligned if necessary.
Check it with a spirit level.
- Rear adjustment right and left:
You will need an open-end wrench
(3/8" (10mm)).
- Front adjustment right and left:
You will need an open-end wrench
(5/8" (16mm)) for the locknut and
an open-end wrench
(1/2" (13mm)) for the adjustable
nut.
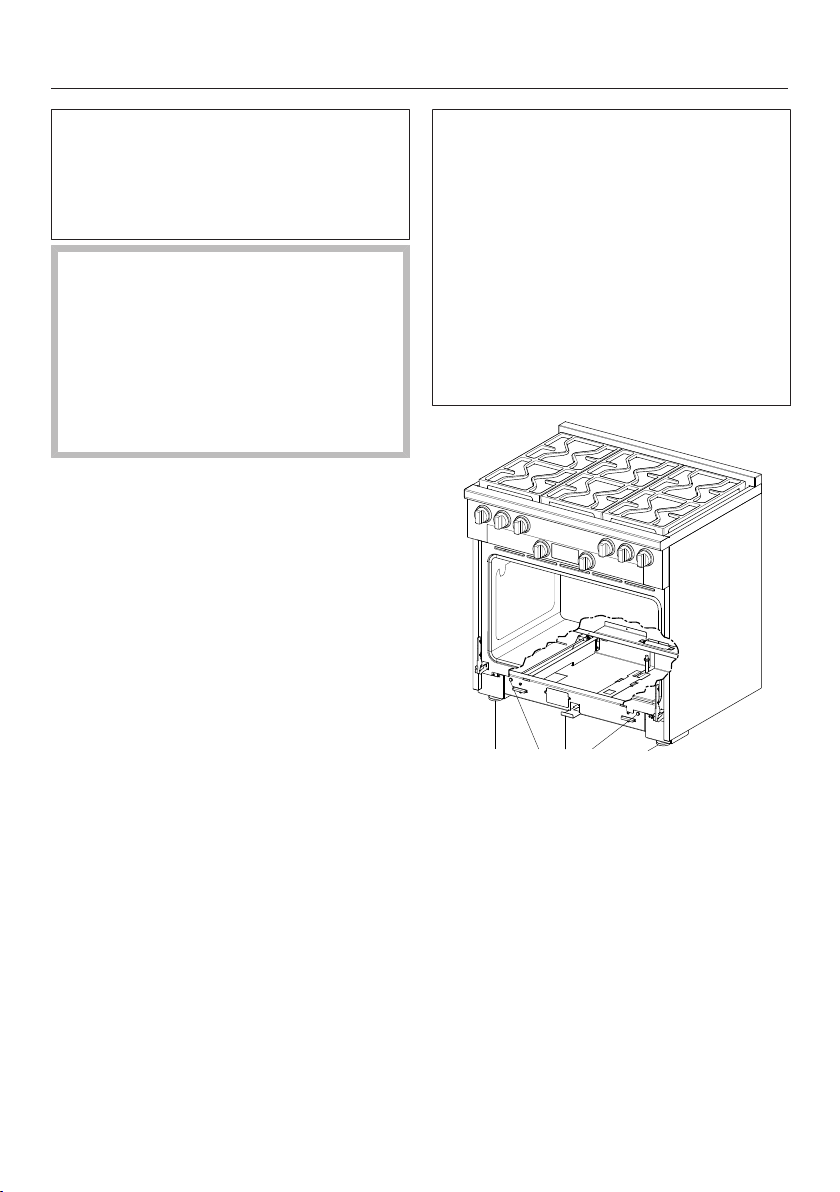
1 22 33
a
Locking clamp
b
Rear adjustment
c
Front adjustment
Align the range.
Slide the locking clamp firmly
back.
Loading ...
Loading ...
Loading ...