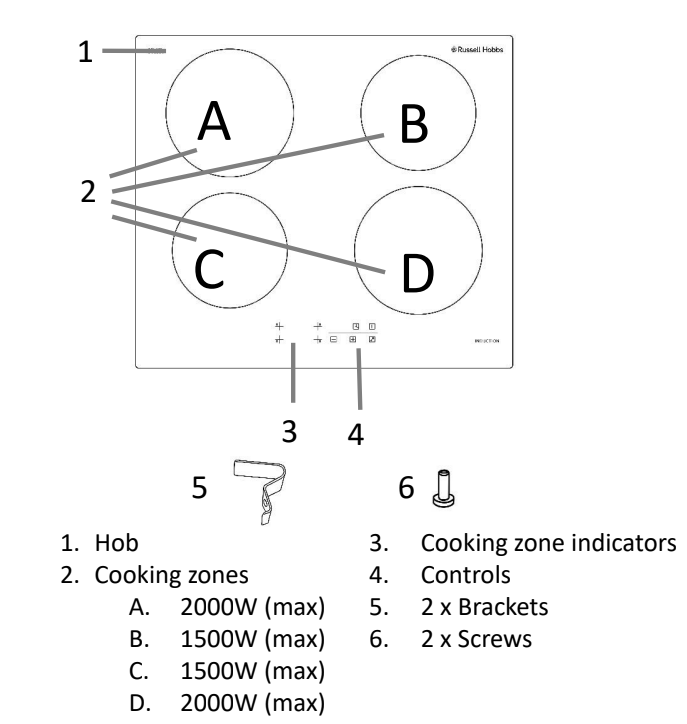
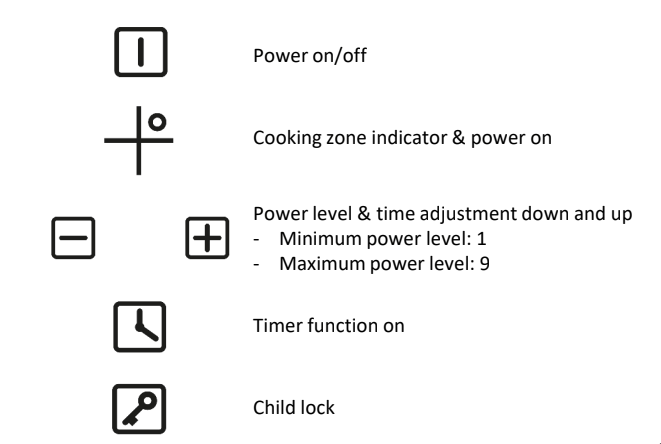
The appliance has 4 cooking zones and these are controlled by the touch controls at the bottom of the hob. To use a cooking zone you must press the required cooking zone indicator/on control of the cooking zone before being able to set the power level.
The function of each touch control and the meaning of each icon is explained below:
Using the touch controls
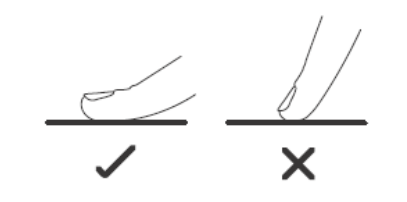
The controls respond to touch, so you don’t need to apply pressure to them.
Below are tips on how to use the controls:
Use the ball of your finger, not its tip.
You will hear a beep each time a touch is registered.
Make sure the controls are always clean, dry, and that there is no object (e.g. a utensil or a cloth) covering them. Even a thin film of water may make the controls difficult to operate.
Indicators
Cooking zone indicators
Each cooking zone has its own indicator that is located next to its cooking zone on control . The indicator will show the power level, if a zone has any residual heat after operation and if it is being used with the timer.
Timer indicator
The timer indicator is located next to the timer control
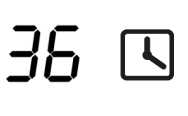
It will show the time that has been set for the minute minder and if one cooking zone is to be turned off after a period of time (maximum of 99 minutes).
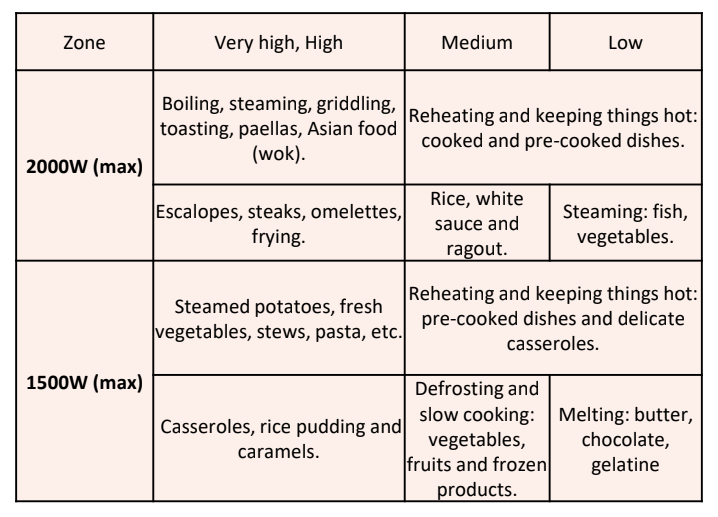
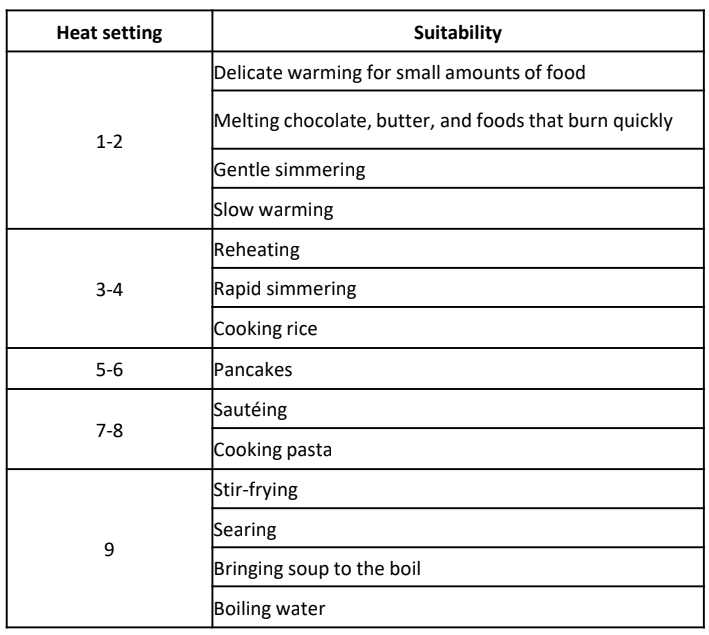
Power levels
The settings below are guidelines only, the exact setting you will require will depend on several factors, including your cookware and the amount you are cooking. Experiment with the induction hob to find the settings that best suit you.
To use a cooking zone
Turn on the appliance at the circuit, the appliance will beep and all indication lights will flash and then go out.
Place a suitable pan on the zone you wish to use. Make sure the bottom of the pan and the surface of the pan support are clean and dry.
Touch the power on/off control , all indicators will display a ‘-’ symbol.
Touch the cooking zone on control of the required cooking zone. The indicator of that cooking zone will display a ‘0’.
5.Set the power level of the required cooking zone by touching the controls. The first power level that will be shown on the indicator will be 5.
6.You can modify the power setting of a cooking zone at any time during cooking. Please note that if a power level is not selected within 1 minute of powering on the hob, the hob will automatically switch off. If this happens then you will need to start again from step 3.
7.Note: If a cooking zone indicator flashes with the symbol, this means:
i. You have not placed a pan on the correct cooking zone ii. The pan you’re using is not suitable for induction cooking iii. The pan is too small or not properly centred on the cooking zone. No heating takes place unless there is a suitable pan on the cooking zone. The display will automatically turn off after 1 minute if no suitable pan is placed on it.
8.To switch the cooking zone off, you can either scroll down the power levels until the ‘-’ symbol is shown on the display, touch the controls at the same time until the ‘-’ symbol is shown on the display, or touch the power control and turn the hob off completely. Please note that the fan will keep working and will cool the induction hob for a further 1 minute after the hob has gone in to standby mode.
9.The ‘H’ symbol will be shown on the indicator of the cooking zone controls that have just been used to show that there is residual heat on that cooking zone. The ‘H’ symbol will stay lit until the cooking zone has cooled down sufficiently. It can also be used as an energy saving function if you want to heat an additional pan or keep the contents of a pan warm, use the zone that is still hot.
Locking the controls
You can lock the controls to prevent unintended use (for example children accidentally turning the cooking zones on).
To lock the controls touch the child lock control, the timer indicator will show Lo’.
Note: When the controls are locked, all the controls except the Power on/off control are disabled. If the hob is turned off when the controls have been locked you will have to unlock the controls when the hob is powered on.
To unlock the controls touch and hold the control for at least 3 seconds. All controls can now be unlocked and can be used
Using the Timer
You can use the timer in two different ways:
As a minute minder - in this case, the timer will not turn any cooking zone off when the set time is up.
To turn one cooking zone off after the set time is up.
Note: You can set the timer for up to 99 minutes.
Using the Timer as a Minute Minder
Make sure the hob is turned on and note that you can use the minute minder even if you’re not selecting any cooking zone.
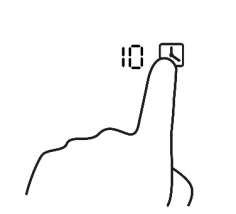
Touch the timer control and the timer indicator will start flashing and“10” will show.
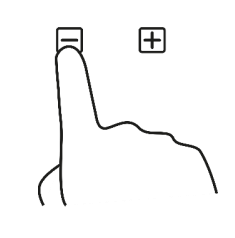
Set the time by touching the control of the timer. By touching these controls the timer will increase or decrease by 1 minute but if you touch and hold these controls the timer will increase or decrease by 10 minutes. If the setting time exceeds 99 minutes, the timer will automatically return to 0 minute.
3. When the time is set, it will begin to count down immediately. The display will show the remaining time and the timer indicator will flash for 5 seconds.
4. When the time has counted down the hob will beep for 30 seconds and the timer indicator will show ‘- -’. Please note if you want to change the time after the timer is set, you have to cancel the timer function and start from step 1.
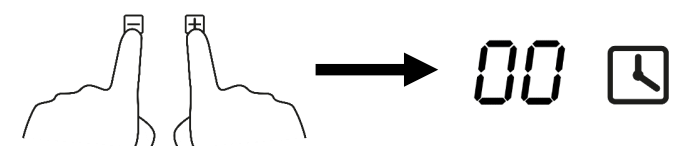
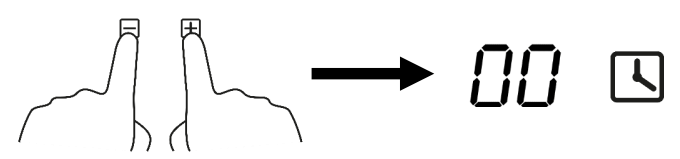
5.If you want to cancel the timer at any point you can do this by touching the controls together. The timer will be cancelled and the timer indicator will show ‘00’.
Setting the timer to turn one cooking zone off
Make sure the hob is turned on and that a suitable pan has been placed on the zone you wish to use. Make sure the bottom of the pan and the surface of the pan support are clean and dry.
Touch the cooking zone on control of the required cooking zone. The indicator of that cooking zone will display a ‘0’.
Touch the controls to set the required power level.
Touch the timer control and the timer indicator will start flashing and “10” will show.
4. Set the time by touching the controls. By touching these controls the timer will increase or decrease by 1 minute but if you touch and hold these controls the timer will increase or decrease by 10 minutes. If the setting time exceeds 99 minutes, the timer will automatically return to 0 minute.
5. When the time is set, it will begin to count down immediately. The display will show the remaining time and the timer indicator will flash for 5 seconds.
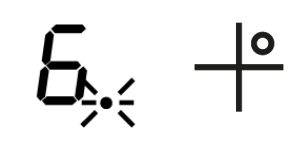
6.Please note that the red dot next to power level indicator will illuminate indicating that zone is selected.
7. When cooking timer expires, the corresponding cooking zone will switch off automatically. Please note if you want to change the time after the timer is set, you have to cancel the timer function and start from step 1.
8. If you want to cancel the timer at any point you can do this by touching the controls together. The timer will be cancelled and the timer indicator will show ‘00-’.
Residual heat warning
When the hob has been operated there will be some residual heat. The display of controls of which ever cooking zone has been used will show a ‘H’ symbol to warn you of the residual heat and to keep away from it.
The ‘H’ symbol will stay lit until the cooking zone has cooled down sufficiently.
Over heat protection
The hob is fitted with a temperature sensor which can monitor the temperature inside the ceramic hob. If an excessive temperature is detected then the hob will stop operation automatically and switch itself off.
Auto shutdown
Another safety feature of the hob is an auto shutdown, this occurs if you ever forget to switch off a cooking zone and certain time has passed. The shutdown times are shown in the table below:
Detection of Small Articles
When an unsuitable size or non-magnetic pan (e.g. aluminum) or some other small items (e.g. knife, fork, key) have been put on the hob. The hob will automatically go in to standby after a period of 1 minute.
Please note that the fan will keep working and will cool the induction hob for a further minute after the hob has gone in to standby mode.
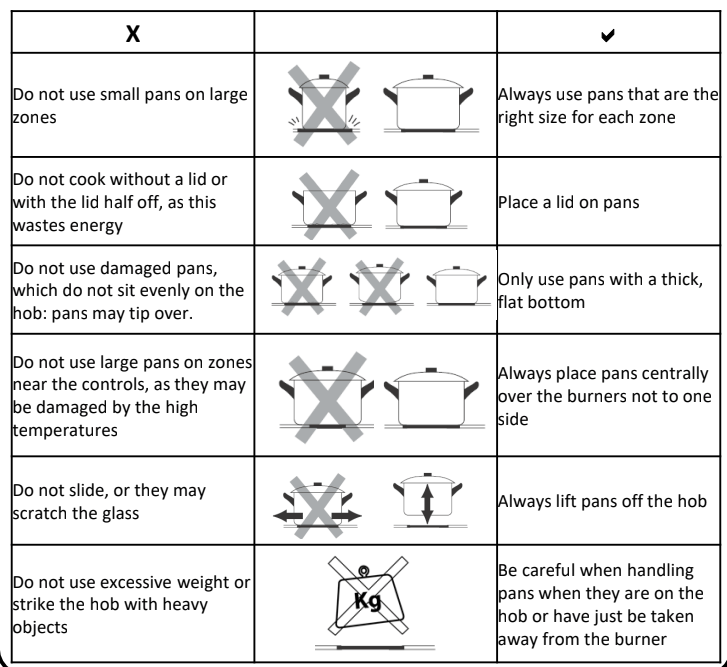
Pans & energy saving
The following advice is to prevent damage to pans and help you save energy:
Cooking recommendations:
The following advice is to help you get the best cooking performance/results:
Cleaning and Maintenance:
Important notes:
The appliance will become hot during operation, allow the appliance to cool down before cleaning.
Do not use any high-pressure cleaners or steam cleaners.
Wash new sponge cloths thoroughly before use.
Follow all instructions and warnings included with the cleaning agents.
How to clean
Observe the information in the table below to ensure that the surface is not damaged by using the wrong type of cleaning agent. Do not use:
Harsh or abrasive cleaning agents,
Cleaning agents with a high concentration of alcohol,
Hard scouring pads or sponges,
High-pressure cleaners or steam cleaners.
How to clean:
After each use, clean the surface of each zone once they have cooled down. If any residue is left (baked-on food, drops of grease etc.), however little, it will become stuck to the surface and more difficult to remove later.
Always clean off any liquid as soon as it is spilt: you will save yourself any unnecessary effort.
Do not leave acidic liquids (e.g. lemon juice, vinegar, etc.) on the hob.
Where possible, do not allow salt to come into contact with the surface of the electric hob.
Causes of damage:
Rough pot and pan bases scratch the ceramic.
Avoid boiling pots dry. This may cause damage.
Sugar can cause the surface to blister if not removed immediately
Never place hot pots or pans on the control panel, the display area or the surround. This may cause damage.
Damage can occur if hard or pointed objects fall on the hob.
Aluminium foil and plastic containers melt on hot hotplates.
Oven protective foil is not suitable for your hob.
Unsuitable cleaning agents can cause discolouration and/or stains.
Spillages can cause discolouration if not removed/cleaned immediately.
Dragging or scraping pans across the hob can cause discolouration, pans should lifted when moving them
Trouble Shooting:
Problem
Solution
No power
The plug is not plugged in Connect the appliance to the electricity supply
Power cut or faulty fuse Check whether other kitchen appliances are working or check in the fuse box to make sure that the fuse for the appliance is working
Controls aren’t working
The child lock/control lock is operational Unlock the child lock/control lock
No heating
Incorrect cookware is being used Induction hobs create a magnetic field so pans need to either be made from a magnet metal such as cast iron or steel, or have a magnetic base. If your current cookware isn’t then new induction suitable cookware will have to be purchased.
The indicator is showing
Incorrect cookware is being used Induction hobs create a magnetic field so pans need to either be made from a magnet metal such as cast iron or steel, or have a magnetic base. If your current cookware isn’t then new induction suitable cookware will have to be purchased. If no suitable pan has been put on the hob then the cooking zone indicator(s) will show
No pan has been put on a cooking zone Put a suitable pan on to the required cooking zone
Scratches, discolouration or blistering
Sliding or dragging pans may scratch the glass Always lift pans off the hob
Rough pot and pan bases scratch the ceramic Replace cookware
Spillages can cause discolouration Remove/clean all spillages immediately
Sugar can cause the surface to blister Remove/clean all spillages immediately
Cookware is damaged
Cookware can become deformed if boiled dry Never boil pans dry
Fault codes:
The hob is equipped with a self diagnostic function and the table below shows the fault codes and the actions that should be taken.
Failure code
Problem
Solution
Auto-Recovery
E1
Supply voltage is above the rated voltage.
Please inspect whether power supply is normal.
Power on after the power supply is normal.
E2
Supply voltage is below the rated voltage.
E3
High temperature of ceramic plate sensor
Wait for the temperature of ceramic plate return to normal.
Touch “ON/OFF” button to restart unit.
E4
High temperature of ceramic plate sensor
E5
High temperature of IGBT .
Wait for the temperature of IGBT return to normal. Touch “ON/OFF” button to restart unit.
Check whether the fan runs smoothly; if not , then contact customer services.
 control of the cooking zone before being able to set the power level.
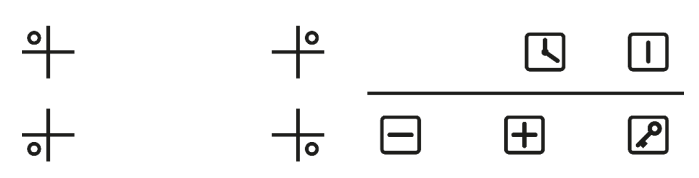
 control . The indicator will show the power level, if a zone has any residual heat after operation and if it is being used with the timer.
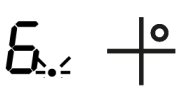

 , all indicators will display a ‘-’ symbol.
 control of the required cooking zone. The indicator of that cooking zone will display a ‘0’.
 controls. The first power level that will be shown on the indicator will be 5.
 symbol, this means:
 controls at the same time until the ‘-’ symbol is shown on the display, or touch the power
  control and turn the hob off completely. Please note that the fan will keep working and will cool the induction hob for a further 1 minute after the hob has gone in to standby mode.

 control, the timer indicator will show Lo’.
 and the timer indicator will start flashing and“10” will show.


 control of the required cooking zone. The indicator of that cooking zone will display a ‘0’.