Loading ...
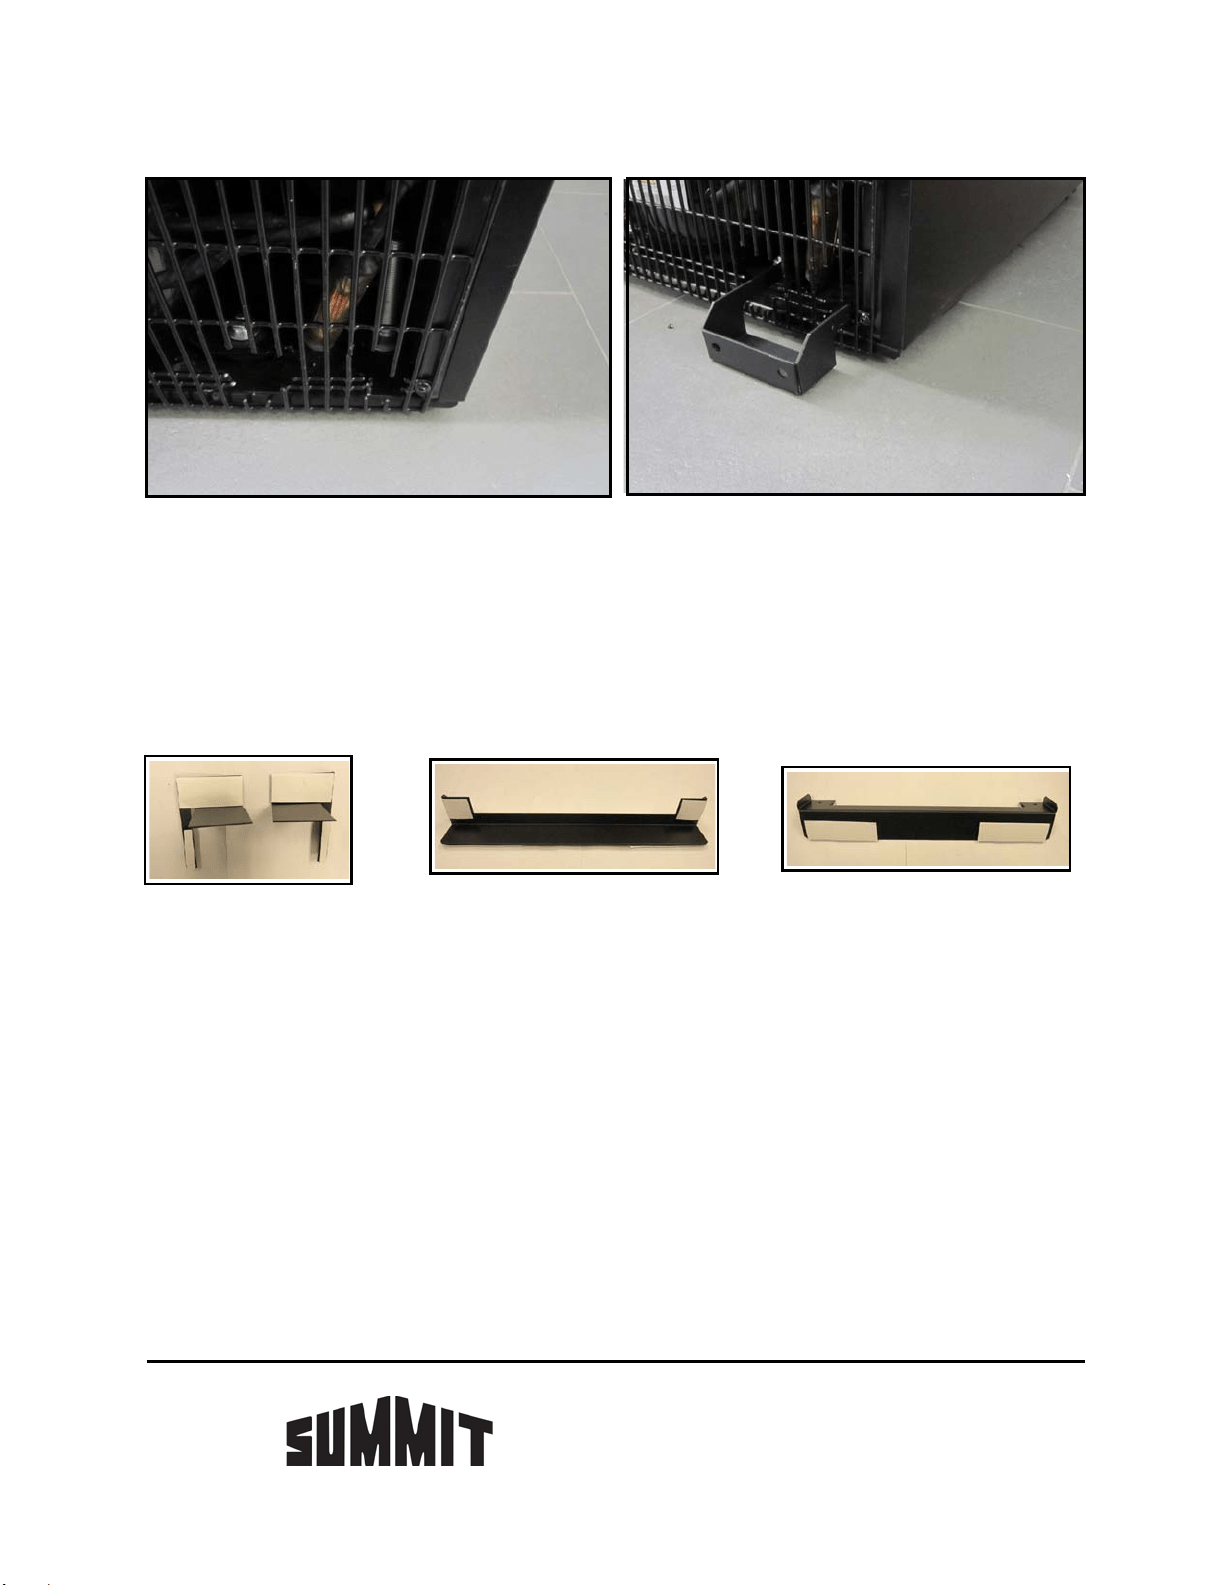
Fig. 4 Fig. 5
Fig. 2 shows the grillwork at the back of the lower appliance before it is cut. Fig. 3 shows how the Anti-Tip
Bracket may be blocked from slipping through the grillwork before the cutting procedure.
If cutting is required, you will have to use a sturdy pair of wire cutters to snip the grillwork (see Fig. 4) so
that the two prongs of the Anti-Tip Bracket can be slid into the back of the lower appliance (Fig. 5).
After cutting the grillwork to size, screw the Anti-Tip Bracket into place, and before stacking the two
appliances together, be sure the lower appliance can be slid into the proper location to connect with the
Bracket.
Back and Front Stacking Brackets: The pictures below show the two Back Brackets and the Front
Bracket with their white protective covers still in place.
There are two Back Brackets, one for the right side of the assembly and one for the left. Remove the
white protective covers from the Velcro patches on both Back Brackets. Attach the Back Brackets to the
lower appliance. Use Fig. 1 as a guide. The left edge of the left bracket should align with the left edge of
the lower appliance; similarly, the right edge of the right bracket should align with the right edge of the
lower appliance. Lift the upper appliance into place, lowering it onto the Back Brackets. It should be
centered so that the rear adjustable legs are positioned directly on top of the large right-angle flange on
each of the Back Brackets. Slide the upper appliance back slightly so the Velcro patches make good
contact.
Peel the protective covers from the Velcro patches on the Front Bracket. While tilting the upper appliance
slightly backward, place the Front Bracket on the lower front edge of the upper appliance, so that the
Velcro makes contact and the long right-angle flange is positioned below the adjustable front legs of the
upper appliance. (See Fig. 1.) When the upper appliance is set vertical again, its weight secures the
Velcro patches below the front legs. The refrigerator and freezer are now firmly joined. No screws are
needed.
Slide the complete assembly into its final position, allowing the Anti-Tip Bracket to pass through the grill at
the back of the lower appliance. Check that the assembly cannot be tilted forward.
Summit Appliance, Division of Felix Storch, Inc.
770 Garrison Avenue, Bronx, NY 10474
Tel.: 718-893-3900 • Fax: 718-842-3093
www.summitappliance.com
Back brackets Front bracket, top Front bracket, bottom