Loading ...
Loading ...
Loading ...
49
3
c Place the included calibration sheet on a flat
surface, and then photograph it from directly
above.
Save the photo to the computer.
Memo
• You can print the calibration sheet with your
printer by clicking [Print the calibration sheet.].
• With the mobile device version; tap [Calibration]
and photograph the calibration sheet.
*1 Photographed area
Note
• Take the photo in a well-lit location.
• Before taking the photo, wipe the camera lens
with a soft dry cloth, and make sure that the
lens is not dirty.
• When photographing, make sure that there are
no objects or shadows on the paper.
• If the calibration sheet is dirty or folded, print a
new copy of the calibration sheet and take a
photo of the new sheet.
• When photographing, do not zoom or use a
flash.
d Click [Select], and then select the image saved
in step
c.
The name of the imported image appears in the
box.
Note
• The only image files that can be used are JPG
files.
e Under [2.Please input your camera name.],
type in the name of the camera.
Memo
• Depending on your camera, its name may
automatically be entered when the image is
selected in step
d.
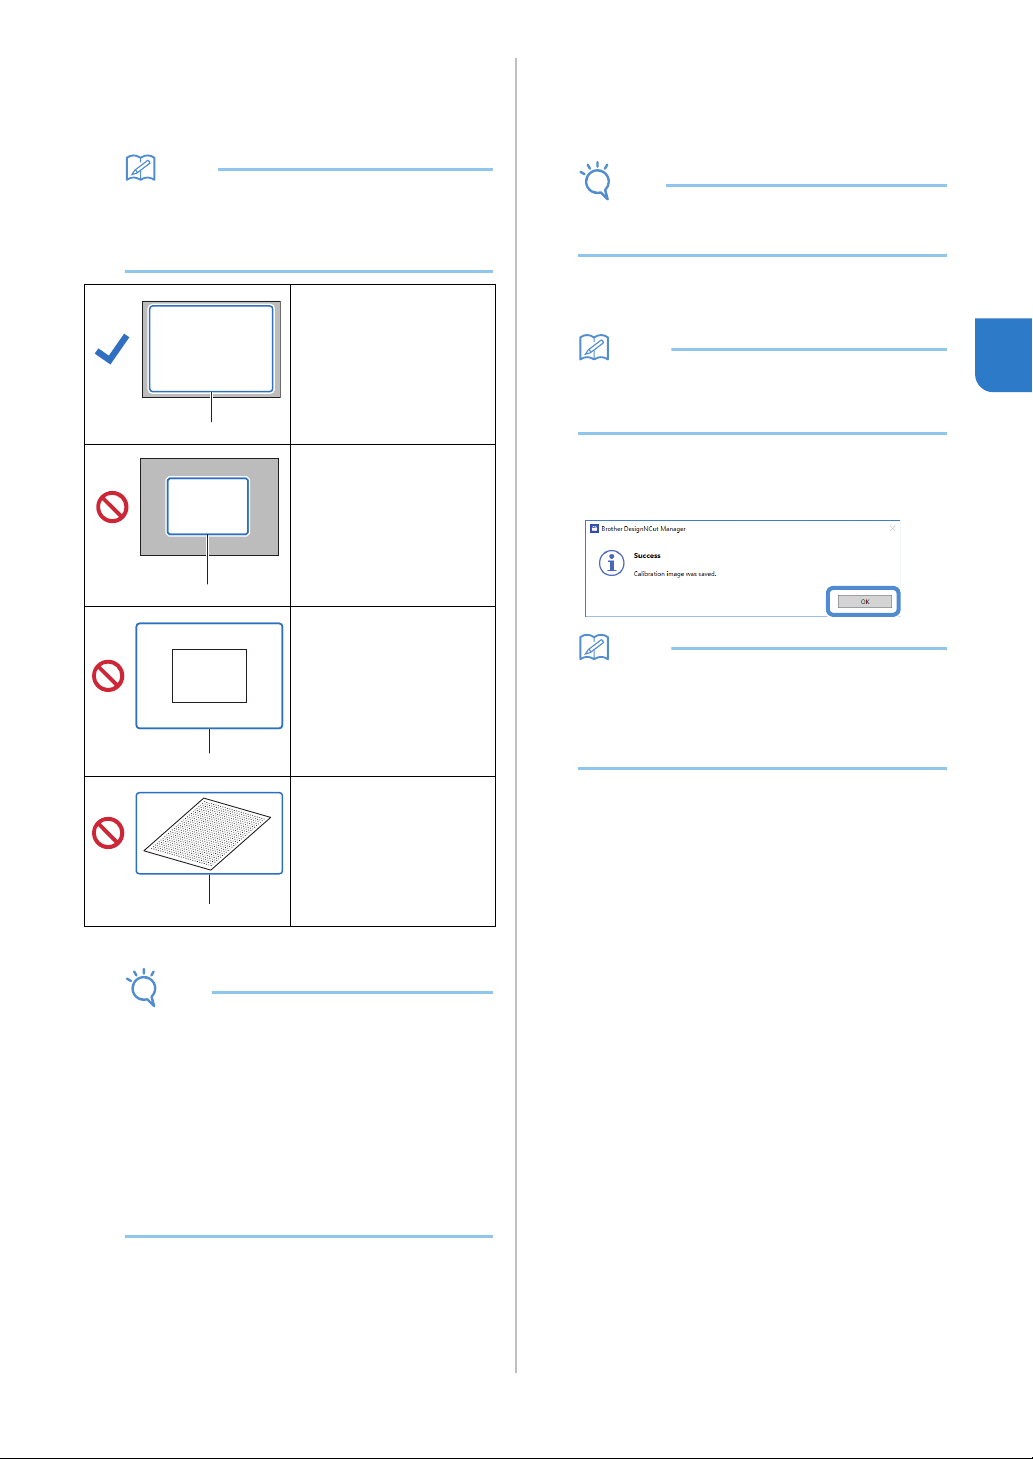
f Click [OK].
The following message appears.
Memo
• The next time “CaptureMat” function is used,
repeat steps
b through f to register new
camera (if the image that will be used was
photographed with a camera different from the
one that was registered).
■ Image correctly
photographed
Make sure to capture all of
the dots in the calibration
sheet and only capture the
dots in the calibration
sheets.
■ Camera too close to
paper
If the camera is too close
to the paper, calibration
will not be performed
correctly.
■ Camera too far from
paper
If the camera is too far
away from the paper,
calibration will not be
performed correctly.
■ Paper at an angle
If the camera and paper
are misaligned, calibration
will not be performed
correctly.
a
a
a
a
Loading ...
Loading ...
Loading ...