Loading ...
Loading ...
Loading ...
4 31-1000385 Rev. 0
5
INSTALL THE PUMP KIT (Cont.)
H. Trace the black and white power cord from
the switch assembly to the black and white
power cord coming from the unit near the
compressor. Make sure that the wires lay on
the left side of the pump if you are facing the
unit from behind. Unplug the current black
and white wire’s connection. Plug the black
and white wire’s connector from the unit into
the black and white connector from the switch
assembly.
I. Repeat with the red and white connections.
It is not necessary to replace the wire tie
that is removed to disconnect the connector.
Connect the 3-pin connector from the switch
assembly bracket to the 3-pin connector on
the pump.
J. Refer to the unit’s wiring diagram and
re-check all electrical connections for proper
placement.
K. Connect drain tube to bin drain, and secure
with the snap fit clamp reserved from
removing the old drain tube.
Installation Instructions
6
FLUSH OUT THE DRAIN TUBE
A. Restore power to the unit.
B. With the unit still OFF, pour several quarts
of water into the bin. The drain pump should
turn on and pump the water out of the bin,
cycling on and off several times during the
process. Pump cycling is normal since the
pump-out rate of the drain pump is greater
than the rate of drain through the bin.
C. While the pump is discharging water,
THOROUGHLY CHECK THE ENTIRE
DRAIN SYSTEM FOR LEAKS.
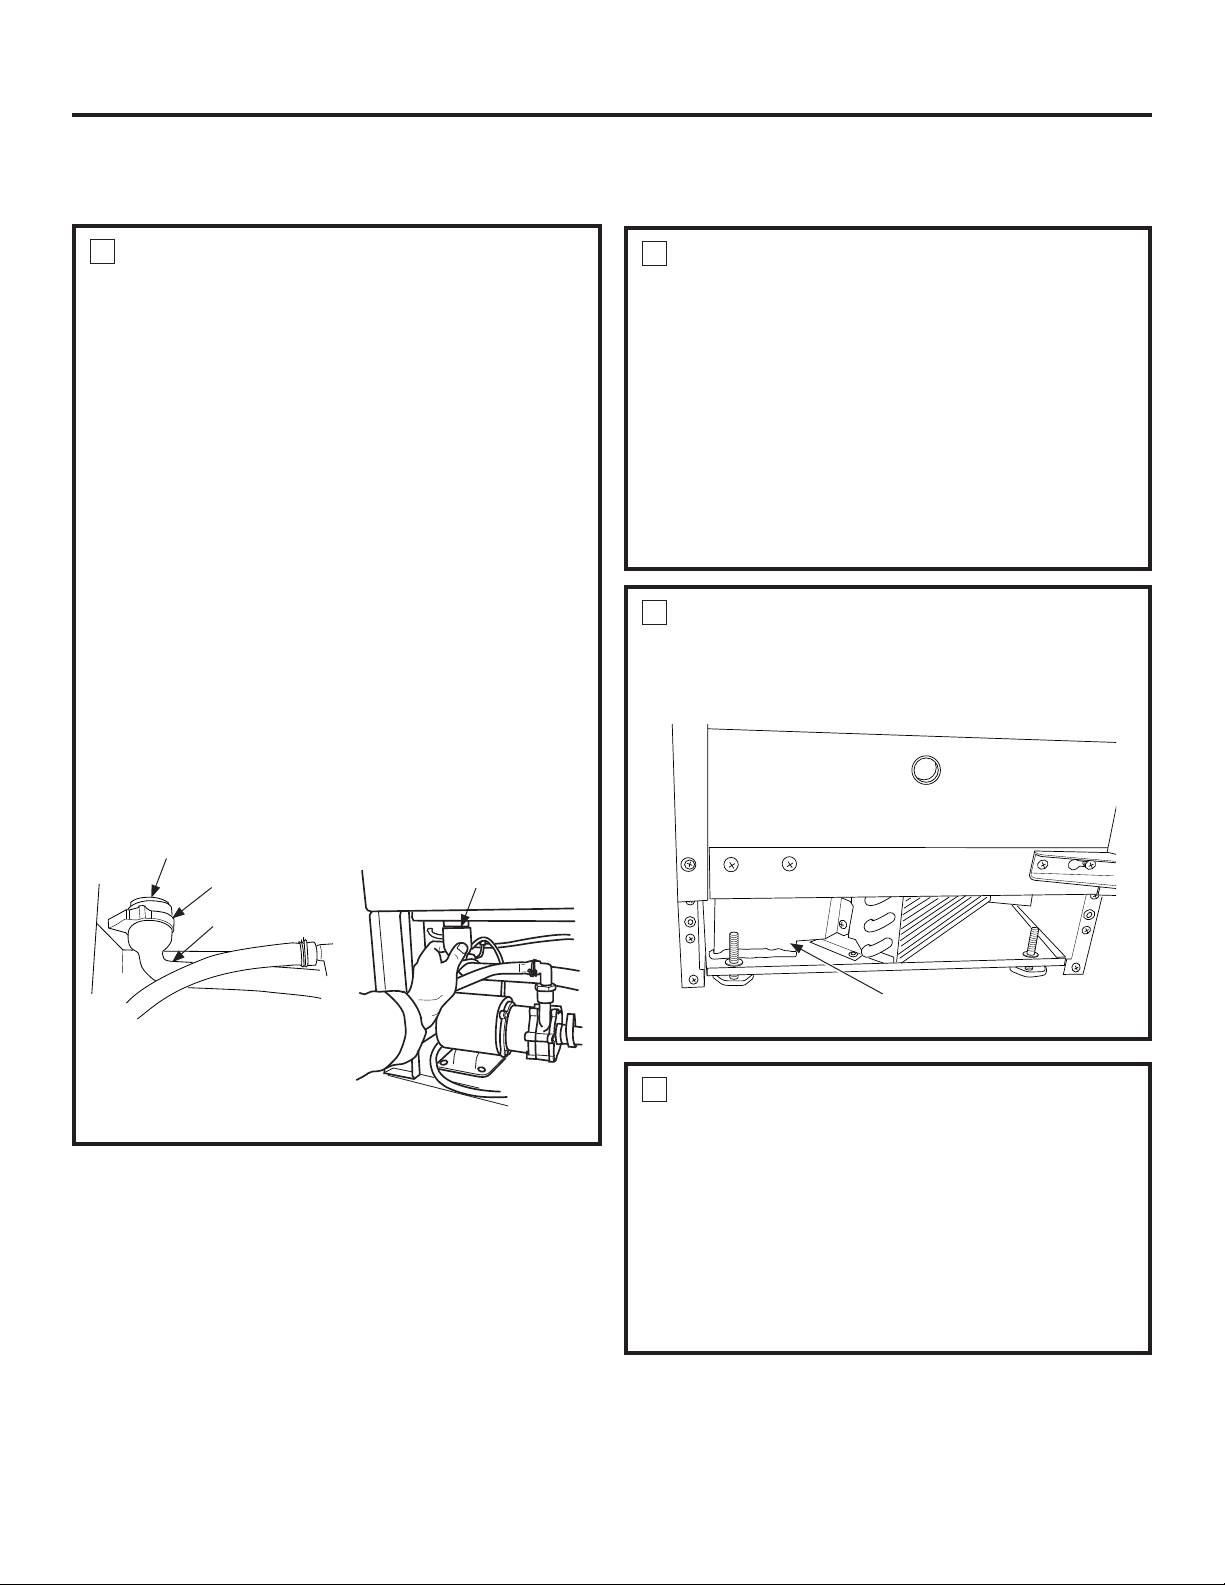
7
GOURMET CUBE ICE MACHINE
ONLY
Attach stainless steel shield to side of condenser
shroud using provided screws.
8
FINALIZE INSTALLATION
A. Re-install all panels and covers.
B. Re-install unit into built-in or free-standing
location. ENSURE THAT NO KINKS OCCUR
IN WATER INLET OR DRAIN TUBING.
Double-check for leaks!
C. Restore potable water supply and restart the
unit. Check unit to ensure proper operation
and to allow a final check for leaks of any
kind.
Shield
INSTALLING PUMP KIT (Continued)
Drain tube
Bin drain
Bin drain
Snap fit clamp
Side view of unit
Loading ...
Loading ...
Loading ...