Loading ...
Loading ...
Loading ...
en Installation
14
Exhaust duct
Note: The device manufacturer does not assume any
warranty for complaints attributable to the pipe section.
■ The device achieves its optimum performance by
means of a short, straight exhaust air pipe and as
large a pipe diameter as possible.
■ As a result of long rough exhaust air pipes, many
pipe bends or pipe diameters that are smaller than
150 mm, the optimum extraction performance is not
achieved and fan noise is increased.
■ The pipes or hoses for laying the exhaust air line
must consist of non-combustible material.
Round pipes
An inner diameter of 150 mm, but at least 120 mm, is
recommended.
Flat ducts
The inner cross-section must correspond to the
diameter of the round pipes.
dia. 150 mm ca. 177 cm
2
dia. 120 mm ca. 113 cm
2
■ Flat ducts should not have any sharp deflections.
■ Use sealing strips for deviating pipe diameters.
Connecting the appliance to the power
supply
Connecting the air extractor
Note: If using an aluminium pipe, smooth the
connection area beforehand.
1. Attach the air extractor pipe directly to the air-pipe
connector.
2. Connect to air extractor opening.
3. Seal the joints appropriately.
Connect the power supply
1. Plug the mains plug into the earthed socket.
2. If a fixed connection is required, please follow the
instructions in the Electrical Connection section.
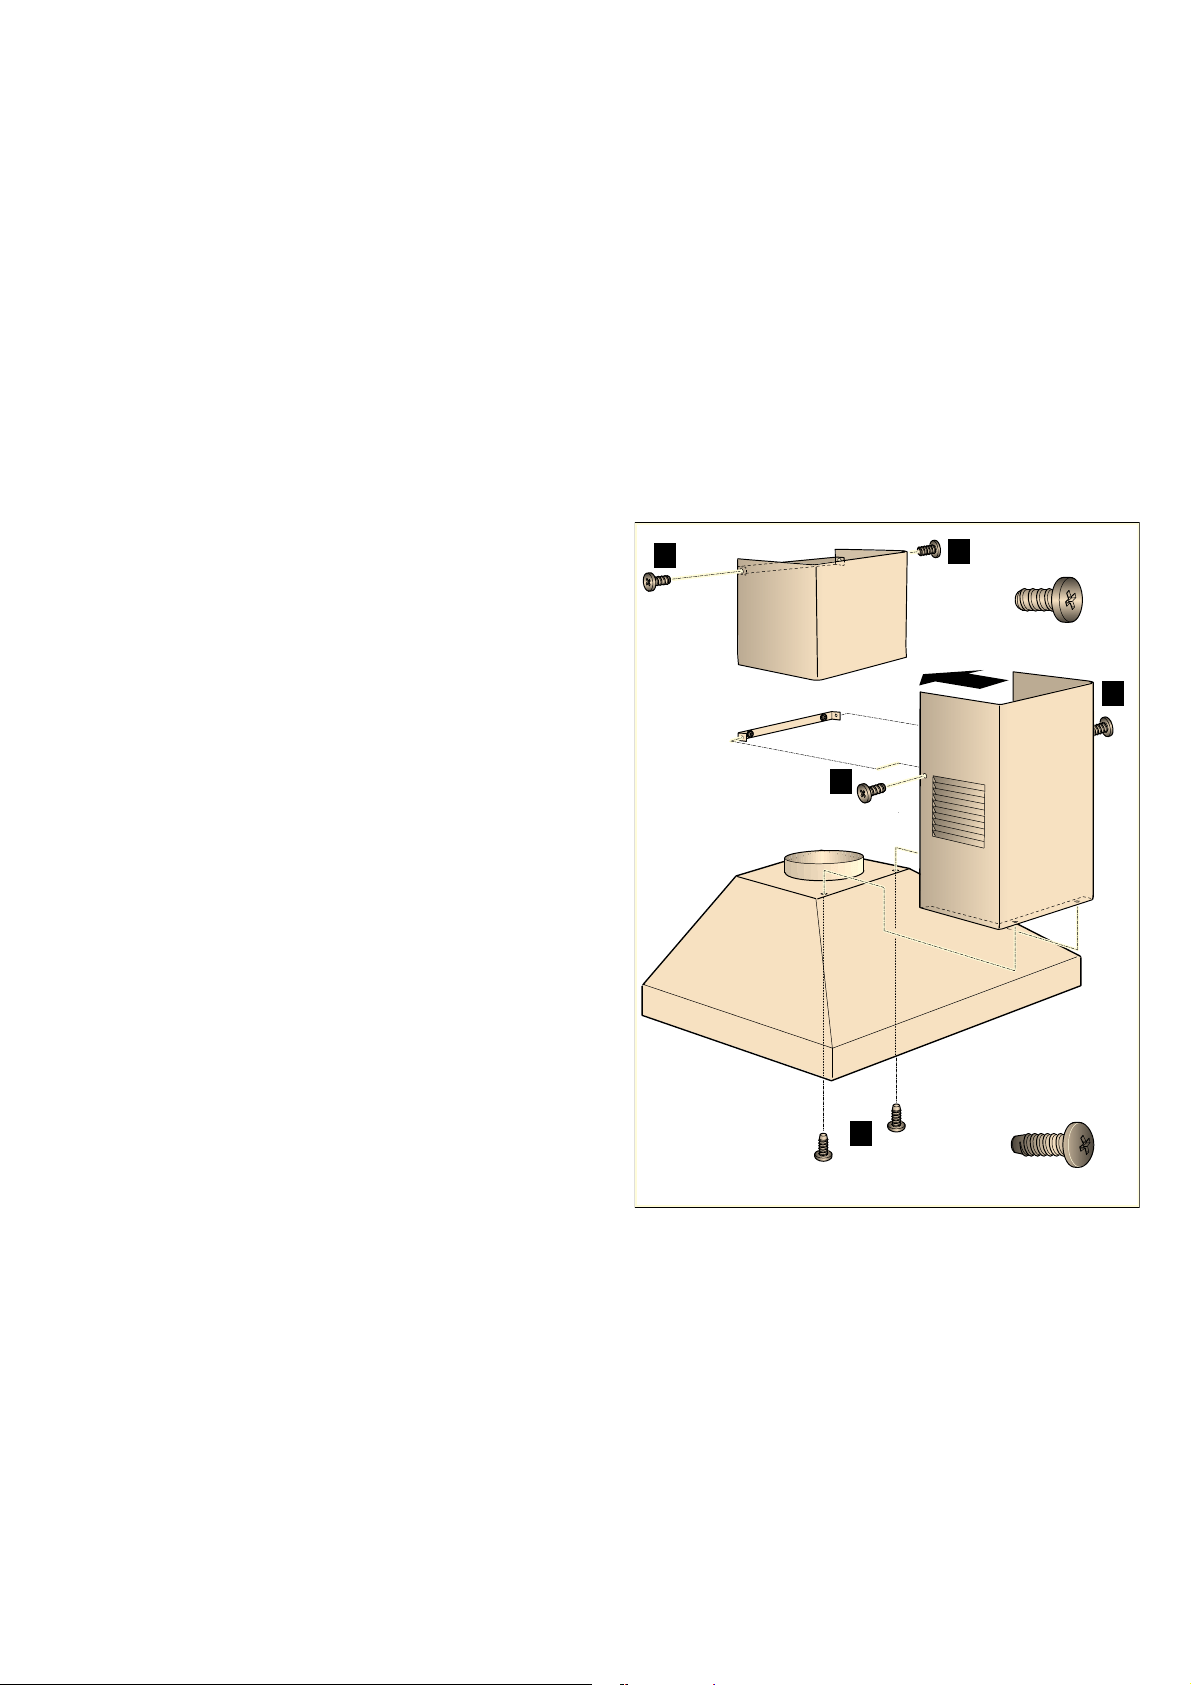
Attaching the flue duct
:Warning – Risk of injury!
Components inside the appliance may have sharp
edges. Wear protective gloves.
1. Separate the flue ducts.
To do this, remove the adhesive tape
2. Remove the protective foil from both flue ducts.
3. Screw the upper flue ducts to the sides of the fixing
bracket using two short screws. ¨
4. Place the lower flue ducts on the appliance and fix in
place using two long screws on the bottom of the
appliance. ©
5. Screw the lower flue duct to the sides of the fixing
bracket using 2 short screws. ª
Note: Align the flue duct before tightening the 2
screws.
[
[
$
$
%
&
&
Loading ...
Loading ...