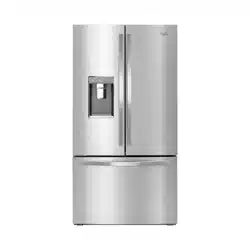
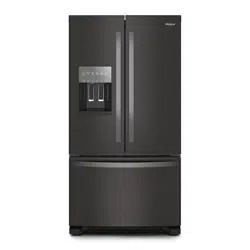
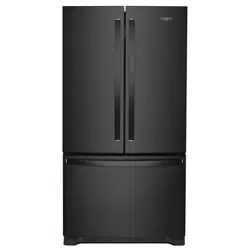
Your Whirlpool® French door refrigerator comes equipped with various innovative storage and energy efficient features.
Energy and Normal Operating Sounds
Your new French door bottom mount refrigerator has been designed with a Linear Compressor to optimize energy efficiency and better regulate temperatures to match cooling demand. You may notice that it operates differently than your previously owned refrigerator. It is normal for the high-efficiency compressor to run for extended periods of time at varying speeds in order to consume only the energy necessary for optimum efficiency. In addition, during various stages of the cooling cycle, you may hear normal operating sounds that are unfamiliar to you.
In-Door-Ice® Ice Dispensing System
The ice maker and ice storage bin are located in the door for easy access to filtered ice while freeing up valuable shelf space inside.
Dual Evaporator
The refrigerator and freezer compartments have separate evaporators to provide fresh food and frozen food with optimal storage climates: cool and humid in the fresh food, cold and dry in the freezer, no mixing of air between the compartments to reduce the transfer of food odors and tastes from refrigerator to freezer, and allows freezer air to remain dry to control frost and reduce freezer burn.
Air Filter
An air filter is 15 times more powerful than baking soda at reducing common food odors inside the refrigerator. Replace your air filter every 6 months for maximum odor reduction.
Produce Preserver (on some models)
Ethylene is a natural gas produced by fruits and vegetables to promote ripening. The Produce Preserver absorbs ethylene to delay the over-ripening of fresh produce. As a result, certain produce items will stay fresh longer.
EveryDrop™ Water Filter
EveryDrop™ water filters are NSF® Certified to reduce most contaminants, including chlorine taste and odor, lead, pesticides, and trace amounts of pharmaceuticals. EveryDrop™ brand filters are the only filters tested and certified for your refrigerator system. Replace your EveryDrop™ filter every 6 months for maximum contaminant reduction.
Water Dispenser with Measured Fill
The Measured Fill feature allows you to dispense a desired amount of filtered water in handy increments like 8, 16, or 24 oz.
More Storage Space
This French door bottom mount refrigerator has the most shelf space and door bin space available.
Infinity Slide Shelf
Your new Infinity slide shelf or shelves (on some models) is designed to maximize accessibility to items of all shapes and sizes. Small items ft perfectly around the shelf perimeter and remain accessible, while tall items nestle perfectly in the center when the glass is pushed back. And, with the Infinity Slide Shelf, you don’t lose an entire half shelf to tall item storage-just push the glass portion back as far as you need to accommodate your tall items-infnite adjustability.
Platter Pocket
This full-width slide-out shelf tucked between the crispers and the lowest shelf is perfect for leftover family-sized casserole dishes, pizza boxes, and large party platters.
Small Items Bin
This bonus storage area is perfect for butter, cream cheese, or salad/condiment packets.
LED Lighting
There is bright white LED strip lighting for maximum illumination. LED lights do not require replacement.
Shelves with Under-Shelf Lighting (on some models)
By moving LED lighting to a new location under the shelves, this leading-edge technology improves interior refrigerator lighting and aids in locating storage items.
Door Alarm
A helpful alarm sounds when the refrigerator door or freezer drawer is left ajar.
Power Outage Indicator
If the power should go out while you are away from home, this indicator will let you know that the refrigerator has been without power.
Enable Wi-Fi
Touch and hold CRUSHED ICE and CUBED ICE together for 3 seconds to enable Wi-Fi.
House LED
House symbol becomes an amber color only if the user has “opt-in” or set up the Energy Advisor.
To view videos on door removal/ replacement, door adjustment, water filter installation, air filter installation, shelf adjustment or removal, and Wi-Fi connectivity, scan the code to the left with your mobile device.
Refrigerator Connectivity Features (on some models)
Wi-Fi connectivity allows your Smart Refrigerator to connect to the Internet and interact with the Whirlpool® App from your smartphone or mobile device. Refer to the “Troubleshooting-Connectivity” section of this Use & Care Guide.
NOTE: Whirlpool® App features & functions subject to change.
SMART FEATURES
Smart Features help make your everyday a little more efficient by letting you remotely monitor, manage, and maintain your refrigerator.
Remote Temperature Control
What it does: Allows you to control the temperature of your refrigerator remotely from your mobile device via the Whirlpool® App.
What it does for you: Lets you control temperatures in your refrigerator, freezer, and temp-controlled pantry remotely-not just when you are standing in front of it.
Water & Air Filter Status
What it does: Gives you a look at the life remaining for your air and water filters before replacement is needed.
What it does for you: Helps you be more efficient in planning for ordering and replacing filters.
Door Open Alert
What it does: Sends you a notification when one of the doors of the refrigerator has been left open.
What it does for you: Alerts you to Door Ajar status so you can close the door(s) or call home to ask someone else to close the door before an over-temp situation arises.
Power Outage
What it does: Sends you a notification when power to your refrigerator goes out, returns, or highest temperature is reached in the refrigerator and freezer compartments.
What it does for you: Alerts you to power status and duration of outage to provide input regarding disposition of refrigerator/ freezer contents.
Fast Ice/Fast Cool Control
What it does: Allows you to control your refrigerator remotely from your mobile device via the Whirlpool® App.
What it does for you: Lets you turn on/off Fast Ice and Fast Cool options remotely to increase ice production or make temperatures colder in refrigerator and freezer in anticipation of loading in newly purchased grocery items.
Connectivity Setup (on some models)
IMPORTANT: Proper installation of your refrigerator prior to use is your responsibility. Be sure to read and follow the User Instructions that came with your refrigerator.
A home wireless router capable of Wi-Fi Protected Setup (WPS). The router should be on and have a live Internet connection.
The Smart Appliance ID (SAID) from your refrigerator which can be found on a sticker on top of the control housing located on top of the refrigerator.
1. Router setup
Press the WPS button on the router. An indicator light will begin blinking.
HELPFUL TIP: The WPS function on your router is active for 2 minutes. Complete the next step within that timeframe or you will need to reinitiate WPS.
2. Refrigerator setup (time-sensitive step)
NOTE: Step 2 will happen after 30 seconds of power-up. Touch and hold CUBED ICE and CRUSHED ICE together for 3 seconds to enable Wi-Fi.
The Wi-Fi status indicator on the refrigerator control panel will blink slowly while your refrigerator and router attempt to connect.
If the connection is successful, the Wi-Fi status indicator will come on and remain lit.
If Your Refrigerator Doesn’t Connect:
If your refrigerator and router fail to connect after 2 minutes, the Wi-Fi status indicator will blink rapidly for 2 seconds and then turn off. Refer to the “Troubleshooting-Connectivity” section of this Use & Care Guide, check any connection instructions for your specific router, and refer to alternate instructions.
NOTE: If this is your first Smart Appliance, you will need to download the Whirlpool® App and create an online user account.
If you already have the Whirlpool® App and a user account, please skip ahead to Step 4 “Register your refrigerator in your user account.”
3. Download app and set up user account
Once installed, tap the Whirlpool® App icon to open the app.
You will be guided through the steps to set up a user account. The app will make sure to get the necessary personal and home information as well as information about your energy company.
4. Register your refrigerator in your user account
Registering your refrigerator in your account is a necessary step in order for you to take full advantage of the Smart Features. When prompted by the app, enter the Smart Appliance Identification Number (SAID) (case sensitive) which can be found on a sticker on top of the control housing located on top of the refrigerator.
My Smart Appliance ID# is:
Once you’ve connected your refrigerator to your home Wi-Fi network, it will remain linked even if the power goes out, you move the appliance, or if you put it in storage for a while.
If you replace your wireless router (or get a different Smart Refrigerator), you will need to repeat this connectivity setup process.
Refrigerator Use
Opening and Closing Doors
There are two refrigerator compartment doors. The doors can be opened and closed either separately or together. There is a vertically-hinged seal on the left refrigerator door
When the left side door is opened. the hinged seal automatically folds inward so that it is out of the way.
When both doors are closed. the hinged seal automatically forms a seal between the 3 doors.
Using the Controls
The temperature control is located across the top of the refrigerator cabinet behind the doors.
IMPORTANT: The display screen on the temperature control panel will turn off automatically when the door is closed. Touch any control button to reactivate the display screen. The home screen will appear as shown.
Viewing and Adjusting Temperature Set Points
For your convenience, your refrigerator, freezer, and pantry drawer controls are preset at the factory.
When you first install your refrigerator, make sure that the controls are still set to the recommended set points. The factory recommended set points are 37°F (3°C) for the refrigerator and 0°F (-18°C) for the freezer.
IMPORTANT:
Wait 24 hours before you put food into the refrigerator. If you add food before the refrigerator has cooled completely, your food may spoil.
NOTE: Adjusting the set points to a colder-than-recommended setting will not cool the compartments any faster.
The recommended settings should be correct for normal household use. The controls are set correctly when milk or juice is as cold as you like and when ice cream is firm.
NOTE: Areas such as a garage, basement, or porch may have higher humidity or extreme temperatures. You may need to adjust the temperature away from the recommended settings to accommodate for these conditions.
Wait at least 24 hours between adjustments. Recheck the temperatures before other adjustments are made.
View Temperature Set Points
1.Touch DRAWER, FRIDGE, or FREEZER to activate Temperature mode.
NOTE: To view temperature in degrees Celsius, touch and hold the A (up) or v (down) arrows simultaneously for 3 seconds and the temperature display will change. To return to Fahrenheit, touch and hold the A (up) or v (down) arrows simultaneously for 3 seconds and the temperature display will change.
To activate Temperature mode, touch FRIDGE or FREEZER and use the A (up) or v (down) arrows to change temperature. The display will show the temperature set point of the selected compartment, and then temperature adjustment will appear in the display.
To activate Temperature mode for Pantry Drawer, touch DRAWER and toggle through 3 optional temperature settings: Meats (raw meat/fish/chicken); Drinks; Deli/Cheese (deli/lunch meat/cheese). The display will show the temperature set point of the selected setting for the Pantry Drawer. Actual Pantry Drawer temperature performance is dependent upon the refrigerator compartment temperature.
Recommended Refrigerator Temperature
Recommended Freezer Temperature
Adjust Temperature Set Points
Refrigerator set point range: 33°F to 42°F (0°C to 5.5°C)
Freezer set point range: -5°F to 5°F (-21°C to -15°C)
1. To activate Temperature mode, touch FRIDGE to select the Refrigerator zone. The display will show the temperature set point of the selected compartment as shown.
2. Touch a (up) arrow to raise the set point or touch v (down) arrow to lower the set point. New setting is automatically saved.
3. To adjust Freezer, change the display to show the freezer set point.
4. Touch the a (up) arrow to raise the set point or touch the v (down) arrow to lower the set point. New setting is automatically saved.
5. The drawer set points for Meats, Drinks and Deli/Cheese are preset. Touch DRAWER once for meats, twice for drinks, and 3 times for deli/cheese, depending on what is being put in the drawer.
When adjusting temperature set points, use the following chart as a guide:
CONDITION:
TEMPERATURE ADJUSTMENT:
Refrigerator too cold
Refrigerator Setting 1° higher
Refrigerator too warm
Refrigerator Setting 1° lower
Freezer too cold
Freezer Setting 1° higher
Freezer too warm/ too little ice
Freezer Setting 1° lower
Fast Cool
The Fast Cool feature assists with periods of high refrigerator and freezer use, full grocery loads, or temporarily warm room temperatures.
To turn on the Fast Cool feature, touch FAST COOL to activate the feature. When the feature is ON, the Fast Cool icon will blink 3 times and remain lighted. The Fast Cool feature will remain on for 24 hours, unless manually turned off.
To manually turn off the Fast Cool feature, touch FAST COOL. When the feature has been turned off, the Fast Cool icon will be unlit.
NOTE: Setting the freezer to a colder temperature may make some foods, such as ice cream, harder.
Icemaker2
The Icemaker2 feature lets you turn the second ice maker on or off.
To turn on second ice maker in freezer, touch ICEMAKER2 to activate. When the feature is ON, the Icemaker2 icon will blink 3 times and then appear lit on the display screen. The second ice maker will remain ON until turned off.
To manually turn off the second ice maker, touch ICEMAKER2. When the feature has been turned off, the Icemaker2 icon will be unlit.
Energy Saver
To turn on the Energy Saver feature, touch ENERGY SAVER to activate the feature. When the feature is ON, the Energy Saver icon will blink 3 times and then appear on the display screen. The Energy Saver feature will remain ON until manually turned off.
To manually turn off the Energy Saver feature, touch ENERGY SAVER. When the feature has been turned off, the Energy Saver icon will disappear from the display.
NOTE: If moisture forms between the refrigerator doors or elsewhere in the cabinet, turn off Energy Saver.
Cooling Off
Your refrigerator and freezer will not cool when cooling is turned off.
To turn cooling off, touch and hold COOLING OFF for 3 seconds. The display will countdown 3, 2, 1. The Cooling Off icon will blink 3 times and then remain lit as shown.
IMPORTANT:
When cooling is OFF, the dispenser paddles and all controls are disabled.
Touch and hold COOLING OFF for 3 seconds again to turn cooling back on.
Power Outage
The Power Outage indicator lets you know if the power supply to the refrigerator has been off and the freezer temperature has risen.
The control panel display will read “Power Outage” and an alert tone will sound 3 times. Touch any button to stop the tone and touch any button again to turn off power outage icon.
Once the power outage has been confirmed, the “Power Outage” will disappear and the display will return to the Home screen.
Showroom Mode
This mode is used only when the refrigerator is on display in a retail store. If you unintentionally turn on Showroom mode, the word “Showroom” will light up on the display. Exit Showroom mode by pressing and holding FRIDGE and FREEZER at the same time for 3 seconds.
External Dispenser Controls
The control is located above the external dispenser of the refrigerator.
IMPORTANT: The display screen on the dispenser control panel will turn off automatically and enter Sleep mode when the control buttons and dispenser paddles have not been used for 2 minutes or more. Touch any control button to reactivate the display screen. The Home screen will appear as shown.
Center light will fade in during Wake-up mode, will progress around the circle during ice/water dispensing, and fill in increments during Measured Fill dispensing.
Options
Fast Ice
The Fast Ice feature assists with temporary periods of heavy ice use by increasing ice production. Once selected, the Fast Ice feature will remain on for 24 hours unless manually turned off.
To turn on the Fast Ice feature, touch FAST ICE to activate the feature. Fast Ice icon will blink, then remain lit.
To manually turn off the Fast Ice feature, touch FAST ICE again. Fast Ice icon will blink, then be unlit.
The Water Filter status lights on the dispenser controls will let you know when to change your water filter.
ORDER FILTER (Yellow) - Order a replacement water filter.
REPLACE FILTER (Red) - Replace the water filter. While you are dispensing water, “Replace Filter” will blink 7 times and an alert tone will sound 3 times. See “Water Filtration System” section.
NOTE: REPLACE FILTER will remain illuminated if a filter reset is not done.
RESET FILTER - Touch FAST COOL and ENERGY SAVER at the same time on the temperature control display for 3 seconds to reset water filter. The display will do a 3-second countdown and then flash the icon and play a tone.
Filter Status
The Whirlpool® App will send an alert that displays the percentage of use remaining in the water filter (from 100% to 0%).
Additional Features
Door Ajar Alarm
The Door Ajar Alarm feature sounds an alarm when the refrigerator door(s) or freezer drawer is open for 5 minutes and cooling is turned on. The alarm will repeat every 2 minutes. Close all doors and drawer to turn it off.
NOTE: To mute the audible alarm while keeping the doors open, such as while cleaning the inside of the refrigerator, touch any button on the control panel. The alarm sound will be temporarily turned off, but the Door Ajar icon will still be displayed on the dispenser control panel.
Lighting the Refrigerator
The refrigerator has an interior light that comes on any time the door is opened.
NOTE: The light is an LED which does not need to be replaced. If the LED does not illuminate when the door is opened, call Service to replace the light. See “Assistance or Service” in the “Warranty” section for contact information.
Water and Ice Dispensers
IMPORTANT:
Allow 3 hours for the refrigerator to cool down and chill water.
Allow 24 hours to produce the first batch of ice. Discard the first 3 batches of ice produced.
The dispensing system will not operate if the left refrigerator door is not closed completely.
A. Water dispenser paddle
B. Ice dispenser paddle
Flush the Water System
Air in the water dispensing system can cause the water dispenser to drip. After connecting the refrigerator to a water source or replacing the water filter, flush the water system.
Flushing the water dispensing system forces air from the water line and filter and prepares the water filter for use. Additional flushing may be required in some households.
NOTE: As air is cleared from the system, water may spurt out of the dispenser.
1. Using a sturdy container, depress and hold the water dispenser paddle for 5 seconds.
2. Release the dispenser paddle for 5 seconds. Repeat steps 1 and 2 until water begins to flow.
3. Once water begins to flow, continue depressing and releasing the dispenser pad (5 seconds on, 5 seconds off) until a total of 3 gal. (12 L) has been dispensed.
Calibrate Measured Fill
Household water pressure may affect the accuracy of the Measured Fill feature. So, for optimum performance of your water dispenser, you must first calibrate Measured Fill.
IMPORTANT:
Flush the water system before calibrating Measured Fill.
For best results, calibration should be performed when water is not being used in the house.
1.Place a sturdy measuring cup (1-cup [237 mL] size) on the dispenser tray centered in front of the ice/water dispenser paddle.
NOTE: Depending on your model, a measuring cup may be provided.
A. Water dispenser paddle
B. Ice dispenser paddle
C. Measuring cup (1 cup)
2. Touch and hold the Measured Fill button for 3 seconds. The Calibration and Measured Fill icons will illuminate and remain lit while the Measured Fill feature is being calibrated.
NOTE: You may touch any button to exit Measured Fill at any time in Calibration mode. The Calibration and Measured Fill icons will disappear.
3. Press and hold the water dispenser paddle, as needed, to dispense water to the 1-cup fill line in the measuring cup. NOTE: If overfilling or spilling occurs, discard the water and restart the calibration process.
4. When 1 cup of water has been correctly dispensed into the measuring cup, touch the center of the ring button to confirm the calibration.
5.When Measured Fill calibration has been confirmed, the Calibration icon will disappear and the display will return to the home screen.
Dispensing
Touch CUBED ICE or CRUSHED ICE for your ice selection.
NOTES:
For crushed ice, cubes are crushed before being dispensed. This may cause a slight delay when dispensing crushed ice. Noise from the ice crusher is normal and pieces of ice may vary in size.
When changing from crushed to cubed, a few ounces of crushed ice will be dispensed along with the first cubes.
Dispensing Water
IMPORTANT:
Dispense at least 1 qt (1 L) of water every week to maintain a fresh supply.
If the flow of water from the dispenser decreases, it could be caused by low water pressure.
With the water filter removed, dispense 1 cup (237 mL) of water. If 1 cup (237 mL) of water is dispensed in 8 seconds or less, the water pressure to the refrigerator meets the minimum requirement.
If it takes longer than 8 seconds to dispense 1 cup (237 mL) of water, the water pressure to the refrigerator is lower than recommended. See “Water Supply Requirements” and “Troubleshooting” sections for suggestions.
To Dispense Water - Standard:
1. Press a sturdy glass against the water dispenser paddle.
2. Remove the glass to stop dispensing.
NOTE: The Measured Fill button does not enable standard dispensing. It only functions in Measured Fill mode (see below).
To Dispense Water - Measured Fill:
Measured Fill allows you to dispense a specified amount of water with the touch of a few buttons.
1. Put a sturdy glass under waterspout. Touch MEASURED FILL to activate.
NOTE: The amount of water you select will be dispensed. Make sure the container can hold the entire volume. If ice is in the container, you may need to adjust your selection.
2. Touch MEASURED FILL to turn on, then touch to select 8 oz (0.2 L), 16 oz (0.5 L), or 24 oz (0.7 L). Touch a fourth time to exit Measured Fill display.
3.Touch FILL (center ring button) and the selected amount of water will be dispensed.
NOTES:
The Measured Fill dispenser will automatically time out after 1 minute of inactivity.
You can refill several glasses with the same measurement by continuing to touch FILL (center ring button) after each glass fill.
Measured Fill Options are listed in the following chart:
Units
Ounces
8
16
24
Cups
1
2
3
Liters
0.2
0.5
0.7
NOTES:
Most coffee cups (commonly 4 to 6 oz [118 to 177 mL] per cup) are not the same size as a measuring cup (8 oz [237 mL]). You may need to recalibrate Measured Fill to underfill or to avoid unintentionally overfilling coffee cups.
4. Dispense water.
NOTE: While dispensing water, the center light circle will fill in. The flow of water will automatically stop once the desired volume has been dispensed.
Press a sturdy glass against the dispenser paddle below the water spout.
OR
Place the glass below the waterspout and touch FILL for hands-free dispensing.
5. To stop dispensing before the selected volume has been dispensed, touch FILL a second time or touch the water dispenser paddle.
NOTE: If you stop dispensing before the desired volume has been dispensed, the center light circle will continue to reflect how much water remains to be dispensed. The display will turn off after 1 minute of inactivity.
6. To select a new volume or start dispensing the same volume again, you must first finish dispensing the selected volume or turn off the Measured Fill feature (either by waiting 1 minute so it will automatically turn off or by touching CUBED ICE or CRUSHED ICE to manually turn it off), and then select Measured Fill again.
The Ice Dispenser
IMPORTANT:
If the ice cubes are hollow or have an irregular shape, it could be because of low water pressure. See the “Water Supply Requirements” section.
Ice travels from the ice storage bin through the dispenser chute to the dispenser. To turn off the ice maker, see the “Ice Maker and Storage Bin” section.
The dispenser may continue to make noise and ice may continue to dispense for several seconds after releasing the dispenser button or paddle.
To Clean the Ice Dispenser Chute:
Humidity causes ice to naturally clump together. Ice particles can build up until the ice dispenser chute becomes blocked.
If ice is not dispensed regularly, it may be necessary to empty the ice storage bin and clean the ice delivery chute, the ice storage bin, and the area beneath the storage bin every 2 weeks.
If necessary, remove the ice clogging the storage bin and delivery chute using a plastic utensil.
Clean the ice delivery chute and the bottom of the ice storage bin using a warm, damp cloth, and then dry thoroughly.
To Dispense Ice:
Paddle Dispensing
1.Select the desired type of ice by pressing CUBED ICE or CRUSHED ICE.
2. Press a sturdy glass against the dispenser paddle. Hold the glass close to the dispenser opening, so ice does not fall outside of the glass.
IMPORTANT: You do not need to apply a lot of pressure to the paddle to activate the ice dispenser. Pressing hard will not make the ice dispense faster or in greater quantities.
3. Remove the glass to stop dispensing.
NOTE: Ice may continue to dispense for several seconds after removing the glass from the dispenser paddle. The dispenser may continue to make noise for a few seconds after dispensing.
The Dispenser Drip Tray
There is an insert in the dispenser drip tray. The insert can be removed from the drip tray to carry to the sink to empty or clean.
Push down on the rear edge of the insert to tilt up the front edge and pull dispenser tray out.
A. Dispenser tray insert
The Dispenser Light
1. When you use the dispenser, the light will automatically turn on.
2. The dispenser light also serves as an automatic night light. Once the ambient light in the room is reduced, the auto sensor will cause the dispenser light to illuminate.
The Dispenser Lock
The dispenser can be disabled for easy cleaning or to avoid unintentional dispensing by small children and pets.
NOTE: The lock feature does not shut off power to the refrigerator or the ice maker dispenser light. It simply deactivates the controls and dispenser levers. To turn off the ice maker, see “Ice Maker and Storage Bin” section.
Touch and hold FAST ICE for 3 seconds to lock the dispenser.
Touch and hold FAST ICE for 3 seconds to unlock the dispenser.
The display screen indicates when the dispenser is locked.
Ice Maker and Storage Bin
IMPORTANT: To avoid low ice production and poor quality ice, flush the water system before turning on the ice maker. See “Water Dispenser” section.
Following installation, allow 24 hours to produce the first batch of ice. Discard the first 3 batches of ice produced. Allow 2 to 3 days to fill the ice storage bin.
The quality of your ice will be only as good as the quality of the water supplied to your ice maker. Avoid connecting the ice maker to a softened water supply. Water softener chemicals (such as salt) can damage parts of the ice maker and lead to poor quality ice. If a softened water supply cannot be avoided, make sure the water softener is operating properly and is well-maintained.
Shelves, Bins, and Drawers
Infinity Slide Shelf
Some shelves will tuck away to create room for taller objects. Some models have 2 Infinity slide shelves.
1. To retract the front section of the shelf, push the adjustable portion of the shelf as far back as needed toward the rear of the refrigerator.
2. Extend the front glass and front trim of the shelf by pulling the retracted portion of the shelf outward until it is fully extended.
Small Items Bin
A shallow storage compartment with removable lids which slide from side to side is located below and in front of the pantry drawer.
NOTE: This compartment is not temperature- or humidity-controlled, so it is not recommended for storing leafy vegetables.
Important information to know about glass shelves and covers:
Do not clean glass shelves or covers with warm water when they are cold. Shelves and covers may break if exposed to sudden temperature changes or impact, such as bumping. Tempered glass is designed to shatter into many small, pebble-size pieces. This is normal. Glass shelves and covers are heavy. Use both hands when removing them to avoid dropping.
Shelves and Shelf Frames
The shelves in your refrigerator are adjustable to meet your individual storage needs.
Storing similar food items together in your refrigerator and adjusting the shelves to fit different heights of items will make finding the exact item you want easier. It will also reduce the amount of time the refrigerator door is open and save energy.
Shelf Height Adjustment
Shelf height can be adjusted by changing the adjustable shelf mounts between their vertical and horizontal positions.
1. Carefully lift the shelf off the shelf mounts and turn the flipper to the desired orientation.
2. Repeat for remaining shelf mounts.
3. Apply pressure to the top of the shelf to ensure the shelf is properly seated on the shelf mounts.
To remove and replace shelves:
1. Make sure adjustable shelf mounts are in the lower position before removing shelves. Also, doors will need to be open at a 90° angle. If open wider, it will make it harder to remove the shelves.
2. Remove the middle shelf or top shelf by lifting it up and out of the shelf supports. Then pull the shelf forward and tilt down to a vertical position. Turn the shelf at an angle and pull out of the refrigerator.
NOTES:
Will need to remove middle shelf first before removing top shelf.
Infinity slide glass shelves should be pushed back in. When tilted up, make sure glass does not slide to front.
3. Remove the bottom shelf by lifting it up and out of the shelf supports. Then pull the shelf forward and tilt up to a vertical position. Turn the shelf at an angle and pull out of the refrigerator.
4. Replace the middle and top shelves by putting the shelf in the refrigerator at an angle with the shelf front down. Lift the front of the shelf up and in until rear shelf drops into the shelf supports. Lower the front of the shelf and make sure that the shelf is in position.
5. Replace the bottom shelf by putting the shelf in the refrigerator at an angle with the shelf up. Lift the front of the shelf down and in until rear shelf drops into the shelf supports. Lower the front of the shelf and make sure that the shelf is in position.
Shelves with under-shelf lighting (on some models)
By moving LED lighting to a new spot under the shelves, this leading-edge technology improves interior refrigerator lighting and aids in locating storage items.
Platter Pocket Removal
NOTE: Refrigerator doors will need to be removed to remove platter pocket. See “Remove and Replace Doors” section for more information.
1. Pull the platter pocket to the fully open position or when it stops.
2. Locate the platter pocket retention clips on both sides. These are in the side under the platter pocket.
3. Push the clip up from the bottom with your finger.
4. After both clips have been disengaged, carefully remove the platter pocket toward the front of the refrigerator.
Replacing Platter Pocket
1. Pull the platter pocket to the fully open position.
2. Locate the platter pocket retention clips on both sides.
3. Push the clip up from the bottom with your finger.
4. After both clips have been disengaged, carefully remove the platter pocket.
Crisper Drawers
To remove and replace the drawers:
1. Grasp the handle at the bottom of the drawer and slide the drawer straight out to the stop. Lift the drawer off the bottom guide.
2. Replace the drawer by placing it on the bottom drawer guide and pushing it past the drawer stop into position.
To remove the crispers cover (can remove only if platter pocket is removed first):
1. Remove the platter pocket first.
2. Holding the glass insert firmly with one hand, press up in center of glass insert until it rises above the plastic frame. Gently slide the glass insert forward to remove.
Refrigerator Door Bins
The bins on your refrigerator door are adjustable to meet your individual storage needs.
Door Bin Divider (on some models)
This divider fits in the door bin to divide the bin and elevate smaller items at the back of the bin.
Installing treasure bin lid (on some models)
1. Set the frame on the top of the door bin with the hinge features at the back of the door bin (the higher section).
2. Push the frame onto the top edge of the door bin.
3. Snap the lid into the hinge at the back of the door bin.
4. Close the lid.
Freezer Drawers
Small Items Bin
This drawer divider is not removable and is for small, delicate items. For storage flexibility, the drawer bin can move forward and back, allowing you to store larger items in one section of the freezer.
Pizza Pocket
Space at the front of the drawer allows vertical storage of additional pizza boxes.
Removable Divider (on some models)
This divider can be placed in 1 of 3 locations to help divide space and assist organization.
Third Tier
This shelf is not removable. To allow access, the third tier is able to move backward, allowing reach to items in the area below.
Ice Bin (on some models)
Ice storage for second ice maker
A. Small items bin
B. Pizza pocket
C. Removable divider (not shown)
D. Third tier
E. Ice bin (not shown)
Audio Reference
Tone Assignment
Tone Name
Usage Examples
POWER ON
Cooling system is turned on every time the product is powered on.
POWER OFF
Cooling system is turned off.
KEY PRESS
User presses a valid button.
INVALID (ERROR)
User presses 2 or more valid buttons at the same time. Cancels the countdown and no dispensing is allowed.
ENGAGE
User interface (UI) is locked. Fast Ice is turned on. Measured Fill dispensing complete. Smart Grid is turned on when Wi-Fi connection is initiated by user.
DISENGAGE
UI is unlocked. Fast Ice is turned off. Dispensing has timed out.
ALERT
Wi-Fi alert, door ajar alert, or Wi-Fi connection is lost for 12 hours.
This table is for quick reference only. See corresponding sections for details. In case of inconsistency, section details will prevail.
REFRIGERATOR CARE
Cleaning
Both the refrigerator and freezer sections defrost automatically. However. clean both sections about once a month to avoid odor buildup. Wipe up spills immediately.
Exterior Cleaning
Please see the exterior cleaning information specific to your model.
Style 1 - Smooth Door
IMPORTANT: Damage to smooth finish due to improper use of cleaning products or using non-recommended cleaning products is not covered under the warranty. Sharp or blunt instruments will mar the finish.
DO USE
DO NOT USE
✓ Soft, clean cloth
X Abrasive cloths
X Paper towels or newsprint
X Steel-wool pads
✓ Warm, soapy water with a mild detergent
X Abrasive powders or liquids
X Window sprays
X Ammonia
X Acidic or vinegar-based cleaners
X Oven cleaners
X Flammable fluids
NOTE: Paper towels scratch and may dull the clear coat of the painted door. To avoid possible damage, use only soft, clean cloths to polish and wipe the door.
Style 2 - Stainless Steel
IMPORTANT:
Use recommended stainless steel cleaners and cloths only. Damage to stainless steel finish due to improper use of cleaning products or using non-recommended cleaning products is not covered under the warranty.
Avoid exposing stainless steel appliances to caustic or corrosive elements such as high salt, high moisture, or high humidity environments. Damage due to exposure to these elements is not covered under the warranty.
DO USE
DO NOT USE
✓ Soft, clean cloth
X Abrasive cloths
X Paper towels or newsprint
X Steel-wool pads
✓ Warm, soapy water with a mild detergent
X Abrasive powders or liquids
X Ammonia
X Citrus-based cleaners
X Acidic or vinegar-based cleaners
X Oven cleaners
✓ For heavy soil, use ONLY a stainless steel cleaner designed for appliances. To order the cleaner, see “Accessories” section.
X Stainless steel cleaner is for stainless steel parts only! Do not allow the Stainless Steel Cleaner and Polish to come into contact with any plastic parts such as the trim pieces, dispenser covers, or door gaskets.
Interior Cleaning
IMPORTANT: Refrigerator shelves with under-shelf, LED lighting are not dishwasher safe.
1. Unplug refrigerator or disconnect power.
2. Hand wash, rinse, and dry removable parts and interior surfaces thoroughly. Use a clean sponge or soft cloth and a mild detergent in warm water.
NOTE: Do not use abrasive or harsh cleaners such as window sprays, scouring cleansers, flammable fluids, cleaning waxes, concentrated detergents, bleaches, or cleansers containing petroleum products on plastic parts, interior and door liners, or gaskets.
3. Plug in refrigerator or reconnect power.
Condenser Cleaning
There is no need for routine condenser cleaning in normal home operating environments. If the environment is particularly greasy or dusty or there is significant pet traffic in the home, the condenser should be cleaned every 6 months to ensure maximum efficiency.
If you need to clean the condenser, please call for service.
Lights
The lights in both the refrigerator and freezer compartments are LEDs which do not need to be replaced. If the lights do not illuminate when the door or drawer is opened, call for assistance or service. In the U.S.A., call 1-866-333-4591. In Canada, call 1-800-807-6777.
Vacation and Moving Care
Vacations 1
If You Choose to Leave the Refrigerator On While You’re Away:
1. Use up any perishables and freeze other items.
2. If your refrigerator has an automatic ice maker and is connected to the household water supply, turn off the water supply to the refrigerator. Property damage can occur if the water supply is not turned off.
3. If you have an automatic ice maker, turn off the ice maker. NOTE: Depending on your model, do one of the following:
Raise the shut-off arm to Off (arm up) position.
Press the switch to Off for the door ice maker. or
Touch ICEMAKER2 for display to be unlit on the top inside of the refrigerator.
4. Empty the ice bin.
If You Choose to Turn Off the Refrigerator Before You Leave:
1. Remove all food from the refrigerator.
2. If your refrigerator has an automatic ice maker:
Turn off the water supply to the ice maker at least one day ahead of time.
When the last load of ice drops, press the switch to OFF for the door ice maker or touch ICEMAKER2 for display to be unlit on the top inside of the refrigerator, depending on your model.
3. Empty the ice bin.
4. Turn off the Temperature controls. See “Using the Controls” section.
5. Clean refrigerator, wipe it, and dry well.
6. Tape rubber or wood blocks to the tops of both doors to prop them open far enough for air to get in. This stops odor and mold from building up.
Moving
When you are moving your refrigerator to a new home, follow these steps to prepare it for the move.
1. If your refrigerator has an automatic ice maker:
Turn off the water supply to the ice maker at least one day ahead of time.
Disconnect the water line from the back of the refrigerator.
When the last load of ice drops, press the switch to OFF either on the ice maker or the control, depending on your model.
2. Remove all food from the refrigerator and pack all frozen food in dry ice.
3. Empty the ice bin.
4. Turn off the Temperature controls. See “Using the Controls” section.
5. Unplug refrigerator.
6. Clean, wipe, and dry thoroughly.
7. Take out all removable parts, wrap them well, and tape them together so they don’t shift and rattle during the move.
8. Depending on the model, raise the front of the refrigerator so it rolls more easily OR raise the leveling screws so they don’t scrape the floor. See “Adjust the Doors” or “Door Closing and Door Alignment” section.
9. Tape the doors closed and tape the power cord to the back of the refrigerator.
When you get to your new home, put everything back and refer to the “Installation Instructions” section for preparation instructions. Also, if your refrigerator has an automatic ice maker, remember to reconnect the water supply to the refrigerator.
Troubleshooting - Connected Models
Connection Status
Control Panel Indicator Lights
Refrigerator is not connected.
Wi-Fi icon is OFF.
Refrigerator is attempting to connect to home Wi-Fi router.
Wi-Fi icon is blinking slowly.
Refrigerator is connected to home Wi-Fi router, but Whirlpool® App or Smart Grid functions does not work.
Wi-Fi icon is ON.
Refrigerator is connected to home Wi-Fi router and the Whirlpool® App works.
Wi-Fi icon is ON.
If you experience
Possible Causes
Solution
Refrigerator is not connected to home Wi-Fi router (Wi-Fi icon is OFF).
The refrigerator may be in Standby mode.
Touch and hold CRUSHED ICE & CUBED ICE together for 3 seconds to see the Wi-Fi icon blinking, then lights ON solid. All indicator lights are OFF when in Standby mode.
The refrigerator has never been connected to the home Wi-Fi router.
See “Connectivity Setup” section.
Lost connection to home Wi-Fi router.
Check whether the router is ON and working with other computers or devices in the home (able to access the Internet).
Weak signal strength or signal interference between the refrigerator and router
Try to place the wireless router closer to the refrigerator. It may be necessary to install a Wi-Fi range extender.
Wi-Fi icon does not light at all after touch and holding CRUSHED ICE & CUBED ICE.
Something may be wrong with the refrigerator.
Unplug or disconnect refrigerator power for 30 seconds. Return power. Repeat Wi-Fi connecting process.
Verify that the refrigerator operates correctly, except for not being able to connect. Call for possible additional troubleshooting.
Refrigerator is connected to home Wi-Fi router, but Whirlpool® App does not work.
Connection to the Whirlpool® App may be unavailable.
Check Internet.
User account has not been properly set up or the refrigerator has not been registered in an account.
See “Connectivity Setup” section or the Whirlpool® App directly for account setup and refrigerator registration instructions.
Verify that the refrigerator is paired with your account in the app.
Verify correct email address, mobile number, and notification preferences.
Router is not connected to Internet.
Check other devices connected to Internet through same router.
No connection of refrigerator after several attempts.
Wi-Fi disconnected
Press and hold [Cubed Ice] and [Crushed Ice] button >
15 seconds. The Wi-Fi and House icon will turn off.
Power off service breaker for 30 or so seconds, power back on, and then use alternate setup instructions.
Troubleshooting
If you experience
Possible Causes
Solution
The refrigerator will not operate.
Check electrical supply.
Plug the power cord into a grounded 3 prong outlet.
Do not use an extension cord.
Make sure there is power to the outlet. Plug in a lamp to see if the outlet is working.
Reset a tripped circuit breaker. Replace any blown fuses.
NOTE: If problems continue, contact an electrician.
Check controls.
Make sure the controls are turned on. See “Using the Controls” section.
New installation
Allow 24 hours following installation for the refrigerator to cool completely.
NOTE: Adjusting the temperature controls to the coldest setting will not cool either compartment more quickly.
Refrigerator control is in Showroom mode (on some models).
If the refrigerator is in Showroom mode, cooling is turned off and “Showroom” will be illuminated on the control panel. See “Using the Controls” section for more information.
The motor seems to run too much.
High-efficiency compressor and fans
Larger, more efficient refrigerators run longer at lower, more energy-efficient speeds.
The room or outdoor temperature is hot.
It is normal for the refrigerator to work longer under these conditions. For optimum performance, place the refrigerator in an indoor, temperature-controlled environment. See “Location Requirements” section.
A large amount of warm food has been recently added.
Warm food will cause the refrigerator to run longer until the air cools to the desired temperature.
The motor seems to run too much. (cont.)
The door(s) are opened too frequently or for too long.
Warm air entering the refrigerator causes it to run more. Open the door less often.
The refrigerator door or freezer drawer is ajar.
Make sure the refrigerator is level. See “Door Closing and Door Alignment” section. Keep food and containers from blocking the door.
The refrigerator control is set too cold.
Adjust the refrigerator control to a less-cold setting until the refrigerator temperature is as desired.
The door or drawer gasket is dirty, worn, or cracked.
Clean or change the gasket. Leaks in the door seal will cause the refrigerator to run longer in order to maintain desired temperatures.
The lights do not work.
Your refrigerator is equipped with LED lighting which does not need to be replaced.
If there is power to the refrigerator and the lights do not illuminate when a door or drawer is opened, call for service or assistance.
Doors have been open longer than 10 minutes.
Close the doors and drawer to reset and open to resume lighted task.
Shelves with under-shelf LEDs do not light up (on some models).
Shelf attachment points are not fully engaged in the adjustable shelf mounts.
Check that the rear shelf attachment points are completely seated into the adjustable mount upper face.
Doors have been open longer than 10 minutes.
Close the doors and drawer to reset and open to resume lighted task.
Unusual Noise
To listen to normal refrigerator sounds, go to the Product Help/FAQ section of the brand website and search for “normal sounds.” Below are listed some normal sounds with explanations.
The refrigerator seems noisy.
The compressor in your new refrigerator regulates temperature more efficiently while using less energy and operates quietly.
Due to this reduction in operating noise, you may notice unfamiliar noises that are normal.
Sound of the compressor running longer than expected
High-efficiency compressor and fans
Larger, more-efficient refrigerators run longer at lower, more energy-efficient speeds.
Pulsating/Whirring
Fans/compressor adjusting to optimize performance during normal compressor operation
This is normal.
Popping
Contraction/expansion of inside walls, especially during initial cooldown
This is normal.
Hissing/Dripping
Flow of refrigerant in the compressor
This is normal.
Vibration
The refrigerator may not be steady.
Adjust the leveling screws and lower the leveling foot firmly against the floor. See “Door Closing and Door Alignment” section.
Rattling/Banging
Movement of the water lines against the refrigerator cabinet or of items placed on top of the refrigerator cabinet
Move excess water line away from the refrigerator cabinet or fasten excess tubing to the cabinet. See “Connecting the Water” section or remove items from the top of the refrigerator.
Sizzling
Water dripping on the heater during Defrost cycle
This is normal.
Water running/Gurgling
May be heard when ice melts during the Defrost cycle and water runs into the drain pan.
This is normal.
Buzzing and clicking
Heard when the water valve opens and closes to dispense water and/or fill the ice maker
If the refrigerator is connected to a water line, this is normal. If the refrigerator is not connected to a water line, turn off the ice maker.
Repetitive clicking
Dual evaporator valve regulating the cooling operation
You may hear rapid, repetitive clicking sounds as the unit switches from cooling one compartment to cooling the other. This sound is normal.
Creaking/Cracking/
Grinding
May be heard as ice is being ejected from the ice maker mold.
This is normal.
Clatter
May be heard when the ice falls into the ice storage bin.
This is normal.
Temperature and Moisture
Temperature is too warm.
The refrigerator has just been installed.
Allow 24 hours following installation for the refrigerator to cool completely.
Cooling is turned off.
Turn on cooling. See “Using the Controls” section.
The controls are not set correctly for the surrounding conditions.
Adjust the controls a setting colder. Check the temperature in 24 hours. See “Using the Controls” section.
The door(s) are opened often or not closed completely. Allows warm air to enter refrigerator.
Minimize door openings and keep doors fully closed.
A large load of food was recently added.
Allow several hours for refrigerator to return to normal temperature.
Temperature is too cold in the refrigerator/crisper.
The refrigerator air vent(s) is blocked.
If the air vent, located in the middle rear of the refrigerator compartment is blocked by items placed directly in front of it, the refrigerator will get too cold. Move items away from the air vent.
The controls are not set correctly for the surrounding conditions.
Adjust the controls a setting warmer. Check the temperature in 24 hours. See “Using the Controls” section.
The ice storage bin is not in the correct position.
See “Ice Maker and Ice Storage Bin” section.
Temperature is too cold in the pantry drawer.
The control is not set correctly for the items stored in drawer.
Adjust the temperature setting. See “Using the Controls” in the “Refrigerator Use” section.
There is interior moisture buildup.
NOTE: Some moisture buildup is normal.
The room is humid.
A humid environment contributes to moisture buildup.
The door(s) are opened often or not closed completely. Allows humid air to enter the refrigerator.
Minimize door openings and close doors completely.
The door(s) are blocked open.
Move food packages away from door.
A bin or shelf is in the way.
Push bin or shelf back into the correct position.
Storing liquid in open containers
This adds humidity to the refrigerator interior. Keep all containers tightly covered.
There is frost/ice buildup in the freezer compartment.
The drawer is opened often or left open.
Minimize drawer openings and close drawer completely after use.
Poor door seal
Ensure door seals are making full contact with the refrigerator cabinet to allow for an adequate seal.
Temperature controls are not set correctly.
See “Using the Controls” section for recommended temperature settings.
Ice and Water
The ice maker is not producing ice or is not producing enough ice.
The refrigerator is not connected to a water supply or the water supply shut-off valve is not turned on.
Connect refrigerator to water supply and turn water shut-off valve fully open.
There is a kink in the water source line.
A kink in the line can reduce water flow. Straighten the water source line.
The ice maker is not turned on.
Make sure the ice maker is ON. See “Ice Maker and Ice Storage Bin” section.
The refrigerator has just been installed.
Wait 24 hours after ice maker installation for ice production to begin. Wait 3 days for full ice production.
The ice maker is not producing ice or is not producing enough ice. (cont.)
The refrigerator door is not closed completely.
Close the door firmly. If it does not close completely, see “The doors will not close completely” in this table.
A large amount of ice was recently removed.
Allow sufficient time for ice maker to produce more ice. See “Ice Maker and Ice Storage Bin” section for ice production rates.
An ice cube is jammed in the ice maker.
Remove ice from the ice maker with a plastic utensil.
A water filter is installed on the refrigerator.
Remove the water filter and operate the ice maker. If ice volume improves, then the filter may be clogged or incorrectly installed. Replace filter or reinstall it correctly.
A reverse osmosis water filtration system is connected to your cold water supply.
This can decrease water pressure. See “Water Supply Requirements” section.
The ice cubes are hollow or small.
NOTE: This is an indication of low water pressure.
The water shut-off valve is not fully open.
Turn the water shut-off valve fully open.
There is a kink in the water source line.
A kink in the line can reduce water flow. Straighten the water source line.
A water filter is installed on the refrigerator.
Remove filter and operate ice maker. If ice quality improves, then the filter may be clogged or incorrectly installed. Replace filter or reinstall it correctly.
A reverse osmosis water filtration system is connected to your cold water supply.
This can decrease water pressure. See “Water Supply Requirements” section.
Questions remain regarding water pressure.
Call a licensed, qualified plumber.
Off-taste, odor, or gray color in the ice or water
Newly installed refrigerator requires flush of water system.
Flush the water system. See “Water and Ice Dispensers” section for water system flushing instructions.
Recently installed or replaced plumbing connections. New plumbing connections can cause discolored or off-flavored ice and water.
Discard the ice and wash the ice storage bin. Flush the water system with 3 gal. (12 L) of water. Allow 24 hours for the ice maker to make new ice and discard the first 3 batches of ice produced.
Using a water supply connection type other than recommended
It is recommended to use copper tubing or Whirlpool® supply line, Part Number 8212547RP See “Connect to Water Line” section.
The ice has been stored too long.
Discard ice, and wash ice storage bin. Allow 24 hours for ice maker to make new ice.
The water has been stored too long.
Dispense at least 1 qt (1 L) of water per week to maintain a fresh supply.
Odor from stored food has transferred to the ice.
Use airtight, moisture-proof packaging to store food.
There are minerals (such as sulfur) in the water.
A water filter may need to be installed to remove the minerals.
There is a water filter installed on the refrigerator.
Gray or dark discoloration in ice may indicate that the water filtration system needs additional flushing. Flush the water system after installing and before using a new water filter. See “Water and Ice Dispensers” section for water filter flushing instructions.
The water filter needs to be replaced.
Replace the disposable water filter at least every 6 months or when indicated. See “Water Filtration System” section.
The water-and-ice dispenser will not operate properly.
The refrigerator is not connected to a water supply or the water supply shut-off valve is not turned on.
Connect the refrigerator to the water supply and turn the water shut-off valve fully open.
There is a kink in the water source line.
A kink in the water line can reduce water flow from the water dispenser and result in hollow or irregular-shaped ice. Straighten the water source line.
The refrigerator has just been installed.
Flush and fill the water system. See “Water and Ice Dispensers” section.
The water pressure to the house is not at or above 35 psi (241 kPa).
The water pressure to the house determines the flow from the dispenser. See “Water Supply Requirements” section.
A reverse osmosis water filtration system is connected to your cold water supply.
A reverse osmosis water filtration system can decrease water pressure. See “Water Supply Requirements” section.
The water filter may be clogged.
Remove the water filter and operate dispenser. If water flow increases, your filter is clogged and needs to be replaced. See “Water Filtration System” section.
The water filter is installed incorrectly.
Remove the water filter and reinstall. See “Water Filtration System” section.
The refrigerator door or freezer drawer is not closed completely.
Close the door or drawer firmly. If it does not close completely, see “The doors will not close completely” in this section.
The refrigerator doors were recently removed.
Make sure the water dispenser wire/tube assembly has been properly reconnected at the top of the refrigerator door. See “Refrigerator Doors and Drawer” section.
Ice is clogged in the ice storage bin or ice is blocking the ice delivery chute.
Remove the ice clogging the storage bin and delivery chute, using a plastic utensil if necessary. Clean the ice delivery chute and the bottom of the ice storage bin using a warm, damp cloth, then dry both thoroughly. To avoid clogging and to maintain a fresh supply of ice, empty the storage bin and clean both the storage bin and delivery chute every 2 weeks.
Ice bin is difficult to remove from door.
Ice level in bin may be high and uneven from normal ice production and augering of ice during dispensing.
Dispense 2-3 glasses of ice, then try removing the ice bin.
The ice dispenser jams while dispensing crushed ice.
Crushed ice is blocking the ice delivery chute.
Switch from crushed ice to cubed ice to clear the ice dispenser. Then switch back to crushed ice.
Water is leaking or dripping from the dispenser system.
NOTE: A few drops of water after dispensing are normal.
The glass was not held under the dispenser long enough.
Hold the glass under the dispenser 2 to 3 seconds after releasing the dispenser lever.
Ice continues to flow from the dispenser.
NOTE: A few cubes dispensed after releasing the dispenser lever is normal.
The glass was not held under the dispenser long enough.
Hold the glass under the dispenser 2 to 3 seconds after releasing the dispenser lever.
Water continues to drip from the dispenser beyond the first few drops. There may be a loose water connection. Check for water in bottom of refrigerator compartment, hinge area, or by household connection in back of product.
The refrigerator has just been installed.
Flushing the water system removes the air from the lines which causes the water dispenser to drip. Flush the water system. See “Water and Ice Dispensers” section.
The water filter was recently installed or replaced.
Flushing the water system removes the air from the lines which causes the water dispenser to drip. Flush the water system. See “Water and Ice Dispensers” section.
Water is leaking from the back of the refrigerator.
The water line connections were not fully tightened.
See “Connect the Water Supply” section.
Recently removed the doors and did not fully tighten water line connection
See “Refrigerator Doors and Drawer” section.
Crushed or cubed ice misses the glass when dispensing ice.
The glass is not held close enough to where the ice exits the chute.
Hold the glass close to where the ice exits the chute.
Water from the dispenser is warm.
Water from the dispenser is chilled to 50°F (10°C).
This is normal.
The refrigerator has just been installed.
Allow 24 hours after installation for the water supply to cool completely.
A large amount of water was recently dispensed.
Allow 3 hours for the water supply to cool completely.
Water has not been recently dispensed.
The first glass of water may not be cool. Discard the first glass of water dispensed.
The refrigerator is not connected to a cold water pipe.
Make sure the refrigerator is connected to a cold water pipe. See “Water Supply Requirements” section.
Doors
To view an animation showing how to adjust and align the doors, refer to the Product Help/FAQ section of the brand website and search for “door closing and door alignment.”
If you experience
Possible Causes
Solution
The doors will not close completely.
The door is blocked open.
Move food packages away from door.
A bin or shelf is in the way.
Push bin or shelf back into the correct position.
Recently installed
Remove all packaging materials.
The doors are difficult to open.
The door gaskets are dirty or sticky.
Clean gaskets and contact surfaces with mild soap and warm water. Rinse and dry with soft cloth.
The doors appear to be uneven.
The doors need to be aligned or the refrigerator needs to be leveled.
See “Refrigerator Leveling and Door Closing” section.
The refrigerator is unsteady or it rolls forward when opening and closing doors.
The refrigerator brake feet are not snug against the floor.
Remove the base grille. Turn both brake feet (one on each side) clockwise, the same amount, until they are snug against the floor. See “Refrigerator Leveling and Door Closing” section.