Loading ...
Loading ...
Loading ...
GETTING READY — — — — — — — — — — — — — — — — — — — — — — — — — — — — — — — — — — — — — — — — — — — —
—
26
Installing the bobbin
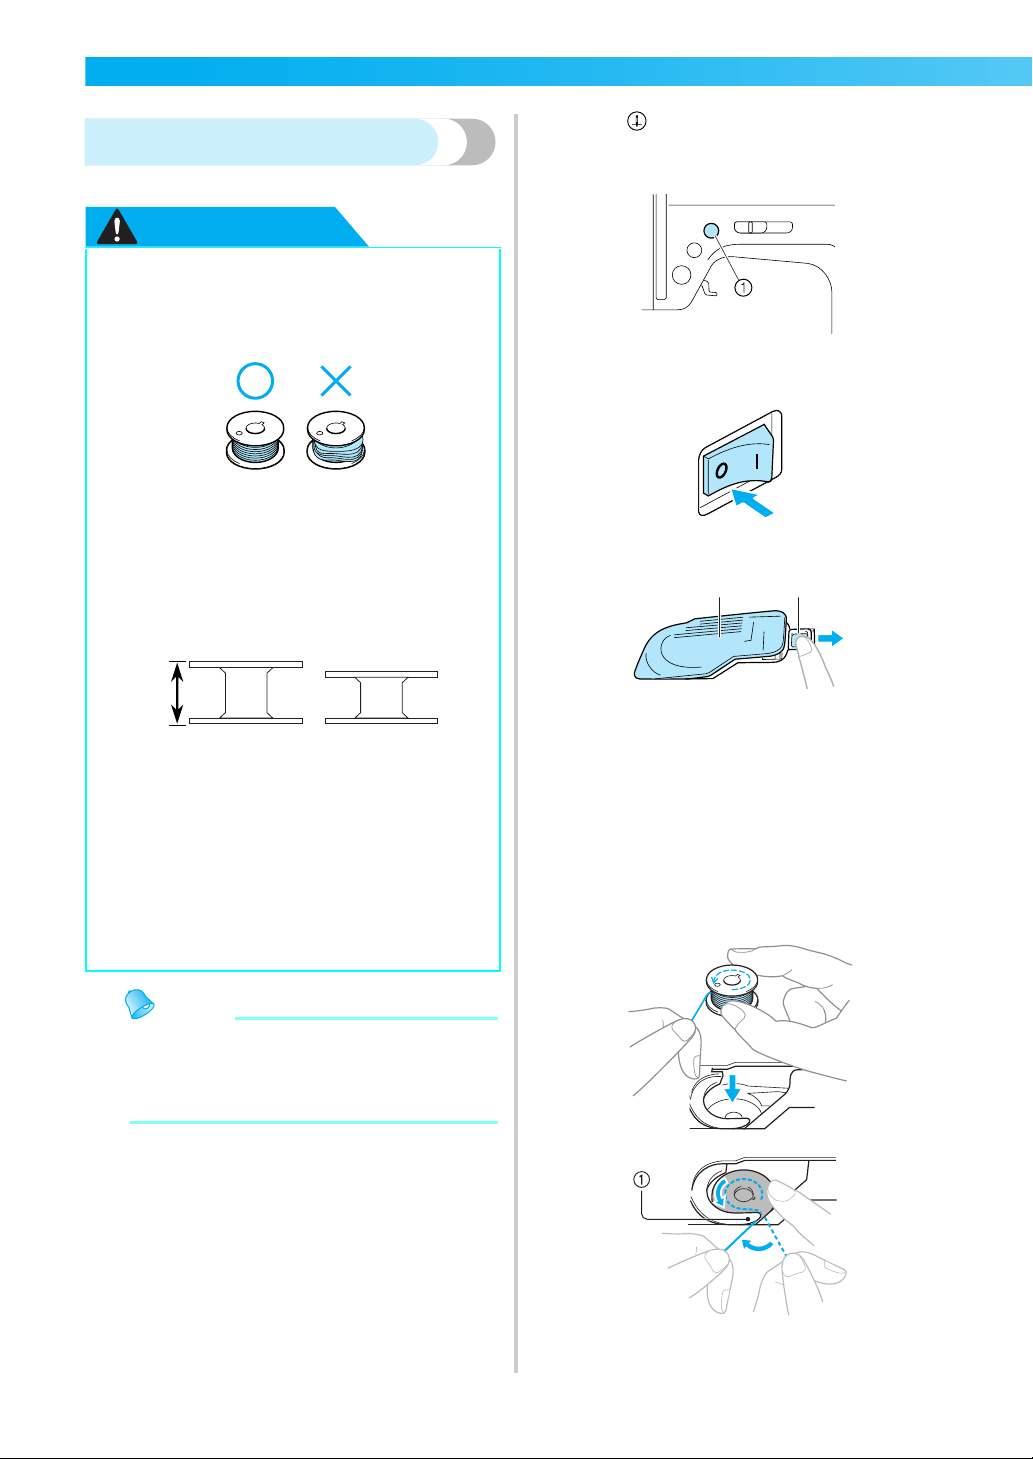
Install the bobbin wound with thread.
CAUTION
Memo
z The order that the bobbin thread should be
passed through the bobbin case is indicated
by marks around the bobbin case. Be sure to
thread the machine as indicated.
a
Press (needle position button) once or
twice to raise the needle, and then raise the
presser foot lever.
a Needle position button
b
Turn off the sewing machine.
c
Slide the bobbin cover latch to the right.
a Bobbin cover
b Latch
X The bobbin cover opens.
d
Remove the bobbin cover.
e
Insert the bobbin with your right hand so that
the end of the thread is on the left, and then,
after pulling the thread firmly around the tab
with your left hand as shown, lightly pull the
thread to guide it through the slit.
a Tab
• Be sure to insert the bobbin correctly.
● Use a bobbin that has been correctly
wound with thread, otherwise the needle
may break or the thread tension will be
incorrect.
●
The bobbin was designed specifically for
this sewing machine. If bobbins from other
models are used, the machine will not
operate correctly. Use only the included
bobbin or bobbins of the same type (part
code: SA156, SFB(XA5539-151)).
a Actual size
b This model
c Other model
d 11.5 mm (7/16 inch)
● Before installing the bobbin or replacing
the needle, be sure to turn off the sewing
machine, otherwise injuries may occur if
start/stop button is accidentally pressed
and the machine starts sewing.
1
23
4
ab
Loading ...
Loading ...
Loading ...