Loading ...
Loading ...
Loading ...
10
——————
—————————————————————————————————————————————————————————————————————————
—
————————————————————————————————————————————————————————————————————————————————————————————————————————————————————————————————————————————————————————————————————————————————————————————————————
1
Changing the presser foot
CAUTION
You will have to change the presser foot depending on
what you want to sew and how.
1
Turn off the machine.
Raise the presser foot lever.
2
Raise the needle by turning the
handwheel toward you
(counterclockwise) so that the mark on
the wheel points up.
3
Note
● Depending on the type of presser foot
holder, the method of releasing the presser
foot will vary.
4
Put a different presser foot on the needle
plate so that the bar on the presser foot is
in line with the slot on the shank.
5
Lower the presser foot lever and fix the
presser foot onto the shank. If the presser
foot is in the correct place, the bar should
snap in.
1 Shank
2 Bar
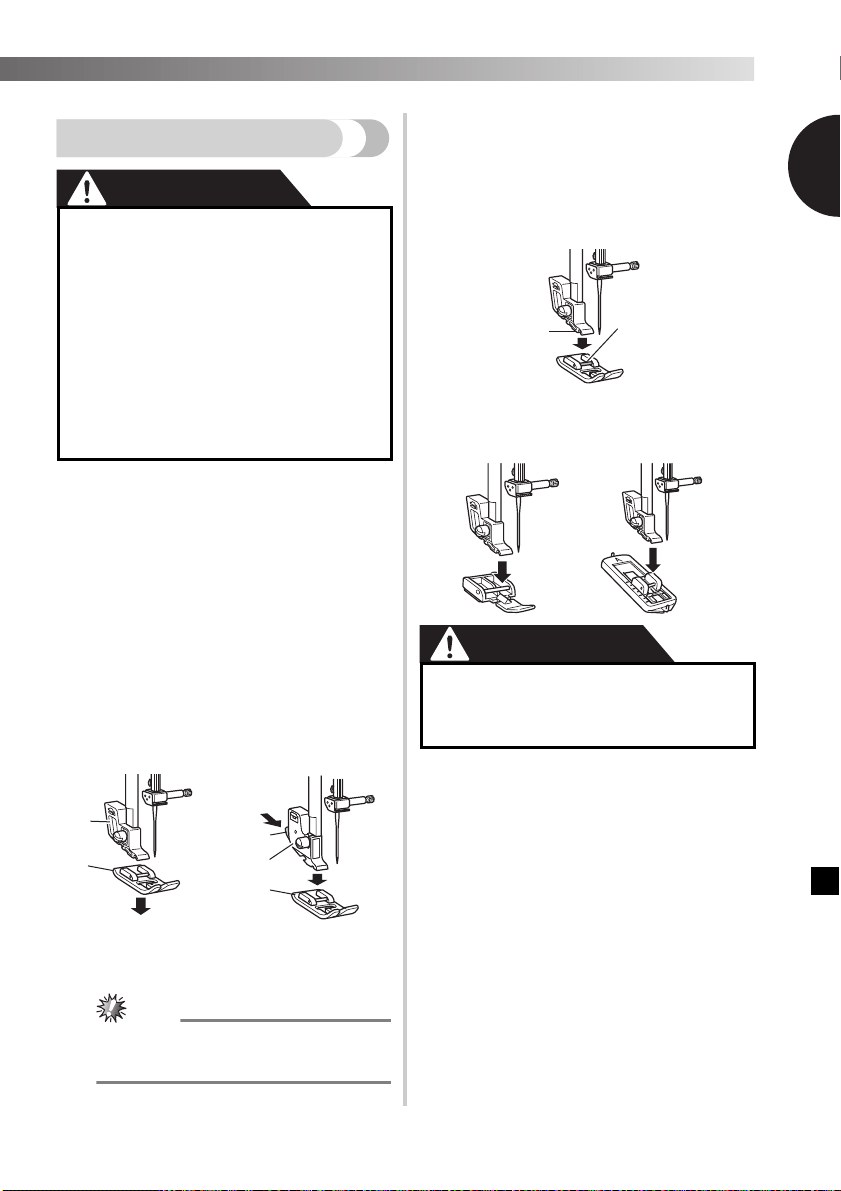
■ Presser foot installation orientation
CAUTION
●
Always turn off the machine before you
change the presser foot. If you leave the
power on and step on the controller, the
machine will start and you may be injured.
● Always use the correct presser foot for
the stitch pattern you have chosen. If
you use the wrong presser foot, the
needle may strike the presser foot and
bend or break, and may cause injury.
● Only use presser feet that have been
designed to be used with this machine.
Using any other presser foot may cause
accident or injury.
Remove the presser
foot by pulling it
vertically downward.
|
|
|
|
|
|
|
|
or
|
|
|
|
|
|
|
|
Press the black
button at the back of
the presser foot
holder to release the
presser foot.
1 Presser foot holder
2 Presser foot
1 Black button
2 Presser foot holder
3 Presser foot
1
2
1
2
3
● If the presser foot is not installed with
the correct orientation, the needle may
strike the presser foot, which may bend
or break the needle and cause injury.
1
2
Loading ...
Loading ...
Loading ...