
Loading ...
Loading ...
Loading ...
9
Note:
• Change the water daily to avoid
bacteria growth.
• Use a tissue or cloth to clean the
nozzle regularly.
• Do not use detergents to clean the
humidifier.
• Never submerge the base in water.
• Deep clean before and after storing.
• If not using the humidifier regularly,
do not leave water inside. Dry and
store instead.
KEEPING THINGS CLEAN
Basic Cleaning
Deep Cleaning
You should clean your humidifier every 3 days.
1. Unplug the humidifier and remove the
power adapter from the base.
2. Remove and rinse the nozzle and
nozzle cap.
3. Remove the water tank from the base.
Pour out any remaining water from the
tank and base.
Deep clean the humidifier every 2 weeks and
before and after storing it for a long period
of time. You should also deep clean if there
is any mold or scale buildup inside the water
tank or base.
1. Unplug the humidifier.
2. Remove and rinse the nozzle and
nozzle cap.
3. Remove the water tank from the base
and pour out any remaining water.
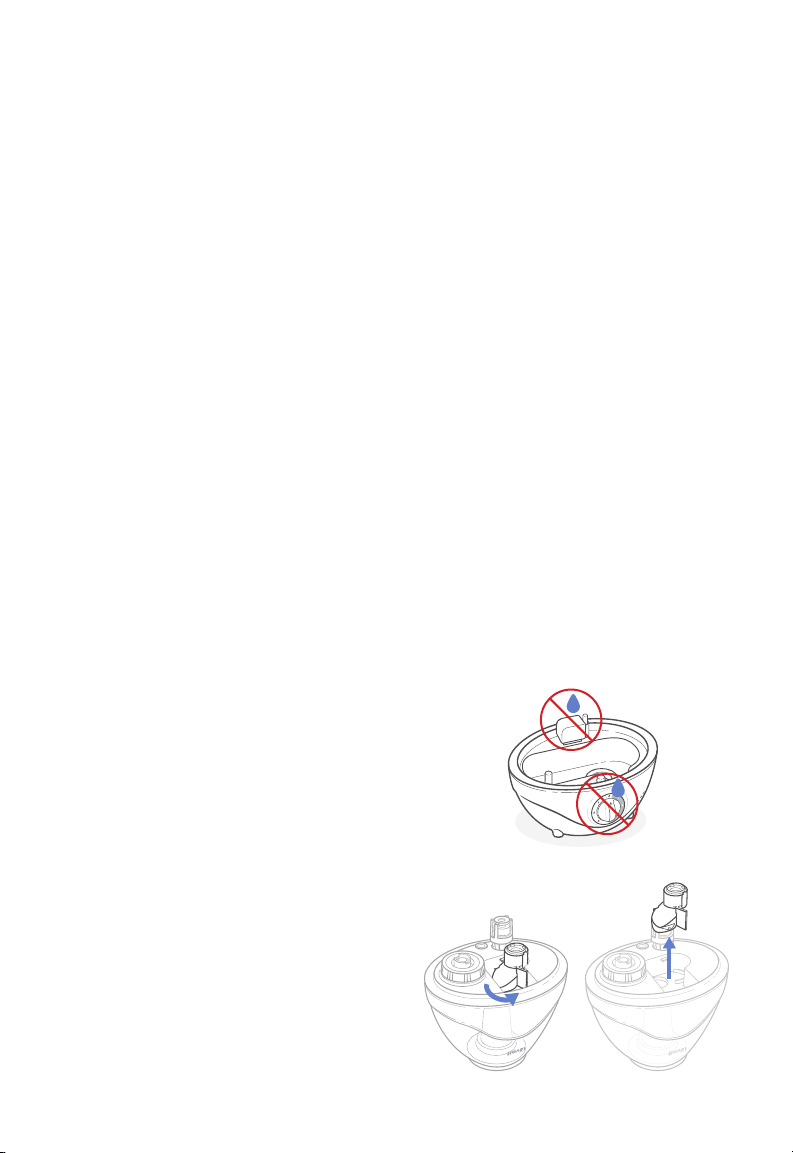
4. Flip the tank over and remove the noise
silencer from the tank. [Figure 2.2]
Note: Do not let water inside the air
outlet or near the mist level dial. This
will damage the humidifier. [Figure 2.1].
Note: Do not let water inside or around
the air outlet or near the mist level dial.
4. Rinse the tank and the inside of the
base with cool, clean water. Do not
immerse the base in water.
5. To remove any scale buildup inside
the water tank or base, soak with
distilled white vinegar and wipe with
the cleaning brush, a clean cloth, or a
cotton swab.
6. Rinse all parts and pour out remaining
water.
7. Dry all parts with a cloth. Make sure
all parts are completely dry before
reassembling or storing.
5. To remove any scale or buildup in the
water tank, fill the water tank and base with
distilled white vinegar and allow to soak.
6. Rinse all parts and dry with a clean cloth.
Make sure all parts are completely dry
before reassembling or storing.
Figure 2.2
Figure 2.1
Loading ...
Loading ...
Loading ...