Loading ...
Loading ...
Loading ...
14
appliance's control panel or steam handle (depending on model).
1 • Press & Steam vertical support*
Assembly:
• Remove the Press & Steam vertical support from its pouch. (fig. 19)
• Make sure the telescopic pole is fully extended.
• Hold the Press & Steam vertical support such as the handle is located downward and its
"Press & Steam" logo is in front.
• Insert the upper part inside the integrated hanger, then pull down slightly until hooking the
handle on the Press & Steam vertical support hook located on the pole. (fig. 20-21)
• The Press & Steam vertical support helps keep the garment in place while steaming.
• When steaming a shirt, begin with steaming the sleeves. Get hold of one sleeve and cross it
over the garment using the Press & Steam for vertical support.
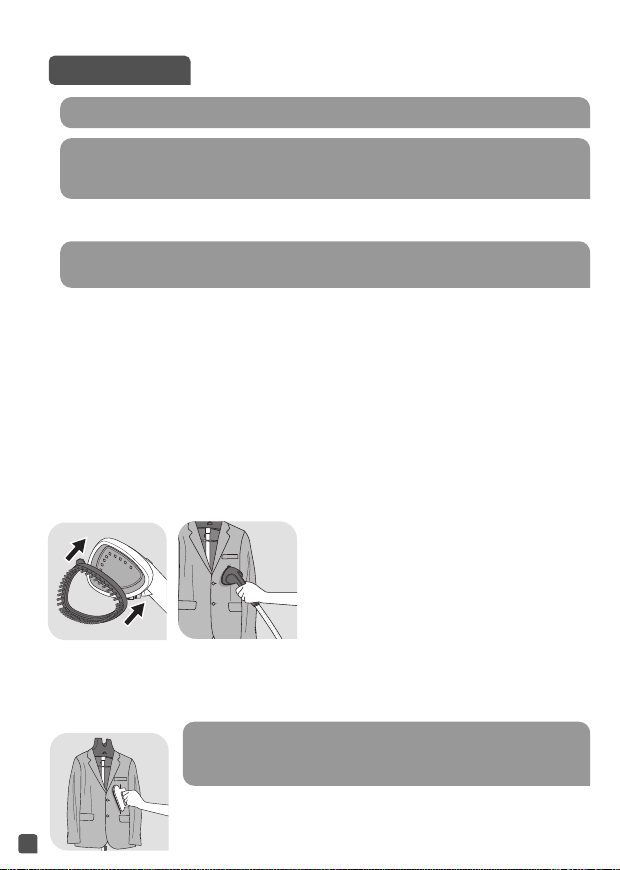
2 • Fabric brush*
The fabric brush opens the weave of the fabrics
for better steam penetration.
• Attach the fabric brush to the steam head by
lining up the bottom of the brush with the
bottom of the steam head. Gently push the top
of the brush onto the steam head until it clicks
into place. (fig. 22)
• Gently brush the area to be steamed following
the grain or nap of the fabric. (fig. 23)
• Remove the fabric brush once unit is unplugged and completely cool. Remove it by pressing
on the release tab on top of brush while pulling it forward.
3 • Lint pad*
The lint pad removes hair, lint and animal fur for a professional finish.
ACCESSORIES
Be sure the unit is unplugged and completely cool before attaching accessories.
Before using an accessory, check the manufacturer recommendations.
It is also recommended that you carry out a test on part of the fabric which cannot
be seen.
The Press & Steam system set in the hanger provides a vertical support while
steaming, to help remove "creases" more easily and efficiently.
The lint pad is a separate accessory and cannot be attached to
the steam head.You can use the lint pad independently from the
steamer.
* depending on model
1800133082-03 IS8300 _110x154 24/11/14 11:34 Page14
Loading ...
Loading ...
Loading ...