Loading ...
Loading ...
Loading ...
8
WARNING
When reversing the door swing:
You MUST move the anti-tip bracket to align
with the hinges of the door and install the toe
grille support for proper balance. Failure to
do so will result in injury.
Washer
Hinge
Pin
Bottom
Hinge
Screws
Toe
Grille
Door Stop
Screw
Door
Stop
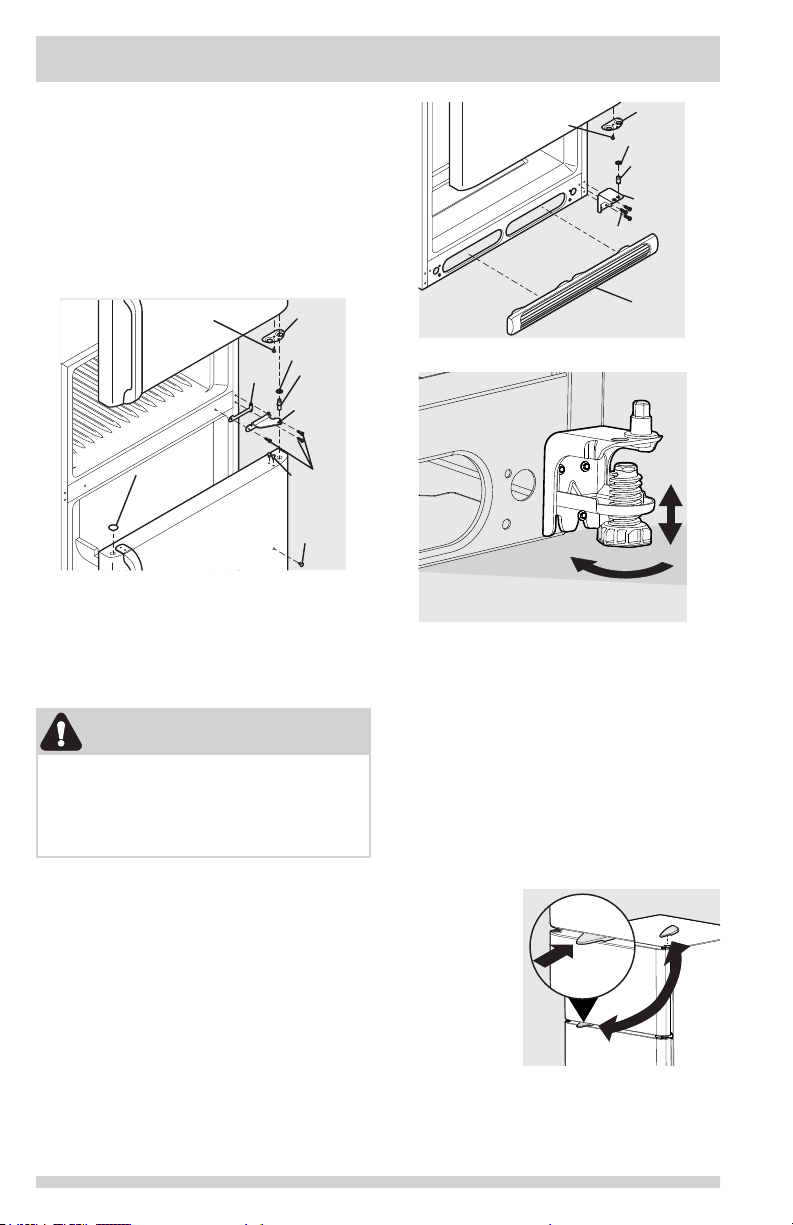
7. Remove three screws on bottom hinge
andanti-tipbracket(ifequipped)with⅜”
socket wrench.
8. Remove toe grille support and screws (if
equipped).
OR
Lower
Anti-tip
Bracket
4. Lift refrigerator door off of bottom hinge
and set aside.
5. Remove center hinge and shim by
removing inside screw and loosening two
outside screws enough to allow hinge and
shim to slide out. Tighten screws.
6. Loosen two outside screws on opposite
side of refrigerator, remove inside screw
and install center hinge.
Door
Stop
Shim
Washer
Hinge
Pin
Center
Hinge
Screws
Hinge
Hole
Plug
Handle
Hole
Plug
Door
Stop
Screw
9. Install bottom hinge and anti-tip bracket
(ifequipped)onoppositesidewiththe
three screws removed from step 7.
10. Unscrew bottom hinge pin using
adjustable wrench. Move hinge pin to
other hole in hinge and tighten with
adjustable wrench.
11. Install toe grille support and screws on
oppositeside(ifequipped).
12. Reverse door handles (see Handle
Installation section).
13. Move freezer and refrigerator door stops
to opposite side. Before starting screws,
use an awl to puncture the foam.
14. Position refrigerator door onto bottom
hinge pin and screw center hinge pin
through center hinge into top of door. Close
refrigerator door to help align hinge hole.
15. Tighten center hinge pin with adjustable wrench.
16. Remove cabinet and hinge hole plugs and
move to opposite side.
17. Lower freezer
door onto center
hinge pin.
18. Close freezer
door. Lift up
on handle
side of door
and grasp the
thinnest part
of the top
hinge cover (which was removed in Step
2) and insert the thickest part between the
doors on the handle side approximately
3 inches from the outside edge. This will
ensure proper spacing.
DOOR REMOVAL/REVERSAL INSTRUCTIONS
(SOME MODELS)
Loading ...
Loading ...
Loading ...