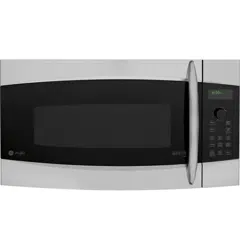
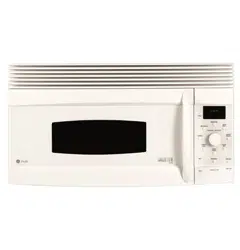
Owner's manual Advantium Oven
Oven Features

- Turntable: The turntable must always be in place. on the oven floor. for all cooking. Be sure the turntable is seated securely over the spindle in the center of the oven.
- Metal Tray: Put food directly on the metal tray and place on the turntable when using the speedcook. broil. and toast.
- Wire Oven Rack: Put food directly on a metal tray or in an oven-safe dish on the wire oven rack only when convection baking or warming.
- Clear Glass Tray: Place on turntable when using microwave features. Place food or microwave-safe cookware directly on tray.
- Upper Halogen Lamp & Ceramic Heater: A 500W halogen lamp and 700W ceramic heater cook food from above in speedcook. broil and toast.
- Window: Allows food to be viewed during cooking.
- Door Handle: Pull to open the door.
- Door Latches: The door must be securely latched for the oven to operate.
- Lower Ceramic Heater: One 375W ceramic heater cooks food from the bottom in speedcook. broil and toast.
- Control Panel: The pads used to operate the oven are located on the control panel.
- Convection System: One 1550W heating element cooks food with a convection fan circulating the hot air throughout the cavity in convection bake and warm.
Cooking controls

SELECTOR DIAL - Turn to select. Press to enter. Turn to select food. power level. or temperature selections. Also use the dial to increase (turn clockwise] or decrease (turn counterclockwise) time. Simply press the button to enter the selection.
BACK - Press this pad to step back one or more levels in the programming process.
HELP - Press this pad to find out more about your ovens features.
DISPLAY - Shows feature selections and information about the oven when in use.
START/PAUSE - Press this pad to start or pause any cooking function.
CLEAR/OFF - Press this pad to cancel ALL oven programs except clock, auto night light, timer, vent fan, and surface light
SPEEDCOOK - Press this pad to access the pre-set speedcook menu or to set your own speedcook program.
CONV BAKE - Press this pad to use convection bake.
MICROWAVE - Press this pad to access the microwave menu or to set your own microwave Program.
SETTINGS - Press this pad to set the clock and access Turntable On/Off, Auto Conversion, Auto Nightlight. Beeper Volume, Display On/Off, Reminder, and Temperature Units.
COOKING OPTIONS - Press this pad to access Repeat Last, Brail, Proof, Toast, Warm and Delay Start.
MICRO 30 SECS - Starts the microwave for 30 seconds of cooking time. An additional 30 seconds is added to the remaining cooking time each time the pad is pressed.
TIMER ON/OFF - Press this pad to set a minute and seconds timer.
SURFACE LIGHT - Press this pad to turn the cooktop light on and off.
VENT - Press this pad to tum the vent fan on and off
Care and cleaning
Surface Light
- Use to light your cooktop.
- Press the SURFACE LIGHT pad to change from bright to night to off.
Vent Fan
- The vent fan removes steam and other vapors from surface cooking.
- Press the VENT FAN pad to change from high to medium to low to off.
- The vent fan may come on automatically if the oven gets too hot, ven if the oven isnit running. The screen will display: "Normal Operation. Fan is on due to high heat. Fan will shut off automatically."
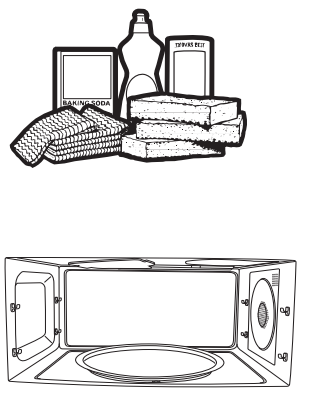
How to clean the inside of the oven
- Be certain the oven control is turned off and the oven is warm or cool to the touch before cleaning any part of this oven.
- Clean the inside of the oven often for proper heating performance.
- Some spatters can be removed with a paper towel. others may require warm soapy cloth. Remove greasy spatters with a sudsy cloth. then rinse with a damp cloth.
- If the dirt and spatter do not come off easily with a warm sudsy cloth. place a medium sized bow! full of water in the unit on the metal tray and press the SPEEDCOOK pad. Select MY RECIPE and set for 10 minutes at U=3. L=3. M=7. This should loosen the dirt in the oven so that it can be removed with a warm sudsy cloth.
- If you notice yellowing on the metal inside the oven that cannot be removed with a warm sudsy cloth. use a stainless steel cleaner that removes heat discoloration and/or tarnishing. You can then clean the inside of the oven as you normally do.
- Do not use abrasive cleaners or sharp utensils on oven walls.
- Never use a commercial oven cleaner on any part of your oven.
- Do not clean the inside of the oven with metal scouring pads. Pieces can break off the pad inside the oven. causing electrical shock as well as damaging the inside surface finish of the oven.
Removable turntable
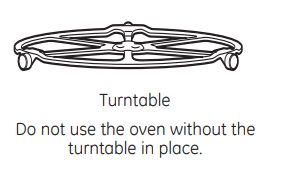
- The area underneath the turntable should be cleaned frequently to avoid odors and smoking during a cooking cycle.
- The turntable can be broken if dropped. Wash carefully in warm. sudsy water. Dry completely and replace.
- To replace the turntable. place its center over the spindle in the center of the oven and turn it until it seats into place.
Cooking trays and wire oven rack

Mica sheet

- Do not remove the mica sheet.
- To clean the mica sheet: Allow the oven to cool completely. Wipe clean with a warm soapy cloth.
How to clean the outside of the oven - We recommend against using cleaners with ammonia or alcohol. as they can damage the appearance of the oven. If you choose to use a common household cleaner. first apply the cleaner directly to a clean cloth. then wipe the soiled area
- Case: Clean the outside of the microwave with a sudsy cloth. Rinse and then dry. Wipe the window clean with a damp cloth.
- Control Panel: Wipe with a damp cloth. Dry thoroughly. Do not use cleaning sprays. large amounts of soap and water. abrasives or sharp objects on the panel - they can damage it. Some paper towels can also scratch the control panel.
- Stainless Steel Surfaces {on some models): The stainless steel panel can be cleaned with Stainless Steel Magic or a similar product using a clean. soft cloth. Apply stainless cleaner carefully. avoiding the surrounding plastic or glass parts. Do not use appliance wax. polish. bleach or products containing chlorine on stainless steel.
- Plastic Color Panels {on some models): Use a clean. soft. lightly dampened cloth. then dry thoroughly.
- Door Seal: It's important to keep the area clean where the door seals against the oven. Use only mild. non-abrasive detergents applied with a clean sponge or soft cloth. Rinse well
- Bottom: Clean off the grease and dust on the bottom often. Use a solution of warm water and detergent.
Replacing the surface light

- To replace the surface light. first disconnect the power at the main fuse or circuit breaker panel or unplug the oven.
- Remove the screw from the side of the light compartment cover and lower the cover untiit stops.
- Be sure the bulb to be replaced is cool before removing. Gently pull the bulb from the receptacle. Replace with a 130 volt 50-watt halogen bulb. Order WB08X10051 from your GE supplier.
- Roise the light cover and replace the screw. Connect electrical power to the oven
Removing and cleaning the filters
- The metal fiters trop grease released by foods on the cooktop. They also prevent flames from foods on the cooktop from damaging the inside of the oven.
- For this reason. the filters must always be in place when the hood is used. The vent filters should be cleaned once a month. or as needed.
- To remove. slide them to the rear using the tabs. Pull down and out.
- To clean the vent fiters. soak them and then swish around in hot water and detergent. Don't use ammonia or ammonia products because they will darken the metal. Light brushing can be used to remove embedded dirt.
- Rinse. shake and let dry before replacing
- To replace. side the fiters into the frame slots on the back of each opening. Press up and to the front to lock into place.
Replacing the oven cavity lamp
- Disconnect power at the main fuse or circuit breaker panel
- Remove the top grill by removing the two screws that hold it in place.
- Remove charcoal filter if present. Slide the filter toward the left ond pull toward the front to remove. NOTE: Charcoal fter is an optional kit. you may not have one.
- Remove the screw holding the lamp shield in place.
- Pull the lamp shield out Pull the light bulb out and replace with the 130V, 20-watt halogen bulb.
- Return the lamp and lamp shield to original position and replace screw and charcoal filter.
- Replace the grill and 2 screws. Reconnect power to the oven
Charcoal filter
- If the model is not vented to the outside. the air will be recirculated through a disposable charcoal filter that helps remove smoke and odors.
- The charcoal filter cannot be cleaned. It must be replaced.
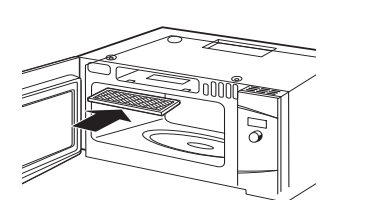
To install the charcoal filter - To install a new filter:
- Remove plastic and other outer wrapping from the new filter.
- Remove the top grill by removing the two screws that hold it in place
- Insert the filter into the top opening of the oven as shown.
- It will rest at an angle on two back support tabs and in front by two tabs.
- Replace the grill and two screws. To remove the filter. repeat step 2 above. remove the filter and repeat step 5.
Troubleshooting
LIGHTS
- Light during a speedcook cycle dims and cycles on and off. even at full power levels.
- This is normal. Power level has been automatically reduced because the oven is hot.
- This is normal. The oven senses the heat level and adjusts automatically.
- Light visible around the door and outer case while speedcooking.
- This is normal.
- When the oven is on. light may be visible around the door and outer case.
FAN
- Fan continues to run cooking stops.
- The oven is cooling.
- The fan will automatically shut off after when the internal parts of the oven have cooled.
- Oven vent emits warn air while oven is on.
- Vent fan comes on automatically when oven not in use.
- This is normal.
- If the cooktop or oven gets hot enough the vent fan comes on.
- Fan comes on automatically when using the microwave.
- This is normal.
- If the microwave is used after speedcook and the oven senses that it is too hot. the vent fan comes on to cool the oven.
- The oven makes unusual sounds while cooking.
- Clicks and fans blowing are normal. The relay board is turning the components on and off.
- Fan sound changes while cooking.
- This is normal.
- Fan may turn on or off during cooking to maintain cooking temperature.
COOKING
- Smoke comes out of oven when the door is opened.
- Food is high in fat content. Aerosol spray used on the pans.
- Smoke is normal when cooking high-the fat foods. Use vegetable oil or olive oil on the meat itself instead of coating the entire pan.
- Food is not fully cooked or browned at the end of a cooking program.
- Programmed times. may not match the size or amount of food you are cooking.
- Increase or decrease time for doneness or adjust the upper or lower lamps for browning.
- Oven has turned off, in Warm, Proof, or Convection Bake
DISPLAY
- The display is blank.
- The display has been turned off.
- Check the SETTINGS menu for clock display settings. Turn the display on.
- “Control Panel LOCKED" appears display.
- The control has been locked.
- Press and hold CLEAR/OFF for about 3 seconds to unlock the control.
- Control display is lighted yet oven will not start.
-
Clock is not set.
-
Door not securely closed.
-
START/PAUSE not pressed after entering cooking selection.
-
Delay Start was accidentally set.
-
Oven is in DEMO Mode
-
CLEAR/OFF was pressed sceidentaly.
OTHER PROBLEMS
- The door and inside of the oven feels hot.
- The oven es intense heat in a small space.
- This is normal
- Use oven mitts to remove food when when ready.
- Floor of the oven is warm. even when the oven has not been used.
- The cooktop light is located below the oven floor. When the light son. the heat it produces may make the oven floor get warm.
- Oven will not start.
- Glass microwave tray does not lock into center hub.
- Align the protrusions on the bottom of the glass microwave tray with the indentation in the turntable. This fit is not tight, some movement is normal.