1
ACCESSORIES
COOKING
GOR474, GOR476, GGR475, GXR650
USER MANUAL
Gas Built-in Cooking Appliances

2 3
SAFETYCONTENTS
Please read the user manual carefully and store in a handy
place for later reference.
The symbols you will see in this booklet have these meanings:
WARNING
This symbol indicates information concerning your personal safety
CAUTION
This symbol indicates information on how to avoid damaging the appliance
TIPS & INFORMA
TION
This symbol indicates tips and information about use of the appliance
ENVIRONMENTAL TIPS
This symbol indicates tips and information about economical and
ecological use of the appliance
Meanings of symbols used in this manual are shown below:
This symbol indicates never to do this
This symbol indicates always do this
WARNING
Read the following carefully to avoid an accident.
GENERAL wARNINGS
•Thisapplianceisnotintendedforusebypersons
(including children) with reduced physical, sensory
or mental capabilities, or lack of experience and
knowledge, unless they have been given supervision or
instruction concerning use of the appliance by a person
responsible for their safety.
•Childrenshouldbesupervisedtoensurethattheydonot
play with the appliance.
•Duringuse,thisappliancebecomeshot.Careshould
be taken to avoid touching hot surfaces, e.g. oven door,
heating elements or internal surfaces of the oven.
•Thisappliancemustnotbeusedasaspaceheater.
•Inordertoavoidare,theappliancemustbekeptclean
and vents kept unobstructed.
•Donotsprayaerosolsinthevicinityoftheappliance
during operation.
•Donotstoreammablematerialsinorunderthe
appliance, e.g. Aerosols.
•Accessiblepartswillbecomehotwheninuse.Toavoid
burns and scalds children should be kept away.
•Donotlinethebottomoftheovenorgrillwithfoilor
cookware, it will damage the enamel.
•Alwaysusegloveswhenhandlinghotitemsinsidegrill
or oven.
•Donotmodifythisappliance.
GRILL
•Thegrilldoormustbeleftfullyopenwhilstgrilling
in a separate grill wall oven (GXR650 model).
•Thegrilldrawermustbeleftapproximatelytwongerwidths
ajar whilst grilling in a separate grill underbench oven
(GGR475 model).
•Alwaysturnthegrilloffimmediatelyafteruseasfatleft
theremaycatchre.
•Donotcovertheinsertwithfoil,asfatlefttheremay
catchre.
•Alwayskeepthegrilldishcleanasanyfatleftmaycatchre.
•Donotleavethegrillonunattended.
•Toavoidare,ensurethatgrilltraysandttingsare
always inserted into the appliance in accordance with
the instructions.
•Donotplacethickportionsoffoodunderthegrill.
Foods may curl, catch and ignite.
•Accessiblepartsmaybecomehotwhengrillisinuse.
Childrenshouldbekeptaway.
OvEN
•Duringusetheappliancebecomeshot.Careshouldbe
taken to avoid touching the hot surfaces inside the oven.
•Switchtheapplianceoffbeforeremovingtheovenlight
glass for globe replacement.
•Toavoidanaccident,ensurethatovenshelvesand
ttingsarealwaysinsertedintotheappliancein
accordance with the instructions.
•Donotusethedoorasashelf.
•Donotpushdownontheopenovendoor.
INSTALLATION, CLEANING ANd SERvICING
•Anauthorisedpersonmustinstallthisappliance.
(CerticateofCompliancetoberetained)
•Beforeusingtheappliance,ensurethatallpacking
materials are removed from the appliance.
•Inordertoavoidanypotentialhazard,theenclosed
installation instructions must be followed.
•Ensurethatallspeciedvents,openingsandairspaces
are not blocked.
•Wheretheapplianceisbuiltintoacabinet,thecabinet
materialmustbecapableofwithstanding70°C.
•Onlyauthorisedpersonnelshouldcarryoutservicing.
(CerticateofCompliancetoberetained)
•Alwaysensuretheapplianceisswitchedoffbefore
cleaning or replacing parts.
•Donotusesteamcleaners,asthismaycausemoisture
build up.
•Alwayscleantheapplianceimmediatelyafterany
food spillage.
•Tomaintainsafeoperation,itisrecommendedthatthe
productbeinspectedeveryveyearsbyanauthorised
service person.
•Thisappliancemustbeearthed.
IMpORTANT SAfETy INSTRUCTIONS
Importantsafetyinstructions . . . . . . . . . . . . . 3
Descriptionofyourappliance . . . . . . . . . . . . 4
GOR474
GOR476
GXR650
GGR475
Beforeoperatingyourapplianceforthersttime . . . 5
Settingthetime . . . . . . . . . . . . . . . . . . 5
Installingyourovenaccessories . . . . . . . . . . . 5
Using your oven . . . . . . . . . . . . . . . . . . 7
Cooling/ventingfan . . . . . . . . . . . . . . . . 8
Operatingsequence . . . . . . . . . . . . . . . . 8
Pre-heating your appliance . . . . . . . . . . . . . 8
Cookingwithyourtimer . . . . . . . . . . . . . . 9
2-Hour “auto off” timer . . . . . . . . . . . . . . . 9
Electronicclock . . . . . . . . . . . . . . . . . . 9
Cookingguide. . . . . . . . . . . . . . . . . . . 10
Ovenshelflocation . . . . . . . . . . . . . . . . 10
Choosingthebestovensettings . . . . . . . . . . . 11
Roasting meat . . . . . . . . . . . . . . . . . . . 12
Roastingpoultryandsh . . . . . . . . . . . . . . 12
Grilling guide . . . . . . . . . . . . . . . . . . . 12
Grilling hints . . . . . . . . . . . . . . . . . . . 12
Guide to better grilling . . . . . . . . . . . . . . .13
Fan grill . . . . . . . . . . . . . . . . . . . . . 13
Dealingwithcookingproblems . . . . . . . . . . . 14
Cleaningyourappliance . . . . . . . . . . . . . .15
Enamel . . . . . . . . . . . . . . . . . . . . . .15
Stainlesssteel . . . . . . . . . . . . . . . . . . . 15
Glass . . . . . . . . . . . . . . . . . . . . . .15
Oven . . . . . . . . . . . . . . . . . . . . . .15
Grill . . . . . . . . . . . . . . . . . . . . . .15
Cleaningyourovenaccessories . . . . . . . . . . . 15
Cleaningyourdoorglasspanels . . . . . . . . . . 17
Removing & replacing oven light . . . . . . . . . . . 20
Getting to know your oven . . . . . . . . . . . . . 20
Electronicburnercontrol . . . . . . . . . . . . . . 21
Solvingproblems . . . . . . . . . . . . . . . . . 22
Installingyourappliance. . . . . . . . . . . . . . . 23
Cabinetconstruction . . . . . . . . . . . . . . . . 23
Gas installation information . . . . . . . . . . . . .24
Gas connection . . . . . . . . . . . . . . . . . . 24
AppliancesforoperationonN.G.&S.N.G. . . . . . 24
Operatingpressures . . . . . . . . . . . . . . . .25
Testing the operation of the appliance . . . . . . . . 25
Underbench ovens . . . . . . . . . . . . . . . . . 26
Separategrillunderbench . . . . . . . . . . . . . . 27
Separategrillwalloven . . . . . . . . . . . . . . .28
Notes . . . . . . . . . . . . . . . . . . . . . .29
Warranty . . . . . . . . . . . . . . . . . . . . .31
Congratulationsandthankyouforchoosingouroven.
Wearesureyouwillnditapleasuretouse.Before
you use the oven, we recommend that you read through
the relevant sections of this manual, which provides a
description of your appliance and its functions.
To avoid the risks that are always present when you use
an appliance, it is important that the appliance is installed
correctly and that you read the safety instructions carefully
toavoidmisuseandhazards.
Werecommendthatyoukeepthisinstructionbooklet
for future reference and pass it on to any future owners.
After unpacking the appliance, please check it is not damaged.
Ifindoubt,donotusetheappliancebutcontactyourlocal
customer care centre.
Thisappliancecomplieswithrequirementsof
AustralianStandardAS/NZS60335.2.6
CONDITIONSOfUSE
This appliance is intended to be used in household and
similar applications such as:
•Staffkitchenareasinshops,ofcesandother
working environments
•farmhouses
•Byclientsinhotels,motelsandotherresidential
type environments
•Bedandbreakfasttypeenvironments.
Record model and serial number here:
Model:
SerialNo:
TIPS & INFORMATION
IMpORTANT – CHECK fOR ANy dAMAGES OR MARKS.
Ifyoundtheovenisdamagedormarked,youmustreport
itwithin7daysifyouwishtoclaimfordamage/marks
under the manufacturers warranty. This does not affect your
statutory rights.
ENVIRONMENTAL TIPS
INfORMATION ON dISpOSAL fOR USERS
•Mostofthepackingmaterialsarerecyclable.Pleasedispose
of those materials through your local recycling depot or
by placing them in appropriate collection containers.
•Ifyouwishtodiscardthisproduct,pleasecontactyour
local authorities and ask for the correct method of disposal.
CONTENTSCONGRATULATIONS
4 5
OPERATIONFEATURES
SETTING THE TIME
Ifyouhavepurchasedamodelfittedwithanelectronic
clock, you MUST set the time of day before you can
operate your appliance.
ELECTRONIC CLOCK
•Aftertheappliancehasbeenelectricallyconnected
“12.00” will be displayed and the “clock” indicator
will flash.
•Tosetthetimeofday,pressthe–or+symbols.5
seconds after the last change, the “clock” indicator will
disappear, confirming the time has been set.
Note: The clock has a 24-hour display.
•Pleaseremoveallinternalboxesandbagsfromtheoven
before operation.
•Pleasewipeouttheoveninteriorpriortooperationwith
warm soapy water and polish dry with a soft clean
cloth.Donotclosetheovendooruntiltheovenis
completely dry.
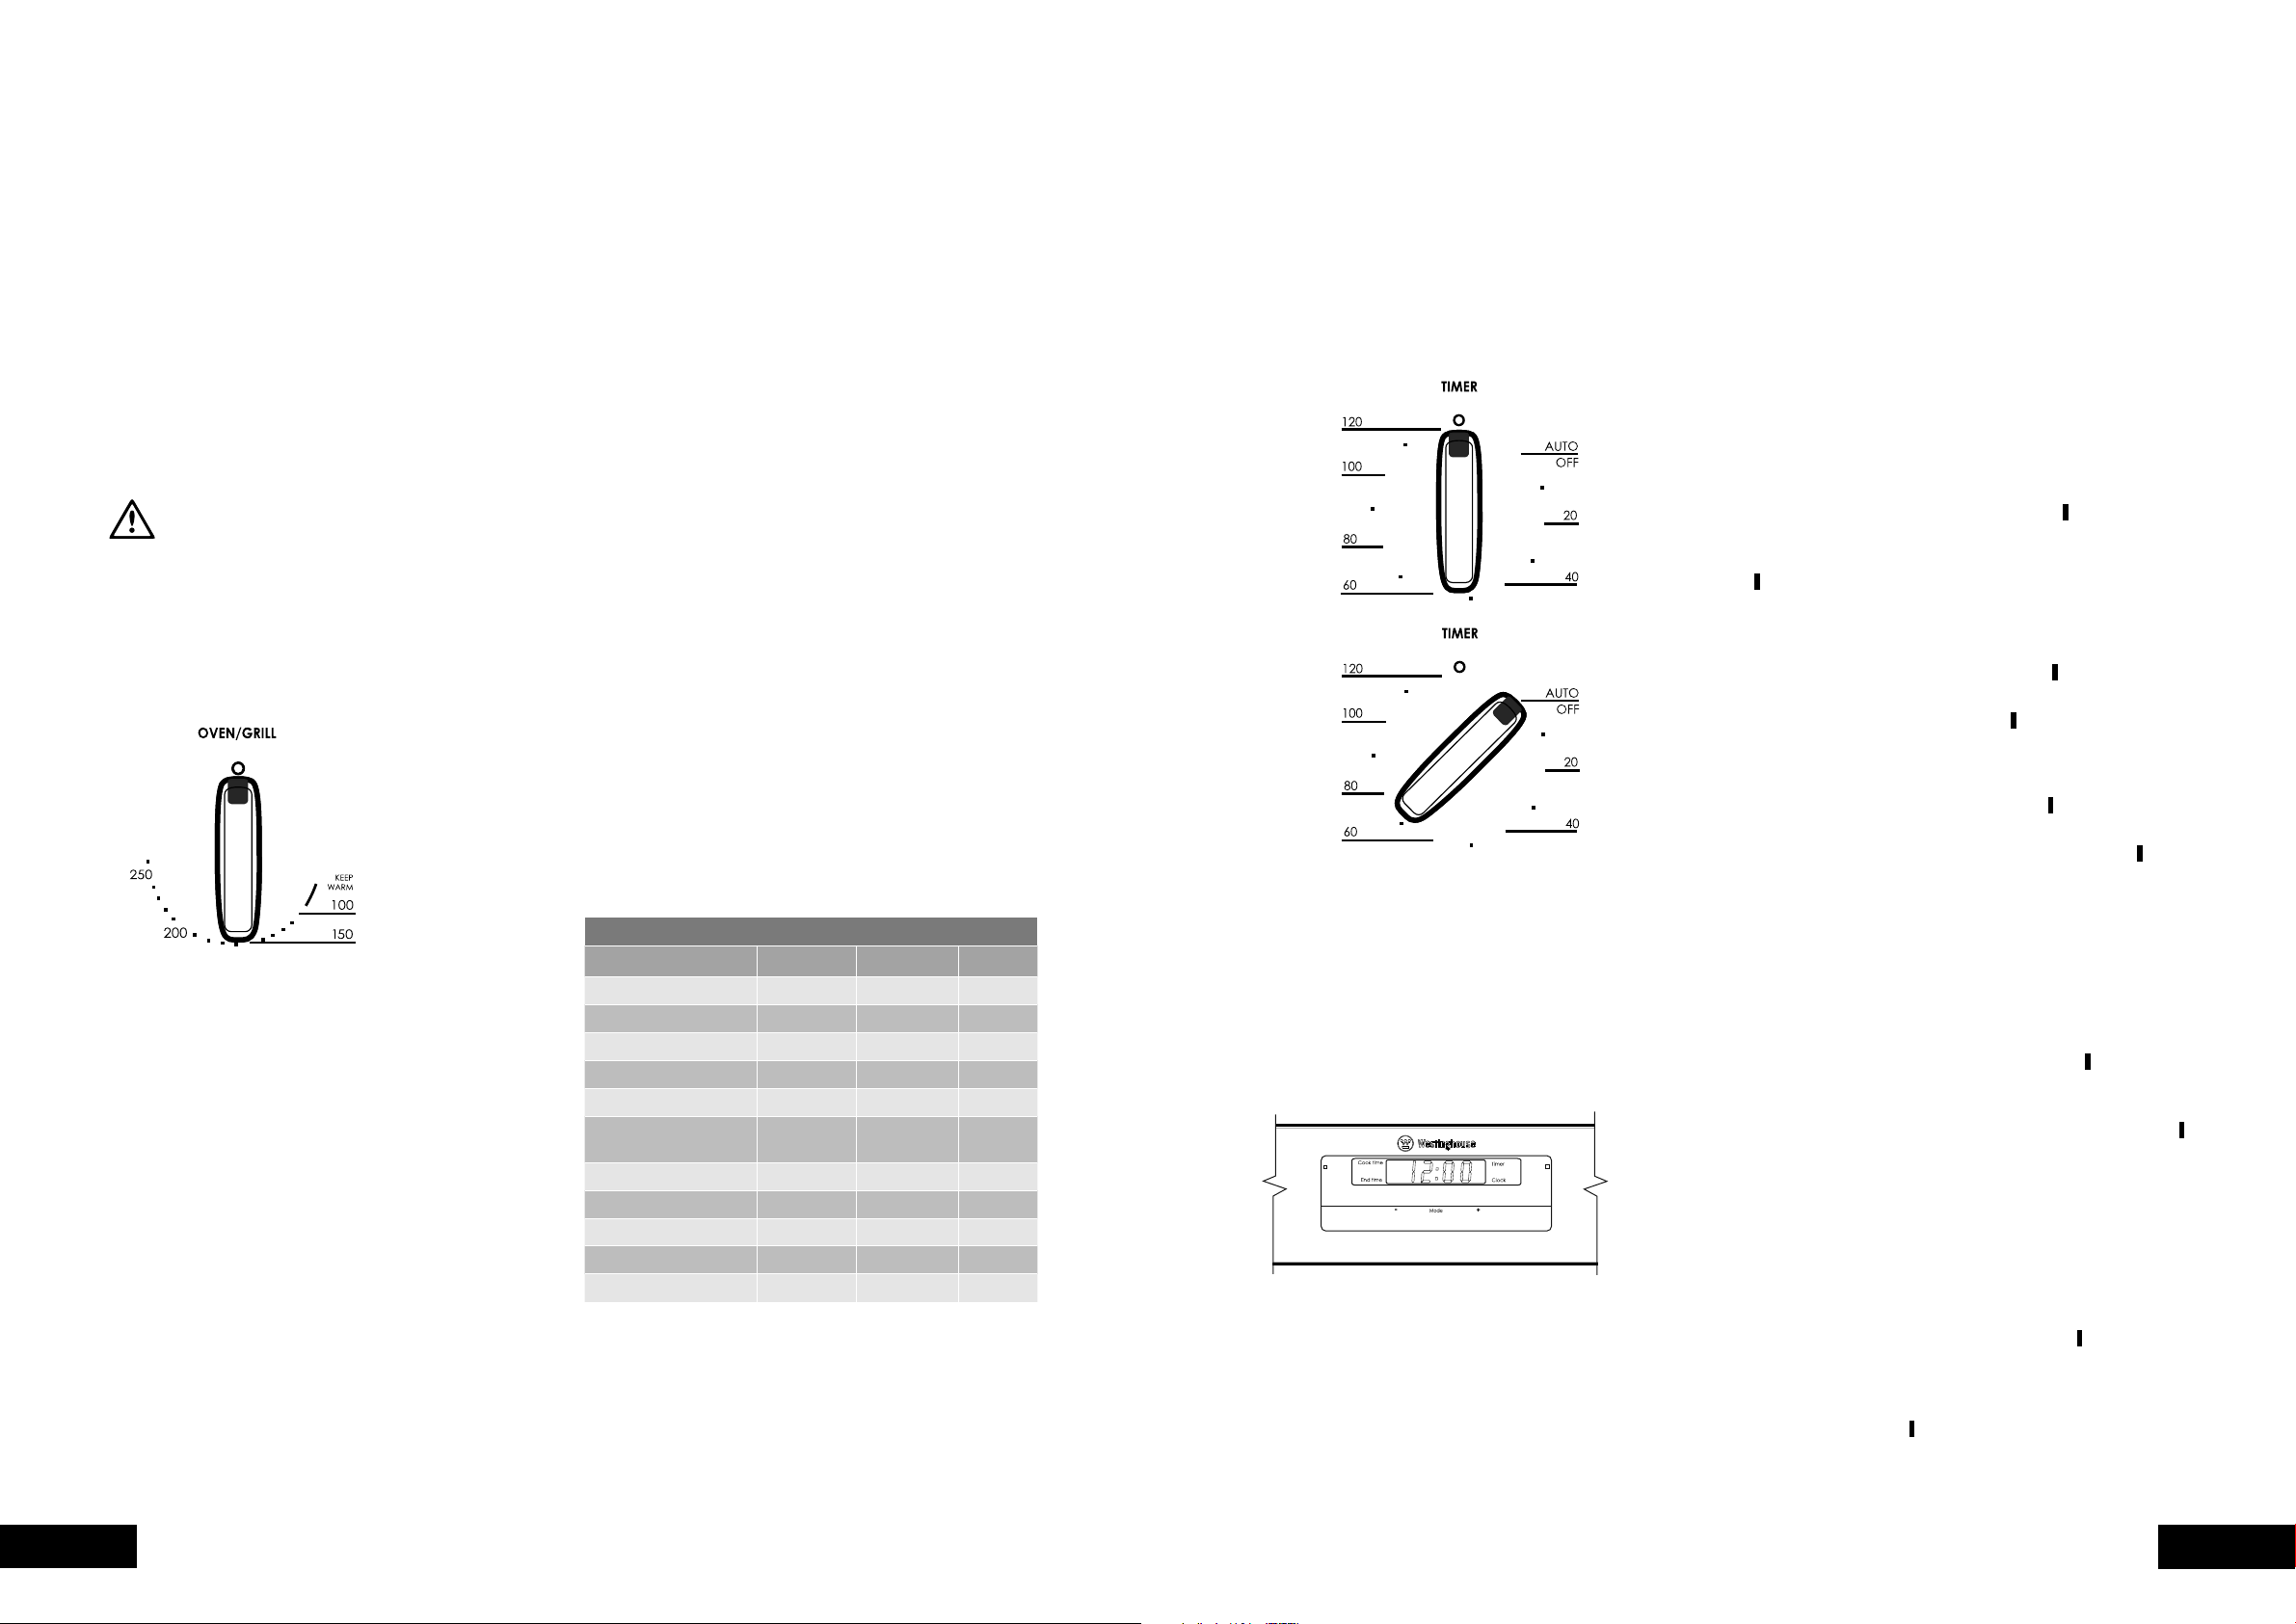
•Ifyourapplianceisfittedwitha2-hour“AutoOff”timer,
makesureitissetto“Off”markerformanualoperation.
Seeimage.
pREpARING yOUR AppLIANCE fOR THE fIRST TIME
Installing your oven accessories
1.Sideracks
The side racks that come with your oven can be attached to
either side of your oven.
• Insertthetwinpeggedsideintotherearaccessholes
provided.Seediagram.
• Thenlocatethefrontpegintothefrontaccessholeand
push in firmly.
BEfORE OpERATING yOUR AppLIANCE fOR THE
fIRST TIME
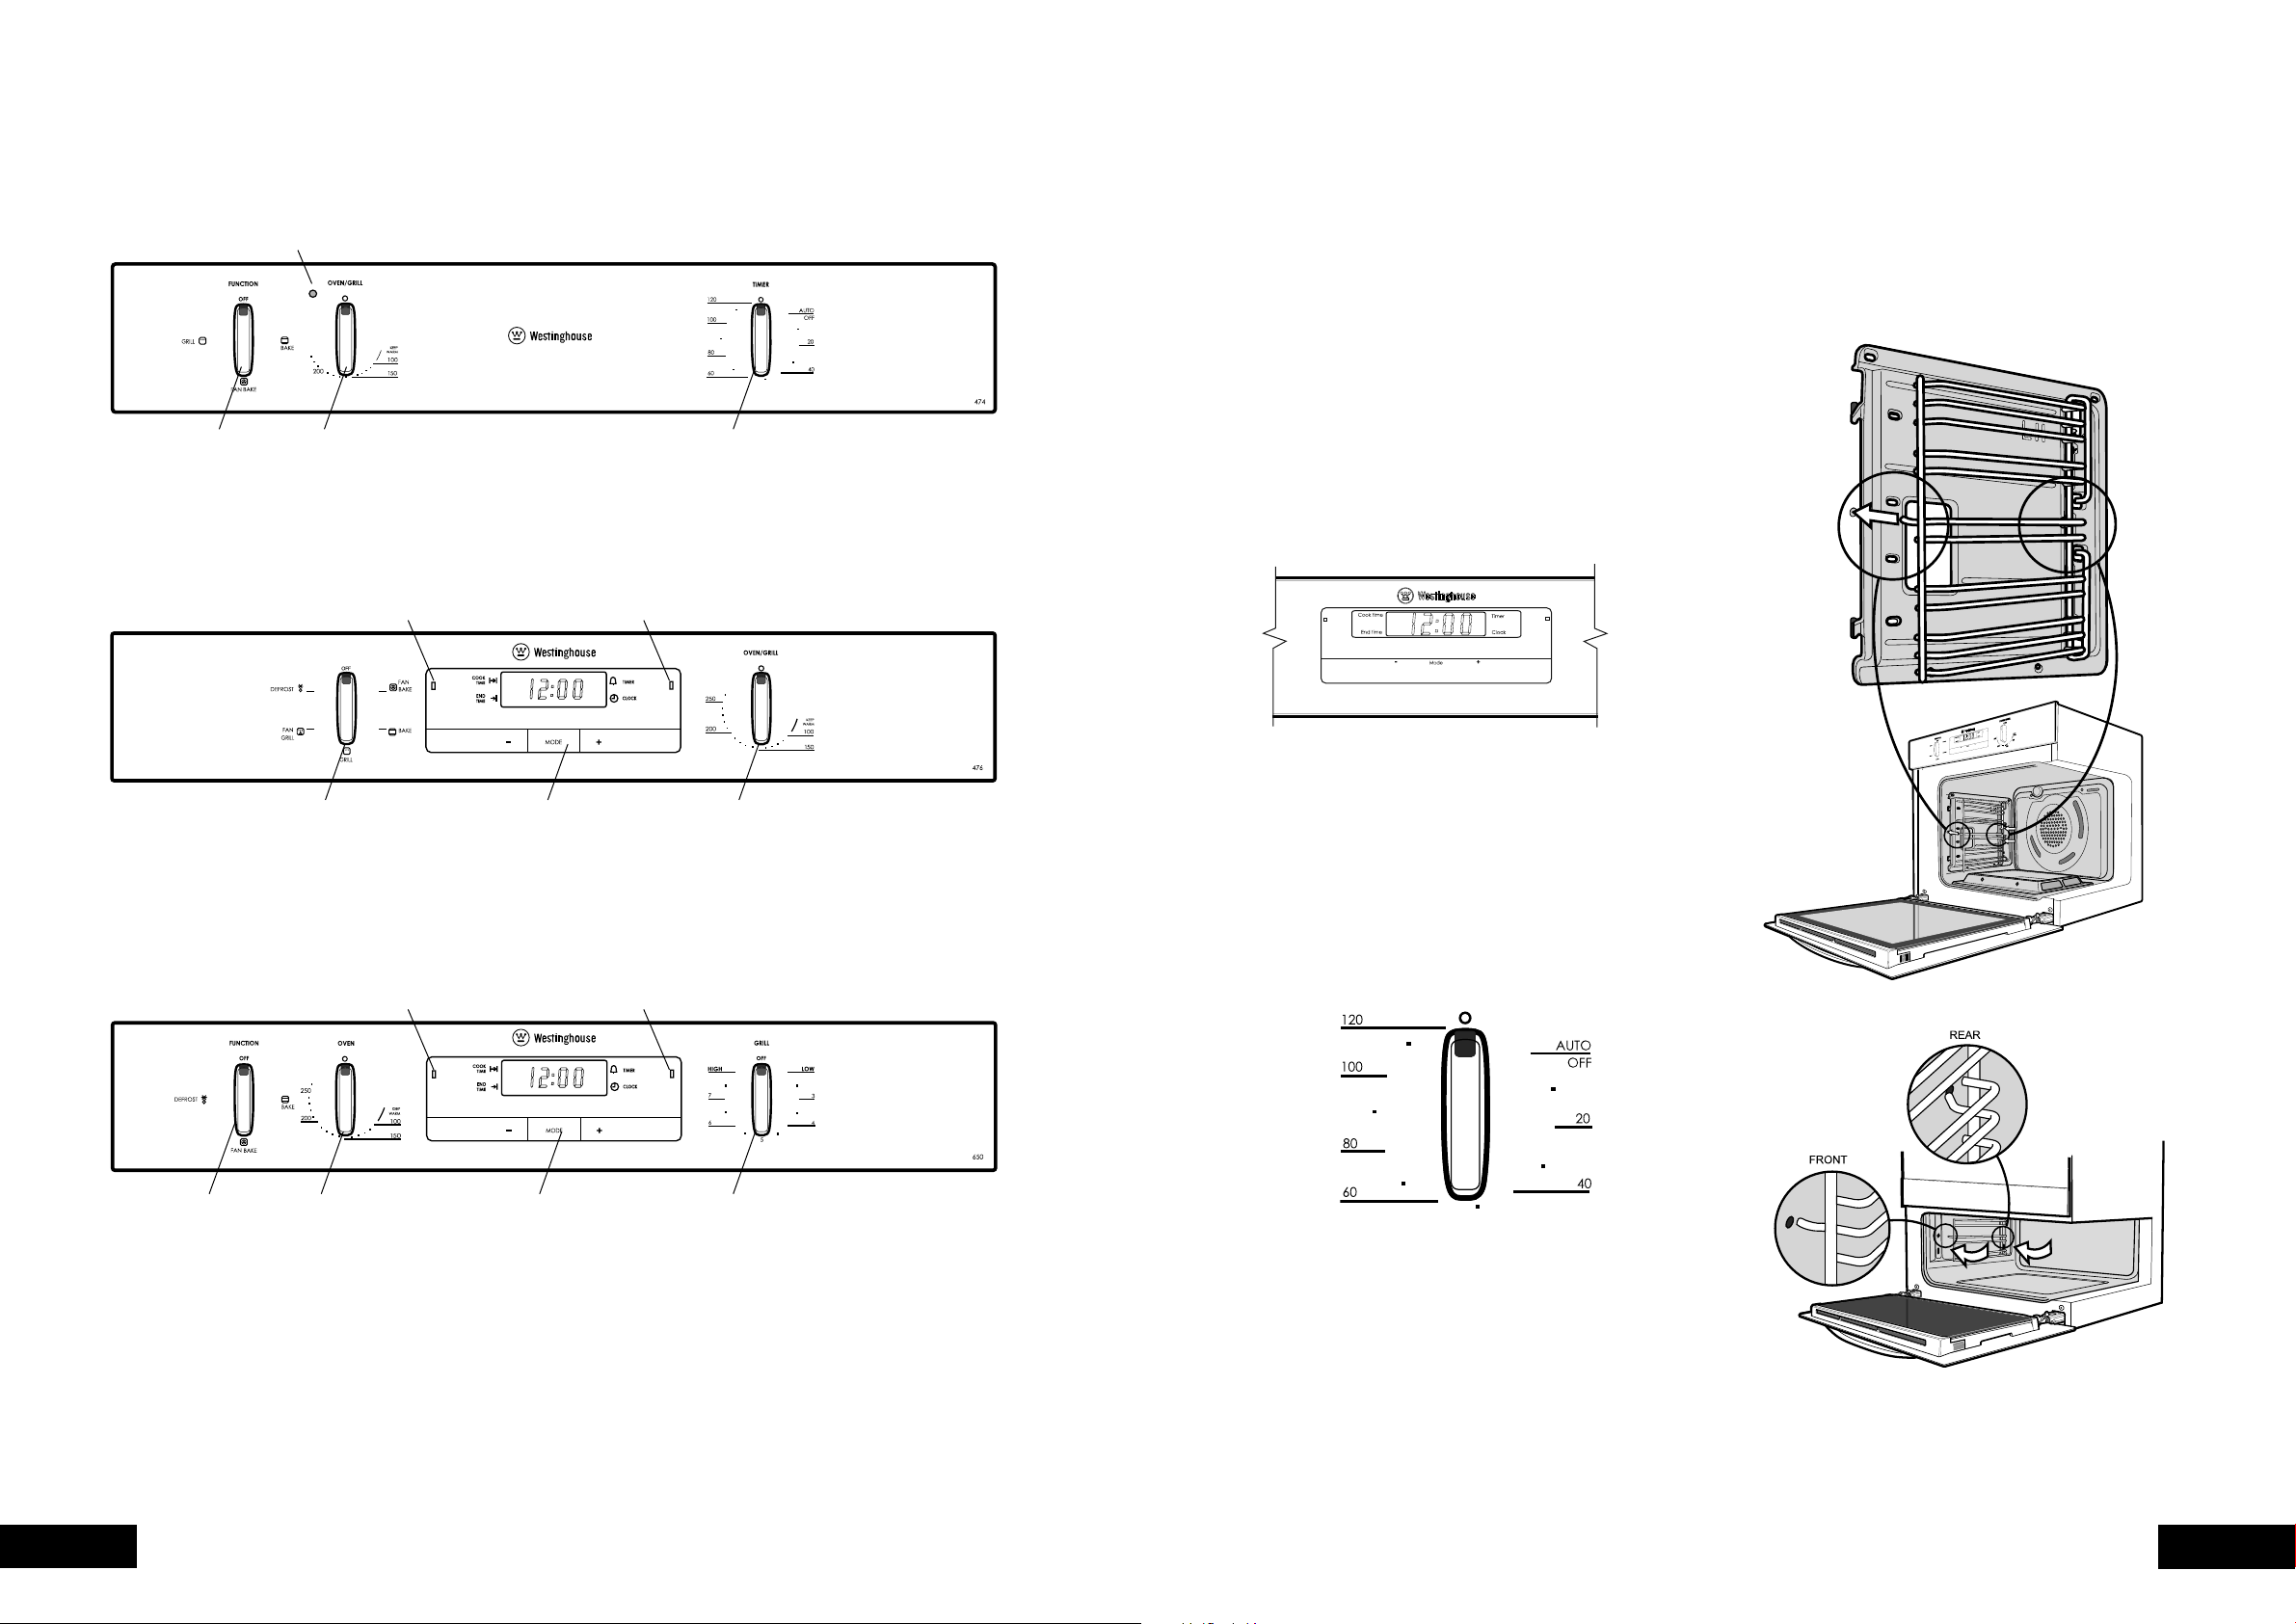
GOR474
Oven
indicator light
Function
selector
Oven/Grill
temperature
selector
2 hour
‘Auto-off’ timer
GOR476
Function
selector
Electronic
clock
Oven/Grill
temperature
selector
GXR650 & GGR475
Function
selector
Electronic
clock
Grill
temperature
selector
Oven
temperature
selector
Function
indicator light
Oven
indicator light
Oven
indicator light
Grill
indicator light
4 5
OPERATIONFEATURES
SETTING THE TIME
Ifyouhavepurchasedamodelfittedwithanelectronic
clock, you MUST set the time of day before you can
operate your appliance.
ELECTRONIC CLOCK
•Aftertheappliancehasbeenelectricallyconnected
“12.00” will be displayed and the “clock” indicator
will flash.
•Tosetthetimeofday,pressthe–or+symbols.5
seconds after the last change, the “clock” indicator will
disappear, confirming the time has been set.
Note: The clock has a 24-hour display.
•Pleaseremoveallinternalboxesandbagsfromtheoven
before operation.
•Pleasewipeouttheoveninteriorpriortooperationwith
warm soapy water and polish dry with a soft clean
cloth.Donotclosetheovendooruntiltheovenis
completely dry.
•Ifyourapplianceisfittedwitha2-hour“AutoOff”timer,
makesureitissetto“Off”markerformanualoperation.
Seeimage.
pREpARING yOUR AppLIANCE fOR THE fIRST TIME
Installing your oven accessories
1.Sideracks
The side racks that come with your oven can be attached to
either side of your oven.
• Insertthetwinpeggedsideintotherearaccessholes
provided.Seediagram.
• Thenlocatethefrontpegintothefrontaccessholeand
push in firmly.
BEfORE OpERATING yOUR AppLIANCE fOR THE
fIRST TIME
GOR474
Oven
indicator light
Function
selector
Oven/Grill
temperature
selector
2 hour
‘Auto-off’ timer
GOR476
Function
selector
Electronic
clock
Oven/Grill
temperature
selector
GXR650 & GGR475
Function
selector
Electronic
clock
Grill
temperature
selector
Oven
temperature
selector
Function
indicator light
Oven
indicator light
Oven
indicator light
Grill
indicator light
6 7
OPERATIONOPERATION
2.Shelvesandtrays
The shelves are designed so that they have maximum travel
but cannot be accidentally pulled right out. The trays are
designed the same way and fit straight into the side racks.
• Locatetherearedgeoftheshelf/trayinbetween2guide
railsofthesiderack-seediagram.Ensurethesamerail
positions on both sides of the oven are being engaged.
• Withthefrontedgeraised,begintoslidetheshelfinto
the oven.
BEfORE OpERATING yOUR AppLIANCE fOR THE
fIRST TIME
• Oncethedetentshavepassedthefrontedgeoftheside
rack, the shelf can be pushed completely in.
• Whenfullyinsertedtheshelf/trayshouldnotinterferewith
the closed oven door.
• Toinsertthegrilltrayinaseparategrillunderbench
(GGR475 model), fully open the grill drawer and position
the tray so that the slots on the outer edges fit on the tabs
on the slides.
USING yOUR OvEN
UNdERSTANdING yOUR OvEN fUNCTIONS
Your oven will have a selection of the following functions.
Referto“Descriptionofyourappliance”(page4)to
confirm what functions are available to you.
OvEN
Refer to cooking guide for more information.
Fan Bake
Heat comes from the gas “base heat” burner which is then
circulated by the fan. This fan circulates the hot air around
the oven cavity so that you can put your food in different
places in the oven and still cook them at the same time.
You can use the “fan bake” function for multi-shelf cooking,
reheating cooked foods, pastries and complete oven meals.
Itwillcookatalowertemperatureandbefasterthanbaking.
Please note that some variation in browning is normal.
Bake
Heat comes from the gas “base heat” burner below the
food. The bottom burner is below the floor of the oven
which is controlled by the thermostat and will turn on and
off to maintain the set temperature.
You can use the “bake” function for single trays of biscuits,
scones, muffins, cakes, slices, casseroles, baked puddings,
roasts and delicate egg dishes.
–forbestresultsusesilverorshinytrays.
Defrost
The “defrost” function uses low temperature air which is
circulated by the fan. You can defrost (thaw) your food before
you cook it. Also you may use your “defrost” to raise your
yeast dough or to dry fruit, vegetables or herbs.
GRILL
Refer to grilling guide for more information.
Grill (grill in oven GoR474, GoR476
models only)
The “grill” directs radiant heat from the powerful upper
element onto the food. You can use the “grill” function for
tender cuts of meat, steak, chops, sausages, fish, cheese
toastiesandotherquickcookingfoods.Grillwiththeoven
door closed. Preheat your grill for 3 minutes to get the best
results. This will help seal in the natural juices of steak, chops
etc. for a better flavour. You can slide your grill dish into
either of the 2 spaces within the upper pairs of support rails.
Fan Grill (grill in oven GoR474, GoR476
models only)
“Fan grill” offers you the benefits of both “bake” and
traditional “grill” functions. The grill element turns on and
off to maintain the set temperature while the fan circulates
the heated air. The oven door remains closed for fan
grill. You can use “fan grill” for large cuts of meat in the
oven which gives you a result that is similar to “rotisserie”
cooked meat. Put your food on a shelf in the second
lowest shelf position. Put the grill dish on the lowest shelf
positiontocatchanyspills.Whenusing“fangrill”itisnot
necessary to turn the food over during the cooking cycle.
Settemperatureto180°C.
Separate Grill (GGR475, GXR650 models only)
The “grill” directs radiant heat from the powerful upper
element onto the food. You can use the “grill” function for
tender cuts of meat, steak, chops, sausages, fish, cheese
toastiesandotherquickcookingfoods..Preheatyourgrill
for 3 minutes to get the best results. This will help seal in
the natural juices of steak, chops etc. for a better flavour.
For models with a drop down grill door (GXR650),
the door must be left open while grilling. For models with
a slide out grill drawer (GGR475), the grill drawer should
be left open approx. two finger widths ajar.
Separategrillunderbench
(GGR475)

8 9
OPERATIONOPERATION
Cooling/Venting fan
Your built-in appliance is fitted with a cooling fan.
This prevents your kitchen cabinet from overheating and
reducesthecondensationinsidetheoven.Itwilloperate
whenever you are using your oven or grill and will blow
warm air across the top of the oven or grill door.
NOTE: If the oven is still hot from cooking, the cooling fan
will keep running to cool the oven down and will switch
off automatically when cool.
OpERATING SEqUENCE
WARNING
If you have purchased a model fitted with an electronic clock you must
set the time of day before you can operate your appliance.
Select the cooking function
Turn the “function selector” in any direction to select the
desired function.
Select the temperature
To set the temperature, turn the temperature selector
in a clockwise direction to the desired setting.
The “oven indicator light” will come on and the oven
burner will ignite. A thermostat controls the temperature
intheoven.Whenthesettemperatureisreached,the
GASburnerflamegoesoutandtheindicatorlightgoes
off.Whentheoventemperaturefallsbelowtheset
temperature the flame automatically re-ignites and the
“oven indicator light” comes on again.
Oncethefoodiscooked,turnthe“oventemperatureselector”
backinananti-clockwisedirection.Donotforceitright
round in a clockwise direction as this will result in damage
totheoven.Turnthe“functionselector”backto“Off”.
Note: The cooking function must be selected before the
ovenwilloperate.Oncethefunctionhasbeenselected,
use the temperature selector to set the cooking temperature.
Pre-heating your appliance
For best results when baking you must preheat your oven
for 30 minutes. Preheat grill for 3 minutes to obtain best
results. Pre-heating your appliance allows it to reach the
requiredtemperaturequicklyandefficiently.
Whenbakingbreadorcakes,loadtheovenasquicklyas
possible after pre-heating, only leaving the oven door open
for the shortest time. This will minimise loss of heat from the
oven and ensure the best results.
With “bake”
1.Itisrecommendedyoupreheatyourappliancewhen
cooking or baking.
2.Setthedesiredpreheattemperature,byrotatingyour
oven temperature selector.
Whentheindicatorlightgoesouttheovenhasreached
the desired preset temperature, place your food into the
oven, close the door and set the timer if you desire.
With “grill”
Preheat the grill for at least 3 minutes to obtain best results.
This will help to seal the natural juices of steak, chops and
other meats for a better flavour.
Setting temperatures
The following table displays the temperature settings for
recipes which do not show actual temperatures.
CONvERSION TABLE
vERBAL CELSIUS
0
C fAHRENHEIT
0
f GAS MARK
Drying 80 - 90 175 - 195 n/a
Veryslow/verylow 95 - 130 200 - 265 1/4-1/2
Slow/low 135 - 150 275 - 300 1 - 2
Moderatelyslow/warm 160 - 170 320 - 340 3
Moderate/medium 180 350 4
Moderate/
moderately hot
190 375 5
Moderately hot 200 390 6
Hot 220 430 7
Hot/veryhot 230 450 8
Very hot 250 480 9
Extremelyhot 260 500 10
• Endcookingtime–youcansetacookingfinishtime.A
timer will count down the preset cooking time, beep when
the finish time has been reached and turn the oven off.
• Delayedstartcookingtime–Youcancombinethe
cooking time and stop cooking time to switch the oven
on and off at a specific time during the day.
Note: Your touch control clock only operates with your
main oven.
Setting the time of day
You must set the time of day before you can operate your
appliance.Whenpowerissuppliedtoyouroven“12.00“
will be displayed and the “clock” indicator
will flash.
1.Tosetthetimeofdayinhoursandminutes,press–or
+.5secondsafterthelastchange,the“clock”indicator
will disappear, confirming the time has been set.
Note: The clock has a 24-hour display.
Change the time of day (Daylight saving)
1. Press “mode” until the “clock” indicator
begins flashing.
2.Press–or+tochangethetime.5secondsafterthe
last change, the “clock” indicator
will disappear,
confirming the time has been set.
Setting the timer
1. Press “mode“ until the “timer” indicator
begins flashing.
2.Setthecountdowntimeyouwantbyusing–and+.5
seconds after the last change the “timer” indicator
will
stop flashing, confirming the timer has been set.
3.Tostopthebeeper,press–,+or“mode”.
Setting the cooking duration
1.Checktheclockdisplaysthecorrecttimeofday.
2.Selectthedesiredovenfunctionandtemperature.
The oven indicator light will glow and the heating source
will come on.
3. Press “mode“ until the “cook time” indicator
begins
flashing.
4.Setthecookingdurationyouwantbyusing–or+.5
seconds after the last change, the “cook time” indicator
will stop flashing, and the time of day will be displayed.
Note:Donotforgettoaddpreheatingtimeifnecessary.
Setting the cooking end time
1.Checktheclockdisplaysthecorrecttimeofday.
2.Selectthedesiredovenfunctionandtemperature.
The oven indicator light will glow and the heating source
will come on.
3. Press “mode“ until the “end time” indicator
begins
flashing.
4.Enterthetimeofdayyouwanttofinishcookingby
pressing–or+.5secondsafterthelastchange,the
“end time” indicator
will stop flashing and the current
time of day will be displayed.
COOKING wITH yOUR TIMER
2-hour “Auto off” timer
The 2-hour timer features an automatic oven “cut off”.
This means that a cooking period of up to 120 minutes can
beset.Whenthetimerhascountedbackto“AutoOff”a
bell will sound and the oven will automatically switch off.
Onceautomaticbakingiscomplete,returntomanual
operationbysettingthetimertothe‘Off’mark.
Note: Itisnotrecommendedtousethistimerforshort
durations (e.g. boiling eggs).
OpERATING THE ELECTRONIC CLOCK
ELECTRONIC CLOCK TOUCH CONTROL
General features
Your touch control clock has the following features:
• Timer–allowsyoutosetacountdowntimethatwillbeep
when the set time has elapsed.
• Cookingduration–Youcansetacookingduration.
A timer will count down the preset cooking time, beep
when the time has elapsed and turn the oven off.
USING yOUR OvEN
10 11
OPERATIONOPERATION
• Selectthecorrectshelflocationforfoodbeingcooked.
•Makesuredisheswillfitintotheovenbeforeyouswitch
it on.
•Keepedgesofbakingdishesatleast40mmfromthe
side of the oven. This allows free circulation of heat and
ensures even cooking.
•Donotopentheovendoormorethannecessary.
•Donotplacefoodswithalotofliquidintotheovenwith
other foods. This will cause food to steam and not brown.
•Aftertheovenisturnedoffitretainstheheatforsome
time. Use this heat to finish custards or to dry bread.
•Donotusealotofcookingoilwhenroasting.Thiswill
prevent splattering oil on the sides of the oven and the
oven door. Polyunsaturated fats can leave residue which
is very difficult to remove.
•Whencookingthingswhichrequireahighheatfrom
below (e.g. tarts), place the cooking dish on a scone
tray in the desired shelf position.
•forspongesandcakesusealuminium,brightfinishedor
non-stick utensils.
oven shelf location
Your oven has five positions for shelves. These are
numbered from 1 (the lowest shelf position) to 5 (the highest
shelfposition).Seediagram.
To give maximum space above and below the shelves,
load them in this way:
• Whencookingwith1shelf,useposition3.
• Whencookingwith2shelves,useposition2and5.
Use the oven efficiently, by cooking many trays of food at
the same time. For example:
• Cook2traysofscones,smallcakesorsausagerolls.
• Cookaroastdinneratthesametimeasyoucookchips
or vegetables.
5 Position Rack
5
4
3
2
1
COOKING GUIdE
Setting the delayed start cooking time
1. Program the “cook time“ and “end time“ as described
intherelevantsections.Onceboththe“cooktime“and
“end time“ have been set, the “cook time“ and “end
time” indicators will stop flashing and the current time
of day will be displayed.
to check or cancel settings
1. To check your settings, press “mode” until the setting you
want is displayed. A red light will flash next to the mode
(cook time, end time etc) that is currently on display.
2. To cancel “delayed start” press “mode” until a light
flashes next to “end time”. Press and hold “–” until the
clock no longer reverses (“0:00” and you will hear a
beep).Ifyouhaveleftthetemperatureandfunction
knobs at a setting the oven will start once the “end time”
light stops flashing.
3. To cancel “auto shut off” press “mode” until a light
flashes next to “cook time”. Press and hold “–” until the
clock no longer reverses (“0:00” and you will hear a
beep). This automatically cancels “delayed start”. Ifyou
have left the temperature and function knobs at a setting,
the oven will start once the “cook time” light stops
flashing.Becauseyouhavecancelled“autooff”the
oven will continue to heat until you manually turn it off.
on completion of cooking
The oven will turn off, the timer will beep and the “end
time”and/or“cook time” indicators will flash.
1. Turn the function and temperature controls to the
off position.
2. Press “+” or “–” or “mode” to stop the timer from beeping.
Switching the clock display oN and oFF
1. Press together “+” and “–”for2secondstoswitch’off’
the display.
2. Press together “+” and “–” for 2 seconds to switch the
clockdisplay’on’again.
Note:Ifatimermodeisset,thenitisnotpossibleto
switch the display off.
OpERATING THE ELECTRONIC CLOCK (CONT.)
Choosing the best oven settings
The following table is intended as a guide and experience
may show some variation in cooking times necessary to
meetindividualrequirements.
Itmaybenecessarytochangesomecookingtimesand
temperatures from your previous oven. For best results when
baking preheat your oven for 30 minutes.
Models without oven fan
Models with oven fan
COOKING GUIdE
fOOd TEMpERATURE
0
C OvEN pOSITION IN SHELf* TIME IN MINUTES
Scones Plain or fruit 220 2 10 - 15
Biscuits Rolled 180 2 10 - 15
Spooned 190 2 12 - 15
Shortbreadbiscuits 160 1 or 2 30 - 35
Meringues Hard - individual 110 2 90
Soft-individual 180 2 15 - 20
Pavlova - 6 egg 110 1 75
Cakes PattyCakes 190 3 15 - 20
Sponge-4egg 180 2 20 - 30
Shallowbuttercake 180 2 30 - 40
Rich fruit cake 150 2 180
Pastry - shortcrust Cornishpasties 200/180 2 40 - 45
Custardtart 200/180 1 10/20-30
Pastry choux Creampuffs 210 2 25 - 30
Yeast goods Bread 210 1 25 - 30
fOOd TEMpERATURE
0
C OvEN pOSITION IN SHELf* TIME IN MINUTES
Scones Plain or fruit 210 Any 10 - 15
Biscuits Rolled 170 2 & 4 10 - 15
Spooned 180 2 & 4 12 - 15
Shortbreadbiscuits 150 2 & 4 30 - 35
Meringues Hard - individual 100 Any 90
Soft-individual 165 Any 15 - 20
Pavlova - 6 egg 100 Any 75
Cakes PattyCakes 180 2 & 4 15 - 20
Sponge-4egg 170 2 20 - 30
Shallowbuttercake 170 2 & 4 30 - 40
Rich fruit cake 130 2 180
Pastry - shortcrust Cornishpasties 180/160 2 40 - 45
Custardtart 190/170 2 20 - 30
Pastry choux Creampuffs 200 2 & 4 25 - 30
Yeast goods Bread 200 Any 25 - 30
*Countingfromthebottomshelfup.
*Countingfromthebottomshelfup.Referto“ovenshelflocation”sectionformoredetailedinformation.
12 13
OPERATIONOPERATION
GRILLING GUIdE
Roasting Meat
1. Place the meat in the oven and set the temperature
between180°Cand200°C.(Itisrecommendedto
wrap your meats in an oven roasting bag or foil to
prevent fats and oils from splattering, making it easier
to clean your oven.)
2.Usethegrill/ovendishandsmokelessgrillinsert.
Place the meat on the insert.
3. Donotpiercethemeat,asthiswillallowjuicestoescape.
4. Whenthemeatiscooked,taketheroastoutoftheoven,
wrap in aluminum foil and leave to stand for about 10
minutes. This will help retain the juices when the meat is
carved. The table shows temperatures and cooking times
for different kinds of meat. These may vary depending
on the thickness or bone content of the meat.
MEAT
RECOMMENdEd
TEMpERATURE
0
C
RESULT
MINUTES pER
KILOGRAM
Beef 200
Rare 35 - 40
Medium 45 - 50
Welldone 55 - 60
Lamb 200
Medium 40
Welldone 60
Veal 180 Welldone 60
Pork 200 Welldone 60
Roasting poultry and fish
1. Place the poultry or fish in an oven set at a moderate
temperatureof180°C.
2.Placealayeroffoiloverthefishforaboutthreequarters
of the cooking time.
The table shows temperatures and cooking times for
different kinds of fish and poultry. These may vary
depending on the thickness or bone content of the meat.
MEAT
RECOMMENdEd
TEMpERATURE
0
C
MINUTES pER KILOGRAM
Chicken 180 45 - 50
Duck 180 - 200 60 - 70
Turkey 180
40 - 45 (<10kg)
35 - 40 (>10kg)
Fish 180 20
Grilling hints
WARNING
Always clean the grill/oven dish after every use. Excessive fat build up
may cause a fire.
As a method of cooking, grilling can be used to:
•Enhancetheflavoursofvegetables,fish,poultryandmeat.
•Sealthesurfaceofthefoodandretainthenaturaljuices.
Note: Belowisatableindicatingthedoorpositionwhilst
grilling for each of the product types.
pROdUCT TypE dESCRIpTION
dOOR pOSITION dURING
GRILLING
Underbench Grill in oven models DoorfULLYclosed
Separategrill
underbench
Slideoutgrilldrawer
Drawer2ngerwidths
ajar
Separategrill
walloven
Dropdowngrilldoor DoorfULLYopen
This table shows how to grill different types of meat:
MEAT METHOd
Beef
Youcanusetenderloin,rump,sirloin.Brushwithoilor
melted butter, especially if the meat is very lean.
Lamb
You can use loin chops, shortloin chops, chump
chops,andforequarterchops.Removeskinorcutat
intervalstostopcurling.Brushwithoilormeltedbutter.
Sausages Prick sausages to stop skin from bursting.
Fish Brushwithoilormeltedbutterandlemonjuice.
Bacon Removerind.Grillatandmakeintorolls.
COOKING GUIdE
Guide to better grilling
No definite times can be given for grilling because this
dependsonyourowntastesandthesizeofthefood.
These times should only be used as a guide and remember
to turn the food over half way through the cooking process.
For better grilling results, follow these easy instructions:
1.Removeoven/grilldishandsmokelessgrillinsertand
preheat grill for about 3 minutes.
2.Chooseonlyprimecutsofmeatorfish.Ifthecutisless
than5mmthickitwilldryout.Ifthecutismorethan
40mm thick, the outside may burn whilst the inside
remains raw.
3.Donotplacealuminiumfoilunderthefoodasthis
prevents fats and oils from draining away, which could
result in a fire.
4.Bastethefoodduringcookingwithbutter,oliveoilor
marinade. Grilled food is better if marinated before
cooking.
5. Use tongs to turn food as a fork pierces the surface
MEAT TIME
Steak 15 - 20 minutes
Chops 20 - 30 minutes
Fish 8 - 10 minutes
Bacon 4 - 5 minutes
Fan Grill (Multifunction grill in oven models only)
Ifyourappliancehasfangrillasafunction,thiswillassist
the grilling process by circulating the heat evenly around
thefood.Therecommendedtemperaturesettingis180°C
for all fan grilling functions.
1. Use the smokeless grill insert and oven dish for all
fan grilling.
2. Position the dish in the lower half of the oven, for best results.
3.Wipeoffanyoilorfatwhichspatterswhiletheovenis
still warm.
There is no need to turn the meat as both sides are cooked
at the same time which means that the food is succulent.
GRILLING GUIdE
14 15
TROUBLESHOOTING CLEANING
dEALING wITH COOKING pROBLEMS
(SEE ALSO p.18)
pROBLEM CAUSES REMEdy
Uneven cooking
Incorerctshelfposition Selectshelfthatplacesfoodinthecentreoftheoven
Oventraytoolarge Experimentwithothertraysordishes
Trays not centralised Centretrays
Airowinovenuneven Rotate food during cooking
Grill dish affecting thermostat Remove grill dish from oven on bake modes
Bakedproductstoo
brown on top
Ovennotpreheated Preheat the oven
Bakingtintoolargefortherecipe Usecorrectsizetins
Bakingtinsnotevenlyspaced
Staggerbakingtinsatleast3cmbetweentinsandtheoven
walls
Productsnotevenlysizedorspacedontrays
Ensureproductsaresamesizeandshapeandareevenly
spaced over trays
Bakingtemperaturetoohigh Lowerthetemperature
Bakedproductstoo
brown on bottom
Bakingtintoolargefortherecipe Usecorrectsizetins
Bakingtinsaredarkmetalorglass Changetoshiny,lighttinsorlowerthetemperatureby10°C
Food too low in the oven Cookoneshelfhigher
Ovendooropenedtoofrequentlyduringbaking
Don’topentheovendooruntilatleasthalfofthecookingtime
has passed
Bakingtemperaturetoohigh Lowerthetemperature
Grill dish affecting thermostat Remove grill dish from oven on bake modes
Cakeshaveacracked,
thick crust
Bakingtemperaturetoohigh Lowerthetemperature
Food too high in the oven Cookoneshelflower
Cakebatterover-mixed Mix just long enough to combine ingredients
Pan too deep Checksizeofpananduserecommendedsize
Bakingtinsaredarkmetalorglass Changetoshiny,lighttins
Bakedproducts
arepale,atand
undercooked
Bakingtemperaturetoolow Raise the temperature
Food too low in the oven Cookoneshelfhigher
Bakingtimetooshort Increasecookingtime
Incorrecttinsize Usecorrecttinsize
Cakefalleninthe
centre
Bakingtemperaturetoolow Raise the temperature
Bakingtimetooshort Increasecookingtime
Proportions of ingredients incorrect in the recipe Checkrecipe
Openingdoortooearlyinbaking Donotopenthedooruntilthelastquarterofcookingtime
Roast meat and
potatoes not browning
in fan oven
Poor hot air circulation Elevatefoodontoaracktoallowaircirculation
Grill dish affecting thermostat Remove grill dish from oven on bake modes
Juices running out of
meat
Donotpiercemeatwithfork,turnwithtongs
Grilled meats
overcooked on outside
and raw in centre
Grill at lower insert position
Grilled chops and
steaks curling
Cutintofatevery2cm(1/2inch)
W
ARNING
• Always make sure that the oven is electrically isolated
before cleaning. This can be done via the power point
switch located nearby.
• Donotusesteamcleaners.
• Donotlinethebottomoftheovenorgrillwithfoil
or cookware.
• Donotusesharpmetalimplementsorutensilsonany
surface, as these may leave permanent scratches or marks.
enamel
• Rubpersistentstainsvigorouslywithanylonscoureror
creamed powder cleansers.
Note: You can also use household oven enamel
cleaners-followthemanufacturer’sinstructionscarefully.
• Donotuseharshabrasivecleaners,powdercleaners,
steel wool or wax polishes.
Stainless steel
All grades of stainless steel can stain, discolour or become
greasy. You must clean these areas regularly by following
the procedures below, if you want your appliance to look
its best, perform well and have a long life.
CAUTION
Care must be taken when wiping exposed stainless steel edges.…
they can be sharp!
Your stainless steel appliance is manufactured from a mark
resistant stainless steel. This special stainless steel resists
marks such as finger prints and water spots. To keep your
stainless steel appliance looking at its best, you should
cleanitregularly.Washwithwarmsoapywaterandrinse
withcleanwater.Wipewithcleanwaterandasoftclean
cloth to remove soap residue.
Note: Make sure you follow the polish or brushing lines
in the steel.
WARNING
do not use harsh abrasive cleaners or sharp metal scrapers to clean
the oven door glass since they can scratch the surface, which may
result in shattering of the glass.
Glass
• Glasssurfacesondoorsandcontrolpanelsarebest
cleaned immediately after soiling.
• A damp cloth may help remove baked on food deposits.
• Ovencleanerscanbeusedtoremovestubbornmarks
and stains.
CLEANING yOUR AppLIANCE
oven
• Alwayskeepyourapplianceclean.Ensurethatfatsand
oils do not accumulate around elements, burners or fans.
•Alwayskeeptheovendish,bakingtrays,grilldishand
grill dish insert clean, as any fat deposits may catch fire.
•Alwayswrapyourmeatsinfoiloranovenroastingbag
to minimise cleaning. Any polyunsaturated fats can leave
a varnish-like residue which is very difficult to remove.
•Theupperelementcanbereleasedtoassistincleaning
(refer to page 16).
Separate Grill (GGR475, GXR650 models only)
•Alwayskeepthegrilldishandgrilldishinsertclean,as
any fat deposits may catch fire.
•Ensurethatfatsandoilsdonotaccumulatearoundthe
grill element. The grill element can be released to assist
in cleaning the top of the grill cavity (refer to page 16).
CLEANING yOUR OvEN ACCESSORIES
Removing the trays and shelves from your
appliance
• Slidethedishandshelvestowardsyouuntiltheyreach
the front stop.
• Tilt them up at the front to clear the side supports, taking
care not to spill the contents.
• For separate grill underbench model (GGR475), pull the
grilldrawerouttoit’sfullextent.Carefullyliftthedish
from the support.
• Liftthedishandshelvesclear.
• Washthedishandinserttheshelvesinhotsoapywater.
• Reverse the above steps to put the grill dish and shelves
back again.
• Ensurethattheyareplacedbetweenthe2support
wires.Seepage6formoredetails.

16 17
CLEANINGCLEANING
Removing the side racks (shelf supports) –
grill in oven and separate grill models
• Grasp the shelf supports at the front.
• Pull them firmly inwards.
• To install the side racks, see page 5.
CAUTION
dO NOT remove the separate grill drawer mechanism on the separate
grill underbench model (GGR475). The grill dish can be easily removed
for cleaning.
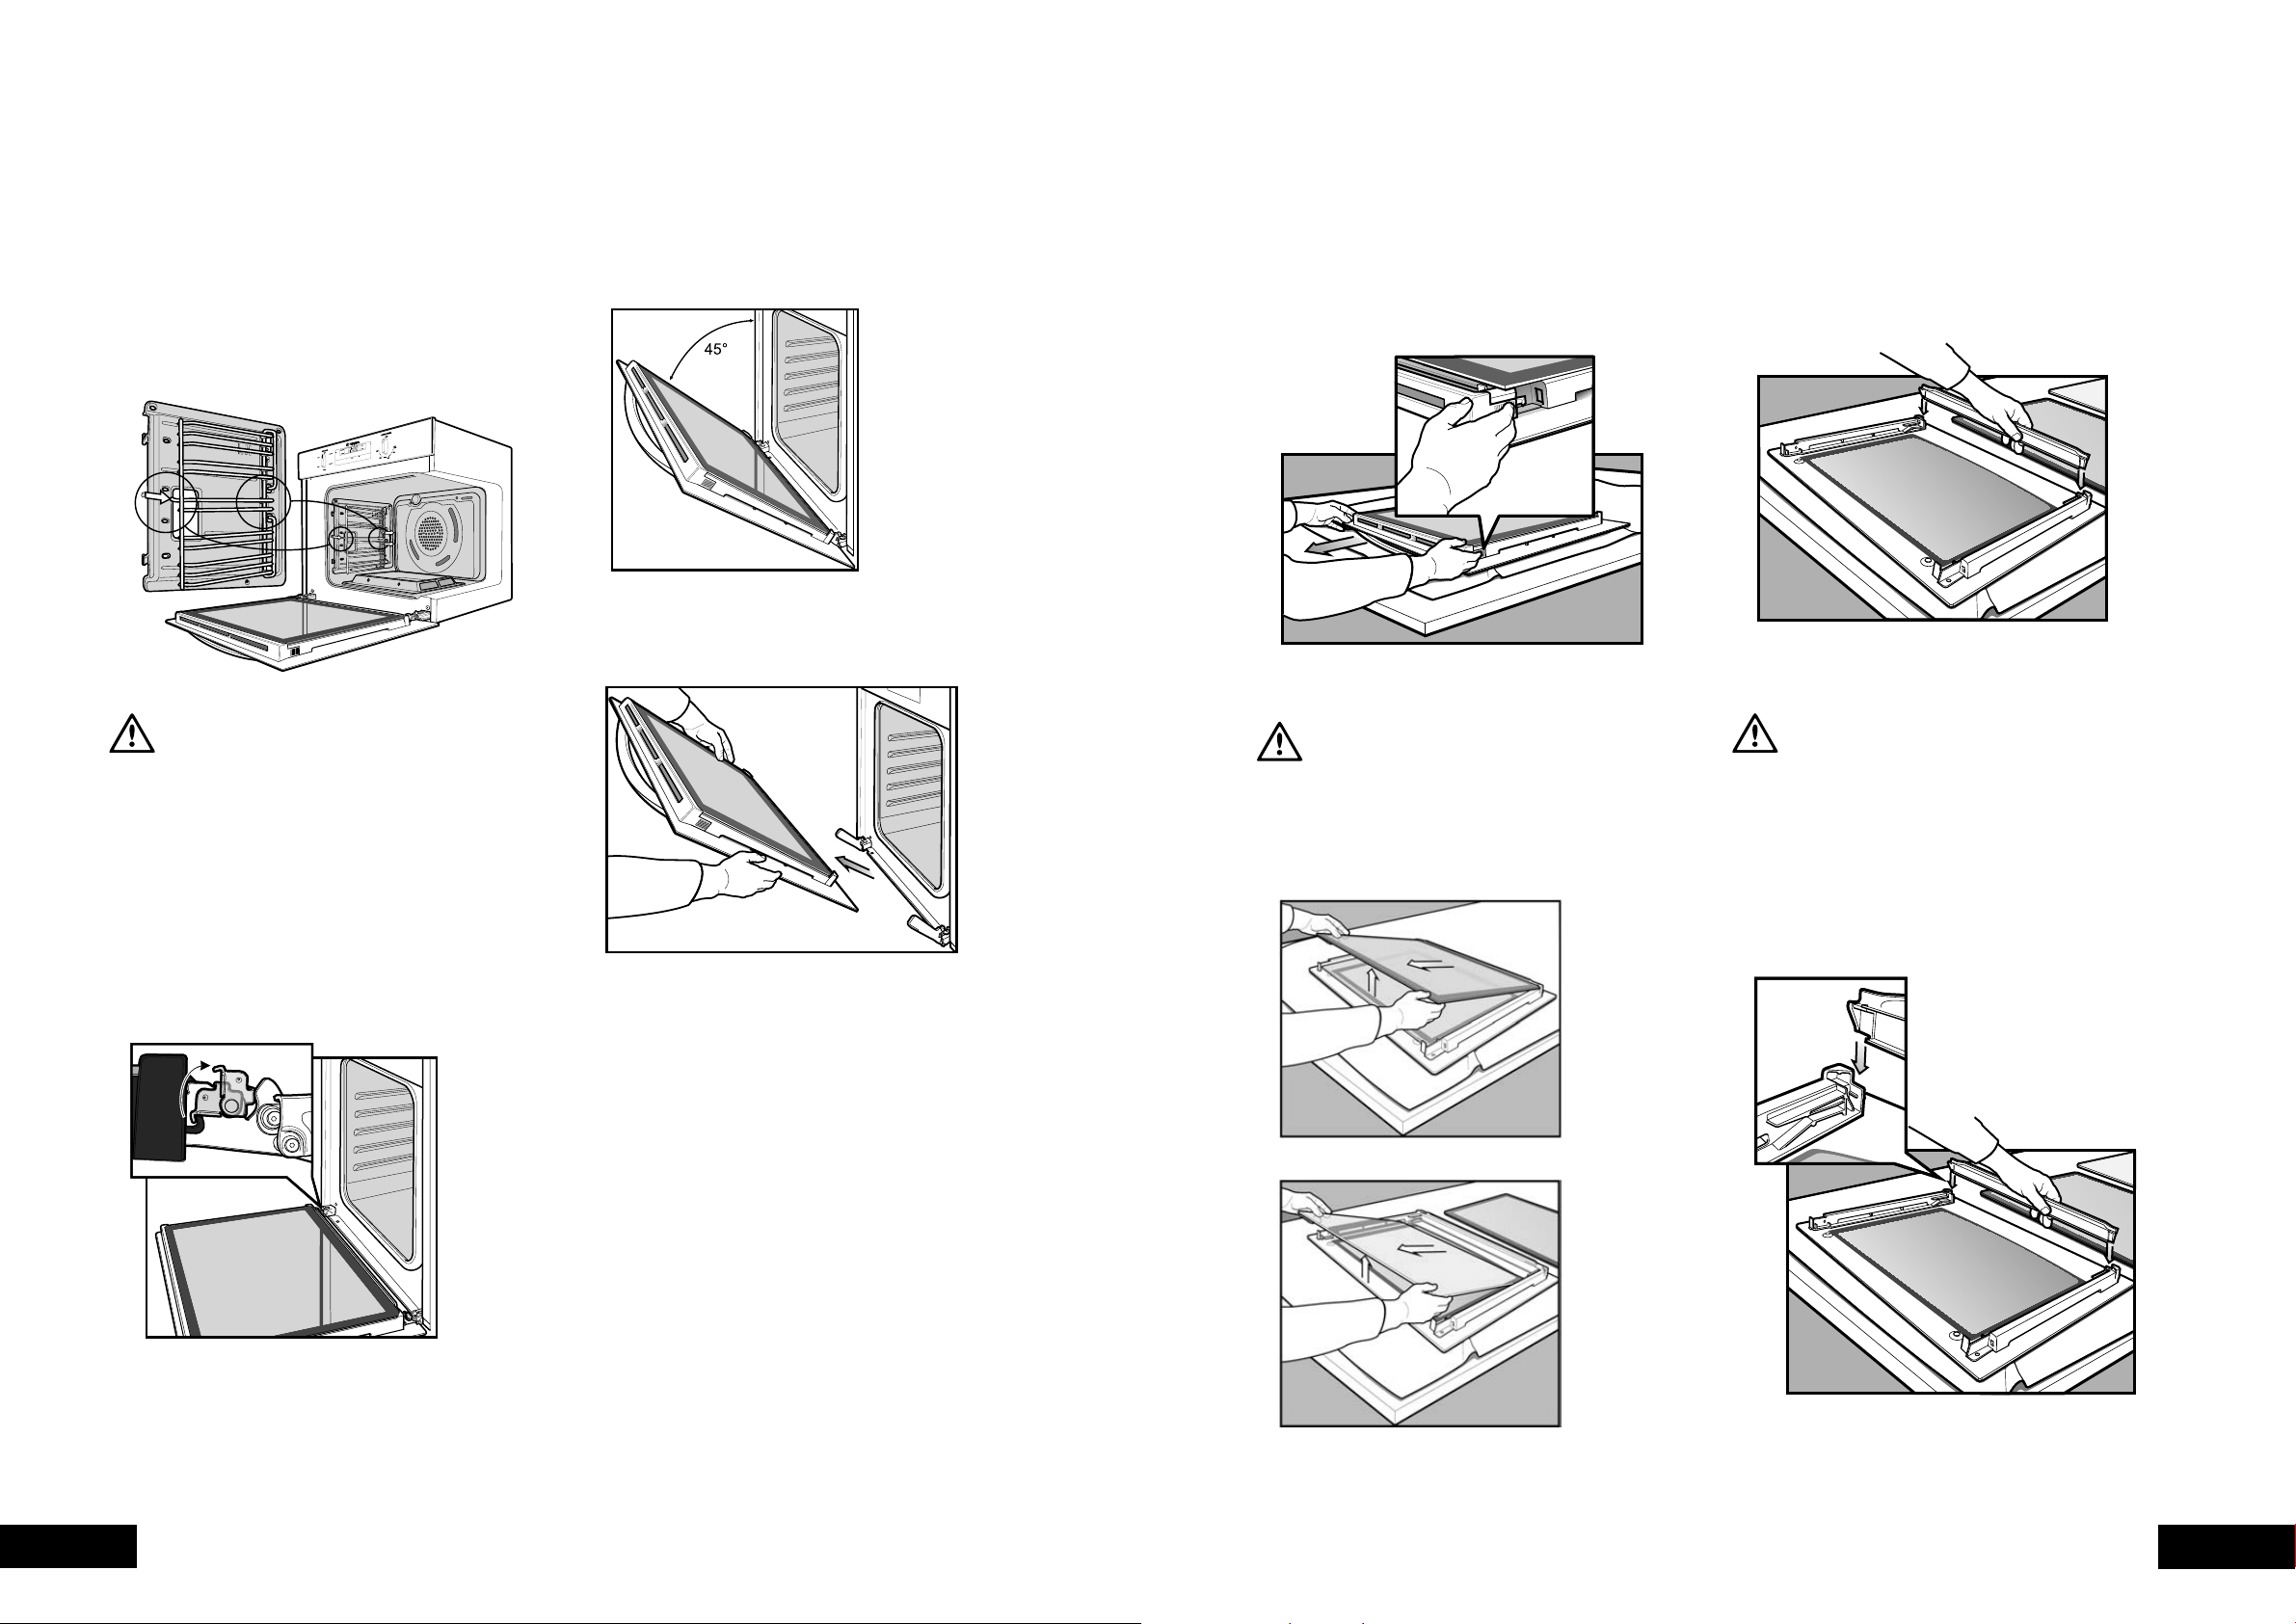
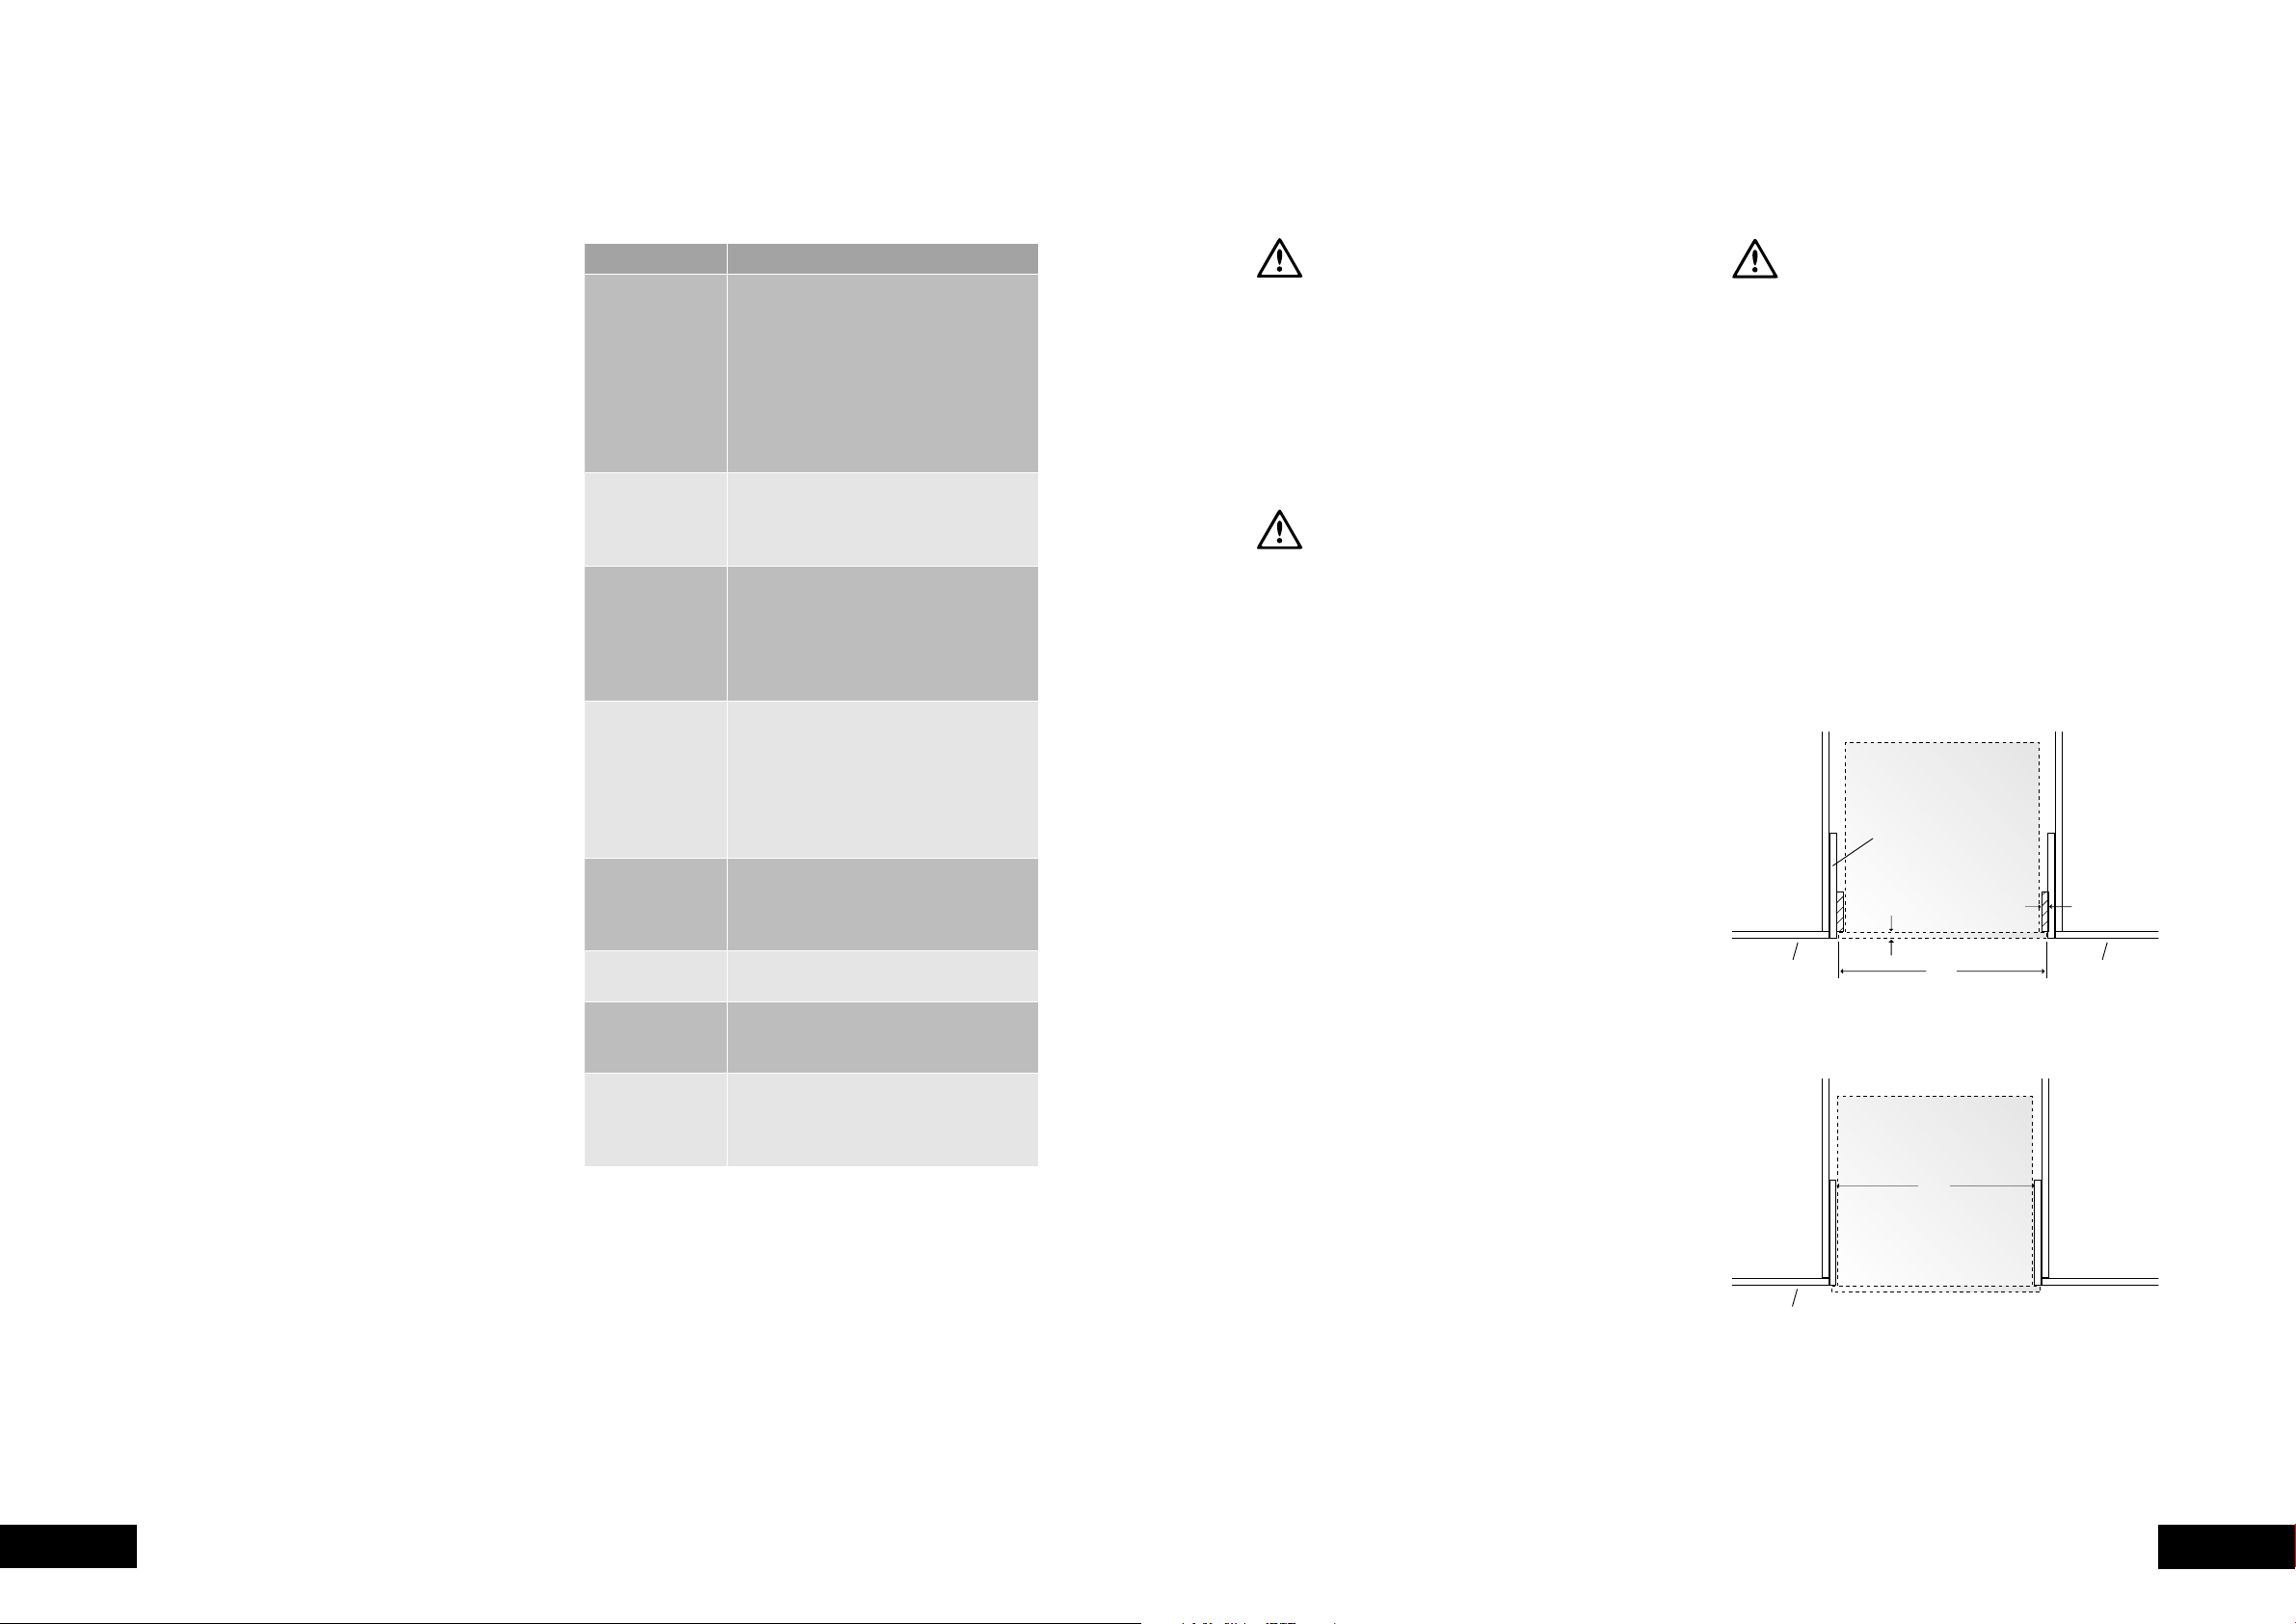
Removing the oven door
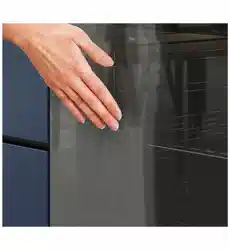
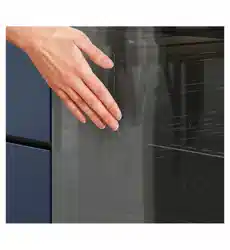
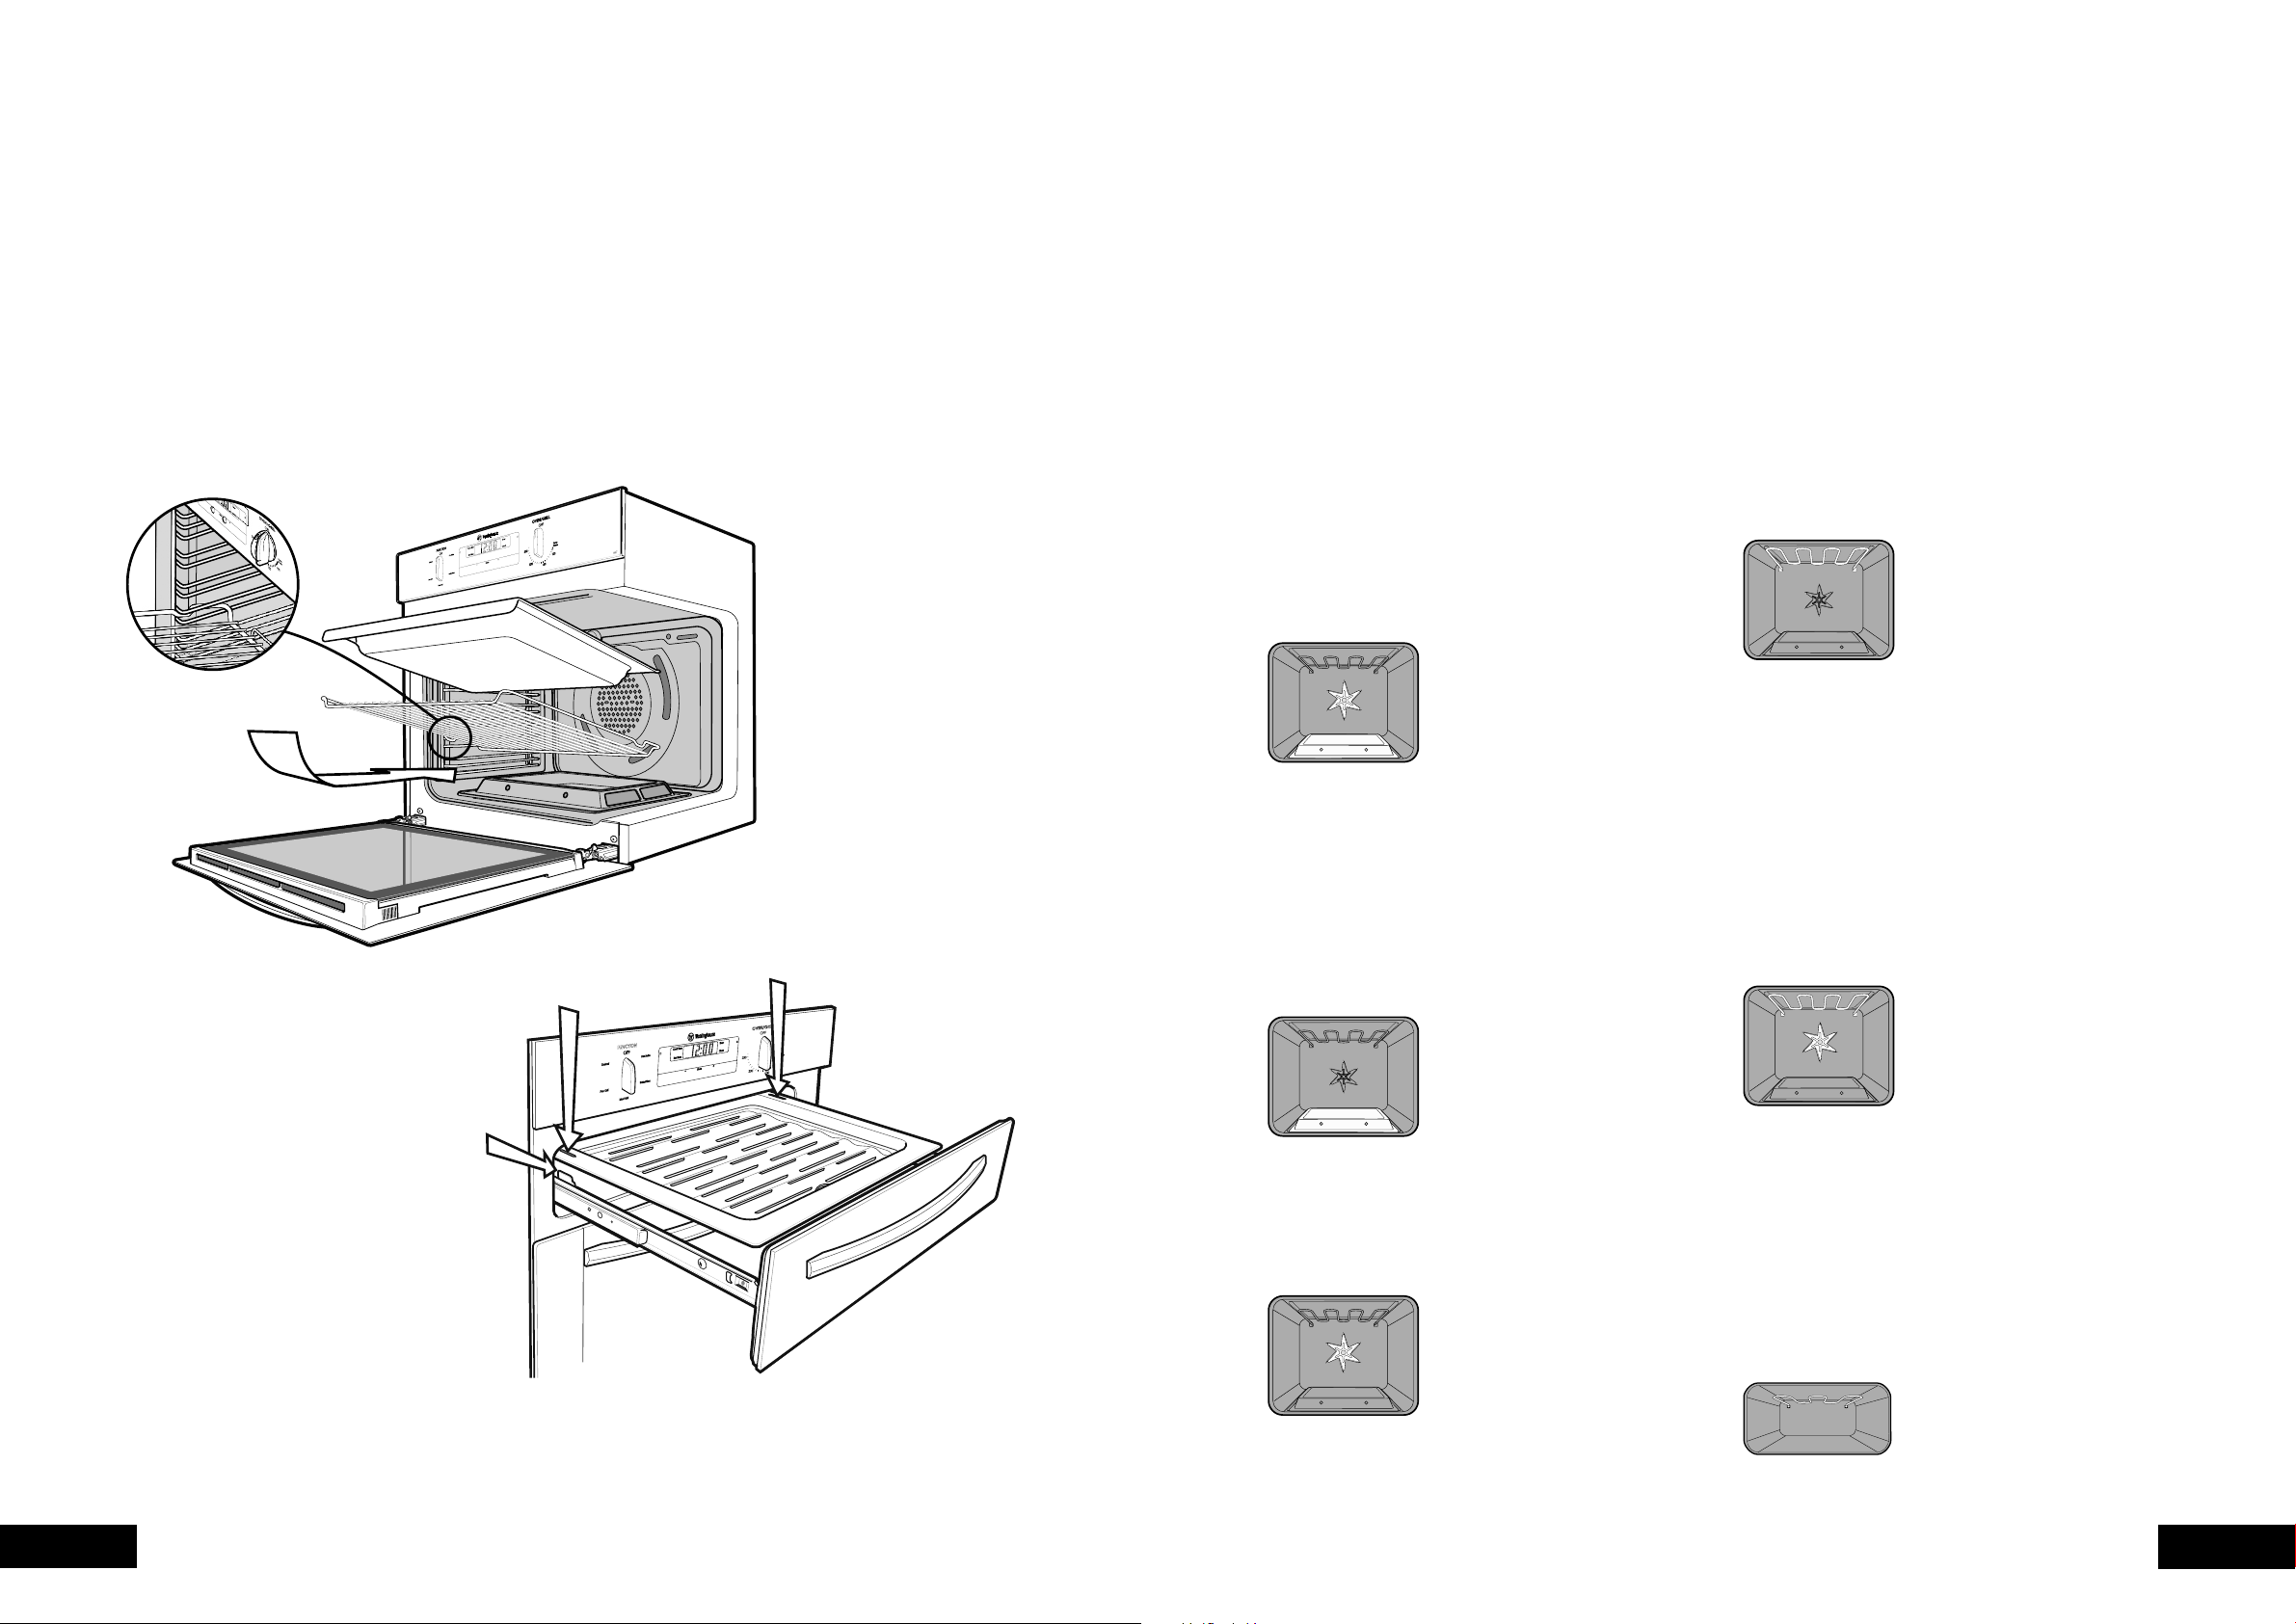
Yourovenisequippedwithadoorthatcanbedisassembled
in order to clean all the panes of glass. Remove the door
before cleaning.
• Openthedoorfullytoaccessthehingesthenrotatethe
‘stirrups’(highlightedintheimage)onbothhingesfully
towards the oven.
Removing oven door top trim
• Takeholdofthegridembossedsectionsofthedoor
trim at each end and press inwards to release the clips.
Remove the door trim by pulling it towards you.
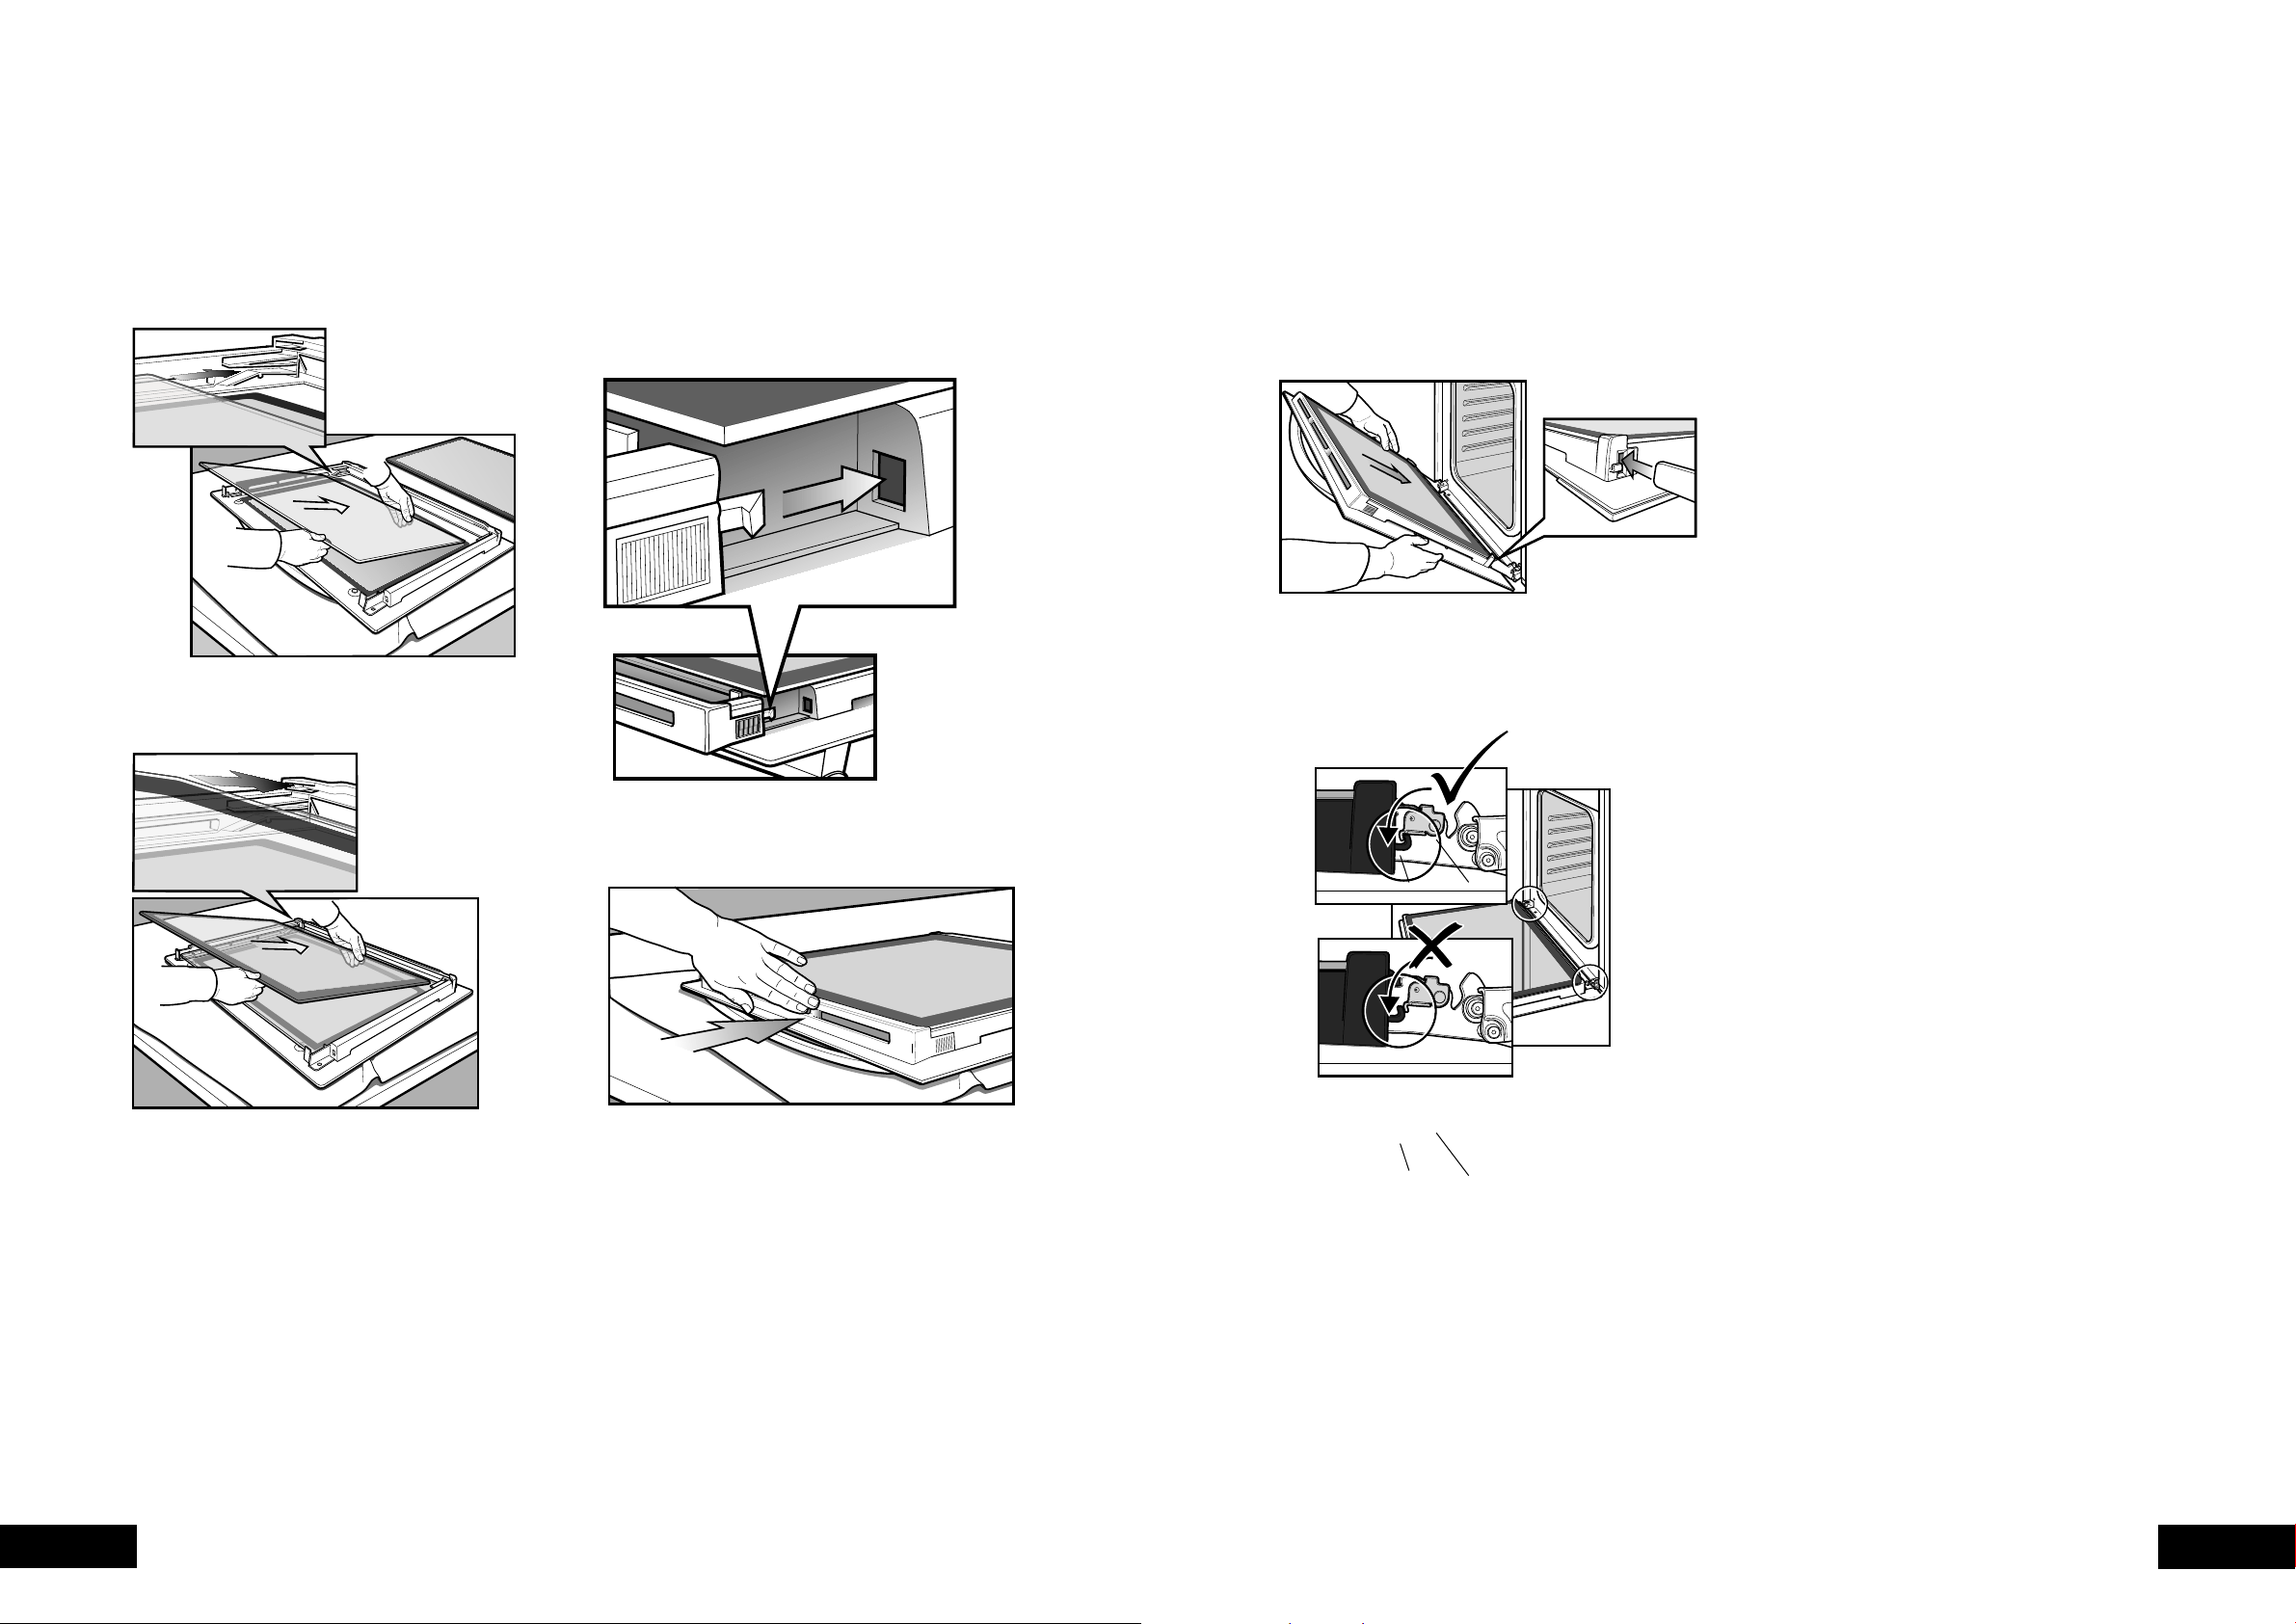
Removing the door glass panels
CAUTION
Rough handling, especially around the edges can cause the glass to break.
• Lifttheblackborderedglasspaneloutoftheguide.
• Repeatthisforthesmallerclearglasspanel(whenfitted).
• Slowlyclosetheovendooruntilitisstopsagainstthe
‘stirrups’(about45°).
• Grasptheovendoorwithahandeachsideofthedoor
and remove it from the oven by pulling it towards you.
• Laytheovendoorwiththeoutersidefacingdownwards
on something soft and flat (for example a blanket on a
kitchen table) to prevent scratches.
Removing the bottom trim (on selected models)
• Thebottomtrimmayberemovedforcleaningby
snapping out and lifting away from the glass.
Cleaning the door glass panels
CAUTION
do not to use harsh abrasives on the glass panes as the reflective surface
plays a role in the function of the oven. do not place glass in dishwasher.
Hand wash only with a soft cloth and warm soapy water. when dry polish
with a soft cloth and ensure the glass is dry before reassembly.
Re-assembling the bottom trim
• Pushdownto“snap”eachsideofbottomtrimbackinto
door columns.

16 17
CLEANINGCLEANING
Removing the side racks (shelf supports) –
grill in oven and separate grill models
• Grasp the shelf supports at the front.
• Pull them firmly inwards.
• To install the side racks, see page 5.
CAUTION
dO NOT remove the separate grill drawer mechanism on the separate
grill underbench model (GGR475). The grill dish can be easily removed
for cleaning.
Removing the oven door
Yourovenisequippedwithadoorthatcanbedisassembled
in order to clean all the panes of glass. Remove the door
before cleaning.
• Openthedoorfullytoaccessthehingesthenrotatethe
‘stirrups’(highlightedintheimage)onbothhingesfully
towards the oven.
Removing oven door top trim
• Takeholdofthegridembossedsectionsofthedoor
trim at each end and press inwards to release the clips.
Remove the door trim by pulling it towards you.
Removing the door glass panels
CAUTION
Rough handling, especially around the edges can cause the glass to break.
• Lifttheblackborderedglasspaneloutoftheguide.
• Repeatthisforthesmallerclearglasspanel(whenfitted).
• Slowlyclosetheovendooruntilitisstopsagainstthe
‘stirrups’(about45°).
• Grasptheovendoorwithahandeachsideofthedoor
and remove it from the oven by pulling it towards you.
• Laytheovendoorwiththeoutersidefacingdownwards
on something soft and flat (for example a blanket on a
kitchen table) to prevent scratches.
Removing the bottom trim (on selected models)
• Thebottomtrimmayberemovedforcleaningby
snapping out and lifting away from the glass.
Cleaning the door glass panels
CAUTION
do not to use harsh abrasives on the glass panes as the reflective surface
plays a role in the function of the oven. do not place glass in dishwasher.
Hand wash only with a soft cloth and warm soapy water. when dry polish
with a soft cloth and ensure the glass is dry before reassembly.
Re-assembling the bottom trim
• Pushdownto“snap”eachsideofbottomtrimbackinto
door columns.
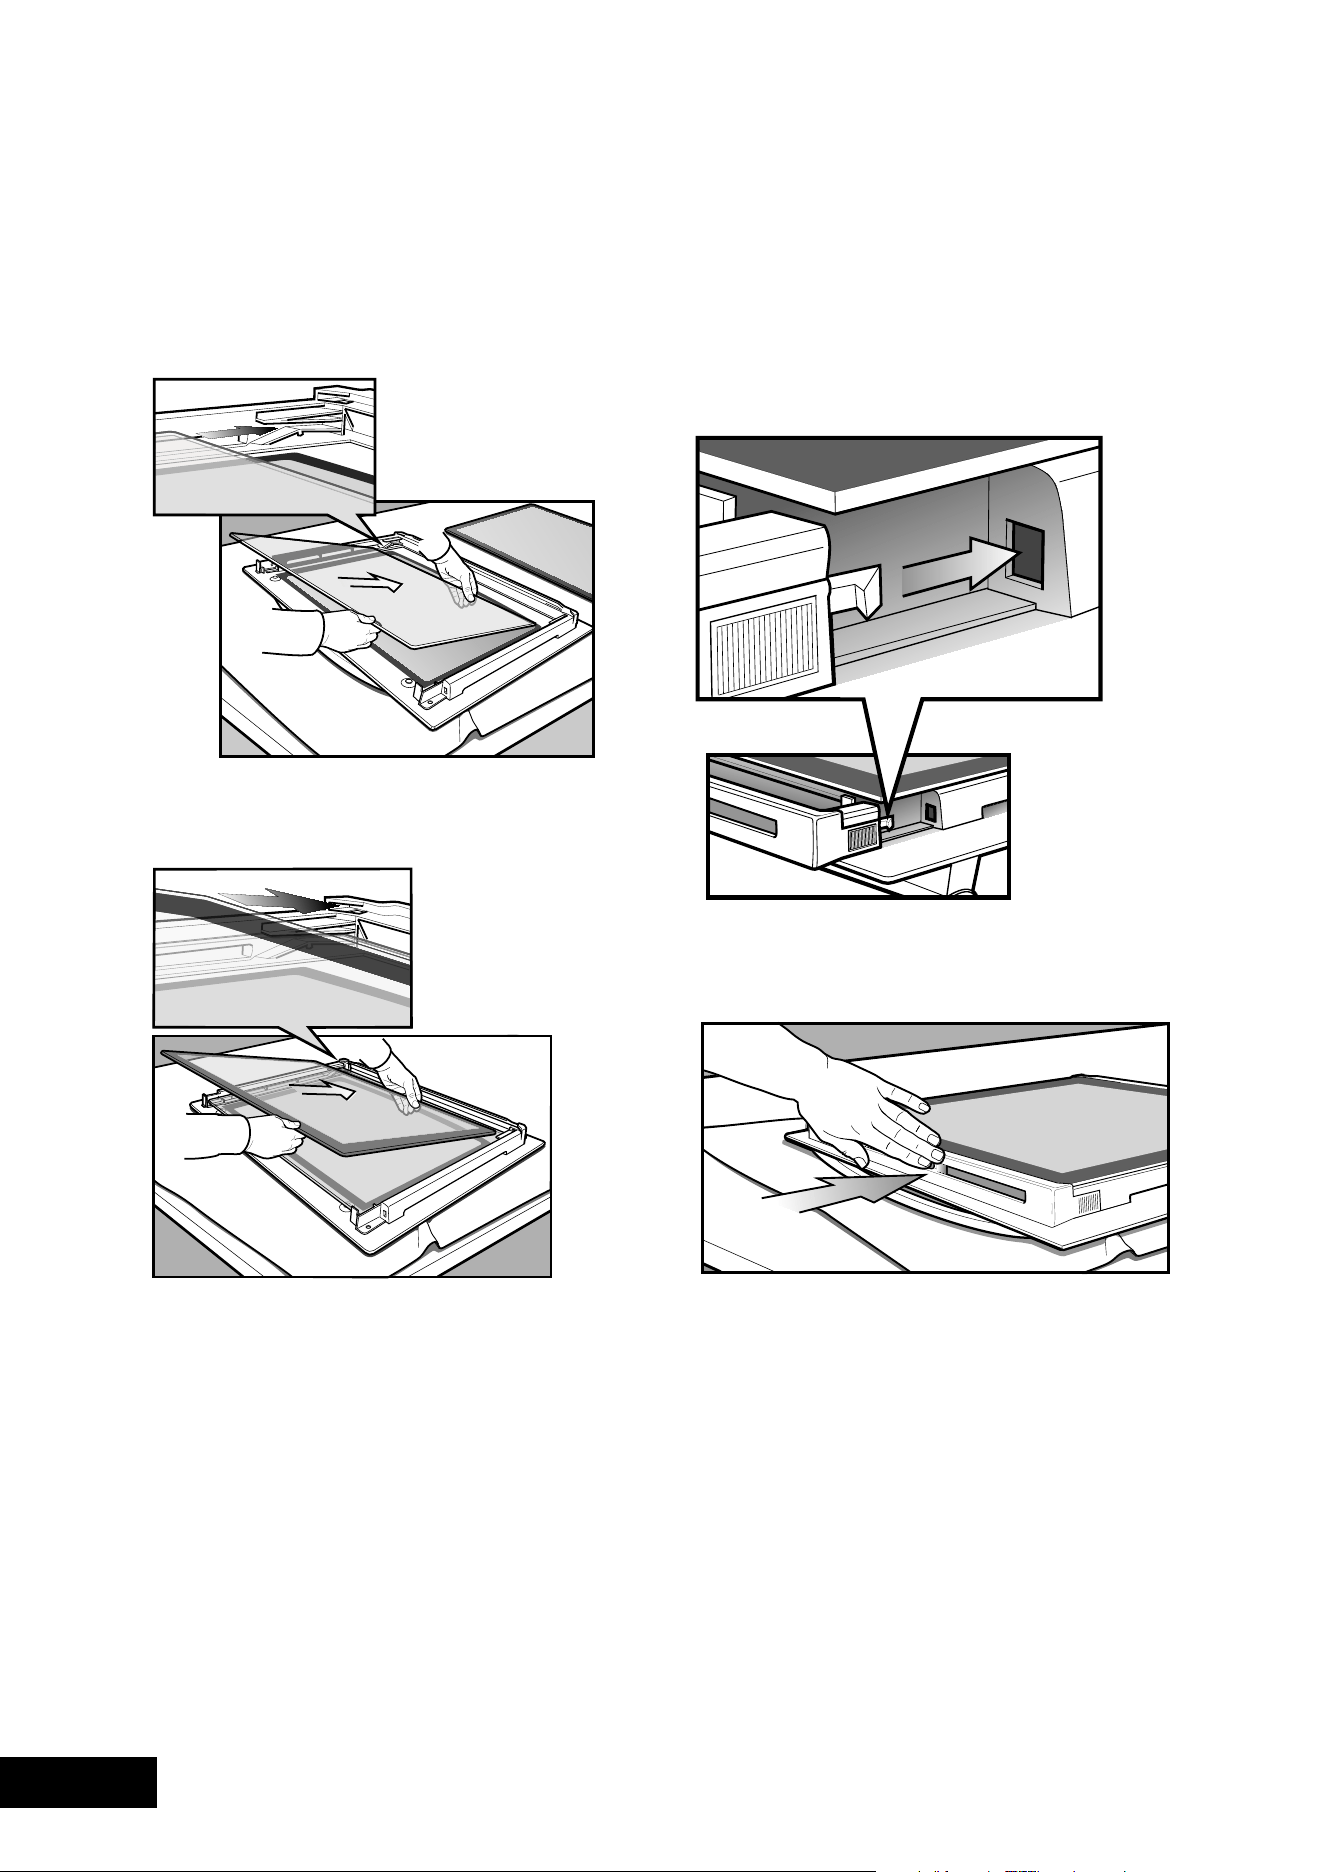
18 19
CLEANINGCLEANING
Re-assembling the door glass panels
• Insertthesmallerclearglasspanel(whenfitted)firstfrom
above and at an angle to the profile of the door.
• Repeatfortheblackborderedglasspanelensuring
the painted surface is facing to the downside.
Re-assembling the top door trim
• Takeholdofthetopdoortrimateachsideandposition
it to the inside edge of the glass.
• Pushthetrimdownwithitstopedgeoverglasspaneluntil
the clip snaps in on each side of the trim.
• Pushthemiddleofthetrimdowntoensureitisstraight
and firm against the glass panel.
Fitting the oven door
• Takeholdoftheovendoorwithahandoneachsideand
with the door at an angle of 45º, position the recesses
at the bottom of the door onto the hinge arms of the oven.
Letthedoorslidedownthehingearmsasfarasitwillgo.
• Openthedoorfullytoaccessthehinges.Rotatethe
‘stirrups’(seeimagebelow)untiltheylockintothehook.
The oven door may now be closed.”
hook
hook
stirrup
stirrup
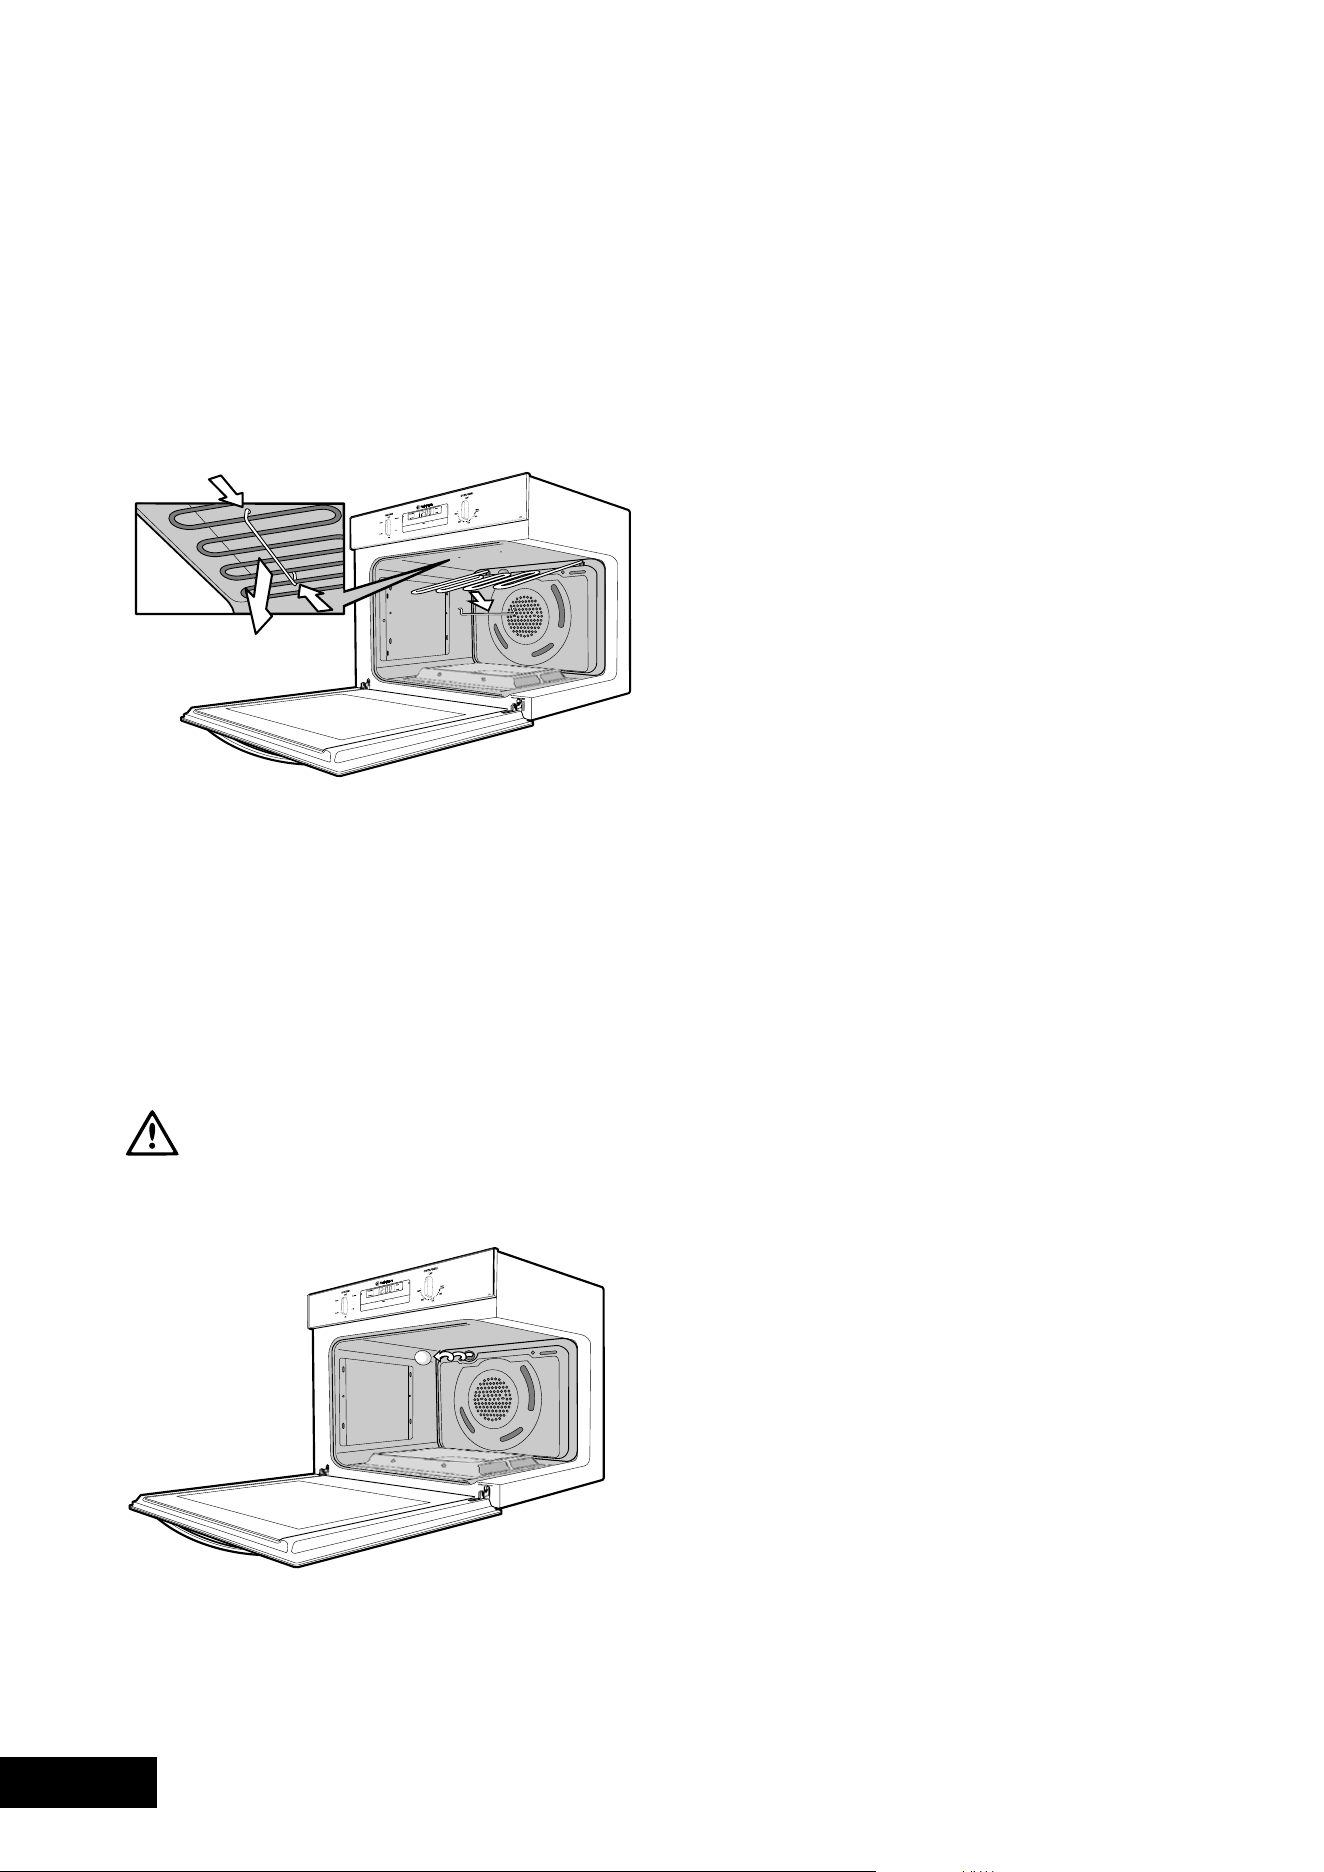
20 21
SAFETYMAINENTANCE
GET TO KNOw yOUR OvEN
Releasing the grill element – grill in oven and
separate grill models
Wehavedesignedtheupperelementwithahangerclipto
help you reach your cavity roof for cleaning. To remove grill,
push sides of hanger clip in the direction of arrows until one
hanger clip can easily be removed from retaining hole.
To replace, reverse the process.
Grill in oven model shown. The grill element in separate
grill models has the same hanger clip arrangement in the
grill compartment.
Removing and replacing the oven light
• Turn oven light glass anticlockwise to remove it for
globe replacement.
• Aspecialhightemperatureresistantglobeshould
be used.
ThiscanbepurchasedfromtheCustomerCareCentre.
WARNING
Make sure the appliance is turned off before you remove or replace
parts, to avoid the possibility of electric shock.
Get to know your new oven with this ‘Simple
test Cake’
Although we strive for a perfect performing oven,
it’spossiblethattherewillbesomevariationincolour
when baking. Therefore, we suggest this simple, easy
anddelicioustomakeSimpleTestCake,itcanhelpyou
understand your new oven. All ovens do sometimes have
hot or cold spots, therefore it is important to judge with
youreyeasyoumayrequiretorotateduringbaking.
‘Simple test Cake’
125g butter, softened to room temperature
1 cup caster sugar
1 teaspoon pure vanilla essence
4 large eggs
2 cups self-raising flour
pinch of salt
4tablespoons(80mL)full-creammilk
Method:
1.Butterbaseandsidesoftwo,20cmstraight-sidedround
orsquarecakepans.Thenlinethebasewithgrease
proof or baking paper.
2.Preheatoventomoderate‘180ºC’(170ºCfanforced)
and ensure oven shelf is in the centre position of oven.
3.Creamsoftenedbutterandsugaruntillightincolour.
4. Add vanilla essence.
5. Then eggs one at a time, beating well after each
addition.
6.Siftflourandsaltintothemixtureandbeatuntil
well combined.
7. Add milk and beat or stir to combine.
8.Spoonmixtureequallybetweenpreparedcakepans.
9.Bakeinpreheatedoven,middleshelfforabout25to
35 minutes or until when tested with a fine cake skewer
it comes out clean or the edges of the cakes have come
away slightly from the sides of the cake pans.
10.Remove from oven to wire cake rack and rest for
5minutesbeforeremovingfromcakepans.Cool
completely.
to Serve: sandwich together with your favourite jam or
conserve, and dust top with pure icing sugar.
Note: if desired substitute butter for either margarine or
olive oil spread.
Recipe is based on the Australian standard metric
250mLcupand20mLtablespoonsets
MAINTAINING yOUR AppLIANCE
Your gas oven is fitted with an electronic controller which
manages the operation of the burner and monitors the
flame. This controller includes features which ensure the safe
operation of your appliance and will prevent the build up
of unburnt gas, should a fault occur.
Itisnormalfortheflametoturnonandoffduringcooking,
to maintain a stable temperature in the oven. The Thermostat
IndicatorLightindicateswhentheflameisonorigniting
(indicator glows), or when the flame is off (indicator off).
The burner flame can be seen by viewing through the
2 holes in the front of the burner cover.
Ignition and Response to Ignition Failure
The controller will attempt to ignite the flame when an oven
function is selected and the Thermostat turns on (indicator
light changes from off to on). The controller will make up
to 2 attempts to ignite the flame, stopping if a flame is
detectedbythecontroller.Ifbytheendofthe2attempts
a flame is not detected then the burner and ignition will be
turned off and a delay of 90 seconds will be observed.
Duringthisdelaythecontrollerwillnotrespondtothe
Function and Thermostat controls.
At the end of this delay, switch the Thermostat or Function
Selectoroffandleaveoffforatleast5seconds.Then
switchtheThermostatandfunctionSelectoronagainto
re-attempt ignition.
Iftheovencontrolsareleftonwhenthedelayendsthen
ignition will not be attempted until the Thermostat or
functionSelectorisfirstturnedofffor5seconds.
Response to Flame Failure
Ifthecontrollercannotdetectflameduetoafault,thenthe
controller will respond
•firstlybyattemptingtore-lighttheburnerwithasequence
of up to 3 attempts and
•Ifthere-lightingsequenceisnotsuccessfultheburnerwill
be shut off.
There-lightingsequencewillincludeupto3attemptsto
re-light the burner, stopping if a flame is detected by the
controller.Ifbytheendofthere-lightingsequenceaflame
is not detected then the burner and ignition will be turned
offandadelayof90secondswillbeobserved.During
this delay the controller will not respond to the Function and
Thermostat controls.
At the end of this delay, switch the Thermostat or Function
Selectoroffandleaveitoffforatleast5seconds.Then
switchthethermostatandfunctionSelectoronagainto
re-attempt ignition.
Iftheovencontrolsareleftonwhenthedelayendsthen
ignition will not be attempted until the Thermostat or
functionSelectorisfirstturnedofffor5seconds.
Recognising a Safety Shut-down Condition
DuringnormalcookingtheThermostatindicatorlightison
when the burner flame is igniting or on, and the Thermostat
indicator light is off when the flame is off.
IfanovenfunctionisselectedandtheThermostatlightison,
but the flame is not on or attempting to ignite then the
controller has invoked a safety shutdown of the burner.
A 90 second delay is observed from the time the shut-down
occurred before the controller will respond to the oven controls.
OncethedelayperiodhasendedtheThermostator
functionSelectormustbeturnedoffforatleast5seconds
before oven functions can resume.
Power Failure
Intheeventofaninterruptiontomainspower,the
restoration of power will not cause the burner to ignite if the
controls were left on. However the grill element will resume
heating on models which do not have an electronic clock.
To resume operation of the appliance after a power
interruption:
• firstturnthefunctionSelectororThermostatcontrolsto
the off position. The controls must remain in this position
for at least 5 seconds
• If the appliance has an electronic clock then set the time
of day on the electronic clock.
Normal operation of the appliance may now resume.
ELECTRONIC BURNER CONTROL

22 23
INSTALLATIONTROUBLESHOOTING
Faults
Ifthereisaproblemwiththeovenand/orgrill,please:
• Checkthepointslistedbelowbeforecallingforservice.
Itmaybepossibletoavoidacallbyfixingtheproblem
yourself – and so continue cooking.
•forcookingproblemsrefertopage14.
Note:Wemaychargeforserviceevenintheguarantee
period if your problem is due to the causes listed below.
Data Plate
Whenyouneedinformation,serviceorreplacement
parts please:
• Tellusthe1.Model,2.ModelNumber&3.Serial
Number shown on the data plate. The data plate is
visible when the oven or grill door is open.
Ifyouneedmoreinformation,pleasecontacttheCustomer
CareCentreon1300363640(Australia–Centreisopen
8.00am – 5.00pm M –fEasternStandardTime)or
+6495732384(NewZealand–Centreisopen
8.00am–5.00pmM– F).
Ifyouhaveawarrantyorsparepartsenquiry,youshould
call the number listed on the back page.
pROBLEM pOSSIBLE CAUSE
Ovenorgrill
not working
- Time of day not set.
- Power not turned on.
-GassupplyturnedofforLPGbottle
empty.
-Controlsareincorrectlyset.
- Household fuse has blown or power
supply is off.
Note:Ifthehouseholdfusecontinuesto
blow,calltheCustomerCareCentre.
Ovenlight
not working
-Lampblownorlooseinsocket.
- Household fuse has blown.
Note: Ifthehouseholdfusecontinuesto
blow,calltheCustomerCareCentre.
Ovennotheating
enough
- Foil or trays on bottom of oven.
-Timerisin“AUTO”mode.(Refertotimer
operating instructions)
- Household fuse has blown.
Note:Ifthehouseholdfusecontinuesto
blow, call the
CustomerCare
Centre.
Ovennotworking -GassupplyturnedofforLPGbottle
empty.
- The oven safety shutdown has enacted.
Reset the controls, wait 90 seconds and
then re-start the oven.
Note:Ifsafetyshutdownpersists,callthe
CustomerCare
Centre.
Timer flashing
on display
- Power failure or interruption.
Note: Reset time of day and any
cooking functions you were using.
(RefertoTIMERoperatinginstructions).
Unit smoking
when first used
- Protective oils being removed.
Doorcannot
be replaced
after removal
-Stirrupnotengagedproperly.
Excessiveheat
or condensation on
control panel
or knobs
- Checkcoolingfanisworkingbyfeeling
for air movement at top of oven door.
Ifnoairmovementisdetected,callthe
CustomerCareCentre.
Note:
Onlyauthorisedpersonnelshouldcarryoutservicing.
SOLvING pROBLEMS
WARNING
Use an authorised person.
As stated in the local municipal building codes and other
relevant statutory regulations.
• Refer to data plate for rating information and circuit
diagram. The data plate is positioned behind the bottom
of the oven door. The circuit diagram is positioned on
the top panel of the appliance.
WARNING
This appliance must be properly earthed
• Donotlifttheappliancebythedoorhandles.
• Prepare the cupboard opening to match your appliance
measurements.(Seediagrams).
• Slideapplianceintothecupboard,ensuringthatthe
supply cable (where fitted) does not kink.
• To prevent tipping, use the screws supplied to secure
your oven into the cupboard. Use just 2 screws for
underbench and separate grill underbench ovens, and
4 screws for separate grill wallovens. Remove the bottom
door in separate grill wallovens to provide access to the
bottom 2 screwing points (see illustrations on page 21).
• forappliancesfittedwithaflexiblesupplycord,
if the cord is damaged, it must be replaced by the
manufactureroritsserviceagentorsimilarlyqualified
personinordertoavoidahazard.Theplugmustbe
accessible after installation.
• Wheretheapplianceisbuiltintoacabinet,thecabinet
materialmustbecapableofwithstanding70°C.
Installationintolowtemperaturetolerantcabinetry
(e.g. vinyl coated) may result in deterioration of the low
temperature coating by discolouring or bubbling.
• Iftheapplianceisinstalledadjacenttovinyl-wrapped
surfaces, use an installation kit available from the vinyl-
wrap supplier.
• ElectroluxHomeProductscannotacceptresponsibility
for damage caused by installation into low temperature
tolerant cabinets.
• Afterinstallation,testandensurethattheappliance
operates correctly before handing it over to the customer.
Itisrecommendedthatthisproductisnotinstalledinan
unvented living space, particularly if that space incorporates
sleepingquarters.
CAUTION
To avoid any potential hazard, you must follow our instructions below
when you install your appliance. failure to install the appliance correctly
could invalidate any warranty or liability claims and lead to prosecution.
This appliance is only suitable for connection to fixed
consumer piping where the maximum over-pressure is
limited to 14kPaorless.Referclause5.2.1ofAS5601.
Cabinet Construction for your appliance
For the best integration within a kitchen, install this
appliance in a standard 600mm wide cupboard that gives
a flush fit with the surrounding cupboard fronts (Figure A).
Arecessof20mmisideal.Itcanalsobeinstalledusing
a proud fit with the surrounding cupboard (FigureB).
Note: Your appliance must be mounted on a flat surface
for the full width and depth of the product.
16mm Cleat
Figure B – Proud fit (top view)
Cupboard front
20mm
Infill panel
565
Figure A – Flush fit (top view)
Cupboard door Cupboard door
600
16mm Cleat
Figure B – Proud fit (top view)
Cupboard front
20mm
Infill panel
565
Figure A – Flush fit (top view)
Cupboard door Cupboard door
600
INSTALLING yOUR AppLIANCE
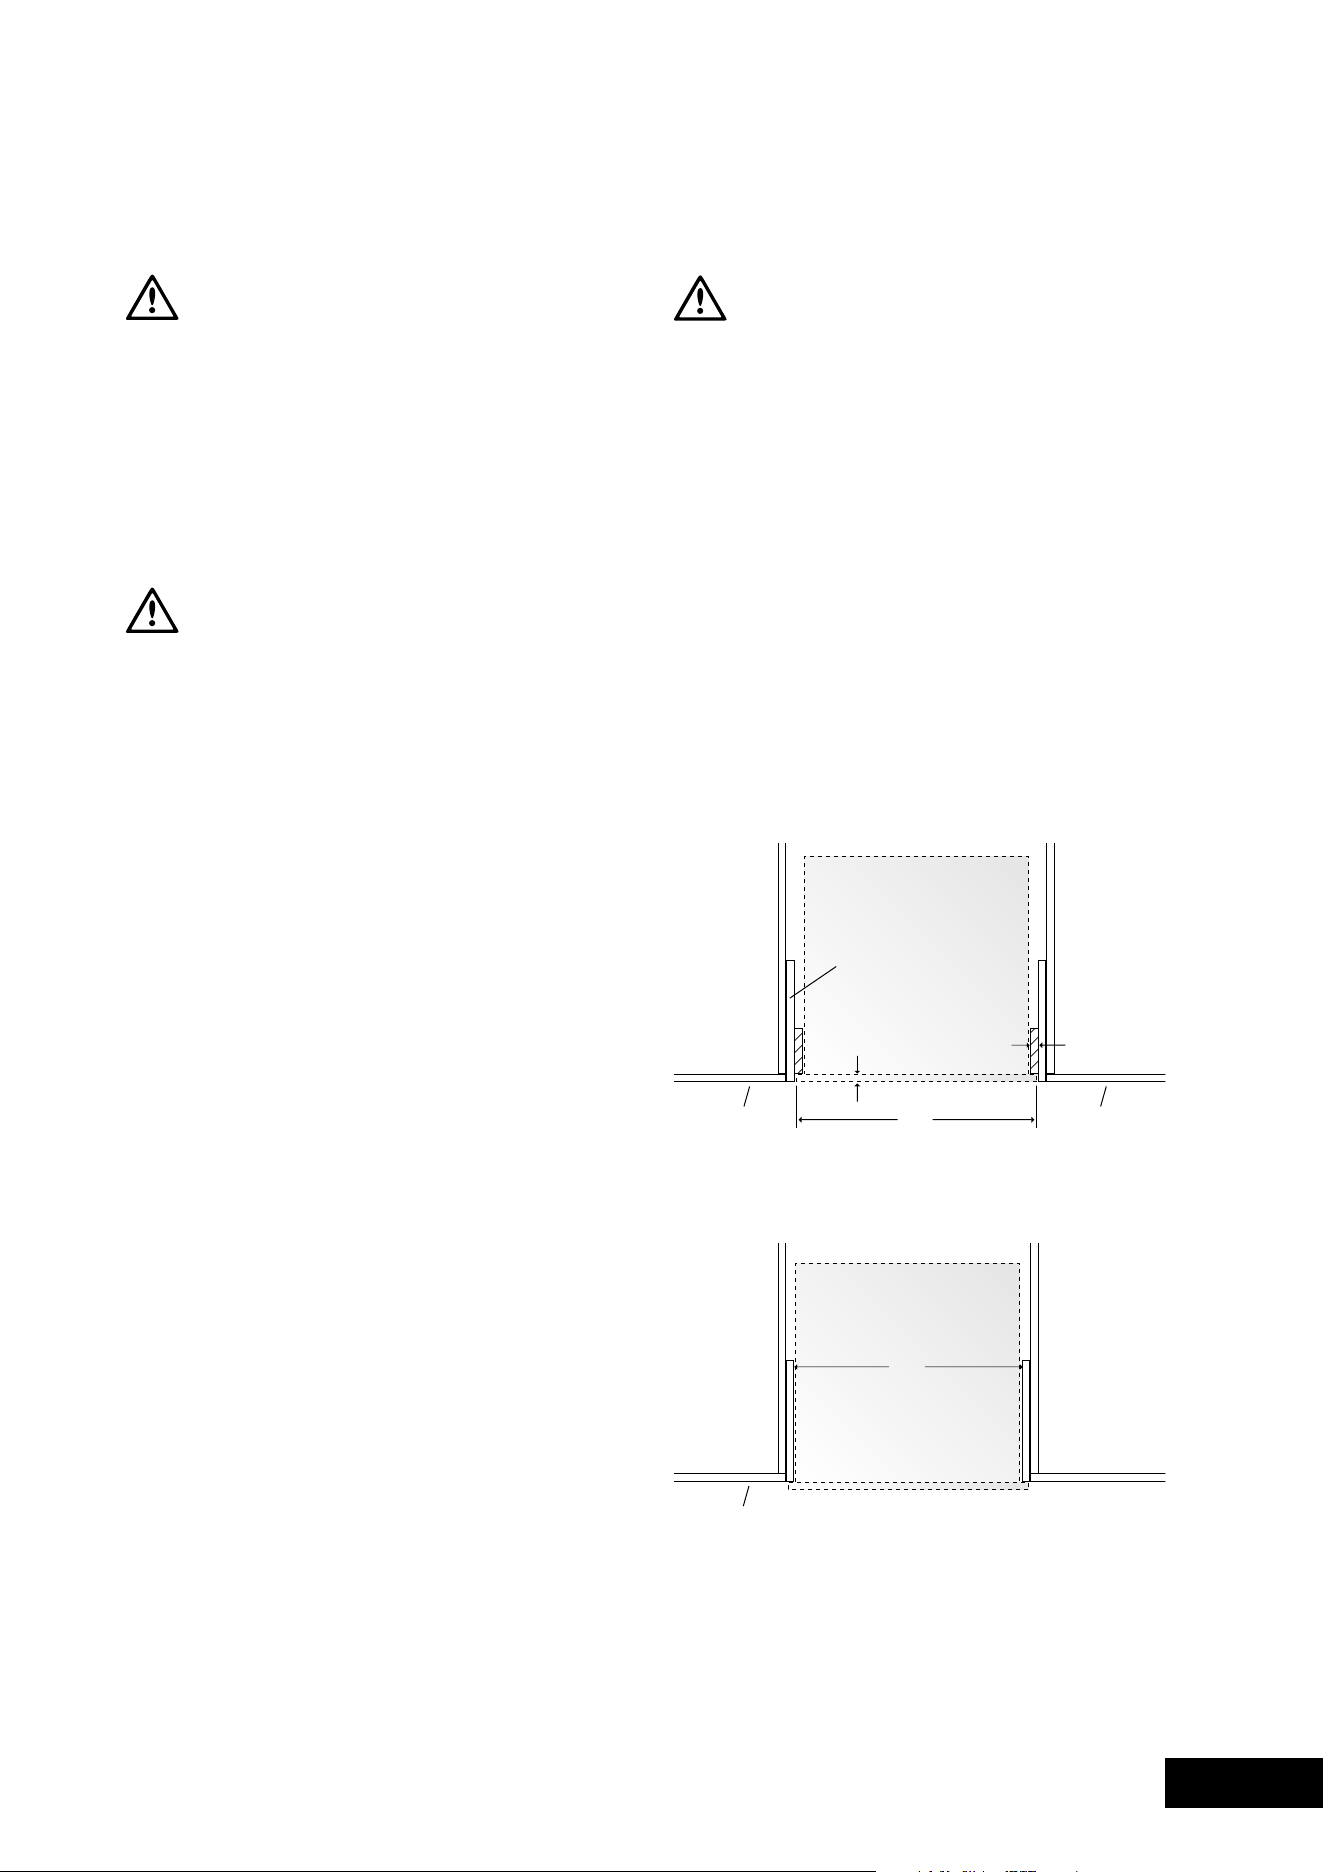
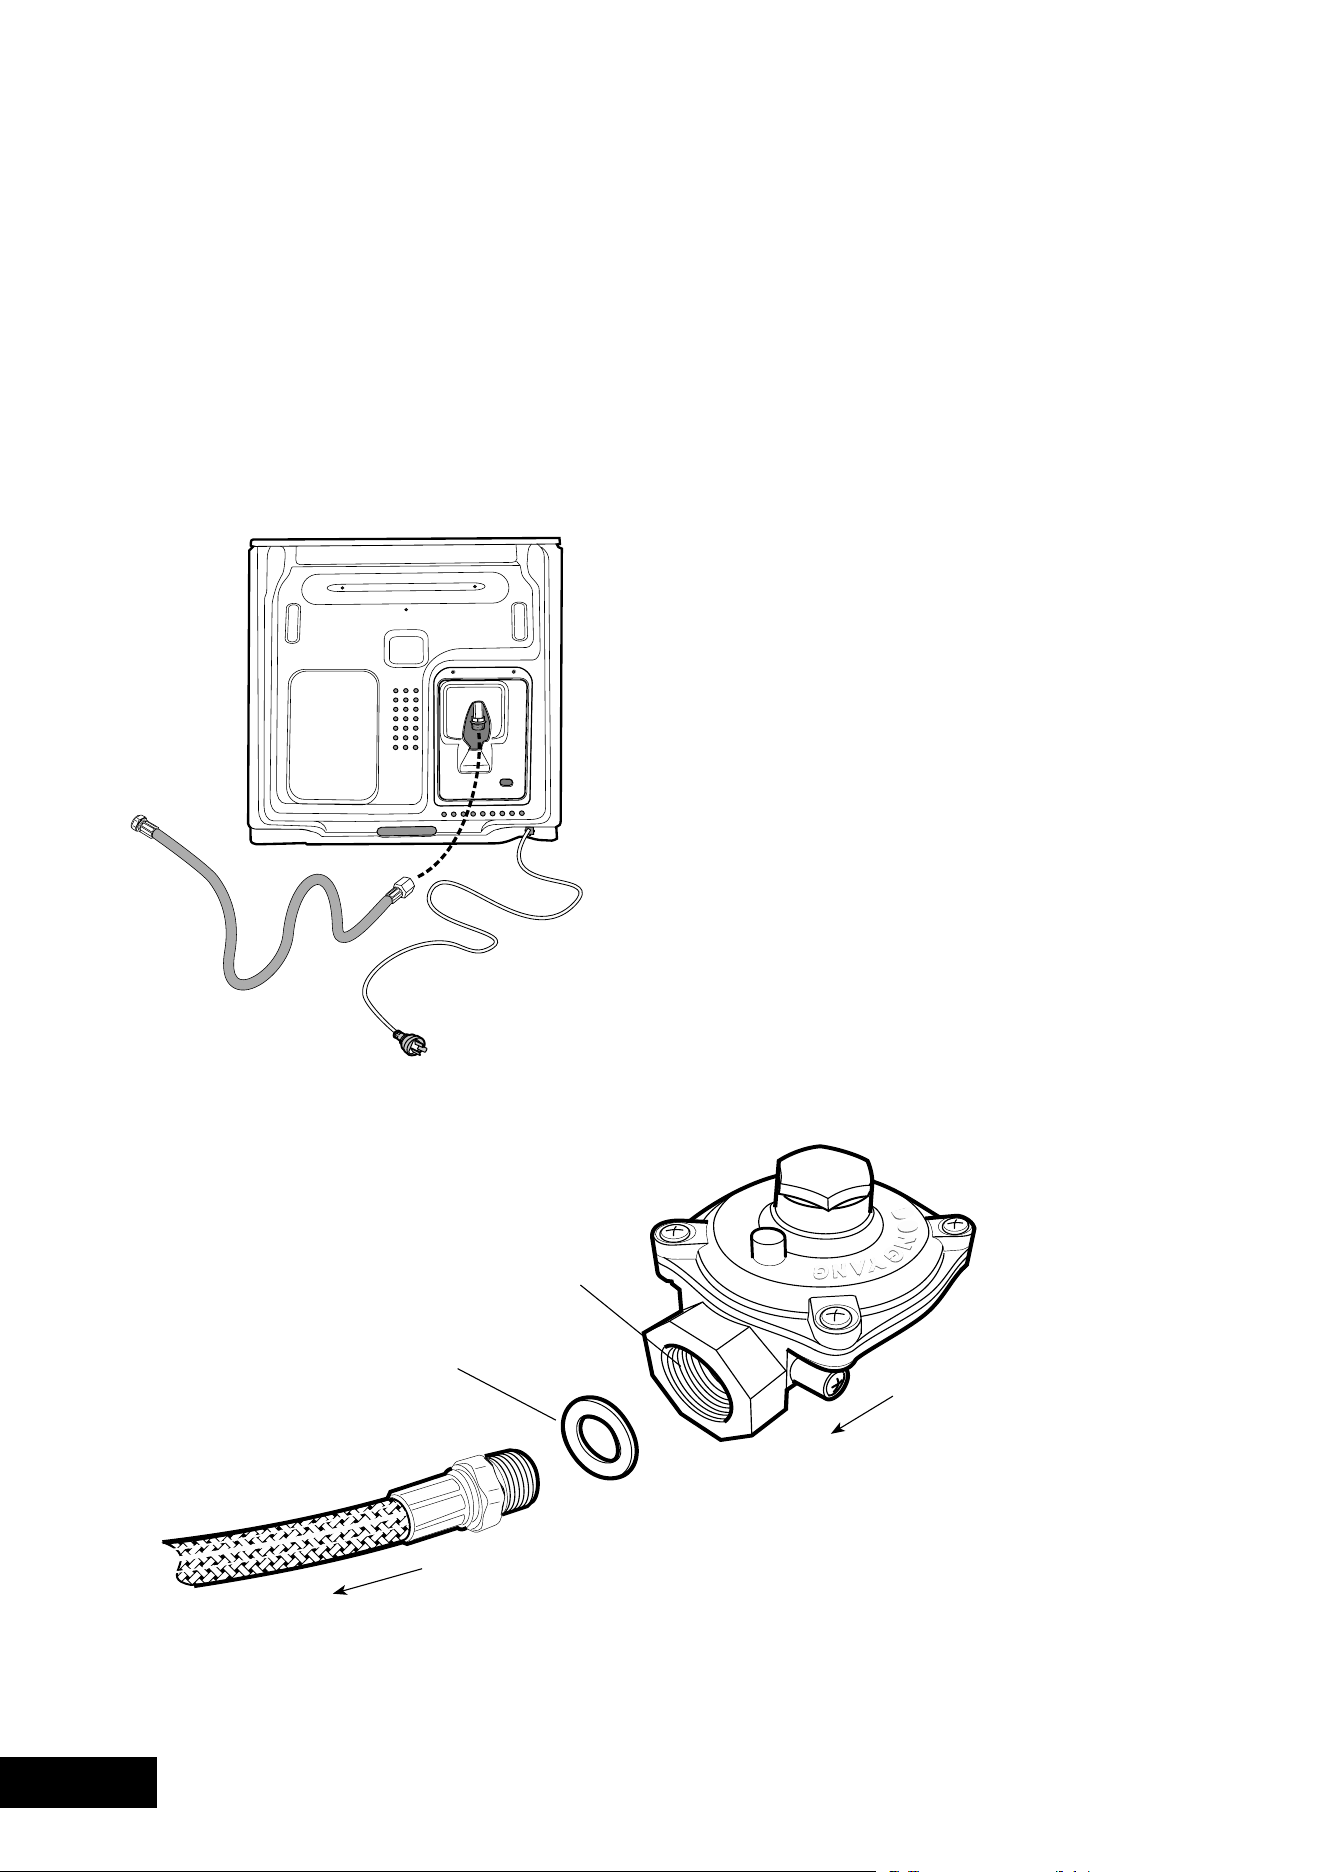
24 25
INSTALLATIONINSTALLATION
Gas Connection
Beforecommencinginstallation,checktoensurethetype
of gas to which the appliance is intended to be connected
matches the gas type given on the appliance data plate.
Checkthedataplate(locatedbehindtheovendoor)to
determine gas type. A gas type label is located on the
back panel near the gas inlet.
A 1700mm long flexible hose is supplied in the pack for
installation purposes.
Connecting flexible hose
• Place a spanner on the flats provided on the gas inlet
to brace the inlet against the action of wrenching when
connecting the hose to the appliance gas inlet. Failure to
do so may damage the appliance.
• An approved thread sealing tape or compound is
requiredfortheconnectionbetweenthehoseandthe
appliance gas inlet.
Appliances for operation on N.G. & S.N.G.
For N.G. and S.N.G appliances the supplied N.G. regulator
must be fitted. For L.P.G appliances (Propane or
Universal LP) the test point fitting supplied must be fitted.
Note: The inlet of the regulator or test point fitting should
be fitted to the consumer piping first. The arrow on the
regulator or test point fitting indicates the direction of gas
flow. Then connect the hose to the outlet of the regulator
or test point fitting using the swivel connection on the hose
and fibre washer supplied.
ensure the regulator or test point fitting is in
a position that is accessible with the appliance
installed and which will allow the appliance to
be withdrawn without disconnecting the hose.
GAS INSTALLATION INfORMATION
Checkalljointsandensurethatconnectionsaresound.
operating Pressures
Supplyandoperatingpressuresforvariousgasesand
correspondinginjectorsizesforeachburner.
GAS TypE
SUppLy pRESSURE
(KpA)
NOMINAL TEST pOINT
pRESSURE (KpA)
OvEN
INjECTOR
NG&SNG 1.13 - 5.00 1.00 1.50
UniversalLP 2.75 2.75 0.82
testing the operation of the Appliance
ThisproducthasanElectronicBurnerControlwithaflame
safeguard system, which includes a safety shutdown
function that operates when the presence of a flame is not
detected within a prescribed period.
Itmaybenecessarytointerrupttheoperationofthecontrol
system in order to facilitate purging of air from the appliance.
Duringthepurgingproceduretheproductshouldbeclosely
monitored to ensure that the ignition spark can be observed
through the round hole in the left hand side of the cover on
the bottom of the oven, and that the solenoid valve can be
heard to open and close.
1. After connecting the gas and leak testing the gas connection,
plug in the service cord and turn on the power.
2.Setthetimeofdayclock(iffitted).
3. Purging procedure:
a. Turn on the oven
b. The unit will commence sparking and the solenoid
valvewillopenforashortperiod.Ifaflameisnot
established, the controller will shut the solenoid valve
and stop sparking, then pause for a moment before
repeating this cycle. At this point if there is still no
flame, the control system will go into safety shutdown.
c. Ifthecontrolsystemdoesgointosafetyshutdown,
turn off all the controls and switch off the power
supply for a few seconds.
d. Then turn the power back on and repeat steps 2.
through to 3.d. until the gas ignites.
Note:Ifthepowersupplyisnotswitchedoff,thena
delayof90secondswillberequiredaftereachsafety
shutdown before a new ignition cycle can be attempted.
formoredetailsabouthowtheElectronicBurnerControl
worksrefertopage16‘ElectronicBurnerControl’.
4.Checkthemanometerzeropointiscorrect.
5. Connectthemanometertothecookerpressuretestpoint.
ThisislocatedontheregulatororLPGinletfitting.
6. Checktheoperatingpressure(refertableabove).
forLPGCookers:Adjusttheregulatorifnecessary
(this may be remote from the cooker).
forNGCookers:Theoutletpressureshouldnotvaryfrom
the nominal outlet pressure of 1.00kPa by more than ±0.20kPa.
Iftheregulatorapppearstonotbeperformingsatisfactorily,
then check the following points.
a. Iftheoutletpressureisconsistentlytoolowthenthe
inlet pressure may be too low and adjustment of an
upstream regulator may be needed, or an upstream
regulator or valve with insufficient flow capacity may
bepresentinthegassupplyline.Ifthisissuspected
then it may be necessary to repeat the checks whilst
measuring both the inlet and outlet pressure to determine
iftheinletpressureisintherange1.13–5kPa.
b. Checkthattheregulatorhasbeenfittedtothegas
supply line in the correct orientation, the arrow on the
base of the body indicates the direction of gas flow.
Oncethesecheckshavebeencompleted,iftheregulator
still fails to perform in a satisfactory manner it should be
replaced.
7. Observetheflameappearanceontheburner.Ifit
is much larger or much smaller than expected, the
injectorsizemayrequirechecking.Whereaflame
is unsatisfactory refer to the servicing instructions and
correct the fault if possible.
8.Checktheoperationofthetimer,lightandfan.
Iftheappliancecannotbeadjustedtoperformcorrectly,
inform the customer of the problem and affix an appropriate
warningnoticetotheappliance.Ifthefaultappearsto
be dangerous, the appliance should be disconnected.
However, if only a minor fault exists, the customer may
wish to use the appliance while awaiting service.
The customer should be advised that, in the event of a fault,
theyshouldcontactthemanufacturer’slocalServiceOrganisation
or the retailer from whom the appliance was purchased.
GAS INSTALLATION INfORMATION
Gas flow
to appliance
Internalflange
N.G. Regulator
(P/No.294-001-031)
Important: flat fibre washer
must be installed
(P/No.115-009-011)
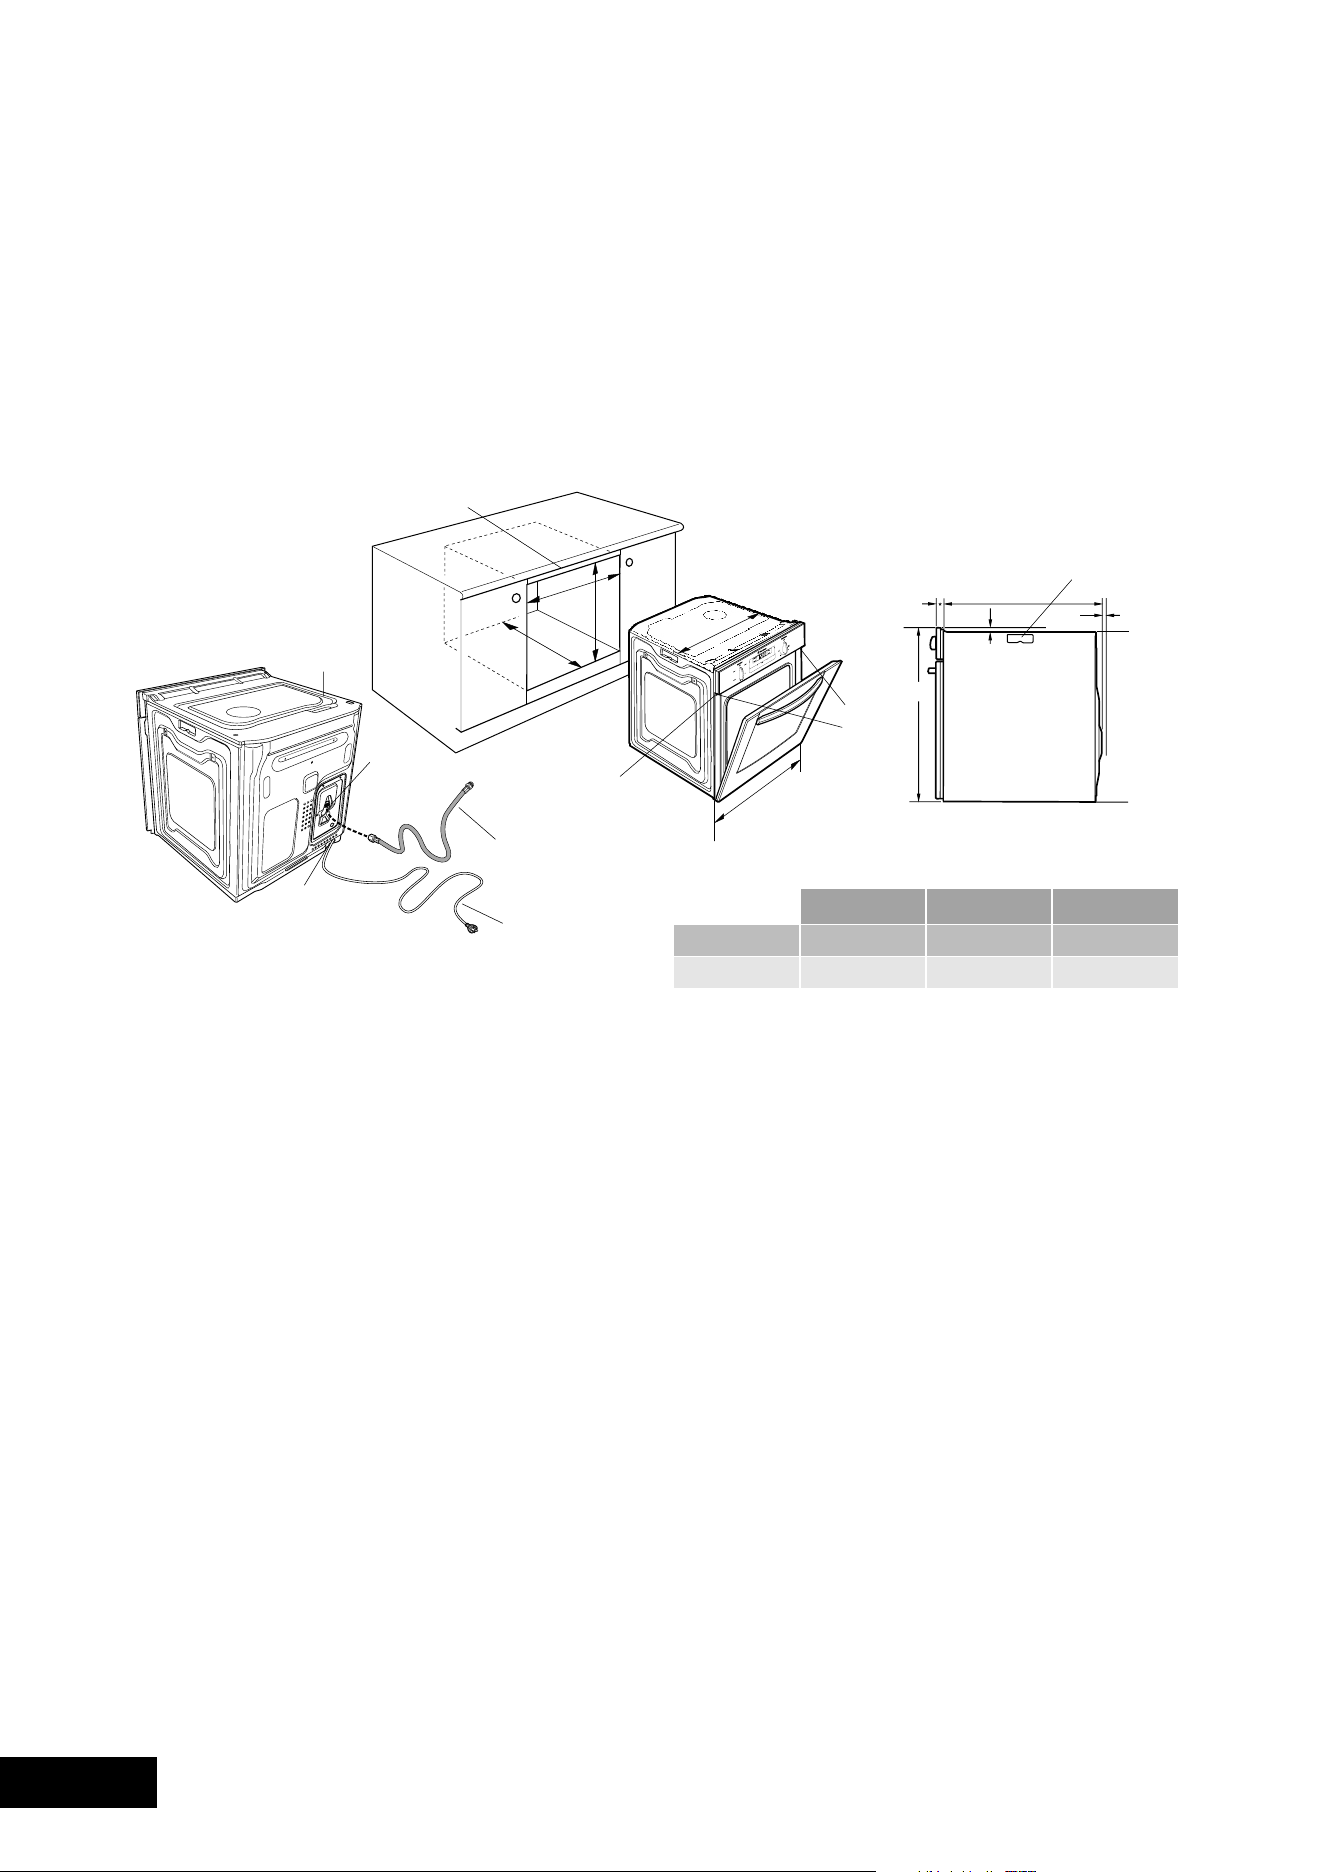
26 27
INSTALLATIONINSTALLATION
A
B
C
561
mounting
holes
596
Use 25mm long black
installation screws
supplied
1.7m flexible gas hose
(supplied unfitted)
1.5m electrical
service cord
D: Gas connection – 150mm from right hand side
– 220mm from bottom
E: Electrical connection – 50mm from right hand side
– at bottom
D
E
carry handle
8mm min
clearance
725
*20
553
15
Separate grill underbench ovens
GAS TypE A B C
flusht 600 731 581min
Proudt 565 723 560min
Recommended cabinet design
Note to INStALLeR:forSeparateGrillUnderbench
InstallationswhereaCooktopisinstalleddirectlyabovethe
appliance, a minimum clearance distance of 10mm must
be allowed for between the bottom of the cooktop & the
topoftheSeparateGrillUnderbenchOven.
Underbench ovens
Your underbench oven looks best when the control panel
is directly under the benchtop. An upper infill panel
may have to be added if the cooktop placed above the
benchtop is too deep.
Refertocooktopinstallationinstructionsforrequired
clearance between cooktop and oven.
GAS INSTALLATION INfORMATIONGAS INSTALLATION INfORMATION
upper infill if required
mounting
holes
carry handle
8mm min
clearance
Use long black
installation screws
supplied
1.7m flexible gas hose
(supplied unfitted)
1.5m electrical
service cord
D: Gas connection – 150mm from right hand side
– 220mm from bottom
E: Electrical connection – 50mm from right hand side
– at bottom
596
595
*20
553
15
558
A
D
E
B
C
GAS TypE A B C
flusht 600 600 581min
Proudt 565 590 560min
Note: Power point connection must be accessible with the
appliance installed.
720mm Module(s)
Bench Top
Kick Panel
Cleat (2)
Infill Panel (2)
Cooker Platform
720mm Module(s)
Area for mounting
of power point.
Supporting shelf 8mm
below door line to give
perfect alignment of
cooker & cupboard
(kick panel notched
to suit).
Front View
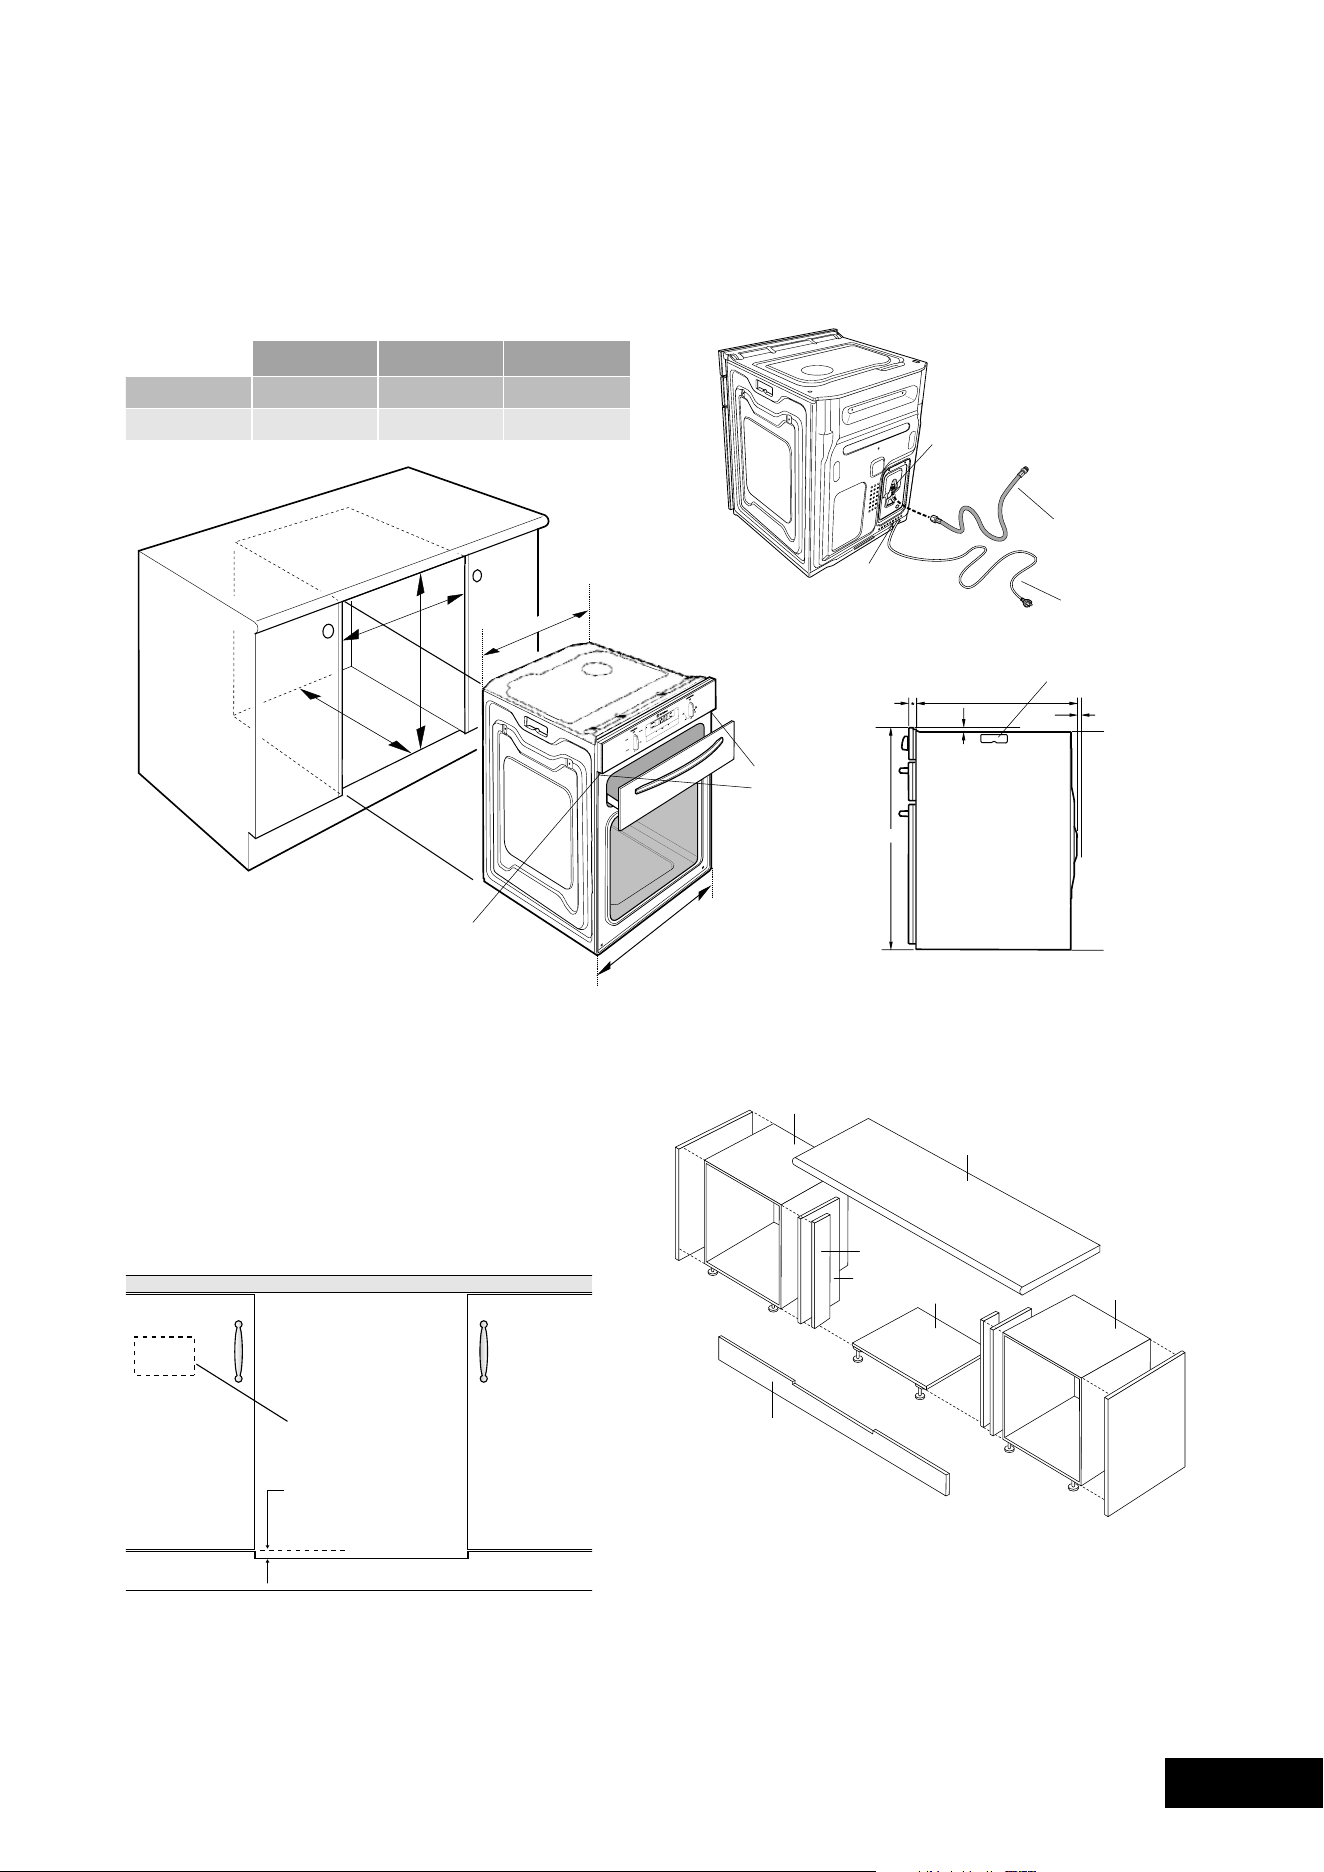
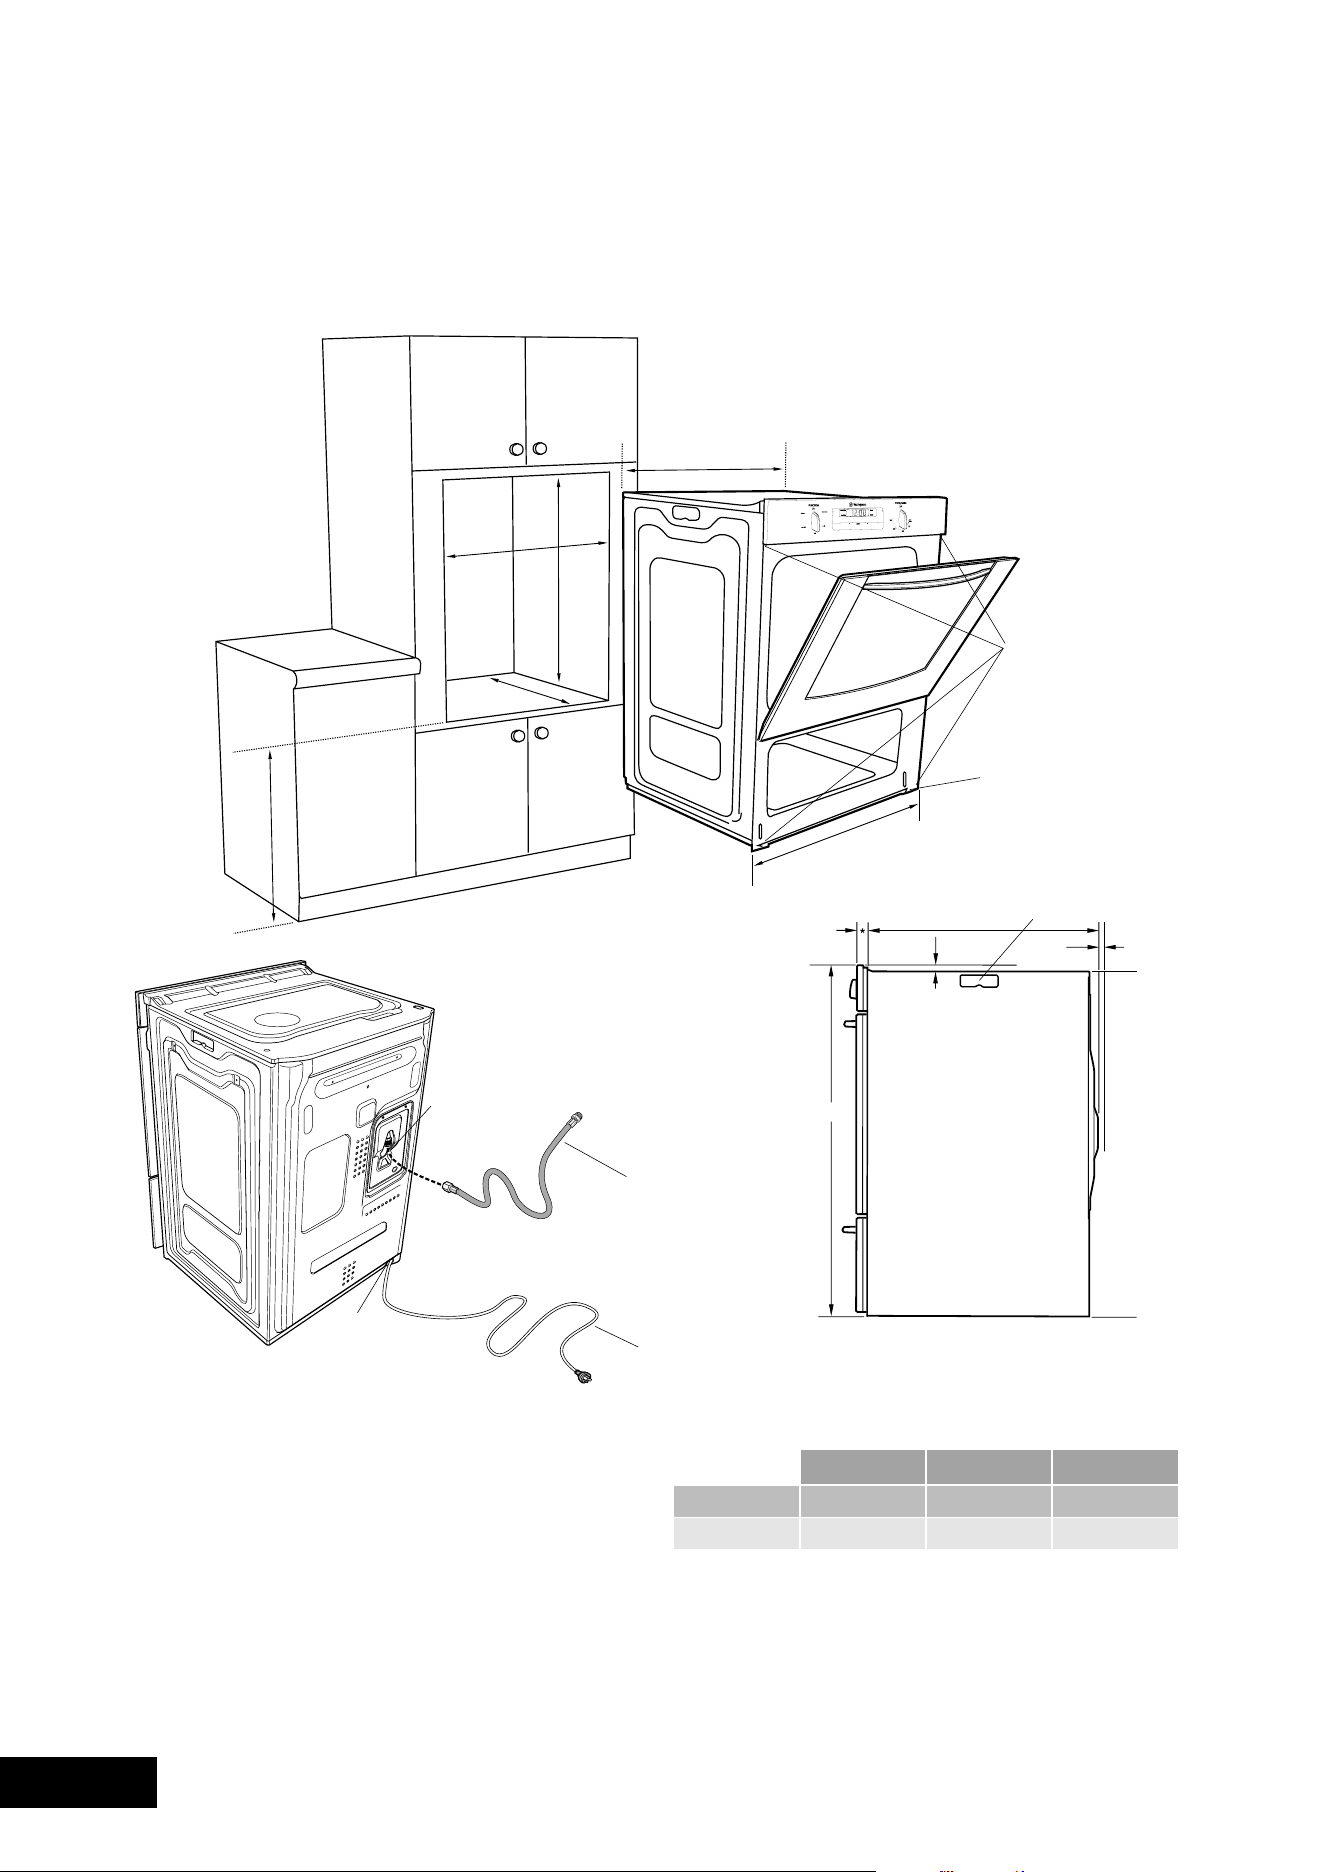
28 29
NOTESINSTALLATION
650
min
A
C
B
561
596
mounting
holes
Use 15mm long black
installation screws
supplied
carry handle
8mm min
clearance
888
*20
553
15
1.7m flexible
gas hose
(supplied unfitted)
1.5m electrical
service cord
E
D
D: Gas connection – 150mm from right hand side
– 220mm from bottom
E: Electrical connection – 50mm from right hand side
– at bottom
Separate grill wall oven
GAS INSTALLATION INfORMATION
GAS TypE A B C
flusht 600 893 581min
Proudt 565 885 560min

30 31
WARRANTYNOTES
This document sets out the terms and conditions of the product
warranties for Electrolux Appliances. It is an important document.
Please keep it with your proof of purchase documents in a safe place
for future reference should you require service for your Appliance.
1. Inthiswarranty
(a) ‘acceptablequality’asreferredtoinclause10ofthiswarrantyhas
thesamemeaningreferredtointheACL;
(b) ‘ACL’meansTradePracticesAmendment(AustralianConsumer
Law)Act(No.2)2010;
(c) ‘Appliance’meansanyElectroluxproductpurchasedbyyou
accompaniedbythisdocument;
(d) ‘ASC’meansElectrolux’authorisedservicedcentres;
(e) ‘Electrolux’meansElectroluxHomeProductsPtyLtdof163
O’RiordanStreet,Mascot,NSW2020,ABN51004762341in
respectofAppliancespurchasedinAustraliaandElectrolux(NZ)
Limitedof3-5NiallBurgessRoad,MountWellington,inrespect
ofAppliancespurchasedinNewZealand;
(f) ‘majorfailure’asreferredtoinclause10ofthiswarrantyhasthe
samemeaningreferredtointheACLandincludesasituationwhen
anAppliancecannotberepairedoritisuneconomicforElectrolux,at
itsdiscretion,torepairanApplianceduringtheWarrantyPeriod;
(g) ‘WarrantyPeriod’means:
(i) wheretheApplianceisusedforpersonal,domesticorhousehold
use(i.e.normalsinglefamilyuse)assetoutintheinstruction
manual,theApplianceiswarrantedagainstmanufacturing
defectsinAustraliafor24monthsandinNewZealandfor24
months,followingthedateoforiginal
purchaseoftheAppliance;
(ii) wheretheApplianceisusedforcommercialpurposes(including
beingusedtodirectlyassistabusinessorwheretheApplianceis
usedinamulti-familycommunalorsharetypeenvironment),the
Appliancewillthenbewarrantedagainstmanufacturingdefects
inAustraliafor3monthsandinNewZealandfor3months,
followingthedateoforiginalpurchaseoftheAppliance.
(h) ‘you’meansthepurchaseroftheAppliancenothavingpurchased
theApplianceforre-sale,and‘your’hasacorrespondingmeaning.
2. ThiswarrantyonlyappliestoAppliancespurchasedandusedinAustralia
orNewZealandandisinadditionto(anddoesnotexclude,restrict,or
modifyinanyway)anynon-excludablestatutorywarrantiesinAustralia
orNewZealand.
3. DuringtheWarrantyPeriodElectroluxoritsASCwill,atnoextracharge
ifyourApplianceisreadilyaccessibleforservice,withoutspecial
equipmentandsubjecttothesetermsandconditions,repairorreplace
anypartswhichitconsiderstobedefective.ElectroluxoritsASCmay
useremanufacturedpartstorepairyourAppliance.Youagreethat
anyreplacedAppliancesorpartsbecomethepropertyofElectrolux.
Thiswarrantydoesnotapplytolightglobes,batteries,
ltersorsimilar
perishableparts.
4. PartsandAppliancesnotsuppliedbyElectroluxarenotcoveredby
thiswarranty.
5. Youwillbearthecostoftransportation,travelanddeliveryofthe
AppliancetoandfromElectroluxoritsASC.Ifyouresideoutsideofthe
servicearea,youwillbearthecostof:
(a) travelofanauthorisedrepresentative;
(b) transportationanddeliveryoftheAppliancetoandfrom Electroluxor
itsASC,
Inallinstances,unlesstheApplianceistransportedbyElectroluxoran
Electroluxauthorisedrepresentative,theApplianceistransportedatthe
owner’scostandriskwhileintransittoandfromElectroluxoritsASC.
6. Proofofpurchaseisrequiredbeforeyoucanmakeaclaimunder
thiswarranty.
7. Youmaynotmakeaclaimunderthiswarrantyunlessthedefectclaimed
isduetofaultyordefectivepartsorworkmanship.Electroluxisnotliable
inthefollowingsituations(whicharenotexhaustive):
(a) theApplianceisdamagedby:
(i) accident
(ii) misuseorabuse,includingfailuretoproperlymaintainorservice
(iii) normalwearandtear
(iv) powersurges,electricalstormdamageorincorrectpowersupply
(v) incompleteorimproperinstallation
(vi) incorrect,improperorinappropriateoperation
(vii)insectorvermininfestation
(viii)failuretocomplywithanyadditionalinstructions
suppliedwith
theAppliance;
(b) theApplianceismodiedwithoutauthorityfromElectroluxinwriting;
(c) theAppliance’sserialnumberorwarrantysealhasbeenremoved
ordefaced;
(d) theAppliancewasservicedorrepairedbyanyoneotherthan
Electrolux,anauthorisedrepairerorASC.
8. Thiswarranty,thecontracttowhichitrelatesandtherelationship
betweenyouandElectroluxaregovernedbythelawapplicablewhere
theAppliancewaspurchased.WheretheAppliancewaspurchasedin
NewZealandforbusinesspurposestheConsumerGuaranteeActdoes
notapply.
9. Totheextentpermittedbylaw,Electroluxexcludesallwarrantiesand
liabilities(otherthanascontainedinthisdocument)includingliabilityfor
anylossordamagewhetherdirectorindirectarisingfromyourpurchase,
useornonuseoftheAppliance.
10.ForAppliancesandservicesprovidedbyElectroluxinAustralia,
theAppliancescomewithaguaranteebyElectroluxthatcannotbe
excludedundertheAustralianConsumerLaw.You areentitledtoa
replacementorrefundforamajorfailureandforcompensationforany
otherreasonablyforeseeablelossordamage.Youarealsoentitledto
havetheAppliancerepairedorreplacediftheAppliancefailstobeof
acceptablequalityandthe
failuredoesnotamounttoamajorfailure.
Thebenetstoyougivenbythiswarrantyareinadditiontoyourother
rightsandremediesunderalawinrelationtotheAppliancesorservices
towhichthewarrantyrelates.
11.AtalltimesduringtheWarrantyPeriod,Electroluxshall,atitsdiscretion,
determinewhetherrepair,replacementorrefundwillapplyifan
Appliancehasavalidwarrantyclaimapplicabletoit.
12.ForAppliancesandservicesprovidedbyElectroluxinNewZealand,
theAppliancescomewithaguaranteebyElectroluxpursuanttothe
provisionsoftheConsumerGuaranteesAct,theSaleofGoodsActand
theFairTradingAct.
13.Toenquireaboutclaimingunderthiswarranty,pleasefollowthesesteps:
(a) carefullychecktheoperatinginstructions,usermanualandtheterms
ofthiswarranty;
(b) havethemodelandserialnumberoftheApplianceavailable;
(c) havetheproofofpurchase(eganinvoice)available;
(d) telephonethenumbersshownbelow.
14.Youacceptthatifyoumakeawarrantyclaim,ElectroluxanditsASC
mayexchangeinformationinrelationtoyoutoenableElectroluxtomeet
itsobligationsunderthiswarranty.
Warranty
FORSALESINAUSTRALIAANDNEWZEALAND
APPLIANCE:BUILT-INOVEN,COOKTOP
ANDFREESTANDINGCOOKER
Important Notice
Beforecallingforservice,pleaseensurethatthestepslistedinpoint13abovehavebeenfollowed.
FOR SERVICE
ortondtheaddressofyournearest
stateservicecentreinAustralia
PLEASE CALL 13 13 49
Forthecostofalocalcall(Australiaonly)
SERVICE AUSTRALIA
ELECTROLUXHOMEPRODUCTS
www.electrolux.com.au
FOR SPARE PARTS
ortondtheaddressofyournearest
statesparepartscentreinAustralia
PLEASE CALL 13 13 50
Forthecostofalocalcall(Australiaonly)
FOR SERVICE
ortondtheaddressofyournearest
authorisedservicecentreinNewZealand
FREE CALL 0800 10 66 10
(NewZealandonly)
SERVICE NEW ZEALAND
ELECTROLUXHOMEPRODUCTS
www.electrolux.co.nz
FOR SPARE PARTS
ortondtheaddressofyournearest
statesparepartscentreinNewZealand
FREE CALL 0800 10 66 20
(NewZealandonly)
GOV_Warr_Apr11

AUSTRALIA
phone: 1300 363 640
fax: 1800 350 067
email: [email protected]
web: www.westinghouse.com.au
NEWZEALAND
phone: 09 573 2384
fax: 0800 363 600
email: [email protected]
web: www.westinghouse.co.nz
For more information on all Westinghouse appliances,
or for dimension and installation information, call into your retailer,
phone or email our customer care team or visit our website:
TOp SERvICE
TopServiceencompassestheaftersalesservice
providedbyTheElectroluxGrouptoconsumers
including delivery, home service and spare parts.
westinghouse. we are part of the Electrolux family.
Share more of our thinking at www.electrolux.com
P/No: WA 0342 001 575 A eCN: 11A086J
©2011ElectroluxHomeProductsPtyLtd
ABN51004762341
Printcode:WMAN_GASBIO_Jun11