Loading ...
Loading ...
Loading ...
7
Resetting the Pre-Set Buttons to the original
factory settings
1. Access the Owner Controls by activating the power switch located on
the back of the motor base while pressing button 2. Continue to press button 2.
2. Once the unit powers up, it will cycle through four screens then stop on the motor
status screen. Press button 2 again, within 12 seconds, to scroll through the menu
settings.
3. Scroll using button 2. The screen will display “1 TO OVERWRITE CURRENT PROGRAM”.
Press button 1 to reset to the original factory settings.
1 Single Thin
Starts at low speed for 6 seconds, ramps to medium speed for
9 seconds
:15
2 Double Thin
Starts at low speed for 6 seconds, ramps to medium speed for
15 seconds
:21
3 Single Smoothie
Starts at low speed for 5 seconds, quickly ramps to medium speed
for 2 seconds then to high speed for 19 seconds
:26
4 Double Smoothie
Starts on low speed for 6 seconds then to high speed for 24
seconds
:32
5 Hard Pack Shake
Ramps to high for 10 seconds then back down to low speed for
15 seconds
:25
6 Thick Hard to Blend
Starts at low speed for 4 seconds, gradually ramps to medium
speed for 6 seconds then medium high for 5 seconds, last 20
seconds on high
:35
7 Thick Hard to Blend Double
Starts at low speed for 4 seconds, gradually ramps to medium
speed for 6 seconds then medium high for 10 seconds, last 25
seconds on high
:45
8 General Program 1 Starts at low speed for 8 seconds then to high speed for 24 seconds :32
Recipe Options
Arranged by recipe number (#) and drink type:
DRINK TYPE#
DESCRIPTION
RUN
TIME
9 General Program 2
Starts at medium speed for 11 seconds then to medium high speed
for 3 seconds
:14
10 General Program 3
Starts at medium speed for 7 seconds then to high speed for
13 seconds
:20
11 General Program 4
Slowly ramps to low speed for 10 seconds, immediately to medium
high for 20 seconds then immediately to high speed for 8 seconds
:38
12 Frozen Coee
Starts at low speed for 4 seconds then to medium speed for
14 seconds
:18
13 Soft Serve Milkshake
Starts at low speed for 3 seconds then to medium high speed
for 9 seconds
:12
14 Ice and Puree
Slowly ramps to a low speed for 7 seconds, medium high speed for
4 seconds then high speed for 7 seconds
:19
15 Frozen Bowl 1
Slowly ramps to low speed for 7 seconds, high speed for 53
seconds
:60
16 Frozen Bowl 2
Slowly ramps to high speed for 13 seconds, immediately
ramps to low speed for 8 seconds then immediately back
to high for 29 seconds
:50
The following programs are designed to be used with the Vitamix Aerating Container (sold separately). Contact your local Vitamix Dealer/
Distributor to puchase the Aerating Container. Contact Vitamix Customer Service directly for availability and product information.
17 Cold Foam 1
Slowly ramps to low speed for 20 seconds
:20
18 Cold Foam 2 Slowly ramps to low speed for 25 seconds :25
19 Cold Foam 3 Immediately ramps to high for 20 seconds :20
20 Cold Foam 4 Slowly ramps to high for 30 seconds :30
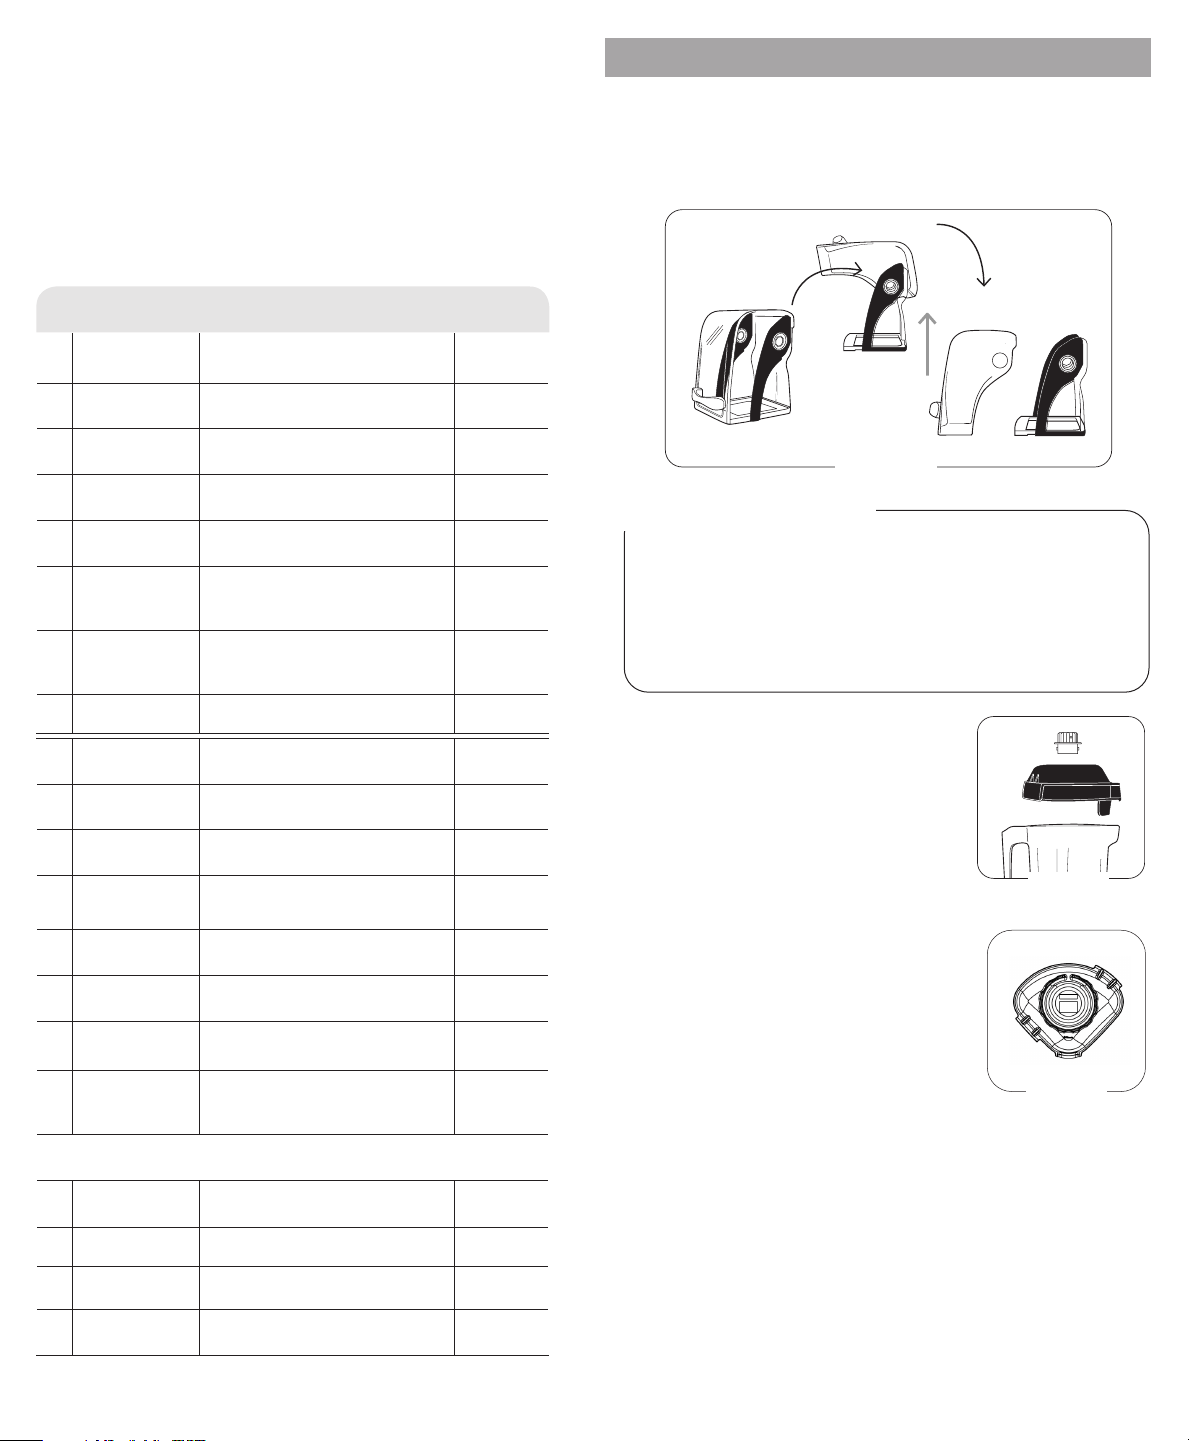
mac h i n e aSS e m b ly
FIGURE A
Cover Door
1. Lift the handle to open the cover. Gently spread the sides of the door over the
round hinges and remove.
2. To reinstall the cover door, gently spread the sides of the door and place the
door hinge cutouts over the round hinges.
IMPORTANT NOTES!
Containers:
• Touch & Go® Advance machines are optimized for use with the Vitamix®
32 oz. / 0,9 L Advance container (3 sided container). The 64 oz. / 2,0 L standard
container will not fit in the compact cover used on the Touch & Go® Advance.
Contact Vitamix customer service at 800-886-5235 or contact your distributor for
more information.
• Outside the United States and Canada, your machine may come with a dierent
container configuration.
Two-Piece Lid (Figure A)
32 oz. / 0,9 L Advance Container
The two-piece lid is easy to clean and easy to put on,
take o and seal.
• To remove a fully latched lid, lift the two tabs and
pull upward and o.
• Twist the center lid plug to fasten or remove.
• To secure lid plug, rotate it so one tab locks
between the notches on top of rubber lid.
FIGURE A
Blade Assembly
Blade Agitator Assembly: The blade assembly includes a precision-hardened
stainless steel blade with enclosed double sealed steel ball bearings for maximum
durability. The rugged blade assembly literally explodes molecules of food and ice
in the container, helping every batch to homogenize more eectively. The blades
do not need to be removed for normal cleaning.
Drive Spline: Inserts into drive socket on the motor base to turn the blade.
Note: Removing and replacing your container while the drive socket is still rotating
will strip the drive spline “teeth.” (This part is NOT removable.)
Retainer Nut: Must be tight.
FIGURE B
One-Piece Lid (Figure B)
32 oz. / 0,9 L Advance Container
The one-piece lid is easy to clean and easy to put on,
take o and seal.
• There is no lid plug for this lid.
• Ingredients can be added through port on top.
Loading ...
Loading ...
Loading ...