
Loading ...
Loading ...
Loading ...
Transporting children safely
Seat belt routing on the integrated
c
hi
l
d seat
Fig. 94 Integrated child seats. adjusting the
se
at
belt
.
Fig. 95 Integrated child seats. seat belt rout-
in
g w
ith guide h
andle
Using the guide handle ›
›
›
Fig. 95, position
the seat belt so that the shoulder part of the
belt lies on the centre of the child's shoulder.
Seat belt guide handle
●
Secure the seat belt guide handle to the
side head restraint on the window side. The
guide handle is secured by a button.
●
Open the upper button on the seat belt
guide handle and pass the belt webbing be-
low the side head restraint and through the
guide handle.
●
Close the button again.
Adjusting the seat belt
●
Guide the automatic three-point seat belt
below the side head restraint.
●
Pull the latch plate and slowly place the
belt webbing across the child's chest and
lap.
●
Insert the latch plate into the buckle for the
appropriate seat and push it down until it is
securely locked with an audible click.
●
Pull the belt to ensure that the latch plate is
securely engaged in the buckle.
WARNING
The seat belt only offers maximum protection
from sever
e or fatal injuries when it is cor-
rectly positioned.
●
Childr
en must assume the proper sitting
position and be properly belted in while trav-
elling.
●
The shoulder belt must be positioned
against the middle of the shoulder.
●
The seat belt must lie flat and fit comforta-
bly.
●
Allow the belt to retract until it fits tightly
over the child's seat.
●
The lap part of the seat belt must lie across
the pelvis, never across the stomach.
●
Only one child may occupy a child seat.
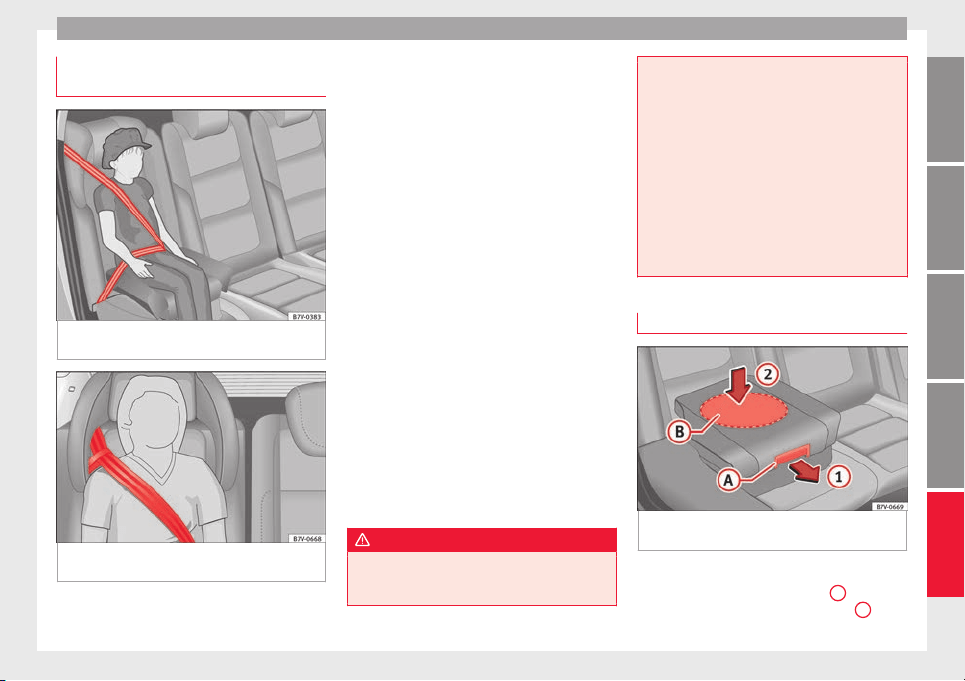
Removing the child seat
Fig. 96 Integrated child seats. lowering the
c
u
shion
Lowering the cushion
●
Pull the unlock lever ›
›
›
Fig. 96
A
on the
c
u
shion in the dir
ection of the arrow
1
.
»
81
Technical dataAdviceOperationEmergenciesSafety
Loading ...
Loading ...
Loading ...