NOTE: Some fine grounds may flow through the filter and appear as sediment in the carafe.
9. Control Panel
See detailed illustration, page 6.
10. Brew Pause™
Stops flow of coffee from basket when carafe is removed (20 seconds max) from the heater plate, so a cup can be poured mid-brew.
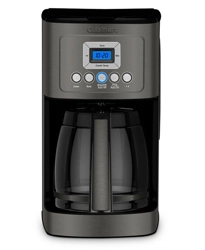
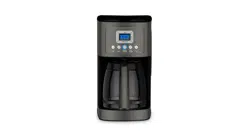
11. 14-Cup Glass Carafe
The easy-pour carafe has an ergonomic handle and brewed coffee markings for 4 to 14 cups.
12. 60-Second Reset (not shown)
One-minute protection in case a breaker trips, the unit is unplugged, or the power fails. It holds all programmed information, including time of day, Auto On time and Auto Off time.
13. Measuring Scoop
14. BPA Free (not shown)
All parts that come in contact with coffee or liquids are BPA free.
GETTING TO KNOW YOUR CONTROL PANEL
Detailed programming and use instructions are on pages 7 and 8.
1. Ready Tone Button
Lets you turn an audible “Brew Cycle Finished” alert on or off.
2. Blue Backlit Display
Displays time of day, Auto On and Auto Off times.
A. Low, Medium and High (L,M,H) warming plate indicators.
B. Ready Tone off icon appears when Ready Tone is off.
3. Hour and Minute Buttons
Use to set hours and minutes for time of day, Auto On and Auto Off times.
4. Carafe Temperature Button
Adjusts warming plate temperature to Low, Medium or High to keep freshly brewed coffee at the temperature you prefer.
5. Clean Button
Red indicator appears when it is time to decalcify your coffeemaker.
6. Bold Flavor Strength Button
Lets you choose bold or regular coffee flavor; blue indicator appears when bold is selected.
7. Brew/Off & Auto Off Button
Turns coffeemaker on and off. Use the Auto Off feature to program the time you want the coffeemaker to shut off – from 0 to 4 hours after brew cycle is finished.
8. Prog/Auto On Button
Lets you program coffeemaker to automatically begin brewing up to 24 hours in advance.
9. 1–4 Cup Button
Adjusts brew process to maximize coffee flavor when brewing fewer than 5 cups. Blue indicator appears when function is selected.
BEFORE BREWING YOUR FIRST POT OF COFFEE
Rinsing your coffeemaker: During the manufacturing process, dust can get trapped in the unit. We recommend flushing out the system before brewing your first pot of coffee. Simply fill the reservoir, power on the unit, and follow steps 1, 3 and 5 on page 8 under MAKING COFFEE. Do not add coffee!
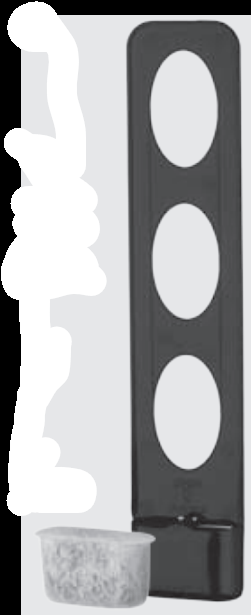
Charcoal Water Filter
Your coffeemaker comes with a charcoal water filter that eliminates chlorine, bad tastes and odors from tap water.
Inserting the Water Filter
• Remove the filter from polybag and soak it, fully immersed, in cold tap water for 15 minutes.
• Lift the water filter holder out of the water reservoir.
• Press down on the filter compartment and pull toward you to open.
• Place filter into the holder and snap it closed. Be careful – improper placement can tear the filter skin.
• Flush filter by running cold tap water through holes in bottom of compartment for 10 seconds.
• Allow the filter to drain completely.
• Slide the water filter holder back into the channel in the water reservoir, pushing it down to the base of the unit.
NOTE: We recommend changing the water filter every 60 days or after 60 uses, and more often if you have hard water.
Replacement filters can be purchased in stores, by calling Cuisinart Customer Service, or at cuisinart website
PROGRAMMING YOUR COFFEEMAKER
SETTING THE CLOCK
When the coffeemaker is plugged in, 12:00 will flash in the display for 10 seconds, indicating the unit is in Clock Set mode. If 12:00 stops flashing, simply press and hold Hour or Minute button to return to flashing Clock Set mode.
Setting Hours and Minutes
Press either button to select the desired time. Hold buttons down to scroll through the digits quickly, or press and release to advance one digit at a time. Be sure the PM indicator is on if setting a PM time.
SETTING THE AUTO ON TIME
1. Press and hold the Prog/Auto On button for 2 seconds.
The digital display will flash the default (12:00) or previously selected time. Follow directions under SETTING THE CLOCK (above) to program your startbrew time. Five seconds after finishing, the unit will automatically exit Auto On Setup mode and the indicator light will illuminate, letting you know Auto On is activated.
NOTE: To exit Auto On Setup mode, you can also just press Auto On button again.
2. To activate Auto On using previously selected time:
Press the Prog/Auto On button.
Previously set time will appear and indicator will light up. Display will return to clock setting.
3. To deactivate Auto On:
Press illuminated Auto On button; light will go off, indicating mode is turned off.
SETTING THE AUTO OFF TIME
1.Press and hold the Auto Off button for 2 seconds.
The digital display will flash the programmed Auto Off default (2:00) or previously selected time. Follow directions under SETTING THE CLOCK to program coffeemaker to shut off from 0 to 4 hours after brew cycle is finished.
2. To exit/confirm Auto Off time setting:
Do not touch any buttons. Auto Off Setup mode will be exited automatically after 5 seconds.
TURNING OFF READY TONE
Your coffeemaker features a Ready Tone that beeps 5 times when coffee is finished brewing. To turn this alert off, press Tone button; an icon will appear in display to indicate tone is off. To turn tone back on, press Tone button again; icon will disappear.
MAKING COFFEE
Follow instructions in BEFORE BREWING YOUR FIRST POT OF COFFEE (page 7).
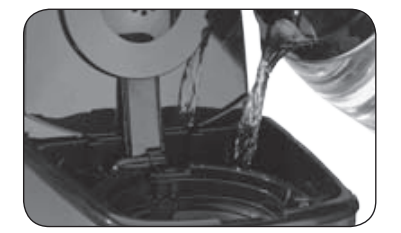
1. Fill the water reservoir
Lift the coffeemaker lid to open. Pour the desired amount of water into the water reservoir using the water level indicator located at the side of the coffeemaker.
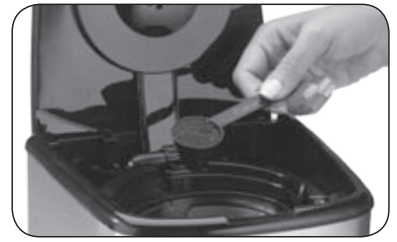
2. Add the ground coffee
Insert a #4 paper filter OR the gold-tone filter. Be sure that the paper filter is completely open and fully inserted in the basket. It may help to fold and flatten the seams of a paper filter beforehand. Add 1 level scoop of ground coffee per cup. Adjust the amount according to taste.
NOTE: The maximum capacity for ground coffee is 15 tablespoons for this coffeemaker. Exceeding this amount may cause overflow if the coffee is too finely ground.
3. Position carafe and plug in unit
Place carafe on heating plate and be sure coffeemaker lid is closed. Plug coffeemaker into an electrical outlet.
4. Set preferences
a. Press the 1–4 cup button if you are brewing fewer than 5 cups. The indicator light will illuminate.
b. Press the Bold button to select stronger coffee flavor, if desired. The button’s indicator light will illuminate. Press again to turn off light and brew at regular strength.
c. Choose Low (L), Medium (M) or High (H) carafe temperature by pressing Carafe Temp button. Selection will appear in display.
5. Start Brewing
Press the Brew/Off button to begin brewing.
6. After brewing
When the brewing cycle has been completed, five beeps will sound. Coffee will continue to stream from the filter for several seconds.
Note: Reservoir cover may be hot during and directly after brewing. Wait at least 10 minutes before opening.
Brew Pause™ Feature
This feature interrupts the flow of coffee from the basket to let you pour that first cup mid-brew. Because the flavor profile of coffee brewed at the start of a cycle differs from that brewed toward the end, be aware that using this feature will weaken the flavor strength of the finished pot.
NOTE: Removing carafe for more than 20 seconds during brew cycle may cause filter basket to overflow.
CLEANING AND MAINTENANCE
Always turn coffeemaker off and remove the plug from the electrical outlet before cleaning.
Lift up the coffeemaker lid. Remove and discard the paper filter and ground coffee. The filter basket can be washed in warm, soapy water and rinsed thoroughly, or cleaned in the upper rack of the dishwasher. Dry all parts after use.
Do not put any water in the unit once the filter basket has been removed. Wipe the area under the filter basket with a damp cloth.
Remove the carafe from the heating plate. Discard any remaining coffee. The carafe and lid can be washed in warm, soapy water and rinsed thoroughly, or placed in a dishwasher. The carafe and carafe lid should be placed on the upper rack only.
Do not use any scouring agents or harsh cleansers on any part of the coffeemaker.
Never immerse base unit in water or other liquids. To clean base, simply wipe with a clean, damp cloth and dry before storing. Fingerprints and other blemishes on the housing can be washed off with soap and water or a nonabrasive cleaning solution. Wipe heating plate with a clean, damp cloth. Never use rough, abrasive materials or cleansers to clean the heating plate. Do not dry the inside of the water reservoir with a cloth, as lint may remain.
Maintenance
Any other servicing should be performed by an authorized service representative.
DECALCIFICATION
Decalcification refers to the removal of calcium deposits that form over time on the metal parts of your coffeemaker. The mineral content of the tap water in your area and the frequency of use affects the rate of the calcium buildup, which can affect the functioning of your coffeemaker and the flavor of your coffee.
For best performance from your PerfecTemp® coffeemaker, we recommend cleaning it whenever the CLEAN LED indicator lights up.
NOTE: Before decalcifying your unit, remove the charcoal water filter from the water reservoir.
To clean:
Fill the water reservoir to capacity with a mixture of 1 ⁄3 white vinegar and 2 ⁄3 water.
Press and hold the CLEAN button. When the CLEAN LED indicator flashes, the coffeemaker is in Clean mode. Release the button.
When the cycle is completed, 5 beeps will sound and the coffeemaker will shut off.
If the CLEAN indicator illuminates once more, repeat the cleaning procedure with a fresh solution of vinegar and water. NOTE: One cleaning cycle is usually sufficient.
When the CLEAN indicator remains off, run one cycle with a full reservoir of fresh, cold water to rinse the unit.
Return the charcoal water filter to the holder inside the water reservoir and your coffeemaker is ready to brew!
Q: I noticed an icon for the first time today.
It is under the PM next to the minute number, some sort of a cylinder with an X over it.
I don’t see anything in the manual about this. Reply