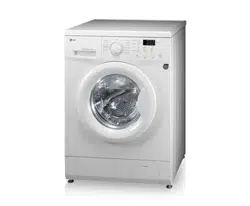
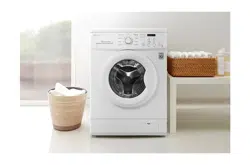
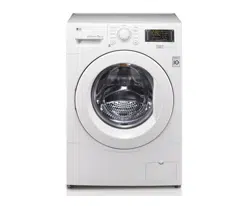
LG F1256QD Washing Machine 7kg Direct Drive
Product's Documents
Below are documents related to this product, you can read online or download:
- User Manual - (English) Read Online | Download pdf
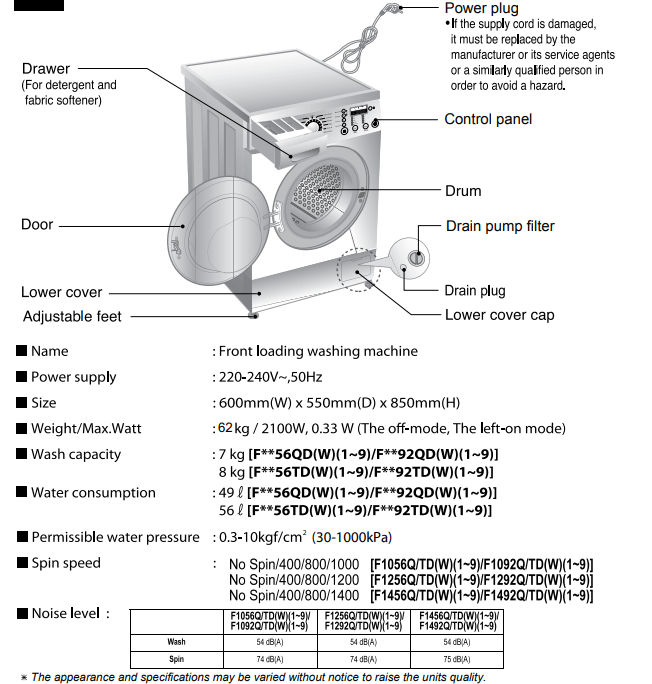
User Manual Washing Machine
 Protection against creases
With the alternate rotation of the drum. creasing in the laundry is. minimized.
 Built-in heater
Internal heater automatically heats the water to the best temperature on selected cycles.
 More economical by Intelligent Wash System
Intelligent Wash System detects the amount of load and water temperature. and then determines the optimum water level and washing time to minimize energy and water consumption.
 Child Lock
The Child lock prevents children from pressing any button to change the settings during operation.
 Low noise speed control system
By sensing the amount of load and balance. it evenly distributes load to minimize the spinning noise level.
 Direct Drive System
The advanced Brushless DC motor directly drives the drum without belt and pulley.
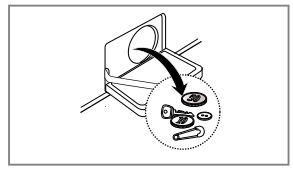
Accessories

Install or store where it will not be exposed to temperatures below freezing or exposed to the weather.
Properly ground washer to conform with all governing codes and ordinances.
The base opening must not be obstructed by carpeting when the washing machine is installed on a carpeted floor.
In countries where there are areas which may be subject to infestation by cockroaches or other vermin, pay particular attention to keeping the appliance and its surroundings in clean condition at all times.
Any damage which may be cause by cockroaches or other vermin will not be covered by the appliance guarantee.
The appliance is fitted with transit bolts to prevent internal damage during transport.
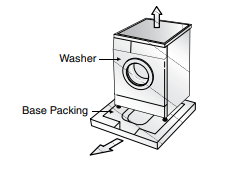
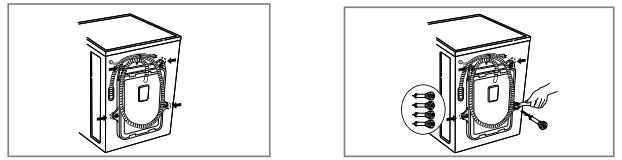
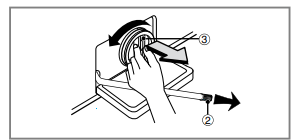
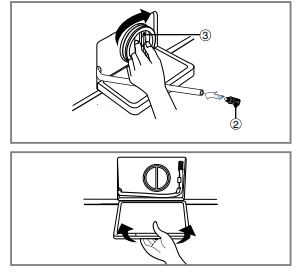
1. To prevent internal damage during transport, the special 4 bolts are locked. Before operating the washer. remove the bolts along with the rubber bungs.
2. Unscrew the 4 bolts with the spanner supplied.
3. Take out the 4 bolts along with the rubber bungs by slightly twisting the bung. Keep the 4 bolts and the spanner for future use.
4. Close the holes with the caps supplied.
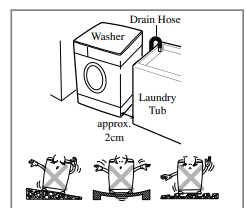
Level floor :
Allowable slope under entire washer is 1°
Power outlet :
Must be within 1.5 meters of either side of location of washer. Do not overload the outlet with more than one appliance.
Additional Clearance :
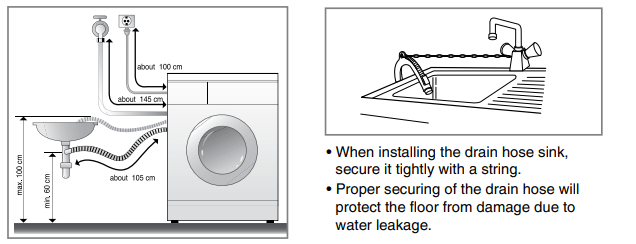
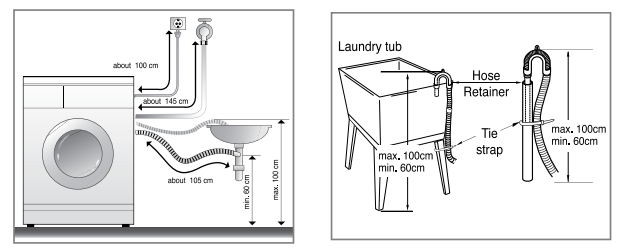
For wall. door and floor modeling is required. (10cm : rear /2cm:right & left side)
Do not place or store laundry products on top of washer at any times.
They can damage the finish or controls.
Install the washer on a flat hard floor.
Make sure that air circulation around the washer is not impeded by carpets, rug etc.
1. Do not use an extension cord or double adapter.
2. If the supply cord is damaged. it must be replaced by the manufacturer or its service agents or similarly. Qualified person in order to avoid a hazard.
3. Always unplug the machine and turn off the water supply after use.
4. Connect the machine to an earthed socket in accordance with current wiring regulations.
5. The appliance must be positioned so that the plug is easily accessible.
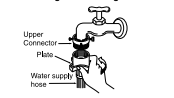
1. Unscrew the fixing screw to attach the tap.
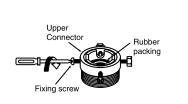
2. Push the connector up til the rubber packing is in tight contact with the tap. Then tighten the 4 screws.
3. Push the water supply hose vertically upwards so that the rubber packing within in the hose can adhere completely to the tap and then tighten it by screwing it to the right.
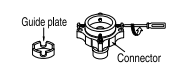
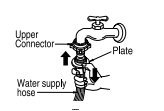
Normal Tap without thread & one touch type inlet hose (Single inlet models)
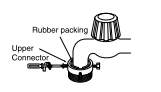
1. Untighten the upper connector screw.

In case the diameter of the tap is large remove the guide plate.
2. Push the upper connector up till the rubber packing is in tight contact with the tap. Then tighten the 4 screws.
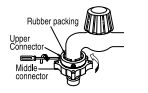
3. Connect the water supply hose to the middle connector. pushing the plate down.

Before the first washing
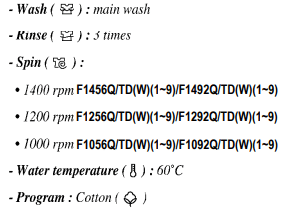
Select a cycle (COTTON 60°C. add a hal load of detergent) allow the unit to wash without clothing. This will remove residues and water from the drum that may have been left during manufacturing.
Caring before washing
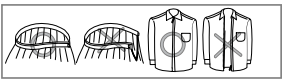
1. Care Labels
Look for a care label on your clothes. This will tell you about the fabric content of your garment and how it should be washed.
2. Sorting
To get the best results. Sort clothes into loads that can be washed with the same wash cycle.
Water temperature and spin speed and different fabrics need to be washed in different ways.
Always sort dark colors from pale colors and whites. Wash separately as dye and lint transfer can occur causing discoloration of white etc. If possible. do not wash heavily soiled items with lightly soiled one.
Soil (Heavy. Normal. Light) Separate clothes according to amount of soil.
Color (White. Lights. Darks) Separate white fabrics from colored fabrics.
Lint (Lint producers. Collectors) Wash lint producers and lint collectors separately.
3. Caring before loading
Combine large and small items in a load. Load large items first. Large items should not be more than half the total wash load.
Do not wash single items. This may cause an out-of-balance load. Add one or two similar items.

Check all pockets to make sure that they are empty. Items such as nails. hair olp. matches. pens. coins and keys can damage both your washer and your clothes.
Pre treat dirt and stains by brushing a litle detergent dissolved in water onto stains Bke collars and cuffs to help shift dirt.
Close zippers. hooks and strings to make sure that these items dont snag on other clothes.
Check the folds of the flexible gasket (gray) and. remove any small articls. f any.
Check inside of the drum and remove any left items in it for next wash cycle.

Remove any clothing or items on the flexible gasket to prevent clothing and the gasket damages.
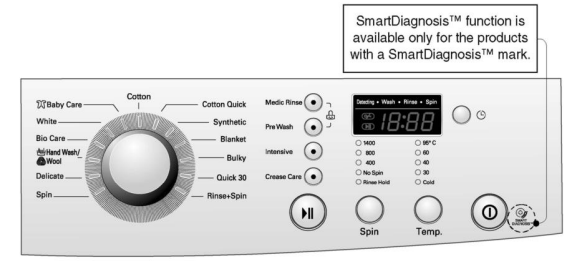
1. Cotton automatically selected upon power on.
2. Manual Selecting
3. Beep on/off

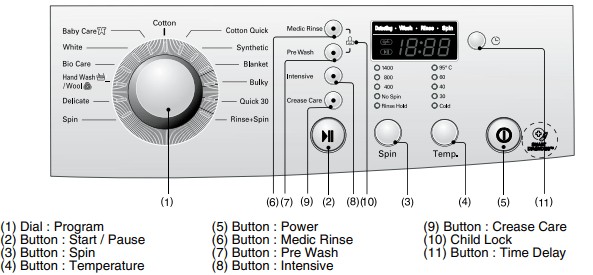
1. Power

2. Initial Program
1. Start
2. Pause

Detecting

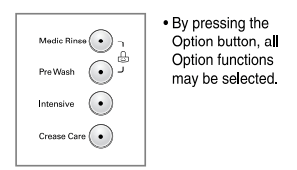
1. Medic Rinse
Rinse option.
2. Pre Wash
3. Intensive
4. Crease Care
The required lamp will light up for identification.

If you choose to lock the buttons on the control assembly to prevent tampering this function may be selected.
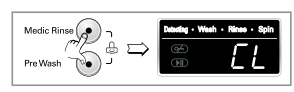
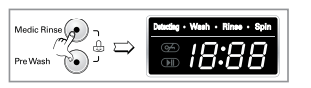
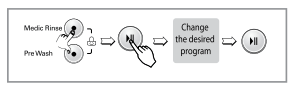
1. Press both Medic Rinse and Pre Wash together once again. (About three seconds)
2. Press the Start/Pause button.
3: Select the desired program and press the
Start/Pause button again.
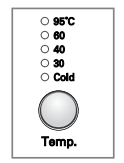
- Cold
- 30°C 40°C 160°C 195°C
The required temperature lamp will light up for identification.

Preparing washing before starting “Time Delay”
How to set “Time Delay”
If Time Delay button is pressed. “3:00" is displayed. The maximum delayed time is
19 hours and the minimum time is 3 hours.
Each pressing of the button advances on time delay by one hour.
To cancel the time delay. press the Power button.
Time Delay is expected time’ from the present to the completion of washing cycle or selected process (Wash. Rinse. Spin).
According to the condition of water supply and temperature. the delayed time and the actual washing time may vary.

1. Special function display
2. Self diagnosis display
If the machine encounters a fault during operation. the associated fault will be displayed.
3. Completion of washing
When washing cycle is completed.  is displayed on the “Multi display”.
4. Time left
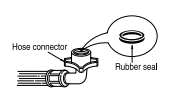
The water inlet filter
 message will blink on the control panel when water does not enter the detergent drawer.
1. Turn off the water tap. 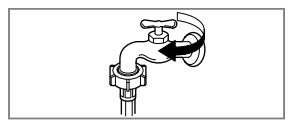
2. Unscrew the water inlet hose. 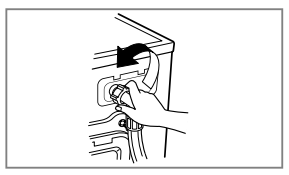
3. Clean the filter using a hard bristle brush.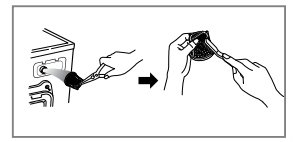
4. Tighten up the inlet hose.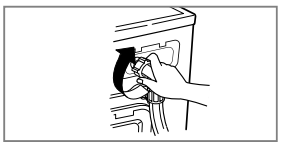
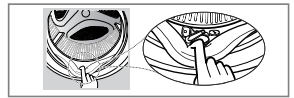
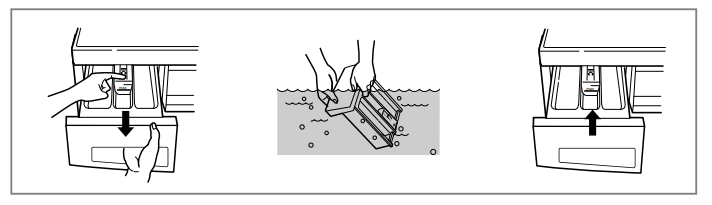
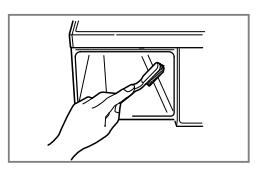
The drain pump filter
1. Open the lower cover cap  by using acoin. Drain plug ( ) to pull out the hose.
2. Unplug the drain plug  . allowing the water to flow out. At this time use a vessel to prevent water flowing on to the floor. When water does not flow any more, turn the pump filter ( ) open to the left.
3. Remove out any foreign material from the pump filter 
4. After cleaning. turn the pump filter ( ) clockwise and insert the drain plug  to the original place. close the lower cover on
Dispenser drawer
After a while detergents and fabric softeners leave a deposit in the drawer.
The drawer recess
Detergent can also accumulate inside the recess which should be cleaned occasionally with an old toothbrush.
Cleaning your washer
1. Exterior
Proper care of your washer can extend its life.
The outside of the machine can be cleaned with warm water and a neutral nonabrasive household detergent.
Immediately wipe off any spills. Wipe with damp cloth.
Try not to hit surface with sharp objects.
IMPORTANT: Do not use methylated spirits. diluents or similar products.
2. Interior
Dry around the washer door opening. flexible gasket and door glass.
Run washer through a complete cycle using hot water.
Repeat process if necessary.
Remove hard water deposits using only cleaners labeled as washer safe.
| Symptom | Possible Cause | Solution |
|
Rattling and clanking noise Thumping sound Vibrating noise |
|
Stop washer and check drum and drain filter. I noise continues after washer is restarted. call your authorised service centre. I sound continues. washer is probably out of balance. Stop and redistribute wash load. I not removed during installation. Refer to Installation guide for removing transit bolts. Wash load may be unevenly distributed in drum. Stop washer and rearranae wash load. |
|
Water leaks. Oversudsing Water does not enter washer or it enters slowly Water in the washer does not drain or drains slowly. |
|
Check and tighten hose connections. Unclog drain pipe. Contact plumber if necessary. Too much detergent or unsuitable detergent may cause excessive foaming which may result in water leaks. Check another tap in the house. Fully open tap. Straighten hose. Clean and straighten the drain hose. |
|
Washer does not start Washer will not spin |
|
Make sure plug fits tightly in wall outlet. Reset circuit breaker or replace fuse. If problem is a circuit overload. have it corrected by a qualified electrician. Close the door and press the |
| Door does not open |
Once started. the door can not be opened for safety reasons. Wait one or two minutes before opening the door to give the electric locking mechanism time to release. |
|
| Wash cycle time delayed |
The washing time may vary by the amount of laundry. water pressure. water temperature and other usage conditions. If the imbalance is detected or if the suds removing program works. the wash time shall be increased. |
|
 |
|
Check another tap in the house. Straighten hose(s). Check the filter of the inlet hose. |
 |
|
Clean and straighten the drain hose. Clean the drain filter. |
 |
|
Add 1 or 2 similar items to help balance the load. Rearrange load to allow proper spinning |
 |
|
Close the door. If |
 |
Unplug the power plug and call the service |
Reference file: LG F1256QD Washing Machine 7kg Direct Drive
Series: F1256Q
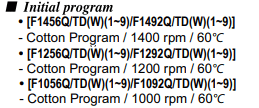
Additionally, the document applies to other LG Electronics models: F1456Q, F1256Q, F1056Q, F1492Q, F1292Q, F1092Q


 Is the door opened?
 is not released, call for service.