Loading ...
Loading ...
Loading ...
3
CONTENTS
Instructions for the User
Important Safety Information
2
Operation
4
Before using 4
Control panel 4
Display 4
Operation 5
Activation of functions 5
Switching off 5
Use of the freezer compartment 5
Temperature control 5
Freezing frsh food 5
Frozen food storage 6
Cold accumulators 6
Thawing 6
Making ice cubes 6
Normal operating sounds 6
Excessive temperature alarm 7
Door open acoustic alarm 7
Hints and Tips
7
Maintenance and Cleaning
8
Internal cleaning 8
External cleaning 8
When the appliance is not in use 8
Defrosting 8
Something Not Working
9
Service and Spare Parts
10
Customer Care
10
Guarantee Conditions
11
Instructions for the
Installer
Technical Specification
12
Installation
13
Positioning 13
Electrical Connection
14
Instruction for totally built-in
appliances
15
Disposal of old Appliances
The symbol on the product or on its packaging
indicates that this product may not be treated as
household waste. Instead it shall be handed over to
the applicable collection point for the recycling of
electrical and electronic equipment. By ensuring this
product is disposed of correctly, you will help prevent
potential negative consequences for the environment
and human health, which could otherwise be caused
by inappropriate waste handling of this product. For
more detailed information about recycling of this
product, please contact your local city office, your
household waste disposal service or the shop where
you purchased the product.
18
PR168
Hb
PR167/1
Hd
Hb
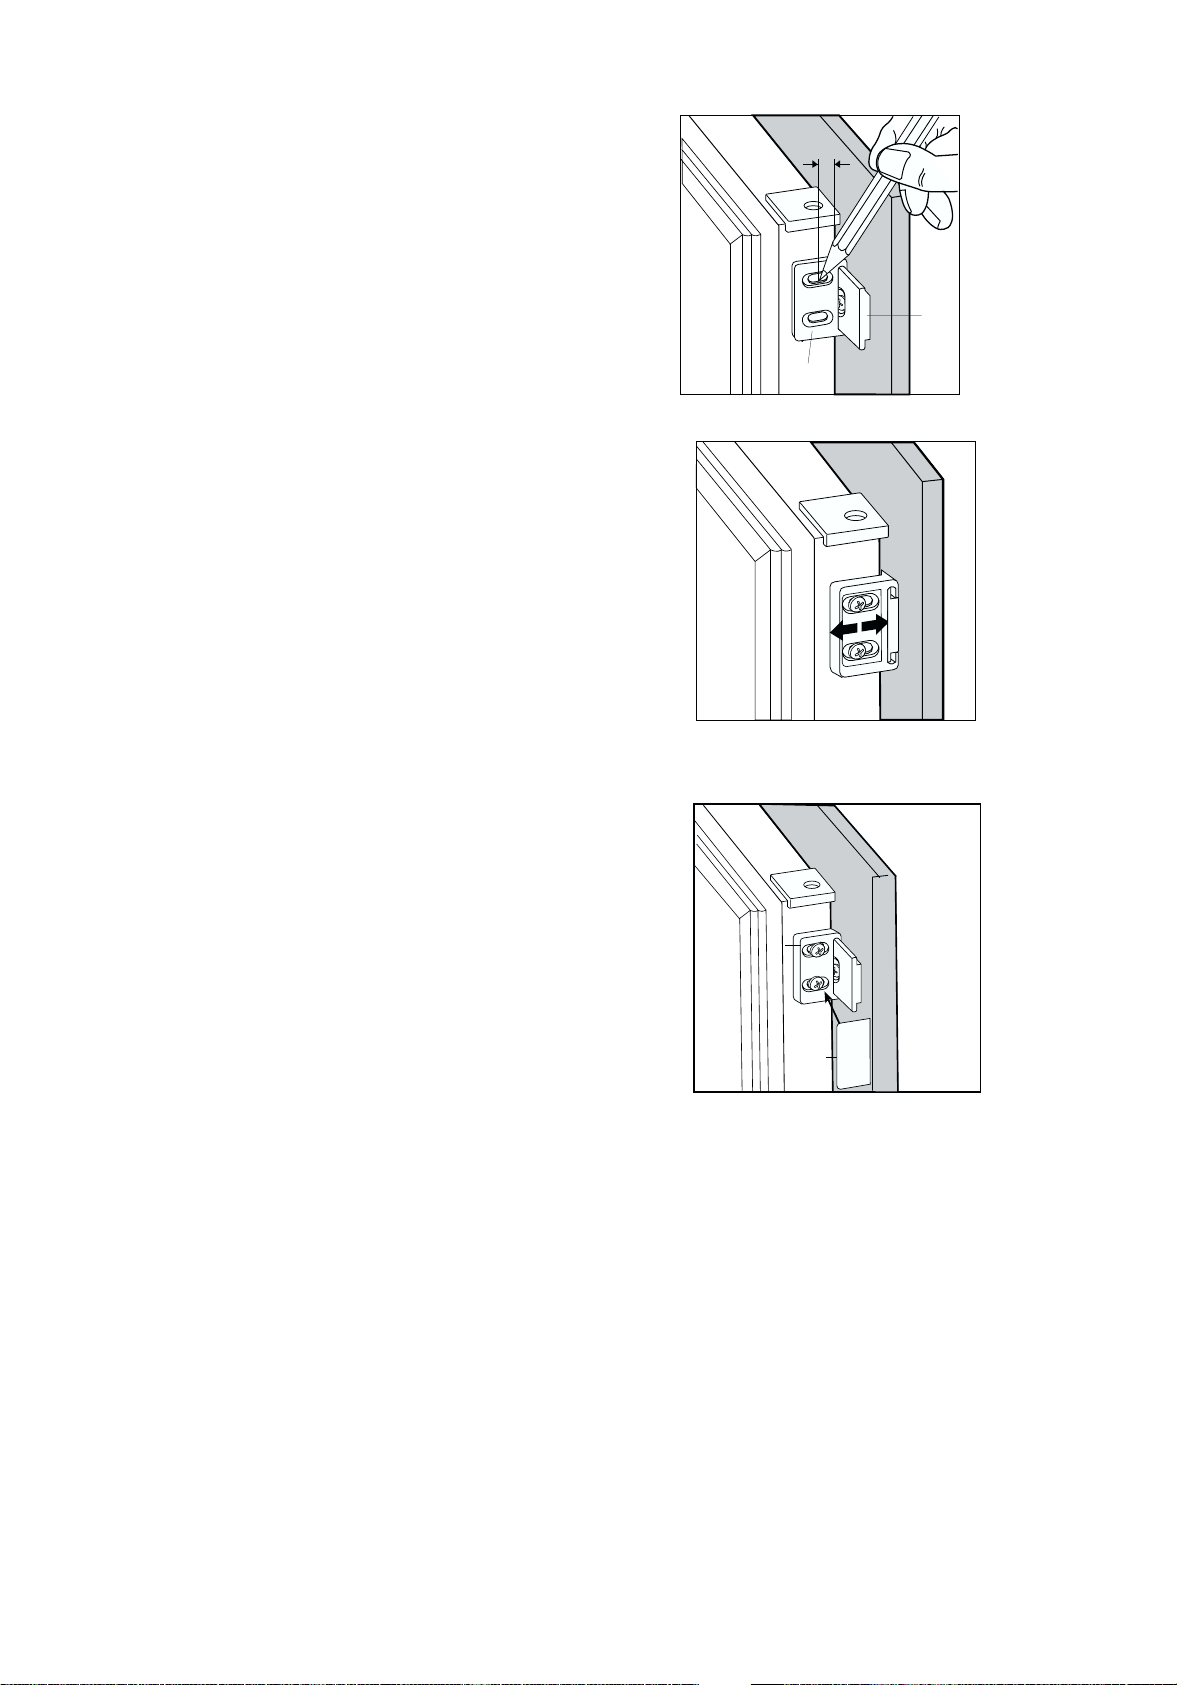
Should the lining up of the furniture door be
necessary, use the clearance of slots.
At the end of operations, it is necessary to check if
the door of the furniture closes properly.
Fix cover (Hd) on guide (Hb) until it clips into place.
PR167
Ha
Hb
8mm
Open the appliance door and the furniture door at
90°. Insert the small square (Hb) into guide (Ha).
Put together the appliance door and the furniture
door and mark the holes as indicated in the figure.
Remove the squares and drill holes with ø 2 mm at 8
mm from the outer edge of the door. Place the small
square on the guide again and fix it with the screws
supplied.
Loading ...
Loading ...
Loading ...