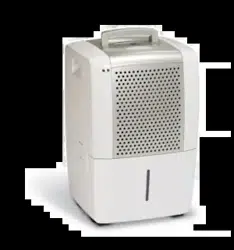
OWNER'S GUIDE for Dehumidifier
DEHUMIDIFIER WARRANTY
Your product is protected by this warranty
Your appliance is warranted by Electrolux. Electrolux has authorized frigidaire Consumer Services and their authorized servicers to perform service under this warranty. Electrolux authorizes no one else to change or add to any ol these obligations under this warranty. Any obligations for service and parts under this warranty must be performed by Frigidaire Consumer Services or an authorized Frigidaire servicer

* NORMAL RESPONSIBILITIES OF THE CONSUMER
This warranty applies only to products in ordinary household use, and the consumer is responsible (or the items listed below.
1. Proper use of the appliance in accordance with instructions provided with the product
2. Proper installation by an authorized servicer in accordance with instructions provided with the appliance and in accordance with all local plumbing, electrical and/or gas codes.
3. Proper connection to a grounded power supply of sufficient voltage, replacement of blown fuses, repair of loose connections ordefects in house wiring.
4. Expenses for making the appliance accessible for servicing, such as removal of trim, cupboards, shelves, etc., which are not a part of the appliance when it was shipped from the factory.
5. Damages to finish after installation.
6. Damage to unit after remove from packaging carton.
EXCLUSIONS
This warranty does not cover the following:
1. CONSEQUENTIAL OR INCIDENTAL DAMAGES SUCH AS PROPERTY DAMAGE AND INCIDENTAL EXPENSES RESULTING FROM ANY BREACH OF THIS WRITTEN OR ANY IMPLIED WARRANTY.
Note: Some states do not allow the exclusion or limitation of incidental or consequential damages, so this limitation or exclusion may not apply to you.
2. Service calls which do not involve malfunction or delects in workmanship or material or for appliances not in ordinary household use. The consumer shall pay for such service calls.
3. Damages caused by services performed by persons other than authorized Frigidaire servicers; use of parts other than Frigidaire Genuine Renewal Parts: obtained from persons otherthan such servicers; or external causes such as abuse, misuse, inadequate power supply or acts ol God.
4. Products with original serial numbers that have been removed or altered and cannot be readily determined.
IF YOU NEED SERVICE
Keep your bill of sale, delivery slip, or some other appropriate payment record. The date on the bill establishes the warranty period should service be required If service is performed, it is in your best interest to obtain and keep all receipts. This written warranty gives you specific legal rights. You may also have other rights that vary from state to state. Service under this warranty must be obtained by following these steps, in order
1. Contact Frigidaire Consumer Services or an authorited Frigidaire servicer.
2. If there is a question as to where to obtain service, contact our Consumer Relations Department at
Important Safety Instructions
Read all instructions before using this dehumidifier. To reduce the risk of fire, electric shock, or injury to persons when using your dehumidifier, follow basic precautions, including the following:
 For Your Safety
Do not store or use gasoline or other flammable vapors and liquids in the vicinity of this or any other appliance. Read product labels for flammability and other warnings.
Child Safety Precautions
• Destroy the carton, plastic bags, and any packing materials Immediately after the dehumidifier Is unpacked. Children should never use these Items for play.
• Do not leave children unattended In an area where the appliance Is operating.
• Do not allow them to sit or stand on the appliance.
Electrical Information
• For your safety and protection, this dehumidifier is equipped with a three-prong grounding plug on the power cord. Do not, under any circumstances, cut or remove the round ground prong from the plug.
• Your dehumidifier must be plugged directly into a properly grounded and polarized three-prong receptacle. If the wall receptacle you intend to use will not accept a three-prong plug, or If you are not sure the outlet Is adequately grounded or protected by a time delay fuse or circuit breaker, have a qualified electrician install the proper outlet according to the National Electrical Code and applicable local codes and ordinances. Do not use an extension cord or an adapter plug.
• Never unplug the dehumidifier by pulling on the power cord. Always grip the plug firmly and pull straight out from the receptacle.
• Do not pinch, bend, or knot the power cord.
Avoid fire hazard or electric shock. Do not use an extension cord or an adaptor plug. Do not remove grounding prong from power cord.

Location
Selecting a Location
IMPORTANT:
1. Dehumldlfler must be operated In an enclosed area to be most effective. Close all doors, windows, and other outside openings to the room. The effectiveness of the dehumldlfler depends on the rate at which new moisture-laden air enters the room.
2. Place dehumidifier in a location that does not restrict airflow through the front of the unit or out of the louvers on the sides of cabinet.
3. A dehumidifier operating In a basement will have little or no effect In drying an adjacent enclosed storage area, such as a closet, unless there is adequate circulation of air in and out of the area. It may be necessary to Install a second dehumldlfler In the enclosed area for satisfactory drying.
4. The dehumidifier must be installed on a level floor that will support it with a full bucket of water.
5. There should be a minimum of 12 inches clearance around the dehumidifier.
How It Works
When the unit Is started, the fan begins to pull moistureladen air across the dehumidifying coils. The coils condense or draw moisture from the air, and air flows through the side louvers into the room as dry, warm air. Moisture removed from air is collected in a bucket on the front of the dehumidifier.
The unit is designed to operate between 41 °F (5 C), and 96"F (35 C).
If the unit is switched off and needs to be switched on again, wait three minutes before doing so.
Make sure the tank Is fitted correctly otherwise unit will not turn on.
NOTE
Unit must be upright for one hour prior to operating.
OPERATION & FEATURES
Allow the unit to reach room temperature before operating.
To begin operating the dehumidifier, follow these steps:
1. Plug the power cord into a properly grounded 115 volt AC outlet. Note the POWER indicators will illuminate.
NOTE: If the "BUCKET FULL" light is on, remove the bucket and re-install to reset the float switch.

2. To turn the unit on press the ON/OFF button. The unit will run in the factory setting of CONTINUOUS and high fan speed.The display reads CO. It is recommended you leave the unit running in the CONTINUOUS setting for the first three or four days until any sweating and dampness odors have ceased.

3. After a few days when the Relative Humidity has declined, press the HUMIDITY  or
or  buttons to choose a value between 35% to 85%, so the room is kept at a comfortable concentration. Pressing the or buttons will change the humidity selection in 5% increments. If at any time you want to return to the CONTINUOUS Mode, pressing the HUMIDITY button will lower the Relative Humidity through the 5% increments until the display reads CO.

4. You can also use the FAN SPEED button to change the fan speed to HIGH or LOW. The indicator light will show the setting you have selected. A higher fan speed will result in quicker moisture removal.

5. The FILTER RESET light will illuminate after 250 hours of operation. At this time refer to the Care and Cleaning section to remove and clean the filter. Once the filter has been cleaned , to extinguish the light simply press the FILTER button.

6. The TIMER function enables you to either Delay Start or Delay Stop the unit in the choice from 0.5 hour to 24 hours. If the unit is running then selecting Timer will turn the unit off after setting hours (Delay Stop). If the unit is off then selecting Timer will turn the unit on after setting hours (Delay Start).
TIMER setting: First press TIMER button.then to adjust timer setting, tap or hold the + or - button to change the delay timer at 0.5 hour increments.up to 10 hours, then by 1 hour increments up to 24 hours. The control will count down the time remaining (8,7.5,7, etc.) until the unit either starts or stops. For the Delay Start, the fan speed and humidity maintained will be the same as previously setting. After TIMER setting finishs, pressing TIMER button again at any time will cancel the TIMER function. The Delay Start/Stop Feature will work until the unit either starts ro stops. Once that happens the above steps have to be repeated again.
Note 1: Before entering TIMER setting, the power indicator must be lit to make sure power is being supplied to the unit.
Note 2: Before entering TIMER setting, make sure first pressing HUMIDITY+or-button sets one desired room humidity.

7. To shut the unit down, press the ON/OFF button.
Note: While the unit is plugged in the power indicator will remain lit. Only removing the plug will extinguish this light.

FAULT CODES
If the display reads "AS" or"ES", a sensor has failed. Contact your Authorized Frigidaire Service Center.

REMOVING COLLECTED WATER
1. Emptying the Bucket:
a. When the bucket is full the unit will shut down and the BUCKET FULL indicator light will illuminate.

b. Do not move the unit at this point otherwise water may spill on the floor.
c. Press sides of bucket gently to unclip the bucket from the unit.
d. Remove the bucket as shown in the photographs below and empty the bucket.

e. Replace the empty bucket back into the unit and once seated correctly the unit will start up again.
f. You should hear a click when the bucket is in the correct position.
If the bucket full light does not extinguish, check that the float is correctly snapped in place as indicated by the diagram.

2. Continuous Drainage:
a. For constant drainage operation, you will need a garden hose and a drain nearby to discharge the water into.
b. Remove the bucket from the unit and set aside.
c. Lift up the side flap located on the right side of the unit as looking from the front (fig. 1)
d. Insert the female threaded end of the hose through the opening, (fig.2)
e. Screw the garden hose onto the threaded portion of the tray underneath the bucket opening, (fig.3)
f. Make sure the hose is secure so there are no leaks.
g. Direct the hose toward the drain, making sure that there are no kinks that will stop the water flowing.
h. Place the end of the hose into the drain.
i. Place the bucket back in the unit and make sure that it is located correctly, (fig.4)
j. Select the desired humidity setting and fan speed on the unit for continuous draining to start.

Note: If the unit stops operating check that the bucket full light is illuminated. If it is remove the bucket and empty the contents and then check the seal between the hose and the drip tray. If there is a small leak then replace the hose gasket and re-tighten the hose.
CARE AND CLEANING
1. Filter
a. Remove the filter every two weeks based on normal operating conditions.
b. To remove the filter, remove Bucket then pull filter downwards.
c. Wash the filter with clean water then dry.
d. Re-install the filter, replace Bucket.

2. Cabinet
a. Dust cabinet with an oil-free cloth, or using a damp cloth.
b. Vacuum grill using brush attachment.
3. Water Bucket
a. Clean bucket with warm water and detergent.
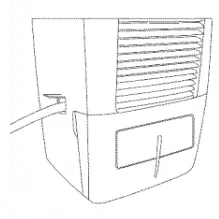
STORAGE
When unit is not in use unplug and use the cord wrap shown for your model type.

Avoid Service Checklist
Before calling for service, review this list. It may save you time and expense. This list Includes common occurrences that are not the result of defective workmanship or materials in this appliance.
|
OCCURRENCE
|
SOLUTION
|
|
DEHUMIDIFIER DOES NOT OPERATE.
|
Plug is disconnected from outlet. Push plug firmly into wall outlet.
|
|
House fuse blown or circuit breaker tripped. Replace fuse with time delay type or reset circuit breaker.
|
|
The dryness level you selected has been reached. Dehumldlfler automatically shuts off when selected amount of moisture has been removed from the air. If you want to remove more moisture. Select 'CONTINUOUS' by using the humidity button or knob. After the dehumidifier starts, reset the control to the desired setting.
|
|
Bucket not Installed properly. See * Removing Collected Water."
|
|
Water in the bucket has reached its preset level. Dehumidifier automatically turns off when this occurs. Empty bucket and return bucket to position.
|
|
Dehumldlfler is not turned on. Turn unit on.
|
|
"BUCKET FULL” light is on. Remove bucket, empty water and re-install correctly.
|
|
DEHUMIDIFIER RUNS TOO MUCH.
|
Windows or doors near dehumidifier are open to outdoors. Close all windows or doors to outside.
|
|
Area to be dehumidified Is too large. Check with your dealer to see If capacity Is adequate.
|
|
Air movement through dehumidifier is blocked. Grill or filter may be dirty. Use brush attachment of vacuum cleaner to clean grill. See "Care and Cleaning.* Dehumldlfler must be placed In a space that does not restrict air flowing Into the rear coll or out of the front grill.
|
|
Dehumidifier has been installed or restarted recently. The higher the moistuire in the room, the longer the dehumidifier will operate.
|
|
Dehumidifier is in the CONT mode and will remain on in this mode use the humidity button or knob to set a RH% higher level.
|
|
DEHUMIDIFIER IS OPERATING BUT ROOM IS NOT DRY ENOUGH.
|
Humidity setting is too high. Press the HUMIDITY button or rotate knob to a lower setting or choose CONTINUOUS for maximum dryness.
|
|
Dehumldlfler has been Installed or restarted recently. The higher the moisture In the room air, the longer it takes for the room air to become dry.
|
|
Dehumldlfler does not have sufficient clearance to operate. Air flow to front grill Is blocked. See * Selecting a Location
|
|
Room temperature Is too low. Unit will not operate satisfactorily If the room temperature Is below 41*F(5*C). See "Operating Conditions"
|
|
Refer to causes under DEHUMIDIFIER RUNS TOO MUCH.
|
|
FROST APPEARS ON COILS ABOVE BUCKET OR DRIP TRAY.
|
Dehumldlfler has been turned on recently. This Is normal due to refrigerant rushing through the coll. Frost will usually disappear within 60 minutes.
|
|
Room Temperature Is too low. All models will operate satisfactorily at temperatures greater than 41*F (5*C).
|
|
NOISE IS LIKE A FAN.
|
Air Is moving through the dehumidifier. This is a normal sound.
|