Loading ...
Loading ...
Loading ...
Installation Instructions
Electrical Requirements
120-volt, 60 Hertz, properly grounded dedicated circuit
protected by a 15-amp or 20-amp circuit breaker or
time delay fuse.
Note: Use of automatic, wireless, or wired external
switches that shut off power to the appliance are not
recommended for this product.
ELECTRICAL CONNECTIONS
3
Grounding
WARNING
Shock Hazard: This appliance must be
properly grounded. Failure to do so can result
in electric shock.
The power cord of this appliance is equipped with a
three-prong (grounding) plug which mates with a
standard three-prong grounding wall receptacle to
minimize the possibility of electric shock hazard from
this appliance.
The customer should have the wall receptacle and
circuit checked by a qualified electrician to make
sure the receptacle is properly grounded.
Where a standard two-prong wall receptacle is
encountered, it is the personal responsibility and
obligation of the customer to have it replaced with a
properly grounded three-prong wall receptacle.
DO NOT, UNDER ANY CIRCUMSTANCES, CUT OR REMOVE
THE THIRD (GROUND) PRONG FROM THE POWER CORD.
DO NOT USE AN ADAPTER. DO NOT USE AN EXTENSION
CORD.
A word about GFCI’s - GFCI’s are not required or
recommended for gas range receptacles.
Ground Fault Circuit Interrupters (GFCI’s) are devices
that sense leakage of current in a circuit and
automatically switch off power when a threshold
leakage level is detected. These devices must be
manually reset by the consumer. The National Electrical
Code requires the use of GFCI’s in kitchen receptacles
installed to serve countertop surfaces. Performance of
the range will not be affected if operated on a GFCI-
protected circuit but occasional nuisance tripping of
the GFCI breaker is possible.
SEAL THE OPENINGS
4
Seal any openings in the wall behind the range and in
the floor under the range when hookups are
completed.
IF THE RANGE HAS ELECTRIC IGNITION
5
There are separate ignition devices for the left and right
hand surface burners. Both of these ignitors are ON
when any knob is turned to the LITE setting. The ignitors
will spark as long as any of the top burner knobs are at
the LITE setting.
In the event of an electrical power failure, the top
burners can still be used. To light a burner, hold a lit
kitchen match adjacent to the top burner to be used
and turn valve knob to LITE. USE EXTREME CAUTION.
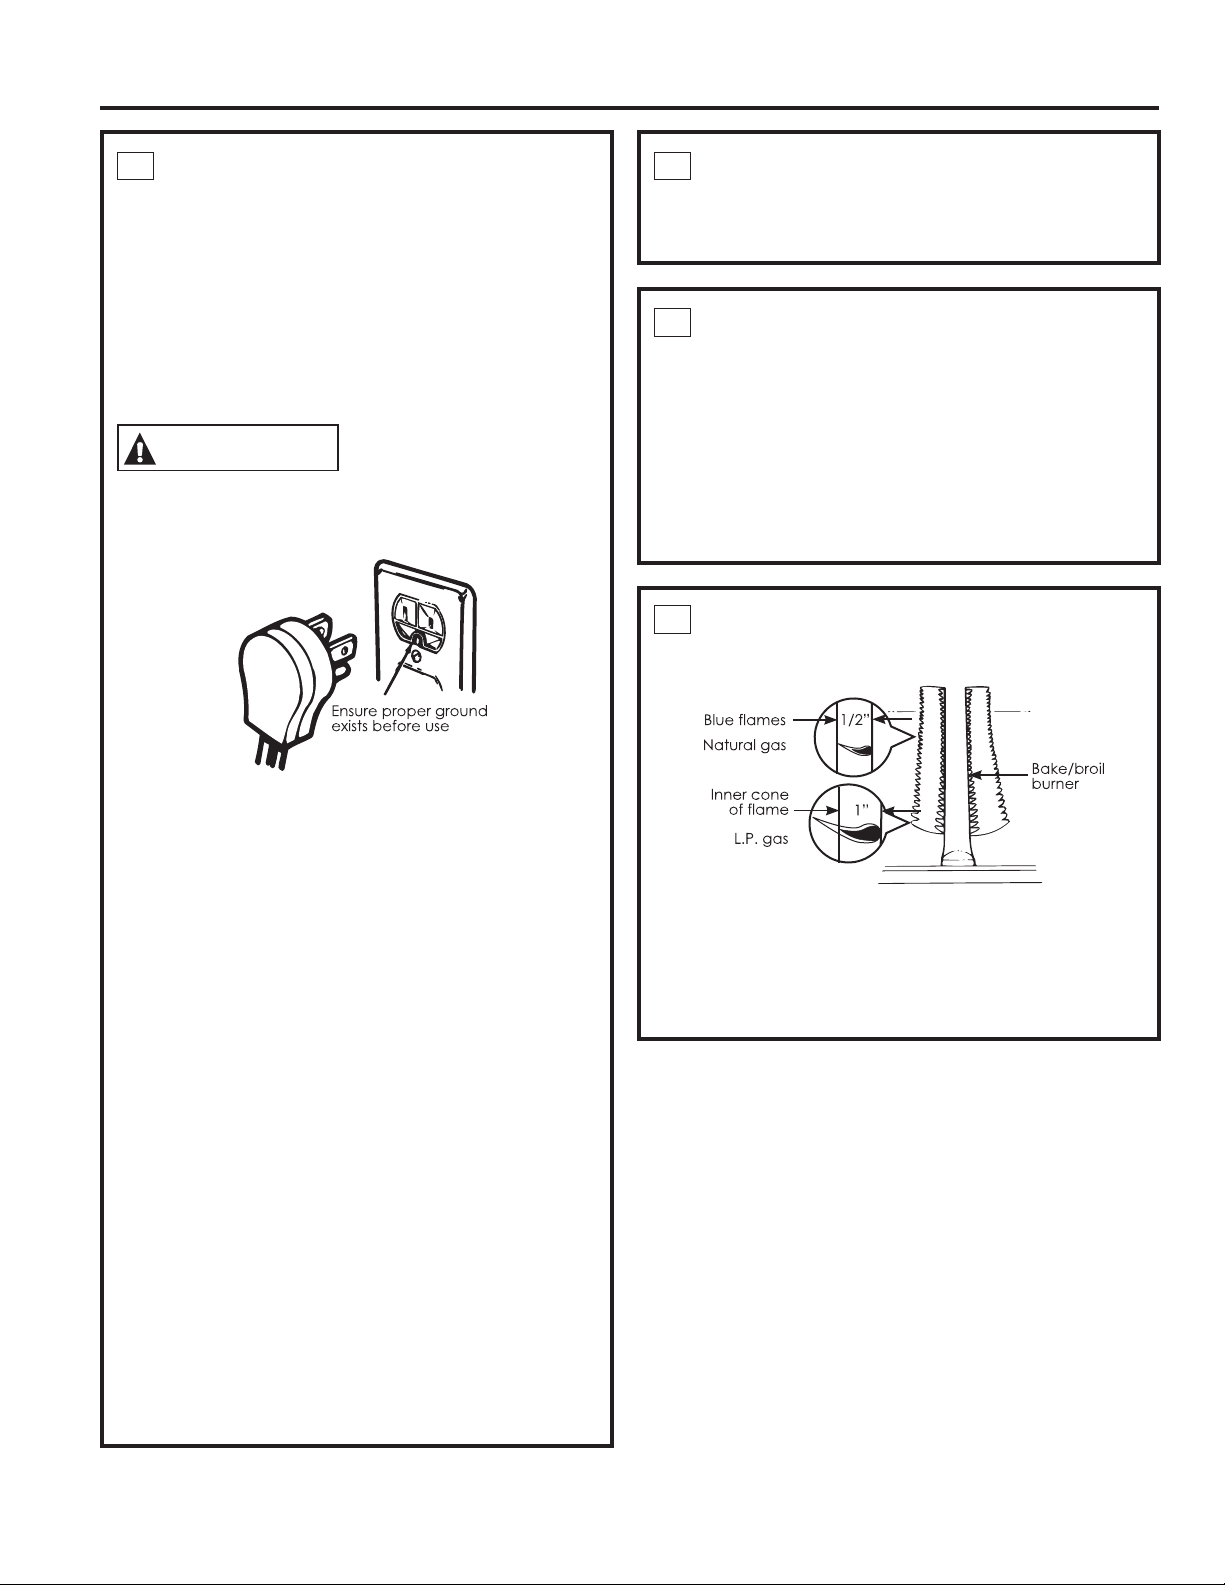
ADJUST THE OVEN BURNER AIR
SHUTTER IF NECESSARY
6
For Natural Gas:
The oven burner flame should be a clean, blue flame
with distinct inner cones approximately 1/2 inch long. A
soft, lazy flame with indistinct cones means too much
gas or not enough air. A noisy lifting flame means too
much air.
25
Loading ...
Loading ...
Loading ...