Loading ...
Loading ...
Loading ...
63
• If the still image index screen is
displayed, move the zoom lever
toward T to display a single image.
• appears and changes to .
• The (print/share) button lights
up and the current print settings
will be displayed for approx.
6 seconds.
IMPORTANT
• If continues to flash (for more than 1
minute) or if does not appear, the
camcorder is not correctly connected to
the printer. In such case, disconnect the
USB cable and turn off the camcorder
and the printer. After a short while, turn
them on again, set the camcorder to
mode and restore the connection.
• During the following operations, even if
you connect a printer to the camcorder
it will not be recognized.
- Erasing all still images
- Erasing all transfer orders
- Erasing all print orders
NOTES
• will appear for images that cannot be
printed.
• We recommend powering the
camcorder using the compact power
adapter.
• Refer also to the printer’s instruction
manual.
• If you have no intention to use the
optional DW-100 DVD Burner, you can
set [USB SETTING] to [ PC/PRINTER]
( 80) so the device type selection
screen does not appear every time you
connect the camcorder to a printer.
• Connection to a PictBridge-compatible
printer will not work when the memory
card contains 1,800 images or more.
• For best performance, we recommend
keeping the number of images on the
memory card under 100.
• Disconnect the USB cable before
changing the mode dial.
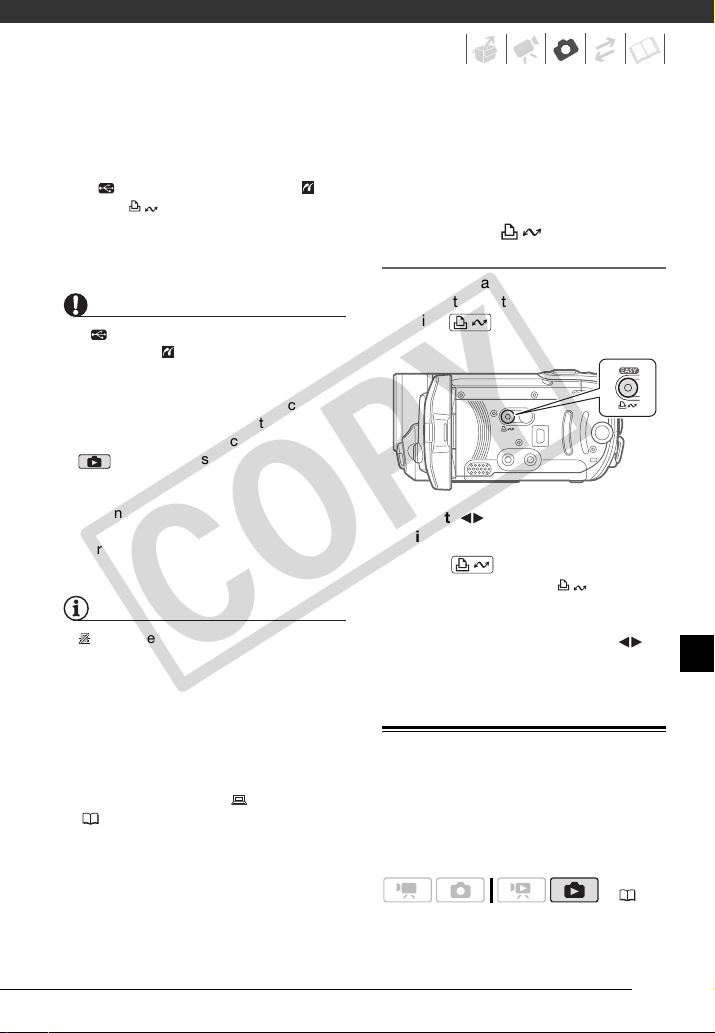
Printing with the (Print/Share)
Button
You can print a still image without
changing the settings simply by
pressing .
1 Select ( ) the still image you
wish to print.
2 Press .
• Printing starts. The button
flashes and stays on when the
printing is completed.
• To continue printing, select ( )
another still image.
Selecting the Print Settings
You can select the number of copies
and other settings for printing. The
setting options vary depending on your
printer model.
( 24)
COPY
Loading ...
Loading ...
Loading ...