Loading ...
Loading ...
Loading ...
10 49-80711 Rev. 4
USING THE OVEN: Oven Racks / Aluminum Foil and Oven Liners
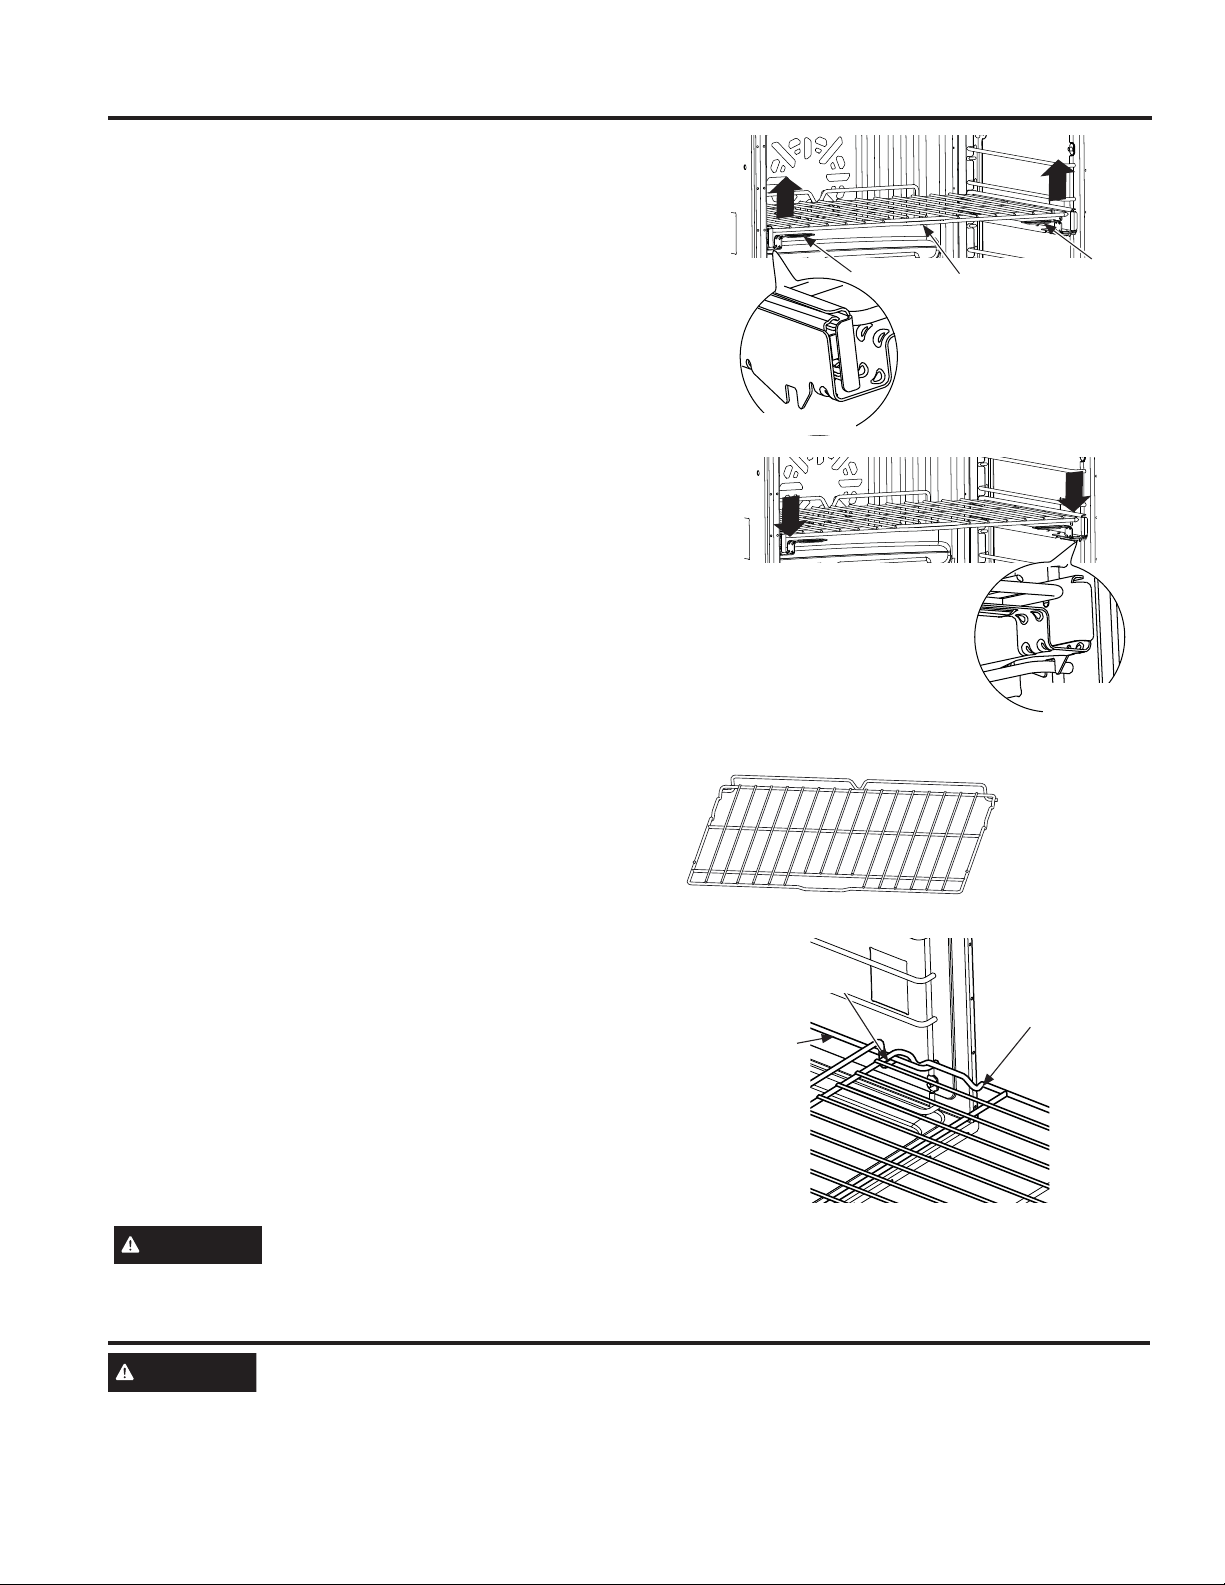
To Remove An Extension Rack
1. Make sure the rack is pushed all the way into the
oven.
2. Grasp the rack by both its upper front rail and its
lower handles on two sides and lift straight up to
unlock the rack from the rack supports.
3. Firmly holding onto both the upper front rail and lower
handles on both sides, pull the rack forward. Grasp the
rack on both sides if necessary. Then remove it from
the oven.
To Replace An Extension Rack
1. Place the rear portion of the rack onto the rack
supports (guides) as shown in the picture.
2. Hold the upper front rail and lower handles and push
the rack all the way in until the install feature locks
into the front rack support.
,IH[WHQVLRQUDFNVDUHGLIILFXOWWRUHSODFHRUUHPRYHZLSH
the oven rack supports with vegetable oil. Do not wipe oil
on the rack slides.
NOTE:8VLQJRWKHUFRRNLQJRLOVZLOOFDXVHDGLVFRORULQJ
or a rust like color residue on the racks and cavity sides.
To clean this residue, use a soap and water or a vinegar
and water solution. Rinse with clean water and dry with a
soft cloth.
Oven Racks (Cont.)
CAUTION
Use caution when removing a rack from lowest position as door may be hot.
Front
Rack Lock
Hold the upper front rail and
lower handles and push the rack
all the way in until the install
feature locks on the front support
CAUTION
Do not use any type of foil or oven liner to cover the oven bottom. These items can trap heat
or melt, resulting in damage to the product and risk of shock, smoke or fire. Damage from improper use of
these items is not covered by the product warranty.
Foil may be used to catch spills by placing a sheet on a lower rack, several inches below the food. Do not use more
foil than necessary and never entirely cover an oven rack with aluminum foil. Keep foil at least 1-1/2” from oven walls
to prevent poor heat circulation.
Aluminum Foil and Oven Liners
Traditional Flat Racks
The racks have stops so that when placed correctly on
the supports they will stop before coming completely out
and will not tilt. When placing and removing cookware,
pull the rack out until it stops.
To Remove a Rack
Pull it toward you, tilt the front end up and pull it out.
To Replace a Rack
Tilt the front of the rack up, hook the rear locating posts
under the rack supports, push the rack back (past the
stoppers) and lower it into position. Push the rack all the
way in.
Racks may become difficult to slide, especially after
a self-clean. Put some vegetable oil on a soft cloth or
paper towel and rub onto the left and right edges.
NOTE: 8VLQJRWKHUFRRNLQJRLOVZLOOFDXVHDGLVFRORULQJ
or a rust like color residue on the racks and cavity sides.
To clean this residue, use a soap and water or a vinegar
and water solution. Rinse with clean water and dry with a
soft cloth.
Flat Rack
Stopper
Rack
Support
Locating Post
Handle
Handle
8SSHU)URQW5DLO
Left to
unlock from
the rack
support
,QVWDOO)HDWXUH
Loading ...
Loading ...
Loading ...