Loading ...
Loading ...
Loading ...
13
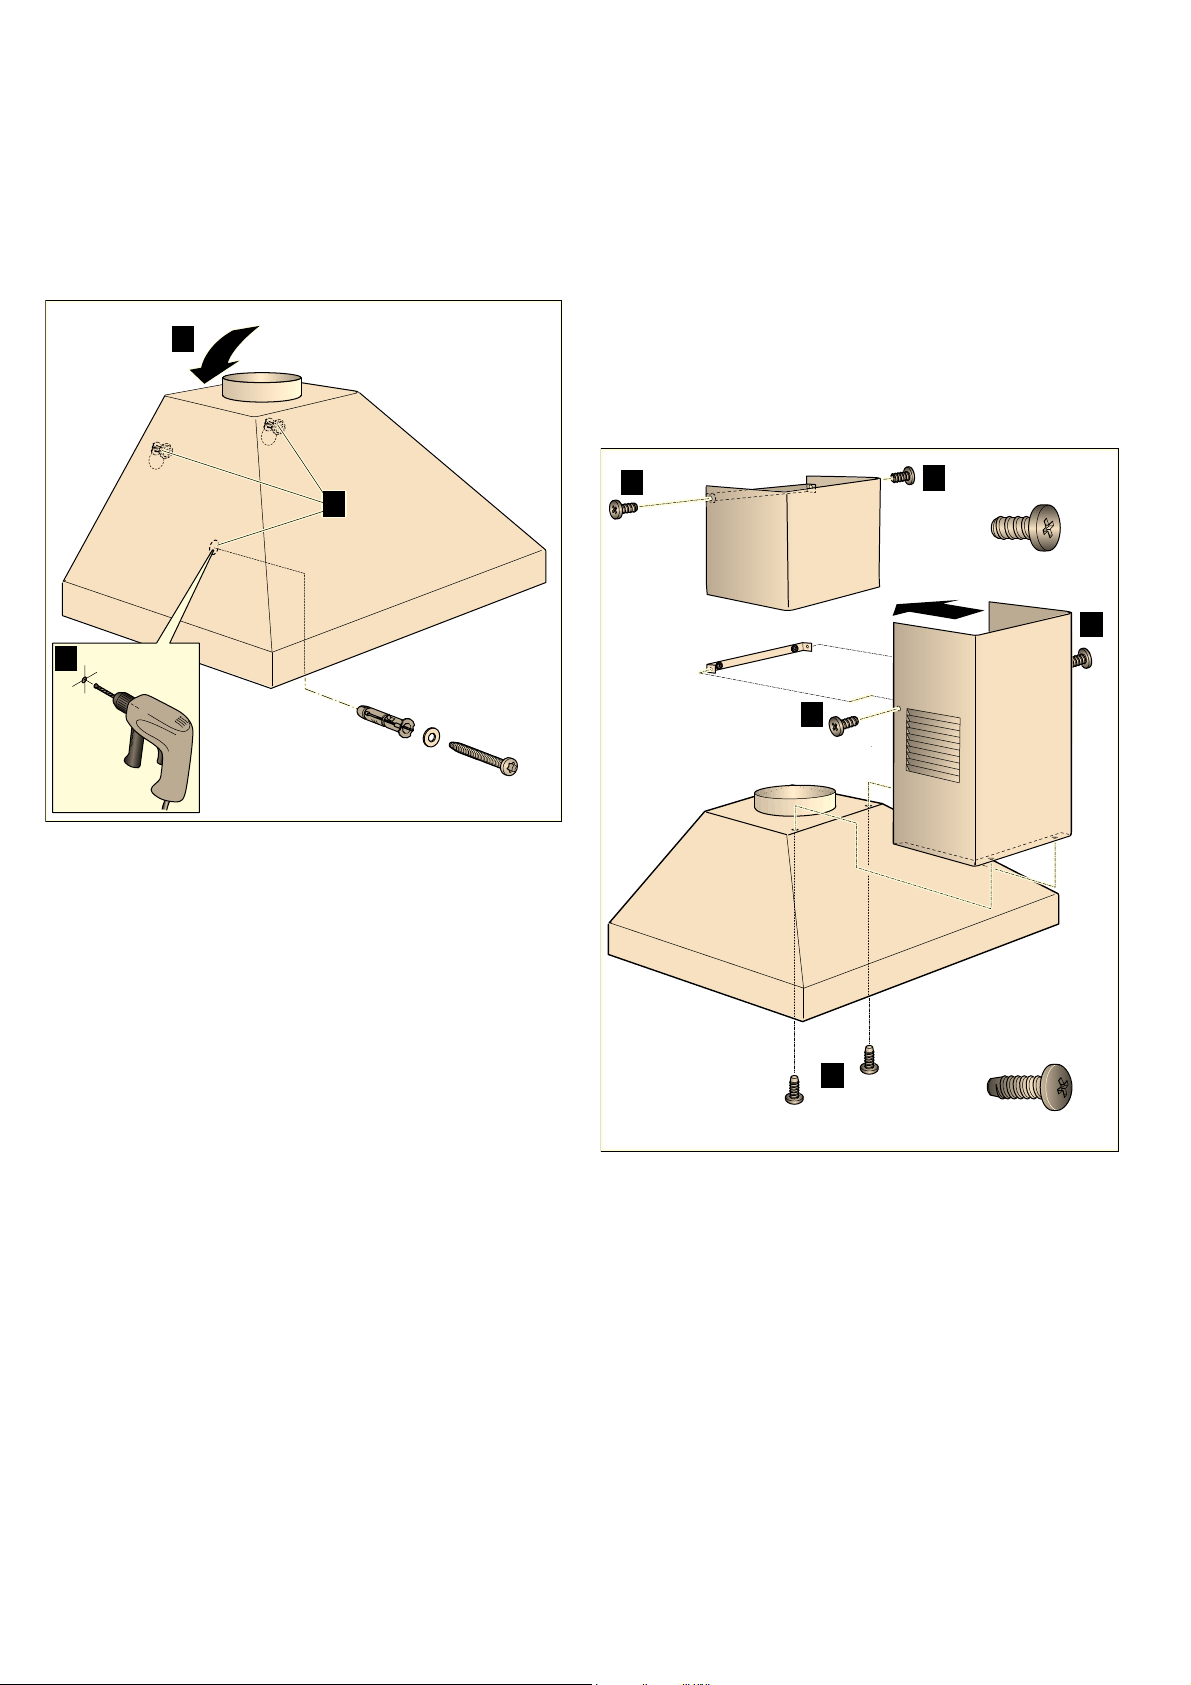
Finishing installation of the appliance
1. Drill an 8 mm Ø hole to a depth of 80 mm for the safety
screw and press the wall plug flush into the wall.
¨
2. Initially remove the protective foil from the back of the
appliance and, following installation, remove the foil
completely.
3. Attach the appliance. ©
4. Screw in the safety screw - and washer - and tighten all the
screws.
ª
Connecting the appliance to the power supply
Connecting the air extractor
Note: If using an aluminium pipe, smooth the connection area
beforehand.
1. Attach the air extractor pipe directly to the air-pipe connector.
2. Connect to air extractor opening.
3. Seal the joints appropriately.
Connect the power supply
1. Plug the mains plug into the earthed socket.
2. If a fixed connection is required, please follow the instructions
in the Electrical Connection section.
Attaching the flue duct
: Risk of injury!
Components inside the appliance may have sharp edges. Wear
protective gloves.
1. Separate the flue ducts.
To do this, remove the adhesive tape
2. Remove the protective foil from both flue ducts.
3. Screw the upper flue ducts to the sides of the fixing bracket
using two short screws.
¨
4. Place the lower flue ducts on the appliance and fix in place
using two long screws on the bottom of the appliance.
©
5. Screw the lower flue duct to the sides of the fixing bracket
using 2 short screws.
ª
Note: Align the flue duct before tightening the 2 screws.
$
%
&
[
[
$
$
%
&
&
Loading ...
Loading ...
Loading ...