Please read these instructions carefully before using this appliance. The instructions contain important information which will help you get the best out of the appliance and ensure safe and proper installation, use and maintenance.
Keep this manual in a convenient place so you can always refer to it for the safe and proper use of the appliance.
If you sell the appliance, give it away, or leave it behind when you move house, make sure you also pass on this manual so that the new owner can become familiar with the appliance and safety warnings.
Preparation
PREPARING THE TUMBLE DRYER
Remove all the packing materials to prevent unsteadiness, including the polystyrene base.
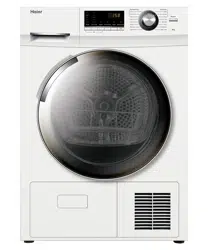
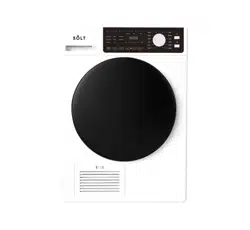
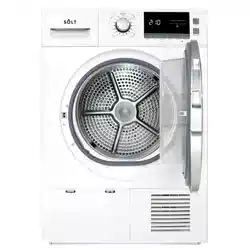
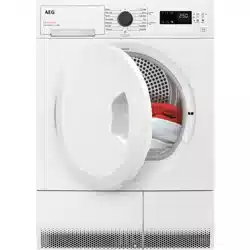
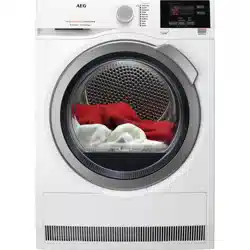
DESCRIPTION
This diagram may be slightly different from the layout of the tumble dryer you have just purchased due to technical improvements.
Control panel
A. Power button
B. Program knob
C. Start/Pause button
D. Signal button
E. Anti-crease button
F. Delay button
G. Dry level button
H. Temperature level button
I. Display
J,L. Maintenance displays
K. Child lock display
Operational functions
A. Power button
Press this button to power on the tumble dryer. Press it again to power it off.
B. Program knob
Turn this knob to choose the desired drying program. This dryer has 16 program options. For description of specific programs, refer fo “program modes" on page 9. When the drying program is selected. the relevant indicator light is on.
C. Start/Pause button
Press this button to start the tumble dryer. Press this button again during the operation of the tumble dryer. the indicator light and display screen will start flashing and the tumble dyer will pause. Press the button again and the program will continue
D. Signal button
When the drying cycle is finished, an intermitted acoustic signal will sound. Touch this button to cancel the buzzer sound.
E. Anti-crease button
If this additional function is selected. the anti-crease phase at the end of the drying cycle is lengthened by 60 minutes. The laundry can be removed at any time during the anti-crease phase
F. Delay button
Press this button repeatedly before starting the program to enter the time you want the dryer to be started. You can delay it 1 to 19 hours in 1 hour intervals. When passing 19 hours, the delay time will turn off. After the delay is set, press the “start/pause” button to start contdown(the indicator light will flash).
G. Dry level button
Press the button to set the final moisture content of the laundry at the end of cycle.
Extra: Extra dry.
Norm: Ready to wear
Damp: Ready to iron
H. Temperature level button
Press the button to set the drying temperature for some programs.
High: High temperature
Med: Middle temperature
low: Low temperature
Airing: Cool air
I. Display
The display shows the remaining program time. the delay time and other related informa tion. Note: The remaining time to start a program is the default time for the program. During operation. with variation of factors such as the mois ture content. The actual remaining time will be automatically adjusted until the preset drying result race achieved and the program is complete
L. Maintenance displays
Clean filter Important: After each drying cycle. clean the filter (see section "cleaning & care" on page 15).
J. Maintenance displays
Clean tank
Important: After each drying cycle, drain the condensed water tank (see section "cleaning & care" on page 15).
H+D. Combined buttons for child lock function
By pressing the “Temp “and “signal”buttons for 3 seconds after having started program. the button lock is activated and the icon will light up.Except the power button Combined buttons for ll the functionalbuttons are useless. In order to cancel the button lack, press the two child lock function buttons again for 3 seconds.
Note: When the cycle ends or the powersupply is interrupted, the function will not be cancelled automatically. > Child lock display — To show the Childlock function has been started.
Using the device
Program selection
Program modes
Warning: The final part of a tumble dryer cycle occurs without heat (cool down cycle) to ensure that the items are left at a temperature not causing damage to them.
Technical data
Drying methods
Please note: This tumble dryer is for domestic use only. Do not use it for purposes other thon thot for which it wos designed. Follow the instructions given on the label of eoch garment and dry only machine-dryable garments.
PREPARATION
Before use, clean any deposits from inside the drum of the tumble dryer with wet cloth.
Clean debris on the filter screen to increase the drying efficiency.
POWER SUPPLY
Connect the tumble dryer to the power supply (220V to 240V~/50Hz)
BEFORE TURNING ON POWER
Before turning on the power for the tumble dryer, please check.
Whether the supply voltage is in accordance with the value indicated on the nameplate.
Whether the supply receptacle can withstand the maximum power load to the tumble dryer.
Whether the supply receptacle is in accordance with the plug of the tumble dryer. If not, replace the power cord or receptacle to make them accord with each other. The replacement of the power cord must be made by a qualified professional or our authorized service agent
Warning: Do not dry silk,feather down and other delicate fabrics to avoid damage to the laundry.
PREPARING THE LAUNDRY
Check whether the laundry to be dried is suitable to be dried in the tumble dryer.
The tumble dryer can only dry the laundry that has been spun dry. Do not put too wet laundry into the tumble dryer.
Empty pockets from keys, coins, etc., remove lighters, matches and harder decorative objects (e.g. brooches) and remove adornment that is not suitable to be dried.
Close zippers and hooks, make sure the buttons are sewn on tightly and place small items such as socks, belts, bras, etc. in a mesh bag.
Unfold large pieces of fabric such as bed sheets, bedspreads, etc.
There are many items that would benefit from being dried on a drying rack.
For example items like sport shoes, soft toys, hats and woollen items that may be shoes, damaged if they are tumbled.
A diying rack is installed in your diyer when it leaves the factory. To remove it, tilt the top of the rack towards you to detach the legs from the slots in the lint filter, and gently remove from the drum.
LOADING THE TUMBLE DRYER
Laundry should be spun as dry as possible in order to save energy.
Make sure that the laundry you are going to dry is suitable for drying in a tumble dryer. You will find information about this on the laundry labels.
Place the laundry evenly into the drum after shaking it loose.
Make sure not to overload the tumble dryer.
Fabric softeners or similar products should be used as specified by the fabric softener instructions.
SWITCH ON THE POWER SUPPLY
Press the key the diyer will be automatically energized.
SELECTING PROGRAM
To get the best drying results, an appropriate drying program should be selected according to the laundry type. Please turn the program knob to select the right program
SELECTING FUNCTIONAL
According to your requirements, select the additional function:
Temp
Dry Level
Signal
Anti-Crease
Delay
Start/Pause
DRYING
Press the "start/pause" button. The tumble dryer will operate according to the pre-set programs. The tumble dryer will stop operation automatically when a drying cycle ends. The "end" sign will appear on the display. Open the tumble dryer door and take out the laundry. If the laundry is not removed, the tumble dryer will start the anticrease protection automatically. During the anti-crease protection cycle, the tumble dryer's drum will run at intervals to keep your laundry loose.
TURNING OFF THE TUMBLE DRYER
Press the power button to cut off the power supply and unplug the tumble dryer at the wall socket.
TIPS FOR SAVING ENERGY
Spin the laundry as dry as possible in the washing machine before putting it into the tumble dryer
Avoid overloading the tumble dryer.
Shake the laundry and make it loose before loading it into the tumble dryer.
Choose a proper drying program. Make sure the laundry in not dried longer than needed.
Clean the filter screen after every drying cycle.
Clean the condenser once a month.
CARE CHART
MAINTENANCE
CLEANING THE TUMBLE DRYER
Wipe the body of the tumble dryer and the control panel with a damp cloth. Remember not to use any organic solvent or corrosive agent to avoid damage to the device
WARNING: The tumble dryer is not to be used if industrial chemicals have been used for cleaning.
CLEANING THE FILTER SCREEN
To ensure good ventilation during drying, the filter screen must be cleaned after every drying program is complete.
Open the door.
Remove the filter screen from the tumble dryer.
Open the filter screen.
Clean off the dust on the filter screen with a wet towel
After cleaning, put the filter screen back in place.
EMPTYING THE WATER COLLECTION TANK
During operation, steam condenses into water and is collected in the water collection tank. Empty the water collection tank after the program is complete.
Hold the handle and pull the tank outwards to remove it. Keep it level to prevent the water from overflowing.
Pour away the water. Put the tank back in place.
Note: Do not use the water for drinking or for food processing.
If the tank has not been emptied, the tumble dryer will sound an alarm every time the tank is full. In that case the indicator light turns on and the tumble dryer will pause. It will not restart until the tank is emptied and replaced.
CLEANING THE DRUM
After the tumble dryer has operated for a time, fabric caring agents or calcium contained in the water will form an almost invisible layer on the inside of the drum.
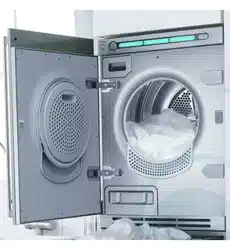
CLEANING THE CONDENSER
The condenser must be cleaned monthly. Switch off the power supply and remove the plug before cleaning:
Unlock the maintenance flap and open it.
Screw both locking levers towards each other,Pull out the handle/air cooler.
Thoroughly clean the handle/air cooler,allow all the water to drip out,then clean the seals.
Re-insert the handle/air cooler,handle below, unscrew both locking levers,close the maintenance flap until it locks into position
Note: Do not use a sharp tool cleaning the heat exchanger, otherwise it may damage its sealing performance.
TROUBLESHOOTING
CODES
CAUSES
SOLUTIONS
the "Tank" is light
the water tank is full
Clean the tank.
F2
Drain pump error.
Please contact the service center.
F31
The NTC1 (near the filter) is open-circuited or short-circuited.
Please contact the service center.
F32
The NTC2(near the heater) is open-circuited or short-circuited.
Please contact the service center.
F4
Temperature of the laundry in the drum does not change.
Please contact the service center.
F5
Communication breakdown
Please contact the service center.
E6
The filler is full.
Clean the filter.
The following circumstances do not constitute problems. Do not contact the service center until the problem has been confirmed.
CODES
CAUSES
SOLUTIONS
Tumble dryer fails to operate.
Poor connection to the power supply.
Power failure.
No drying program is set.
Device has not been switched on.
The water collection tank is full.
The tumble dryer door is not properly closed.
Check connection to the power supply.
Check the power supply.
Make sure a drying program has been set.
Make sure the device is switched on.
Empty the water collection tank.
Close the tumble dryer door properly.
Tumble dryer fails to operate and the display shows "End".
The laundry has reached the condition defined by the program setting.
There is no laundry in the drum.
Check if your program setting is appropriate.
Check if there's laundry in the drum.
Drying time is too long and the results are not satisfactory.
The program setting is not correct.
The filter screen has not been cleaned,
The condenser is blocked.
The tumble dryer is overloaded.
The laundry is too wet.
The vent duct is blocked.
Make sure the program is set correctly.
Clean the filter screen.
Clean the condenser.
Reduce the amount of laundry in the drum.
Spin the laundry properly before drying.
Check the vent duct and unblock it.
Remaining time on the display stops or skips.
The remaining time will be adjusted and corrected continuously and automatically based upon the following factors: