Loading ...
Loading ...
Loading ...
10 11
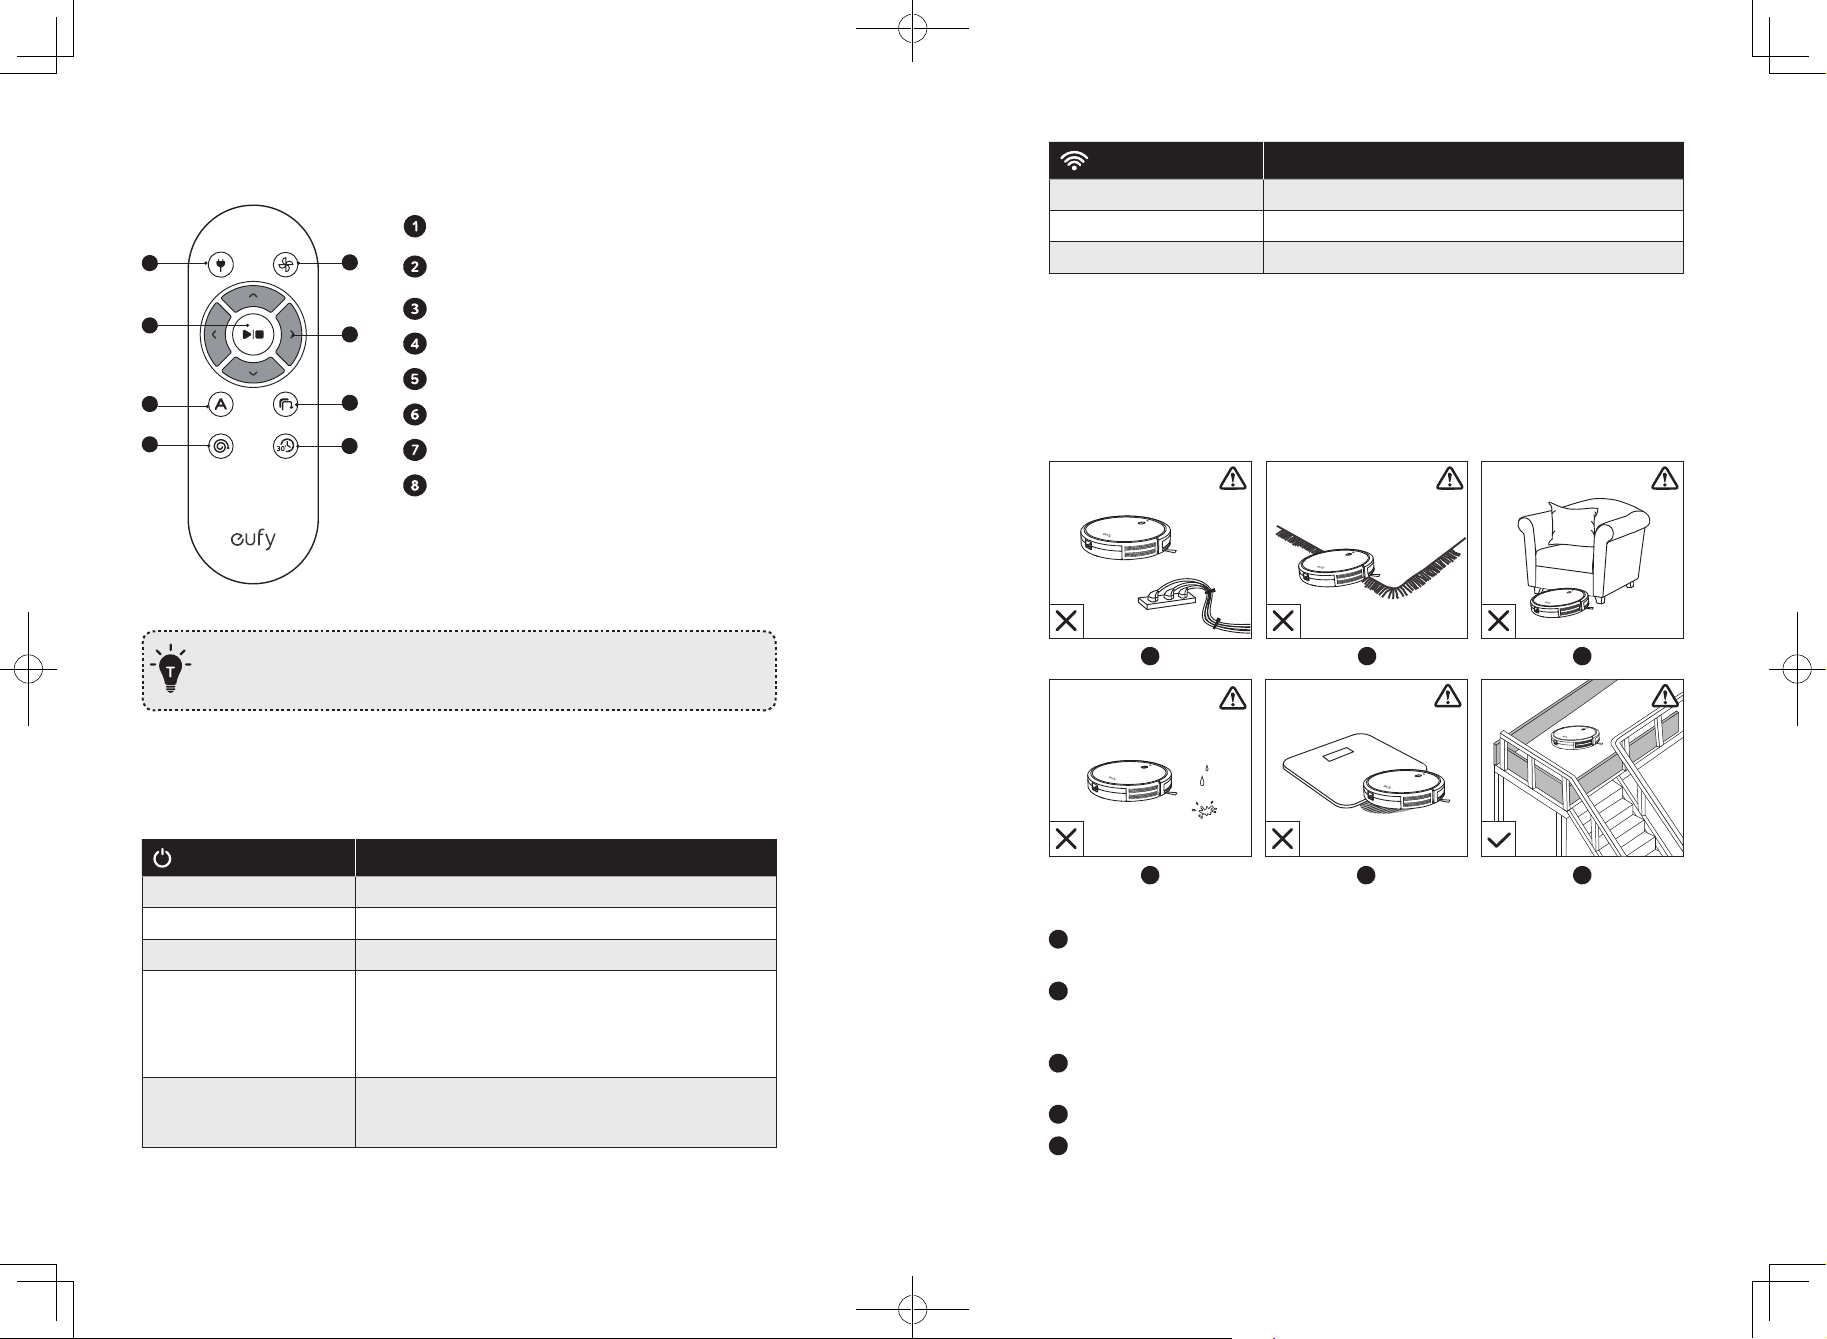
Remote Control
1
2
3
5
4
6
7
8
Return RoboVac to Charging Base
Adjust suction power level in Auto and Quick
Cleaning modes
Start Auto cleaning / Stop cleaning
Control cleaning direction manually
Start Auto cleaning
Start Edge cleaning
Start Spot cleaning
Start Quick cleaning
Install 2 AAA batteries before using the remote control for the first time. Make sure
the positive and negative ends are facing the correct polarity direction as marked in
the battery compartment.
LED Indication
You can see the status of RoboVac from the LED indicators.
(Power Status Light)
Status
Breathing orange Charging
Solid blue Standby / Cleaning / Fully charged
Solid orange Low power and returning to Charging Base
O
• RoboVac is off.
• To conserve power, the light automatically turns off
when RoboVac is not docked to the Charging Base
and has been inactive for 1 minute.
Flashing / Solid red + Beeping
RoboVac has an error.
Refer to the “Troubleshooting>Error Tone” section in this
manual for solutions.
(Wi-Fi Status Light)
Status
Slowly flashing blue Waiting for connection
Rapidly flashing blue Connecting with your wireless router
Solid blue Connected to your wireless router
Using Your RoboVac
Important Tips Before Use
a
b
c
d
e
f
a
Remove power cords and small objects from the floor that may entangle RoboVac. You
can use the supplied cable ties to organize your wires and power cords.
b
Fold tasseled edges of area rugs underneath to prevent tangling RoboVac. Avoid
cleaning very dark-colored high-pile rugs or rugs thicker than 1.02 in/26 mm as they
may cause RoboVac to malfunction.
c
Keep RoboVac away from spaces lower than 2.87 in/73 mm to prevent RoboVac from
getting stuck. If necessary, place a physical barrier to block off the problem areas.
d
Keep RoboVac away from wet areas.
e
RoboVac may climb on top of objects less than 0.63 in/16 mm in height. Remove these
objects if possible.
Loading ...
Loading ...
Loading ...