Loading ...
Loading ...
Loading ...
6
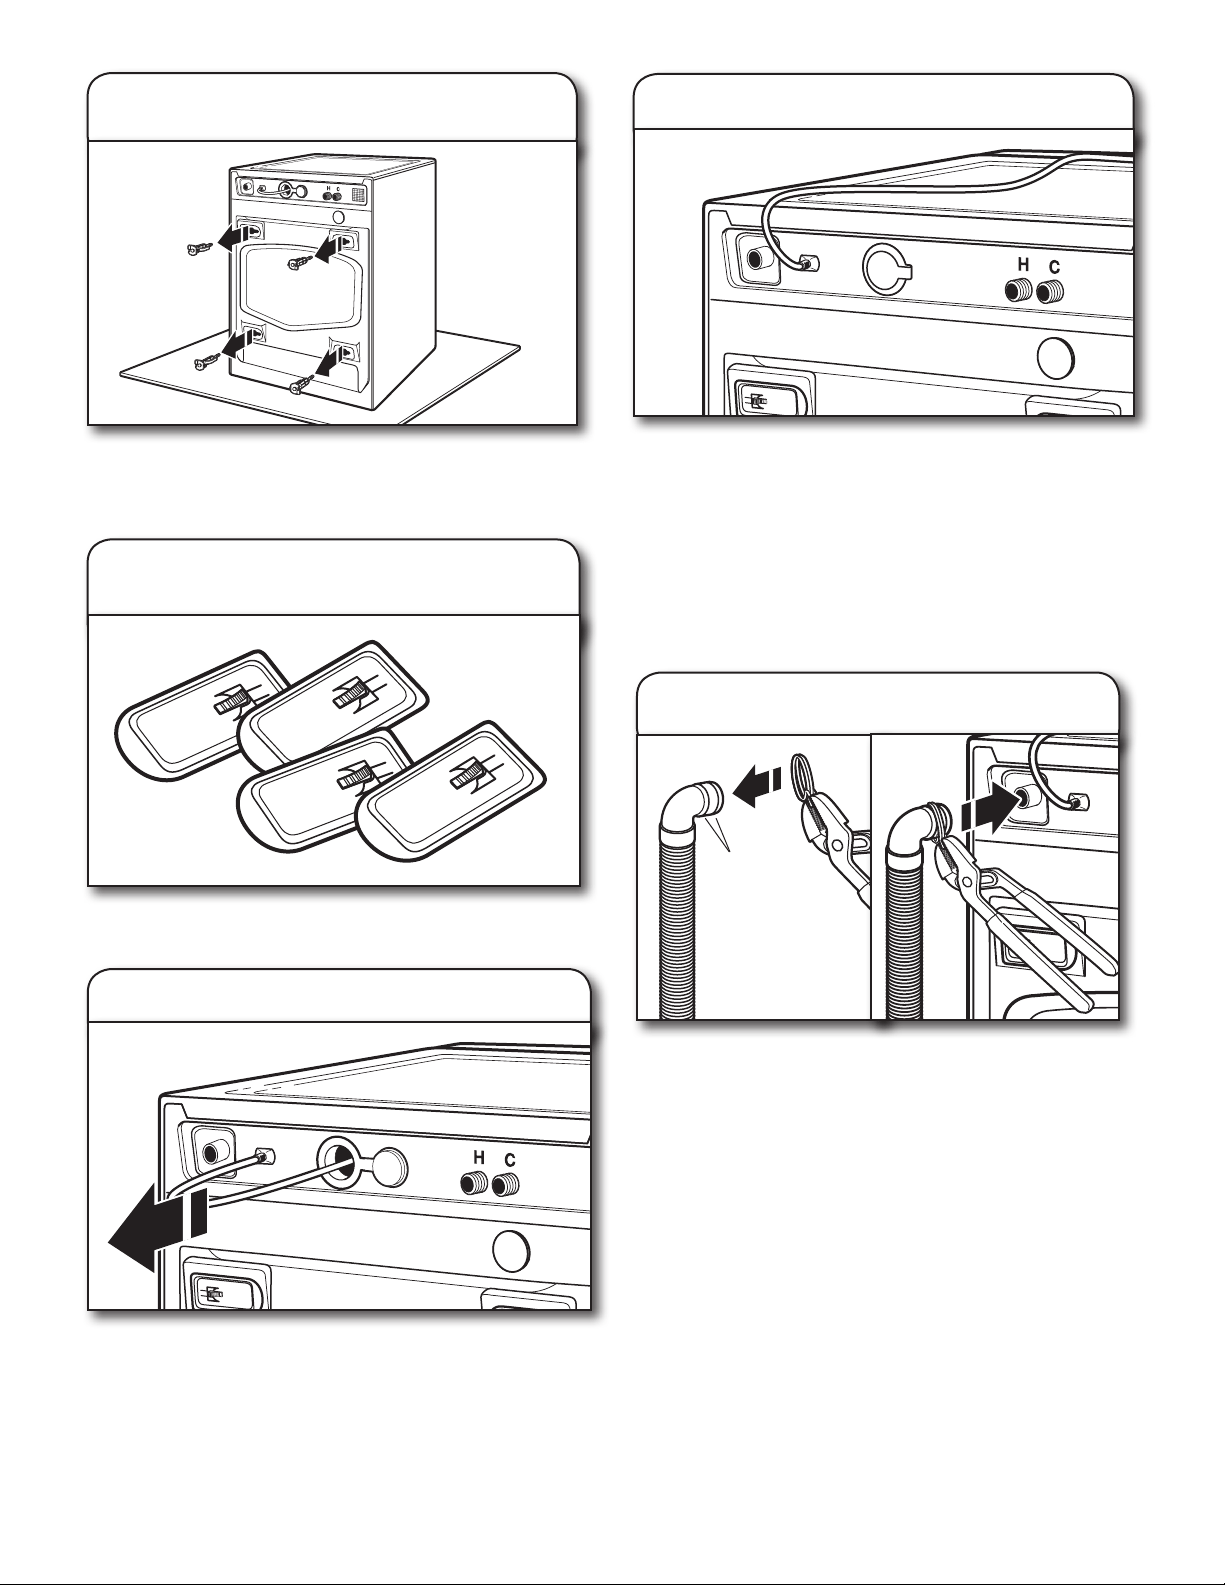
Loosen bolts with a 13 mm (1/2") wrench. Slide each bolt and
spacer to center of hole. Pull bolts and plastic spacers from
back of washer. Discard bolts and spacers.
3. Remove transport bolts from
washer
Close bolt holes on cabinet back with four transport bolt hole
plugs included with washer parts.
4. Cover bolt holes with transport
bolt hole plugs
Pull power cord through opening in rear panel and close hole
with attached cap.
NOTE: If washer is transported at later date, call your
local service center to avoid suspension and structural
damage, a certied technician must properly set up
washer for relocation.
5. Remove power cord
CONNECT DRAIN HOSE
6. Place power cord over top
Remove the yellow shipping strap from the cord. Gently
place power cord over top of washer to allow free access
to back of washer.
IMPORTANT: Do not plug washer in until installation has
been completed.
If clamp is not already in place on elbow end of drain hose,
squeeze clamp with pliers and slide it over end of hose,
centering it between the ribs, as shown. Squeeze clamp with
pliers and slide elbow end of drain hose onto drain port and
secure with clamp.
For a laundry tub or standpipe drain, go to step 9.
For a oor drain, remove the preinstalled drain hose form
as shown in Step 8. You may need additional parts with
separate directions. See “Alternative Parts”.
7. Attach drain hose to drain port
Ribs
Loading ...
Loading ...
Loading ...