Documents: Go to download!
User Manual
- Owner's manual - (English, Spanish)
- Quick specs - (English)
- Features of your Microwave Oven
- Auto Features
- Sensor Features
- Other Features
- Care and cleaning of the microwave oven
- Replacing the light bulbs
- Troubleshooting Tips
Table of contents
Owner’s Manual Microwave Oven
Features of your Microwave Oven
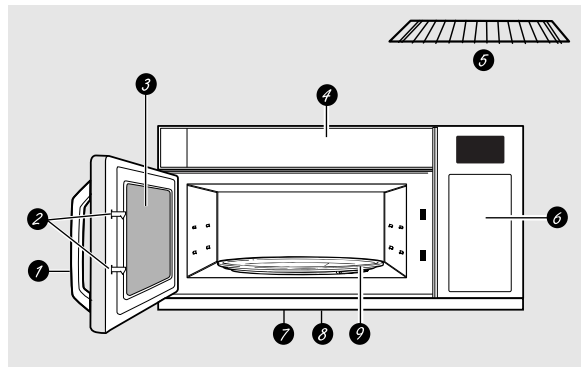
- Door Handle. Pull to open the door. The door must be securely latched for the microwave to operate.
- Door Latches.
- Window with Metal Shield. Screen allows cooking to be viewed while keeping microwaves confined in the oven.
- Active Vent (on some models). The vent door swings open when the fan operates and closes when the fan shuts off.
- Shelf. Lets you microwave several foods at once. Food microwaves best when placed directly on the turntable.
- Touch Control Panel Display.
- Cooktop Light.
- Grease Filter.
- Removable Turntable. Turntable and support must be in place when using the oven. The turntable may be removed for cleaning
NOTE: Rating plate is located on the inside wall of the microwave, or on the upper left front behind the door. Oven vent(s) and oven light are located on the inside walls of the microwave oven
You can microwave by time, with the sensor features or with the auto features.
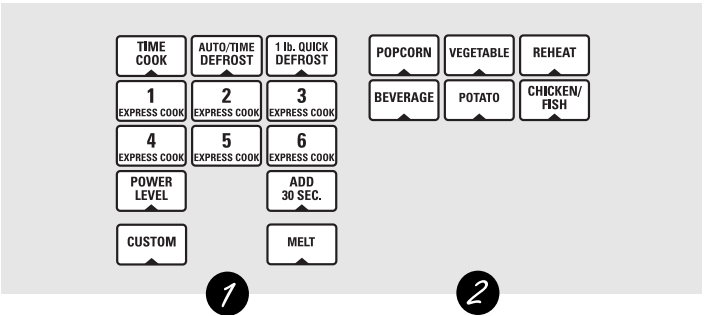
Cooking Controls
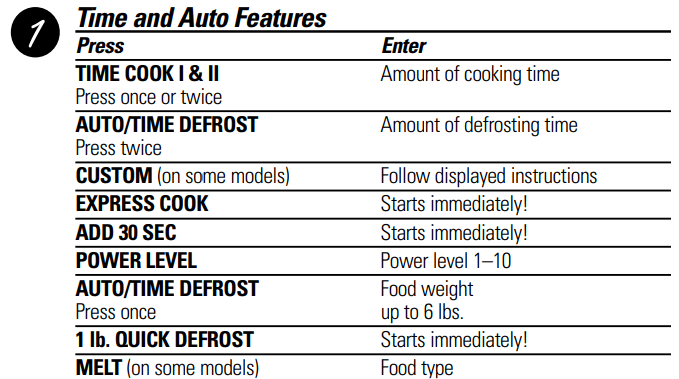
Auto Features
Auto Defrost
Auto Defrost automatically sets the defrosting times and power levels to give even defrosting results for meats, poultry and fish weighing up to six pounds.
- Twice during Auto Defrost, the oven signals Turn Food Over. At each signal, turn the food over. Remove defrosted meat or shield warm areas with small pieces of foil.
- After defrosting, most meats need to stand 5 minutes to complete defrosting. Large roasts should stand for about 30 minutes.
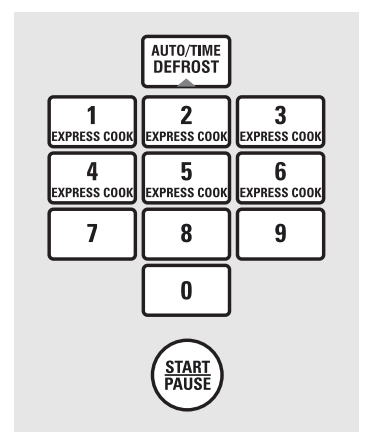
- Press AUTO/TIME DEFROST once for Auto Defrost.
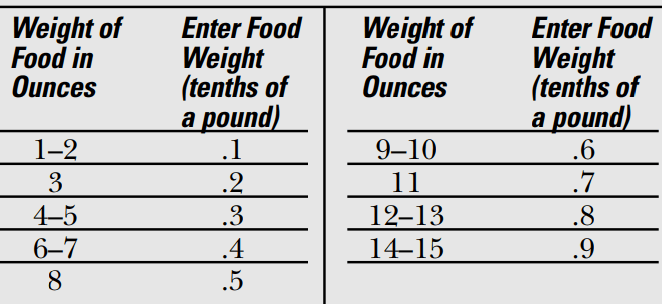
- Using the Conversion Guide at right, enter food weight. For example, press pads 1 and 2 for 1.2 pounds (1 pound, 3 ounces). Enter weight up to 6 pounds for Auto Defrost.
- Press START.
Conversion Guide
If the weight of food is stated in pounds and ounces, the ounces must be converted to tenths (.1) of a pound.
1 lb. Quick Defrost

1 lb. Quick Defrost automatically sets the defrosting times and power levels for foods weighing one pound.
Press 1 lb. Quick Defrost. The oven starts automatically. When the oven signals, turn food over.
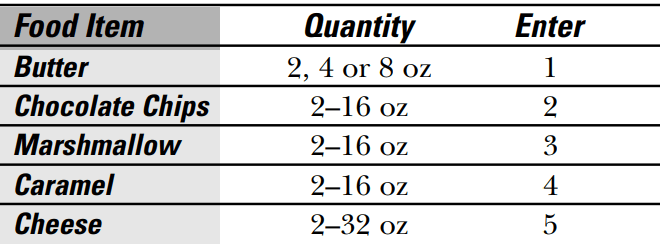
Melt (on some models)

- Press MELT.
- Enter number for food type.
- Press START.
A convenient way to melt frequently used food items.
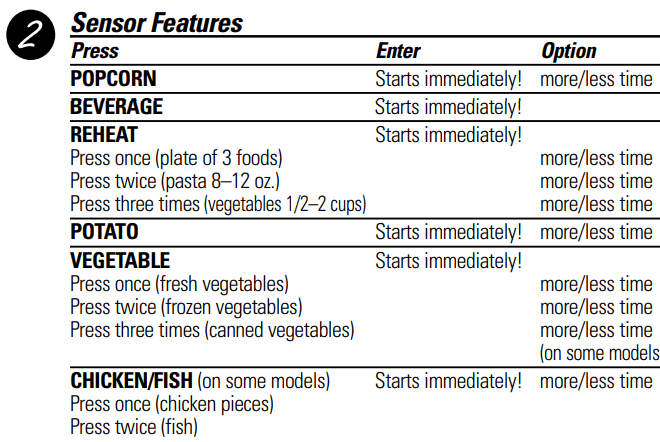
Sensor Features
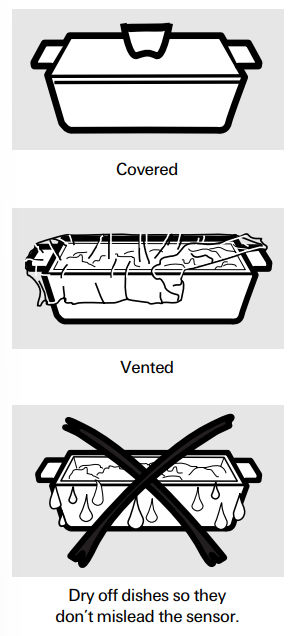
| Humidity SensorWhat happens when using the Sensor Features: The Sensor Features detect the increasing humidity released during cooking. The oven automatically adjusts the cooking time to various types and amounts of food. Do not use the Sensor Features twice in succession on the same food portion—it may result in severely overcooked or burnt food. If food is undercooked after the countdown, use Time Cook for additional cooking time. The proper containers and covers are essential for best sensor cooking. Always use microwave-safe containers and cover them with lids or vented plastic wrap. Never use tight sealing plastic containers—they can prevent steam from escaping and cause food to overcook. Be sure the outside of the cooking containers and the inside of the microwave oven are dry before placing food in the oven. Beads of moisture turning into steam can mislead the sensor |
Beverage

Press BEVERAGE once to heat an 8–10 oz cup of coffee or other beverage.
Drinks heated with the Beverage feature may be very hot. Remove the container with care.
If food is undercooked after the countdown use Time Cook for additional cooking time.
NOTE: Do not use this feature twice in succession on the same food portion—it may result in severely overcooked or burnt food.
Popcorn
NOTE: Do not use the metal shelf when using the Popcorn feature.
NOTE: Do not use this feature twice in succession on the same food portion—it may result in severely overcooked or burnt food.
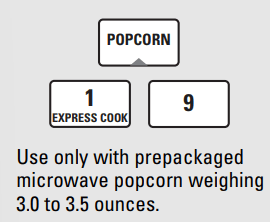
How to Use the Popcorn Feature
- Follow package instructions, using Time Cook if the package is less than 3.0 ounces or larger than 3.5 ounces. Place the package of popcorn in the center of the microwave.
- Press POPCORN for a regular size (3.0 to 3.5 oz) bag of popcorn. The oven starts immediately.
If you open the door while POPCORN is displayed, an error message will appear. Close the door and press START.
If food is undercooked after the countdown use Time Cook for additional cooking time.
How to Adjust the Popcorn Program to Provide a Shorter or Longer Cook Time
If you find that the brand of popcorn you use underpops or overcooks consistently, you can add or subtract 20–30 seconds to the automatic popping time.
To add time: After pressing POPCORN, press 9 within the first 30 seconds after the oven starts for an extra 20 seconds. Press 9 again to add another 10 seconds (total 30 seconds additional time).
To subtract time: After pressing POPCORN, press 1 within the first 30 seconds after the oven starts for 20 seconds less cooking time. Press 1 again to reduce cooking time another 10 seconds (total 30 seconds less time).
Reheat
NOTE: Do not use the metal shelf when using the Reheat feature.
NOTE: Do not use this feature twice in succession on the same food portion—it may result in severely overcooked or burnt food.
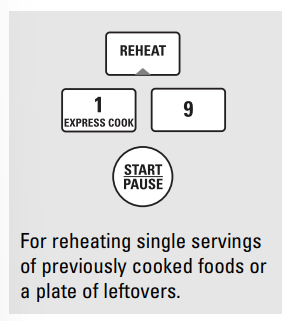
How to Use the Reheat feature:
- Place the cup of liquid or covered food in the oven. Press REHEAT once, twice or three times. The oven starts immediately. Press once for a plate of leftovers. Press twice for pasta (8–12 oz).
- Press three times for vegetables (1/2 to 2 cups). The oven signals when steam is sensed and the time remaining begins counting down.
Do not open the oven door until time is counting down. If the door is opened, close it and press START immediately.
After removing food from the oven, stir, if possible, to even out the temperature. Reheated foods may have wide variations in temperature. Some areas may be extremely hot.
If food is not hot enough after the countdown use Time Cook for additional reheating time.
How to Change the Automatic Settings:
To reduce time by 10%: Press 1 within 30 seconds after pressing the REHEAT pad.
To add 10% to cooking time: Press 9 within 30 seconds after pressing the REHEAT pad.
Some Foods Not Recommended For Use With Reheat:
It is best to use Time Cook for these foods:
- Bread products.
- Foods that must be reheated uncovered.
- Foods that need to be stirred or rotated.
- Foods calling for a dry look or crisp surface after reheating.
Sensor Cooking
(Fish and Chicken Pieces on some models)
NOTE: Do not use the metal shelf with Sensor Cooking.
NOTE: Do not use this feature twice in succession on the same food portion—it may result in severely overcooked or burnt food.
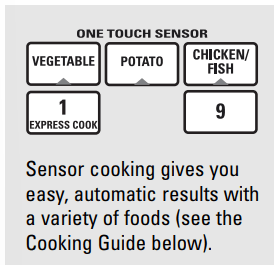
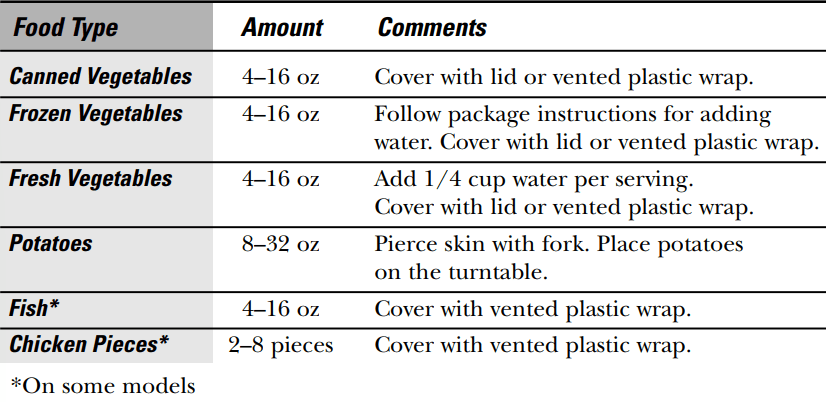
- Place covered food in the oven. Press the food pad. For vegetables, press the VEGETABLE pad once for fresh vegetables, twice for frozen vegetables or three times for canned vegetables. For chicken or fish, press the CHICKEN/FISH pad once for chicken pieces or twice for fish.
- The oven starts immediately. The oven signals when steam is sensed and the time remaining begins counting down. Turn or stir the food if necessary.
Do not open the oven door until time is counting down. If the door is opened, close it and press START immediately.
If food is undercooked after the countdown use Time Cook for additional cooking time.
How to Change the Automatic Settings (automatic settings for canned vegetables cannot be adjusted on some models):
You can adjust the cooking time for all foods to suit your personal taste.
To reduce time by 10%: Press 1 within 30 seconds after pressing the food pad.
To add 10% to cooking time: Press 9 within 30 seconds after pressing the food pad.
Cooking Guide
Other Features
Clock
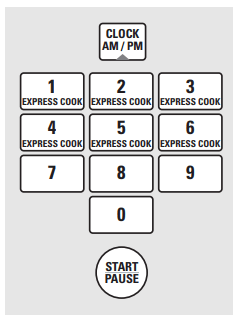
Press CLOCK to set the time of day.
- Press CLOCK.
- Enter the time of day.
- Select AM or PM.
- Press START.
To check the time of day while microwaving, press CLOCK.
Delay Start
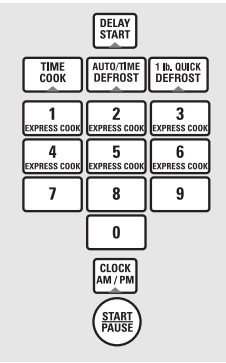
Delay Start allows you to set the microwave to delay cooking up to 24 hours.
- Press DELAY START.
- Select the cooking or defrosting feature you wish to delay; then enter the cooking or defrosting time.
- Press START.
- Enter the time you want the oven to start. (Be sure the microwave clock shows the correct time of day.)
- Select AM or PM.
- Press START
The start time will be displayed and will remain until the oven automatically starts at the delayed time.
The time of day may be displayed by pressing CLOCK.
Timer
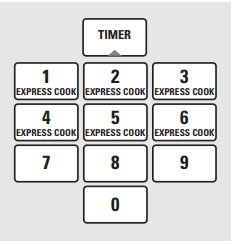
Timer operates as a minute timer and can be used at any time, even when the oven is operating.
- Press TIMER.
- Enter time you want to count down.
- Press TIMER to start.
To pause the countdown, press TIMER. When time is up, the oven will signal. To turn off the timer signal, press TIMER.
NOTE: The timer indicator will be lit while the timer is operating.
To cancel the timer, press and hold the TIMER pad for 2 seconds.
Reminder
The Reminder feature can be used like an alarm clock, and can be used at any time, even when the oven is operating. The Reminder time can be set up to 24 hours later.
- Press REMINDER.
- Enter the time you want the oven to remind you. (Be sure the microwave clock shows the correct time of day.)
- Select AM or PM.
- Press REMINDER. When Reminder signal occurs, press REMINDER to turn it off. The Reminder time may be displayed by pressing REMINDER.
NOTE: The REM indicator will remain lit to show that the Reminder is set. To clear the Reminder before it occurs, press and hold the REMINDER pad for 2 seconds.
Start/Pause

In addition to starting many functions, START/PAUSE allows you to stop cooking without opening the door or clearing the display.
Child Lock-Out

You may lock the control panel to prevent the microwave from being accidentally started or used by children.
To lock or unlock the controls, press and hold CLEAR/OFF for about three seconds. When the control panel is locked, CONTROL LOCKED or LOCKED will be displayed.
Turntable

For best cooking results, leave the turntable on. It can be turned off for large dishes. Press TURNTABLE to turn the turntable on or off.
Sometimes the turntable can become too hot to touch. Be careful touching the turntable during and after cooking.
Vent Fan

The vent fan removes steam and other vapors from surface cooking.
Press VENT FAN once for high fan speed, twice for medium fan speed, a third time for low fan speed or a fourth time to turn the fan off.
Press the VENT FAN BOOST pad (on some models) for extra fan speed.

Automatic Fan
An automatic fan feature protects the microwave from too much heat rising from the cooktop below it. It automatically turns on if it senses too much heat.
If you have turned the fan on, you may find that you cannot turn it off. The fan will automatically turn off when the internal parts are cool. It may stay on for 30 minutes or more after the cooktop and microwave controls are turned off.
Surface Light

Press SURFACE LIGHT once for bright light, twice for the night light, or three times to turn the light off.
Options
Press the OPTIONS pad multiple times to cycle through the available options.
Auto Nite Light
The Auto Nite Light can be set to come on and go off at desired times.
To set the timer:
- Press 1.
- Enter the time of day for the light to come on.
- Select AM or PM.
- Press the OPTIONS pad.
- Enter the time of day for the light to go off.
- Select AM or PM.
- Press the OPTIONS pad.
To review the nite light settings, press 2 after selecting the Auto Nite Light option.
To turn the nite light off, press 0 after selecting the Auto Nite Light option.
Beeper Volume
The beeper sound level can be adjusted. Choose 0–3 for mute to loud.
Charcoal Filter Reminder
The Charcoal Filter Reminder is a 180-day timer to remind you when to change the charcoal filter. Press 0 to turn the reminder off. Press 1 to set the reminder. Press 2 to reset the reminder.
Display Language (on some models)
The language for the scrolling display may be set at either English or Spanish.
Press 1 for English or 2 for Spanish.
Display On/Off
You can choose to turn the clock display on or off. Press 0 to turn the display off. Press 1 to turn the display on.
Display Speed
The scroll speed of the display can be changed. Select 1–5 for slowest to fastest scroll speed.
Care and cleaning of the microwave oven
Helpful Hints
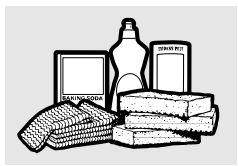
An occasional thorough wiping with a solution of baking soda and water keeps the inside fresh.
NOTE: Be certain the power is off before cleaning any part of this oven.
How to Clean the Inside
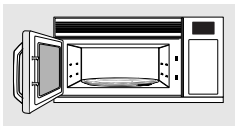
Walls, Floor, Inside Window, Metal and Plastic Parts on the Door
Some spatters can be removed with a paper towel; others may require a damp cloth. Remove greasy spatters with a sudsy cloth; then rinse with a damp cloth. Do not use abrasive cleaners or sharp utensils on oven walls. Never use a commercial oven cleaner on any part of your microwave.
Removable Turntable and Turntable Support
To prevent breakage, do not place the turntable into water just after cooking. Wash it carefully in warm, sudsy water or in the dishwasher. The turntable and support can be broken if dropped. Remember, do not operate the oven without the turntable and support in place.
Shelf
Clean with mild soap and water or in the dishwasher. Do not clean in a self-cleaning oven.
Temperature Probe (on some models)
Clean immediately after using. To clean, wipe with a sudsy cloth, then rub lightly with a plastic scouring ball if necessary. Rinse and dry. The probe can also be washed in the dishwasher.
How to Clean the Outside
We recommend against using cleaners with ammonia or alcohol, as they can damage the appearance of the microwave oven. If you choose to use a common household cleaner, first apply the cleaner directly to a clean cloth, then wipe the soiled area.
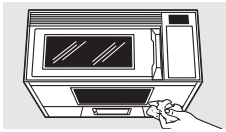
Case
Clean the outside of the microwave with a sudsy cloth. Rinse and then dry. Wipe the window clean with a damp cloth.
Control Panel
Wipe with a damp cloth. Dry thoroughly. Do not use cleaning sprays, large amounts of soap and water, abrasives or sharp objects on the panel—they can damage it. Some paper towels can also scratch the control panel.
Door Panel
Before cleaning the front door panel, make sure you know what type of panel you have. Refer to the eighth digit of the model number (eleventh digit on models JVM1850, JNM1851 and DVM1850). “S” is stainless steel, "G" is Graphite, “L” is CleanSteel and “B”, “W” or “C” are plastic colors.
Stainless Steel
The stainless steel panel can be cleaned with Stainless Steel Magic or a similar product using a clean, soft cloth. Apply stainless cleaner carefully to avoid the surrounding plastic parts. Do not use appliance wax, polish, bleach or products containing chlorine on Stainless Steel finishes.
CleanSteel, Graphite
Use a clean, soft, light and lightly dampened cloth, then dry thoroughly. Do not use appliance wax, polish, bleach or products containing any chemical agent on the CleanSteel surfaces.
Plastic Color Panels
Use a clean, soft, lightly dampened cloth, then dry thoroughly.
Door Seal
It’s important to keep the area clean where the door seals against the microwave. Use only mild, non-abrasive detergents applied with a clean sponge or soft cloth. Rinse well.
Bottom
Clean off the grease and dust on the bottom often. Use a solution of warm water and detergent.
Reusable Grease Filter
The reusable grease filter traps grease released by foods on the cooktop. It also prevents flames from foods on the cooktop from damaging the inside of the microwave.
For this reason, the filter must ALWAYS be in place when the hood is used. The grease filter should be cleaned once a month, or as needed.
Cleaning the Filter
To remove, slide it to the side using the tab. Pull it down and out.
To clean the grease filter, soak it and then swish it around in hot water and detergent. Don’t use ammonia or ammonia products because it will darken the metal. Light brushing can be used to remove embedded dirt. Rinse, shake and let it dry before replacing.
To replace, slide the filter in the frame slot at the side of the opening. Pull up and in to lock into place.
Replacing the light bulbs
Cooktop Light/Night Light
On models JVM1850, JNM1851, DVM1850 and EMO4000, replace the burned-out bulb with a 120 volt, 40-watt incandescent bulb (WB36X10003), available from your GE supplier.
On models JVM1870, JVM1871, JVM2050 and JVM3670, replace the burned-out bulb with a 120 volt, 20-watt halogen bulb (WB36X10213), available from your GE supplier
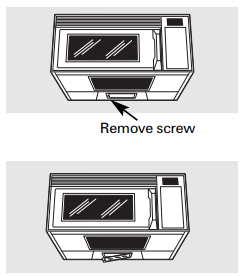
- To replace the bulb(s), first disconnect the power at the main fuse or circuit breaker panel or pull the plug.
- Remove the screw at the left edge of the light cover and push on the right edge of the cover to open.
- Be sure the bulb(s) to be replaced are cool before removing. After breaking the adhesive seal, remove the bulb by either gently turning (for models JVM1850, JNM1851, DVM1850 and EMO4000) or pulling straight out (for models JVM1870, JVM1871, JVM2050 and JVM3670). Replace with the same size and type bulb.
- Raise the light shield and replace the screw. Connect electrical power to the oven.
Oven Light
Replace the burned-out bulb with a 120 volt, 20-watt halogen bulb (WB36X10213), available from your GE supplier.
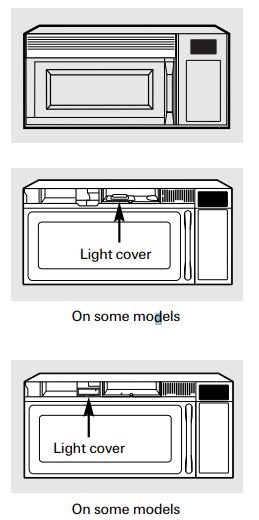
- To replace the oven light, first disconnect the power at the main fuse or circuit breaker panel or pull the plug.
- Remove the top grille by taking out the screws on top of the grille that hold it in place and sliding the grille to the left (opening the door makes grille removal easier).
- Next, remove the light cover.
- On some models, the light cover is located in the center of the top opening. Remove the screw that secures the light cover and lift the cover off.
- On some models, the light cover is located at the left of the top opening. Lift the cover off.
- Pinch the clips that hold the light socket in place and lift the socket out.
- Remove the bulb from the light socket by pulling straight out. Replace with the same size and type bulb, then replace the light socket and cover.
- Replace the grille and screws. Connect electrical power to the oven.
Troubleshooting Tips
| Problem | Possible Causes | What To Do |
| Oven will not start | A fuse in your home may be blown or the circuit circuit breaker. |
|
| Power surge. |
| |
| Plug not fully inserted into wall outlet. |
| |
| Door is not closed. |
| |
| Floor of the oven is warm even when the oven has not been used | Heat from the cooktop light may make the oven floor get warm. |
|
| “CONTROL LOCKED” or “LOCKED” appears on the display | The control has been locked |
|
| “SENSOR ERROR” appears on the display | When using a Sensor feature, the door was opened before steam could be detected. |
|
| Steam was not detected in maximum amount of time. |
| |
| You hear an unusual low-tone beep | You have tried to start the Reminder without a valid time of day. |
|
| You have tried to start the Auto Nite Light without a valid time of day entered for the on-time and off-time. |
| |
| You have tried to change the power level when it is not allowed. |
| |
| Food amount too large for Sensor Reheat | Sensor Reheat is for single servings of recommended foods. |
|
Things That Are Normal With Your Microwave Oven
- Moisture on the oven door and walls while cooking. Wipe the moisture off with a paper towel or soft cloth.
- Moisture between the oven door panels when cooking certain foods. Moisture should dissipate shortly after cooking is finished.
- Steam or vapor escaping from around the door.
- Light reflection around door or outer case.
- Dimming oven light and change in the blower sound at power levels other than high.
- Dull thumping sound while oven is operating.
- TV/radio interference might be noticed while using the microwave. Similar to the interference caused by other small appliances, it does not indicate a problem with the microwave. Plug the microwave into a different electrical circuit, move the radio or TV as far away from the microwave as possible, or check the position and signal of the TV/radio antenna.
- The Active Vent door (on some models) will open during operation, and remain open while the microwave is running, to keep the electronics cool. It is also normal to hear a clicking noise as the vent door opens and closes.
See other models: ZISS480DXDSS CFE28USHMSS JBS07H1BB SCA1000DWW03 JV635H1WW
