Loading ...
Loading ...
Loading ...
Installation Instructions
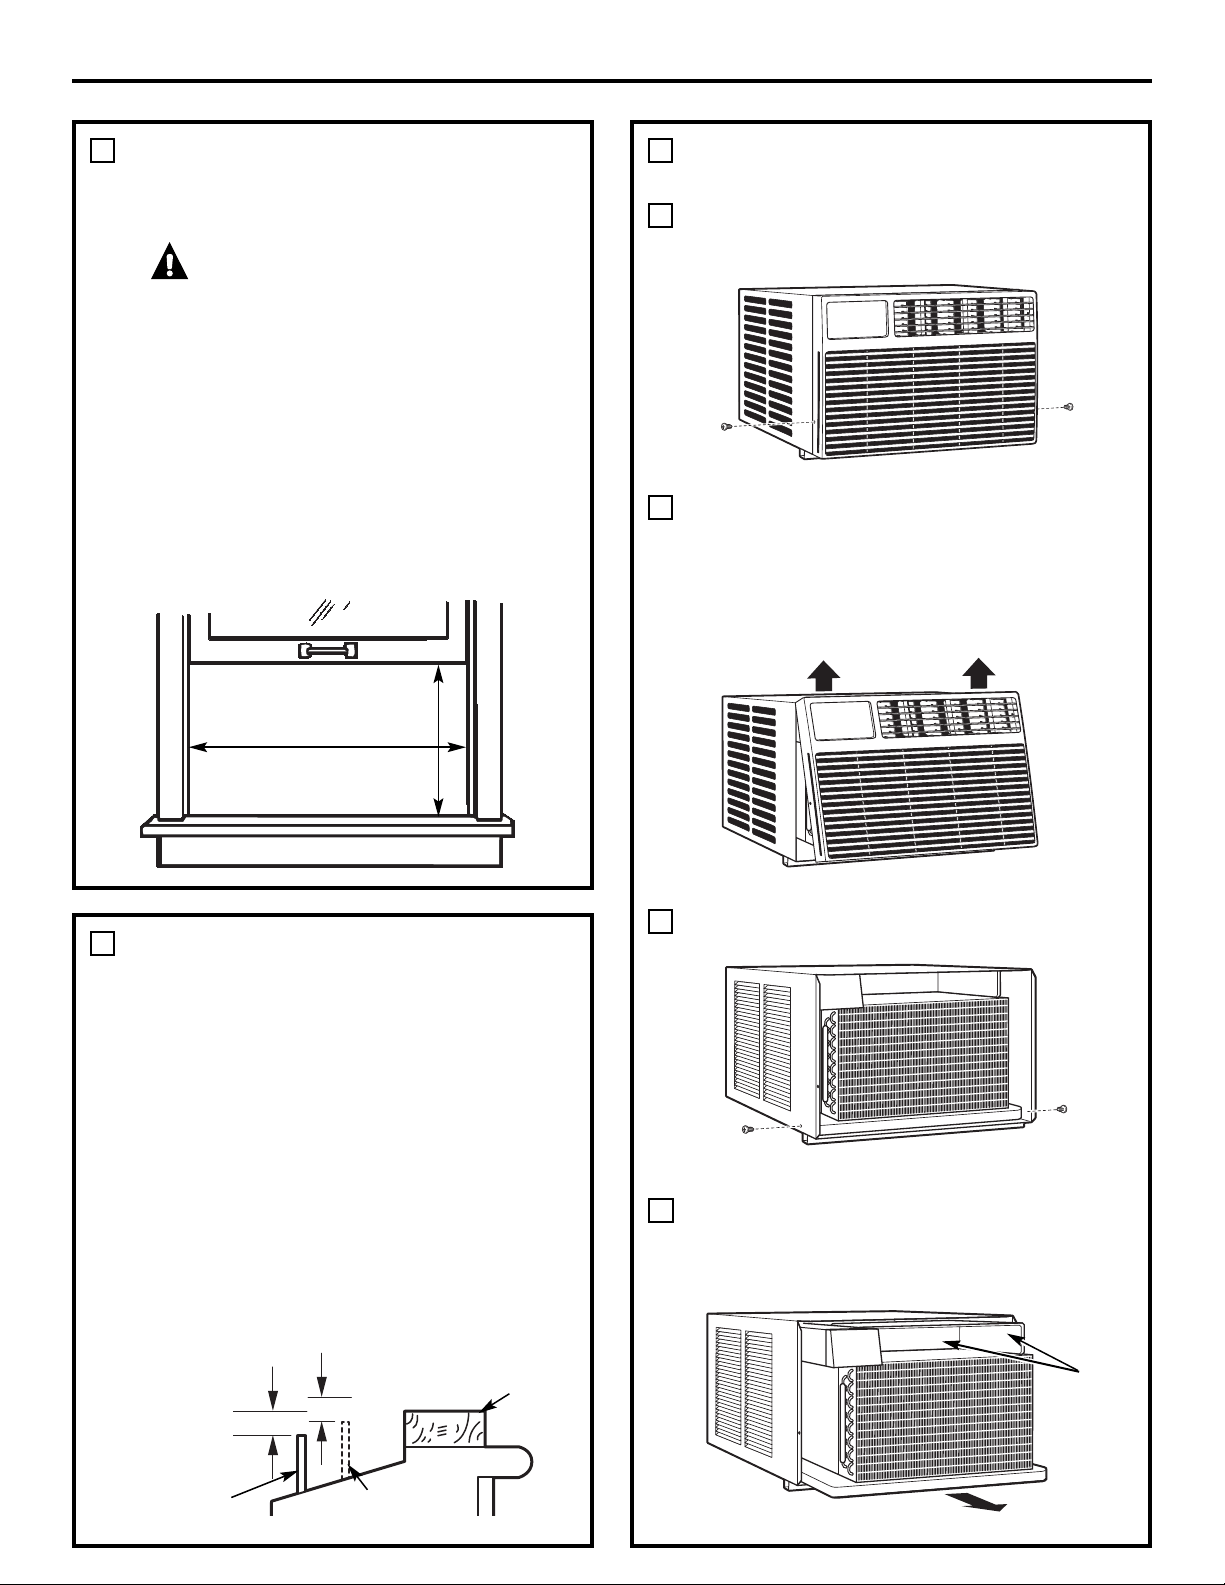
WINDOW REQUIREMENTS
• These instructions are for a standard
double-hung window. You will need to
modify them for other types of windows.
CAUTION:
If the sill support
bolts do not contact the window sill, or
if you have a window without a sill, you
must order accessory kit RAK87 to
properly install this air conditioner.
Call 800.626.2002 or visit ge.com.
• The air conditioner can be installed
without the accordion panels if needed
to fit in a narrow window. See the
window opening dimensions.
• All supporting parts must be secured
to firm wood, masonry or metal.
• The electrical outlet must be within
reach of the power cord.
1
15 1/2” min.
25 1/4″ to 38 1/8″
(With accordion panels)
REMOVE THE AIR CONDITIONER
FROM THE CASE
Remove and save the 2 screws from the
lower sides of the front grille.
Grasp the lower corners of the grille while
pressing in on the case sides with your
finger tips. Pull out to release and lift it up.
NOTE: Do not pull the bottom edge
toward you more than 3″ or you may
damage the tabs of the grille.
Remove the ground screw from each side
of the case. Keep them in a safe location.
Slide the air conditioner from the case by
gripping the base pan handle and pulling
forward while bracing the case. Do not
pull or lift on the styrofoam discharge area.
3
A
B
C
FRONT
FRONT
Do not
pull or
lift in
this
area—
damage
to the
unit may
result
D
STORM WINDOW REQUIREMENTS
A storm window frame will not allow the air
conditioner to tilt toward the outside, and
will keep it from draining properly. To adjust
for this, attach a piece of wood to the sill.
WOOD PIECES –
WIDTH: 2″
LENGTH: Long enough to fit inside the
window frame.
THICKNESS: To determine the thickness,
place a piece of wood on the sill to make
it 1/2″ higher than the top of the storm
window frame or the vinyl frame.
Attach securely with nails or screws
provided by the installer.
2
1/2″ higher
than storm
window
frame
Storm window
frame
Wood
Sill
1/2″ higher
than vinyl frame
(on some windows)
Vinyl frame
9
FRONT
FRONT
Loading ...
Loading ...
Loading ...