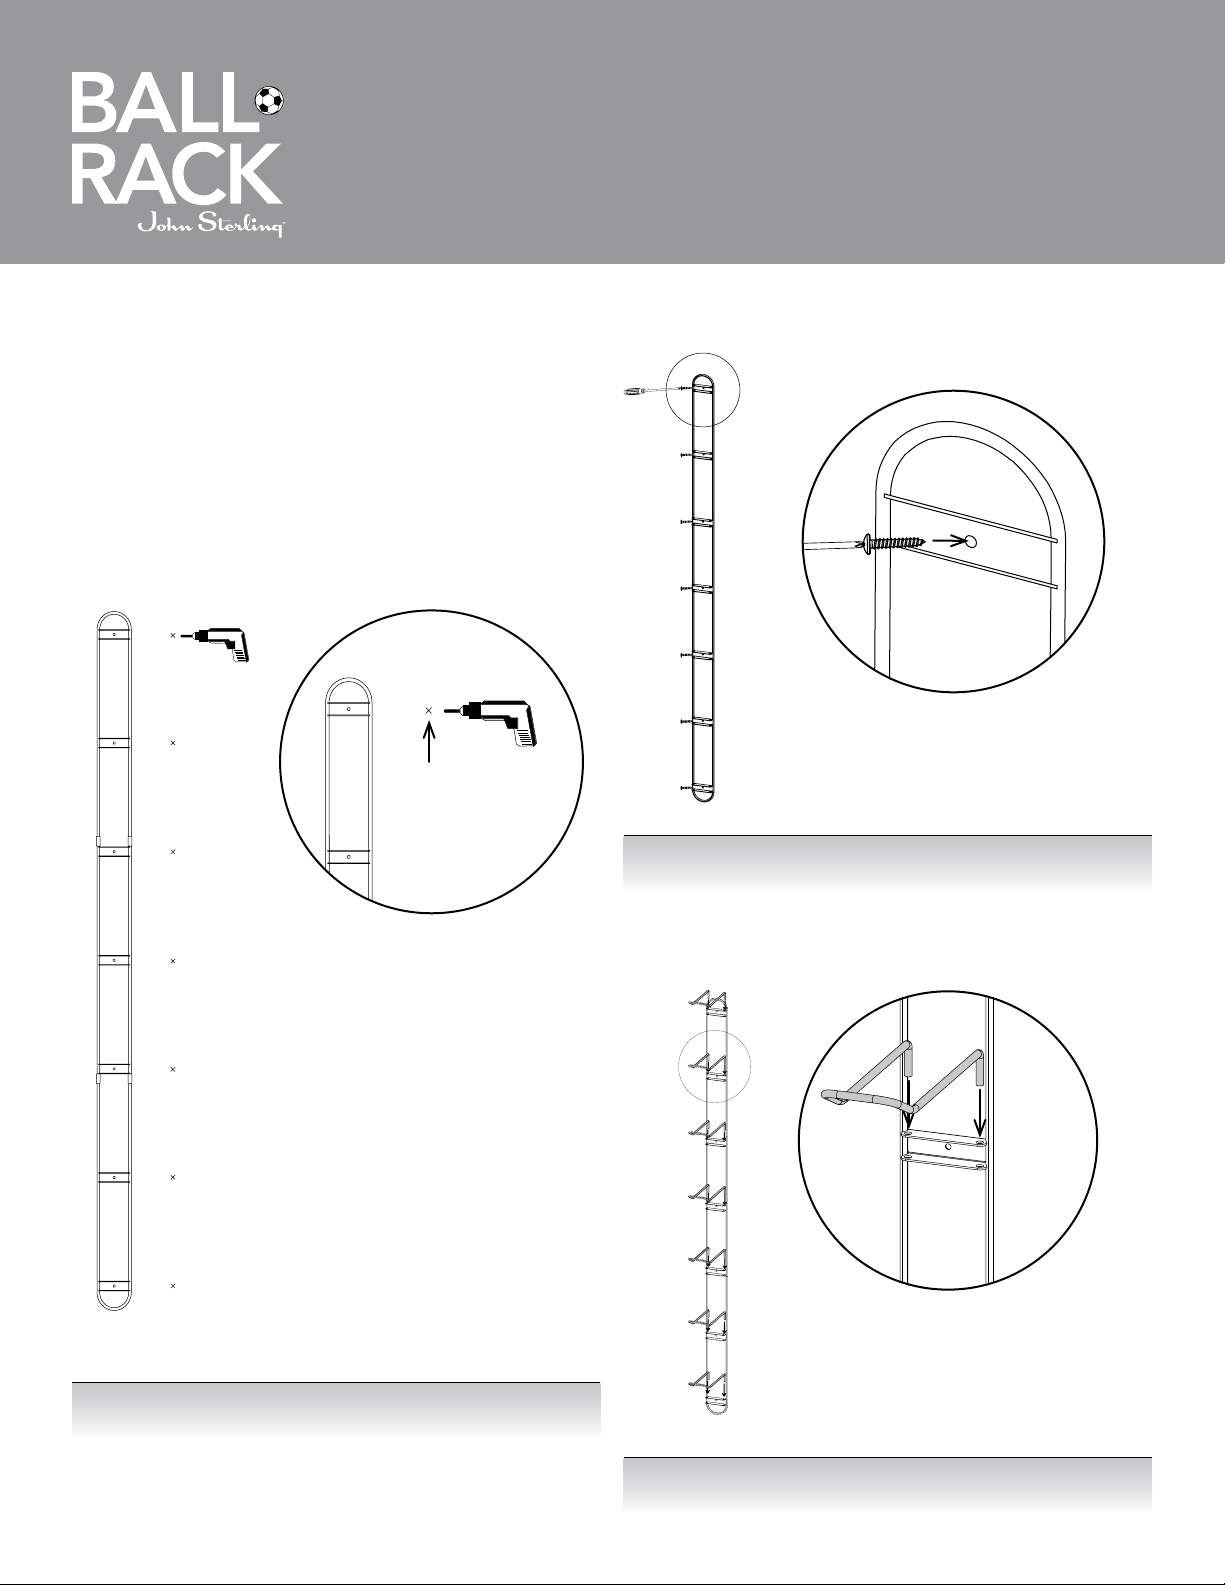
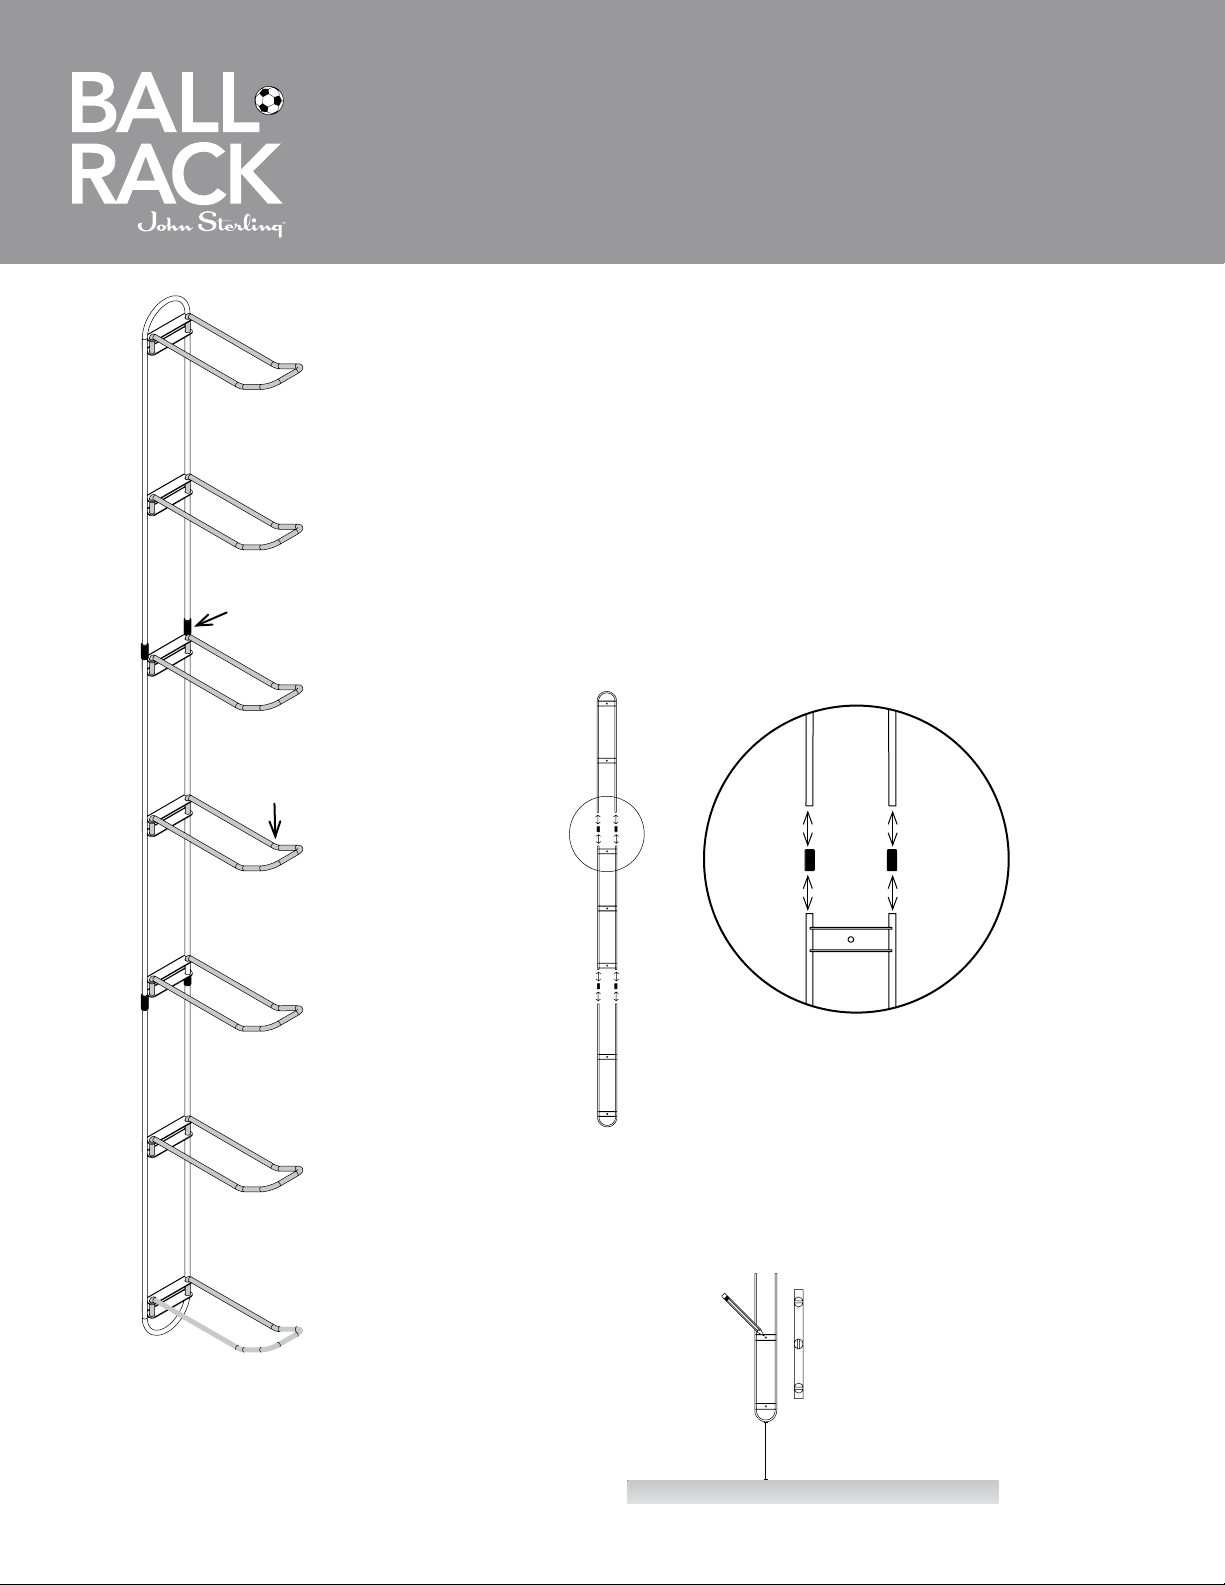
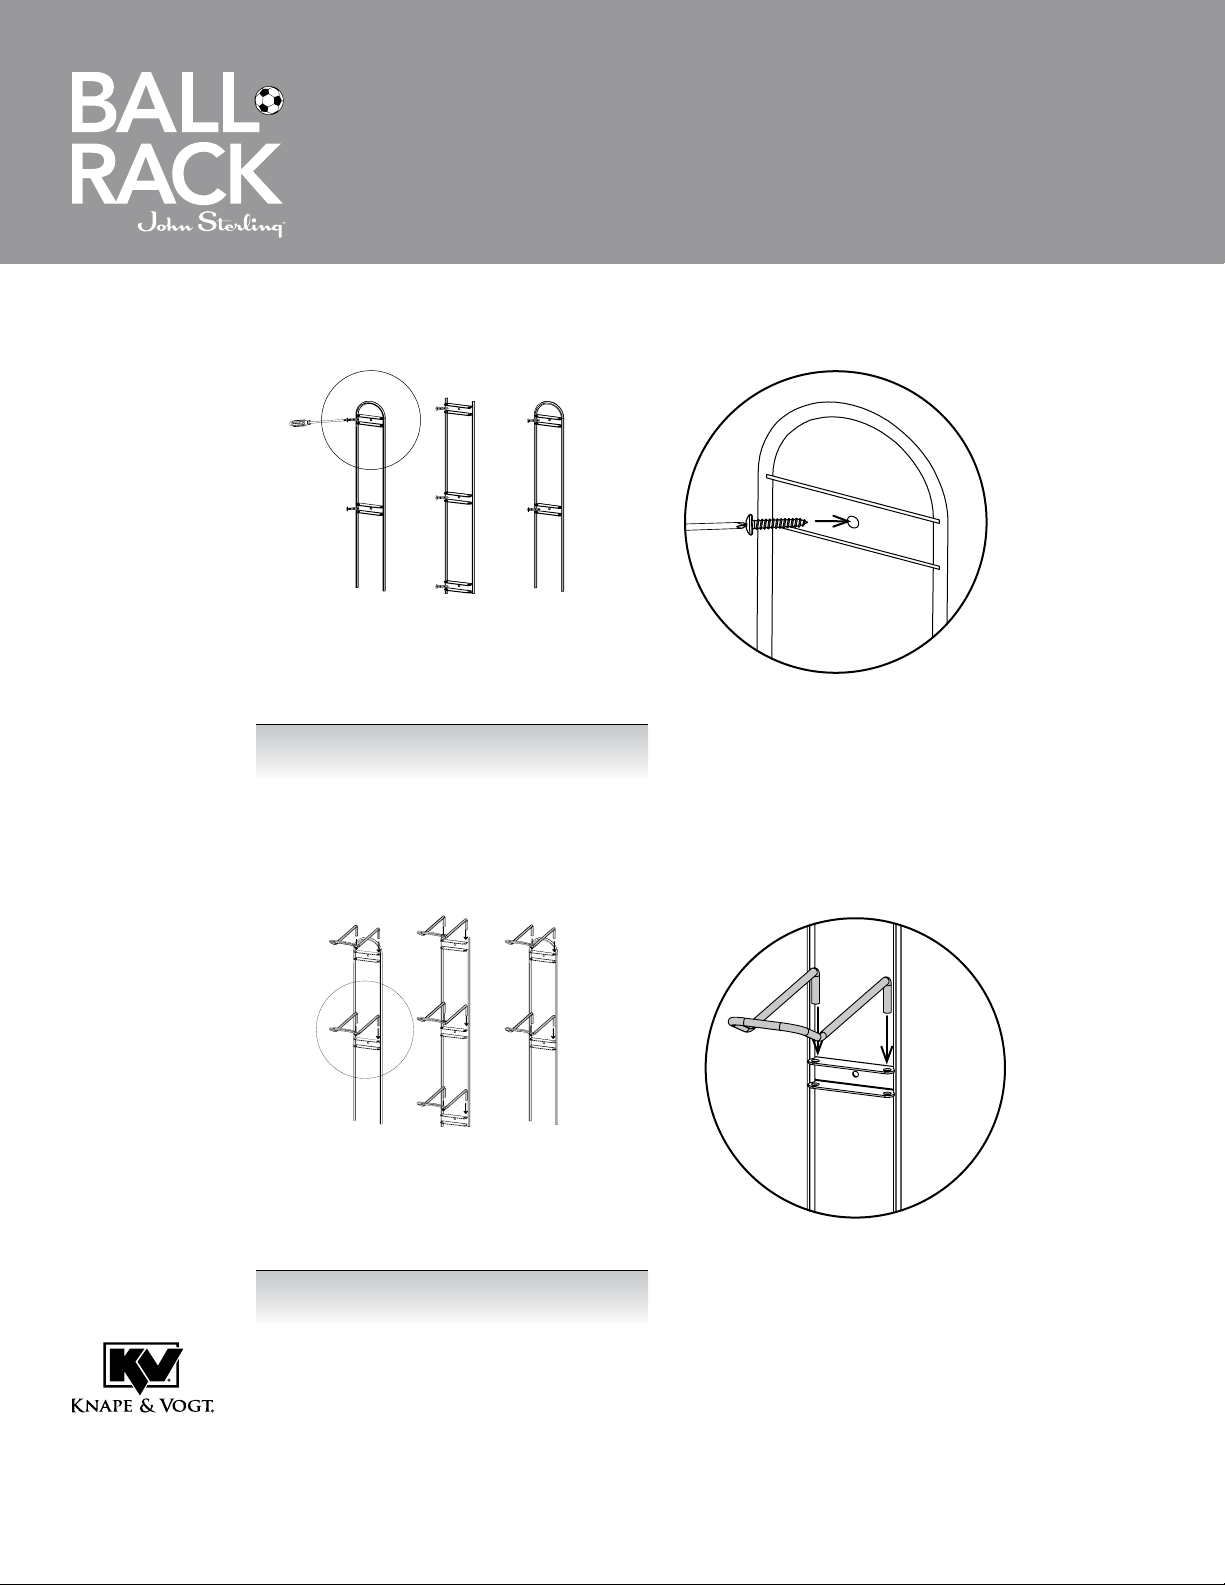
1) Attach the two Closed End Uprights to the one Open End Upright using
four of the Plastic Connectors as shown below.
2) Place the product against the wall to decide how far from the floor to mount the ball
rack and mark all screw holes. Be sure to make sure the rack is level.
Kit Contents:
- (2) Closed End Upright
- (1) Open End Upright
- (6) Plastic Connectors - 2 spare
- (7) Brackets
- (7) Mounting Screws
- (7) Wall Anchors
Tools Required:
- (1) Tape Measure
- (1) Level
- (1) Power Drill
- (1) 1/8" Drill Bit
- (1) 1/4" Drill Bit
- (1) Phillips Screw Driver or
Bit for Power Drill
Plastic Connectors
Ball Bracket Holder
Vertical Installation:
Closed End Upright Closed End UprightOpen Ended Upright
0027-PM & 0027-PM/CAN
Installation Instructions
Floor
Level
Height
Page 1
0027-PM & 0027-PM/CAN
Installation Instructions
3) If installing where studs are present, use a 1/8" drill bit to
pre-drill screw holes.
OR
If installing where studs are not present, use a 1/4" drill bit to
pre-drill the anchor holes. Then insert the provided anchors.
4) Mount the ball rack into the studs or wall anchors using
the provided screws.
5) Place Ball Holder Brackets into the mounting bracket,
as shown below.
Pre-Drill Holes
Floor
Vertical Installation (continued):
Floor
Floor
Page 2
0027-PM & 0027-PM/CAN
Installation Instructions
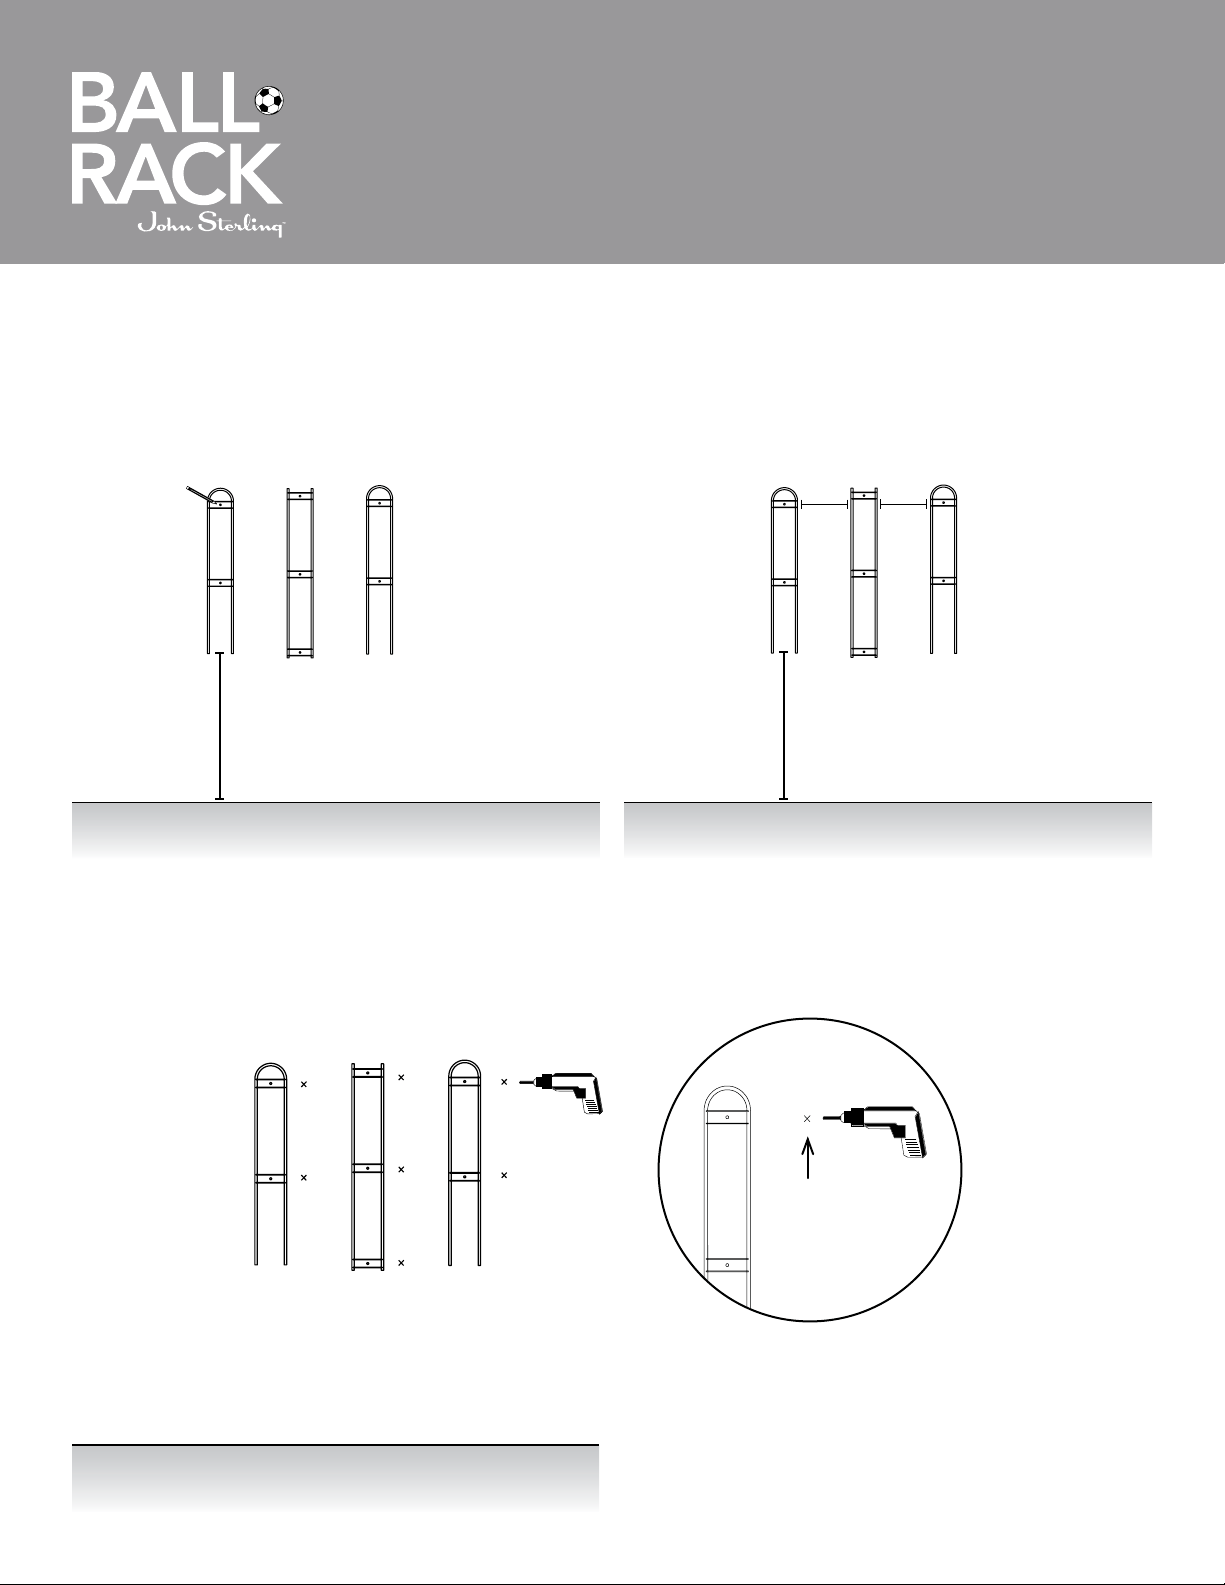
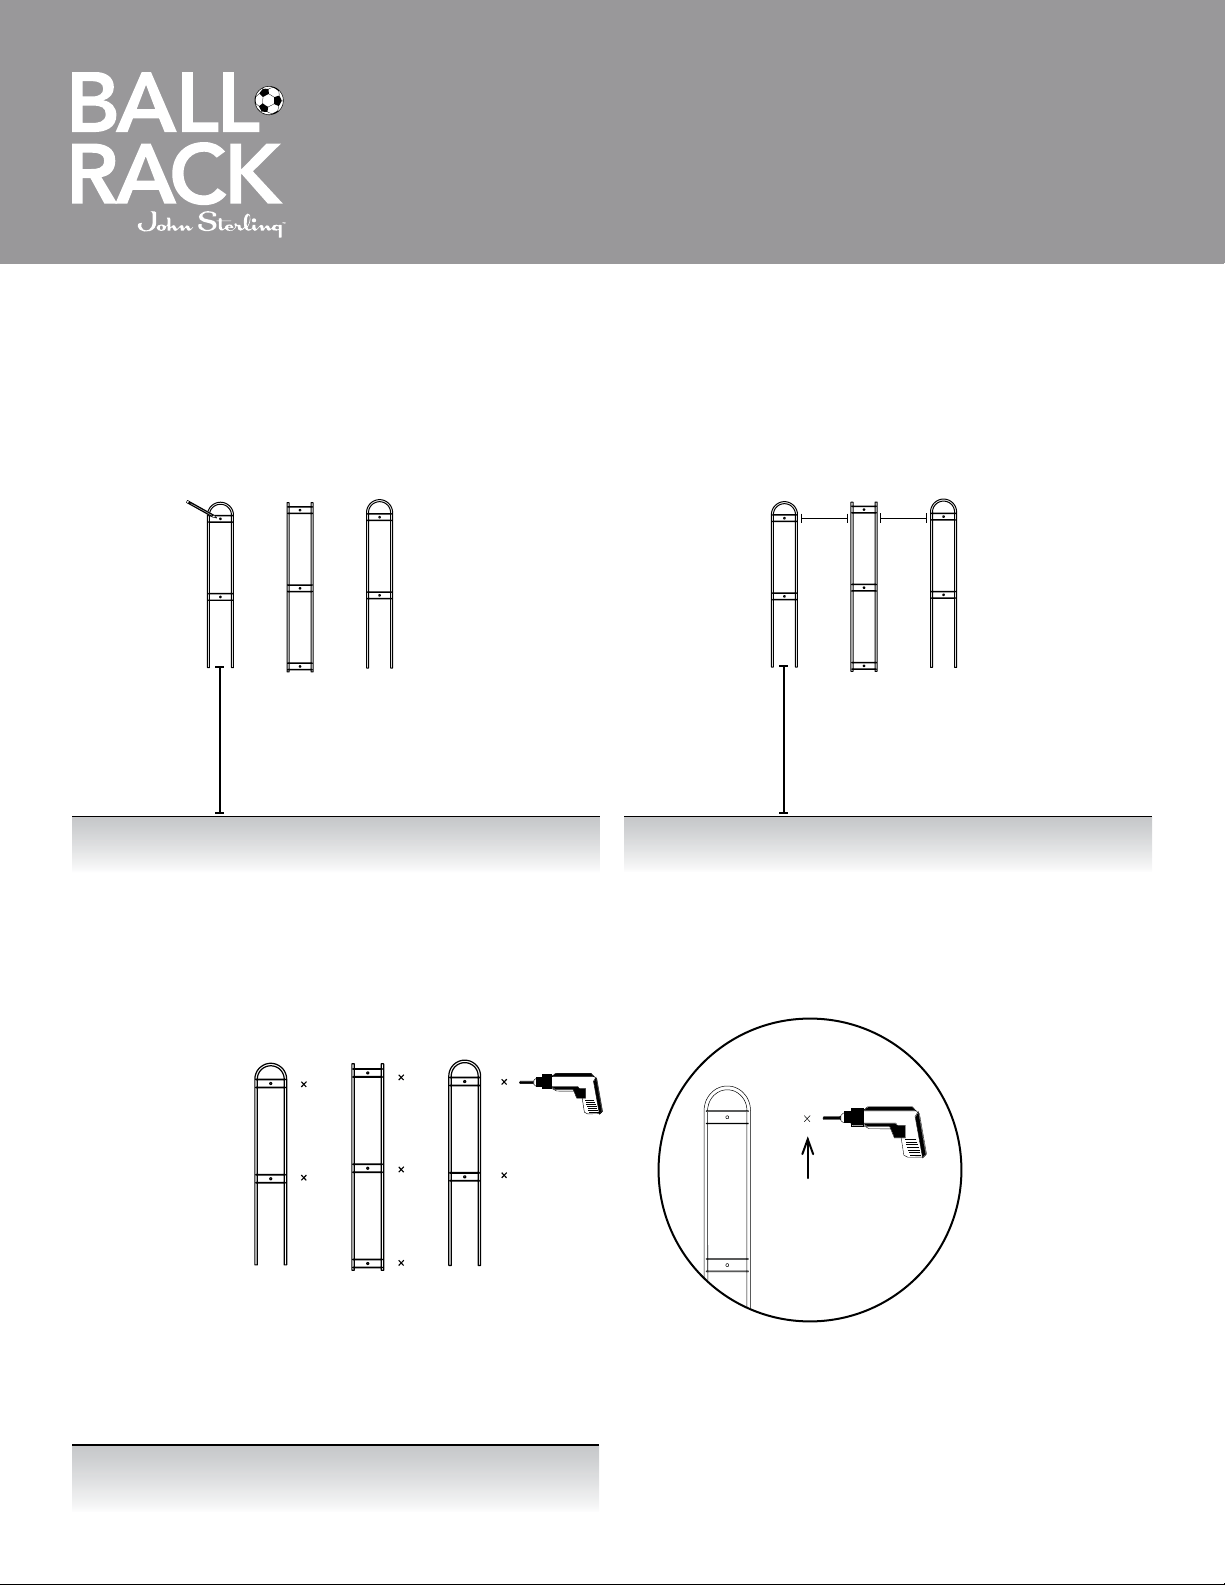
1) Using a Closed End Upright, decide how far from the floor to
install the upright.
Note: We recommend measuring 24" from the floor as
shown below and mark your screw locations.
2) Repeat step 1 for the Open Ended Upright and other Closed
End Upright, while being sure to space them at least 8"
between uprights.
Child-Friendly Installation:
3) If installing where studs are present, use a 1/8" drill bit
to pre-drill screw holes.
If installing where studs are not present, use a 1/4" drill bit to
pre-drill the anchor holes. Then insert the provided anchors.
OR
Floor
Floor
Floor
Pre-Drill Holes
24"
8"
8"
24"
Page 3

0027-PM & 0027-PM/CAN
Installation Instructions
2700 Oak Industrial Dr. NE
Grand Rapids, MI 49505-6026 USA
1.800.253.1561 | 616.459.3311
Fax: 877.636.3290
www.kv.com
©2015 Knape & Vogt. KV and the KV logo are trademarks of Knape & Vogt. 310505/0915
4) Mount the ball rack into the studs or wall anchors using the provided screws.
5) Place Ball Holder Brackets into the mounting bracket, as shown below.
Child-Friendly Installation (continued):
Floor
Floor
Page 4
1) Assemblez les deux supports verticaux à extrémités fermées et le support
vertical à extrémités ouvertes au moyen de quatre des raccords en plastique,
tel qu’illustré ci-dessous.
2) Posez le produit contre le mur afin de décider à quelle distance du plancher installer
le support pour ballons, puis marquez l’emplacement de tous les trous de vis. Vérifiez
que le support est de niveau.
Contenu de la trousse:
- (2) Supports verticaux à extrémités fermées
- (1) Support vertical à extrémités ouvertes
- (6) Raccords en platique - 2 de rechange
- (7) Supports
- (7) Vis de montage
- (7) Chevilles d’ancrage
Outils requis:
- (1) Ruban à mesurer
- (1) Niveau
- (1) Perceuse électrique
- (1) Mèche de 1/8 po
- (1) Mèche de 1/4 po
- (1) Tournevis ou mèche Phillips
Raccords
en plastique
Support à balloon
Installation verticale:
Support vertical à
extrémités fermées
Support vertical à
extrémités fermées
Support vertical à
extrémités ouvertes
0027-PM & 0027-PM/CAN
Instructions d’installation
Plancher
Niveau
Hauteur
Page 5

0027-PM & 0027-PM/CAN
Instructions d’installation
3) Si vous installez le support dans les montants du mur, pré-percez
les trous de vis à l’aide d’une mèche de 1/8 po.
OU
Si vous n’installez pas le support dans les montants du mur,
pré-percez les trous pour les chevilles d’ancrage à l’aide d’une
mèche de 1/4 po. Insérez les chevilles d’ancrage fournies.
4) Fixez le support pour ballons aux montants du mur ou aux
chevilles d’ancrage au moyen des vis fournies.
5) Accrochez les supports à ballons sur les supports de fixation,
tel qu’illustré ci-dessous.
Pré-percez les trous
Plancher
Installation verticale (suite):
Plancher
Plancher
Page 6
0027-PM & 0027-PM/CAN
Instructions d’installation
1) Au moyen d’un support vertical à extrémités fermées, décidez
à quelle distance du plancher installer le support vertical.
Remarque : Nous recommandons de mesurer 24 pouces à
partir du plancher et de marquer l’emplacement
des vis.
2) Répétez l’étape 1 pour le support vertical à extrémités
ouvertes et l’autre support vertical à extrémités fermées,
en vous assurant de laisser un espace d’au moins
8 pouces entre les supports verticaux.
Installation à la portée des enfants:
3) Si vous installez les supports dans les montants du mur,
pré-percez les trous de vis à l’aide d’une mèche de 1/8 po.
Si vous n’installez pas les supports dans les montants du mur,
pré-percez les trous pour les chevilles d’ancrage à l’aide d’une
mèche de 1/4 po. Insérez les chevilles d’ancrage fournies.
OU
Plancher
Plancher
Plancher
Pré-percez les trous
24 po
8 po
8 po
24 po
Page 7
0027-PM & 0027-PM/CAN
Instructions d’installation
2700 Oak Industrial Dr. NE
Grand Rapids, MI 49505-6026 USA
1.800.253.1561 | 616.459.3311
Fax: 877.636.3290
www.kv.com
©2015 Knape & Vogt. KV and the KV logo are trademarks of Knape & Vogt. 310505/0915
4) Fixez les supports pour ballons aux montants du mur ou aux chevilles d’ancrage au moyen des vis fournies.
5) Accrochez les supports à ballons sur les supports de fixation, tel qu’illustré ci-dessous.
Installation à la portée des enfants (suite):
Plancher
Plancher
Page 8