Loading ...
Loading ...
Loading ...
4
IMPORTANT SAFETY INSTRUCTIONS
Electrical Requirements
Check Installation Instructions for proper location for the
power supply.
The electrical requirements are a 120 volt 60 Hz, AC only, 15
amp. or more protected electrical supply. It is recommended
that a separate circuit serving only the microwave oven be
provided.
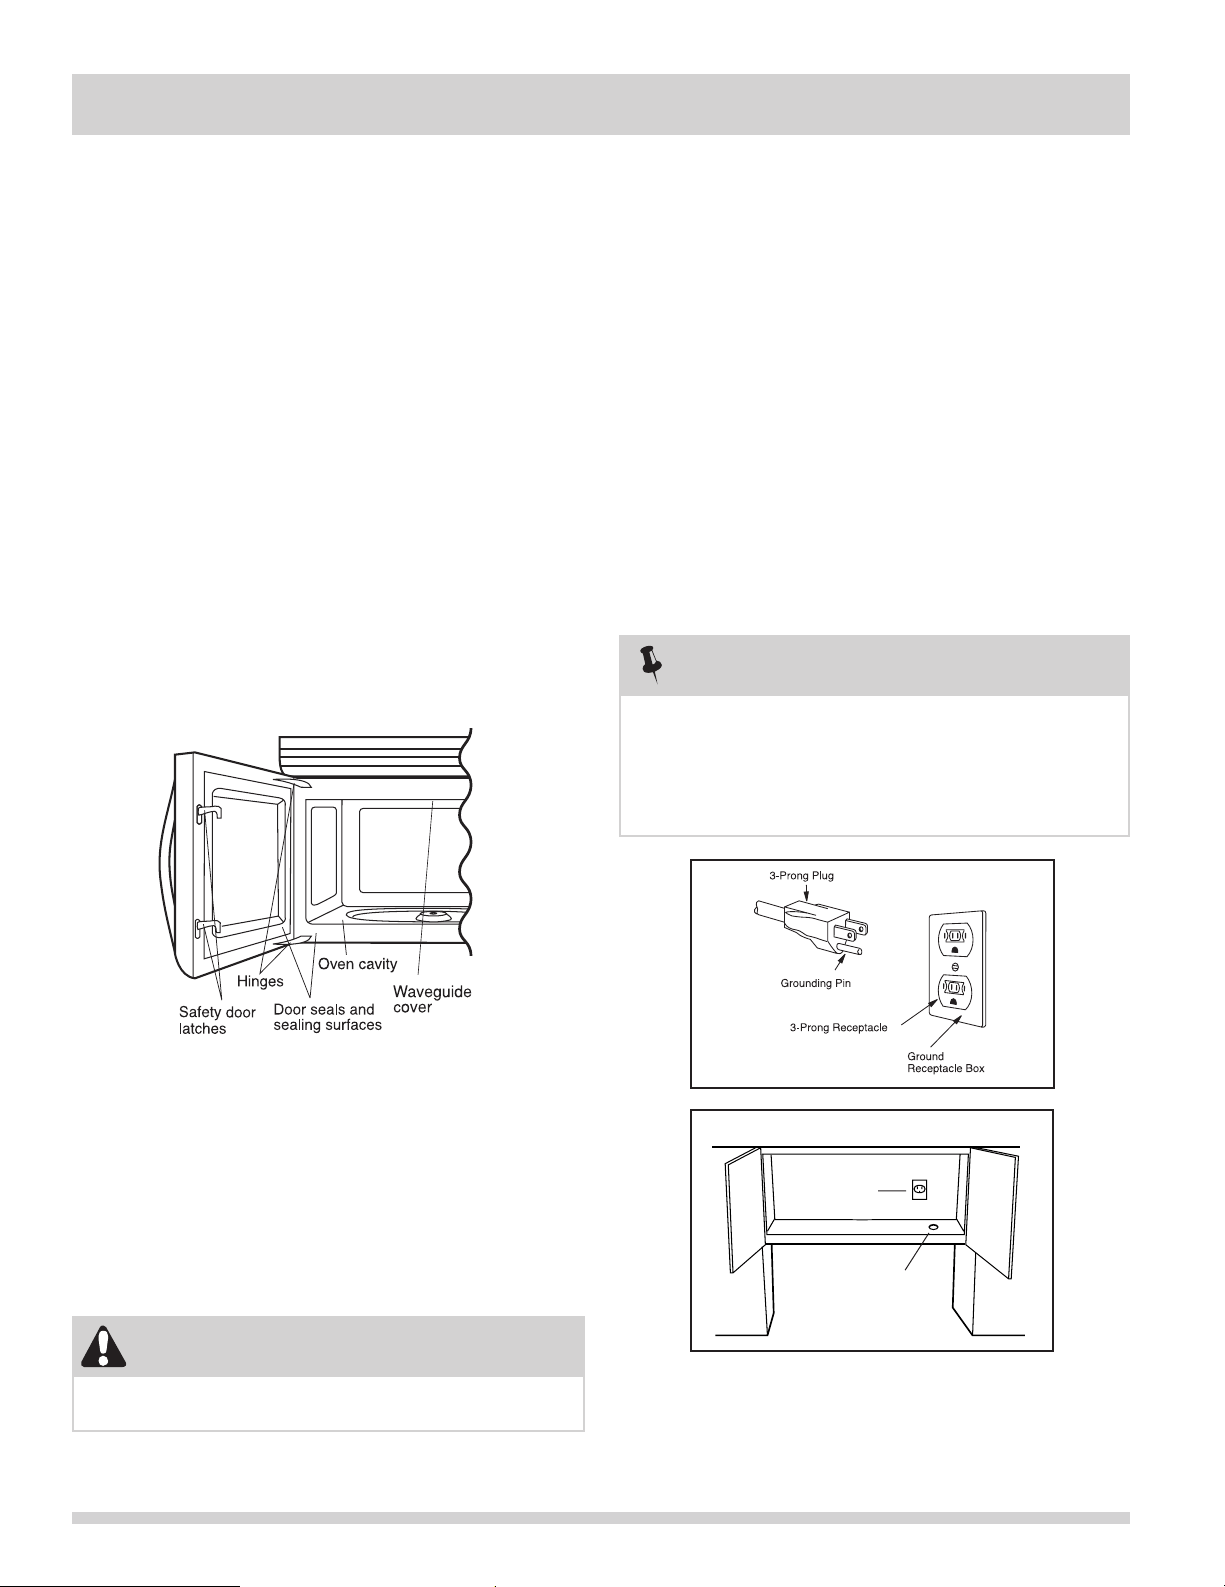
The microwave oven is equipped with a 3-prong grounding
plug. It must be plugged into a wall receptacle that is properly
installed and grounded. DO NOT UNDER ANY CIRCUMSTANCES
CUT OR REMOVE THE GROUNDING PIN FROM THE PLUG.
DO NOT USE AN EXTENSION CORD.
If the power supply cord is too short, have a qualifi ed electrician
or serviceman install an outlet near the appliance.
The Power Supply Cord and plug must be connected to
a separate 120 Volt AC, 60 Hz, 15 Amp, or more branch
circuit, single grounded receptacle. The receptacle should
be located inside the cabinet directly above the Microwave
Oven mounting location as shown in Figure 1.
Figure 1
Ground
Receptacle
Opening for
Power Cord
WARNING
Improper use of the grounding plug can result in a risk
of electric shock.
NOTES
1.
If you have any questions about the grounding or electrical
instructions, consult a qualifi ed electrician or service person.
2. Neither Electrolux nor the dealer can accept any liability
for damage to the microwave oven or personal injury
resulting from failure to observe the correct electrical
connection procedures.
GROUNDING INSTRUCTIONS
This appliance must be grounded. This microwave oven
is equipped with a cord having a grounding wire with a
grounding plug. It must be plugged into a wall receptacle
that is properly installed and grounded in accordance with
the National Electrical Code and local codes and ordinances.
In the event of an electrical short circuit, grounding reduces
risk of electric shock by providing an escape wire for the
electric current.
UNPACKING AND EXAMINING YOUR
MICROWAVE OVEN
Open the bottom of the carton, bend the carton fl aps back and
tilt the microwave oven over to rest on plastic foam pad. Lift
carton off microwave oven and remove all packing materials,
Installation Instructions, Wall Template, Top Template,
Charcoal Filter, Turntable and Turntable Support. SAVE THE
CARTON AS IT MAY MAKE INSTALLATION EASIER.
• Remove the feature sticker from the outside of the door,
if there is one.
•
DO NOT REMOVE THE WAVEGUIDE COVER, which is located
on the ceiling in the microwave oven cavity. Check to see
that there are Installation Instructions, Wall Template,
Top Template and Charcoal Filter, which is used when
recirculating is chosen. Read enclosures and SAVE the Use
and Care Manual.
Check the microwave oven for any damage, such as
misaligned or bent door, damaged door seals and sealing
surfaces, broken or loose door hinges and latches and dents
inside the cavity or on the door. If there is any damage, do
not operate the microwave oven and contact your dealer
or ELECTROLUX SERVICER. See Installation Instructions
for more details.
U&C 2.0 bottom control_UL [B321]4 4U&C 2.0 bottom control_UL [B321]4 4 1/31/12 4:00:16 PM1/31/12 4:00:16 PM
Loading ...
Loading ...
Loading ...