Rating plate with information about the washing machine (on the inside of the washing machine door)
QR and AUID code (on the inside of the washing machine door)
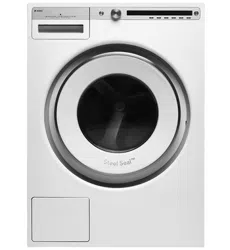
Washing machine door
Drain filter cover
Water release hose
Drain filter pump (installed behind the drain pump filter)
DISPENSER TRAY
1. Prewash compartment
2. Compartment for main wash liquid detergent.
Use the barrier (3).
3. Compartment for main wash powder detergent.
Do not use the barrier (3).
4. Softener / conditioner compartment
5. Tab for dispenser tray removal
BEFORE USING THE APPLIANCE FOR THE FIRST TIME
PACKAGING
Remove all packaging.
Please sort the materials in compliance with local recommendations (see chapter ”DISPOSAL”).
TRANSPORT PROTECTION
Before using the appliance, remove the three transport bolts and plastic plugs which protect the appliance during transport.
1. Release and remove the bolts as shown in the figures.
2. To remove the plastic plugs holding the bolts, squeeze them and then pull them out.
3. Remove the caps from the plastic plugs. Push the caps over the three holes in which the plastic plugs were inserted. Save the plastic plugs if you have to transport your washing machine in the future.
If you wish to transport the washing machine, reinstall the bolts and plastic caps to lock the machine. This will prevent any damage to the machine due to vibrations during transport. If you have lost the transport bolts or plastic caps, replacements can be ordered at your dealer.
Please order three pieces of each item!
CLEANING
Disconnect the washing machine from the power mains and open the door. Clean the washing machine drum with a damp cloth and a mild detergent.
No program can be started while the door is open.
SETTINGS BEFORE FIRST USE
After connecting the washing machine and running it for the first time, choose the following:
Language selection
Press the button 2 or the program selector knob to scroll the list of languages. Confirm your selection by pressing the OK button.
The amount of detergent depends on the hardness of water. For details, see the detergent packaging.
Please contact your local water supply company to check the water hardness in your area.
Before it dispatched from the factory, every appliance is tested.
As a result, there may be some residual water left in the drain pump filter. This, however, does not aff ect the quality and will not damage the appliance.
WASHING PROCESS, STEP BY STEP (1 – 8)
STEP 1: SORT THE LAUNDRY
See chapter "TIPS BEFORE WASHING"
Use a washing net for underwire bras. Empty the pockets. Coins, nails etc. could damage the machine and the fabric.
STEP 2: TURN ON THE MAIN SWITCH.
Turning on
Press the on/off button.
Turning off
Press the on/off button.
If the machine does not accept the on/off command correctly, wait for at least 8 seconds before pressing any other button.
STEP 3: OPEN THE WASHING MACHINE DOOR AND INSERT THE LAUNDRY.
Open the washing machine door by pulling the handle towards you.
Place the laundry into the washing machine drum.
Before doing so, make sure the drum is empty.
Do not overload the drum!
If the washing machine drum is too full, the laundry will not be washed as thoroughly.
STEP 4: ADD THE DETERGENT AND THE CONDITIONER.
Recommended amount of detergent is usually specifi ed on the detergent packaging. When washing a smaller amount of laundry, the amount of detergent used can be decreased.
Observe manufacturers' recommendations regarding the type of detergent suitable for certain temperatures, load size, and water hardness.
Powder detergent
Add powder detergent into the main wash detergent compartment. If you have selected the Prewash function or Heavy program, Stain program Coff ee or Fruit, or the Time program with 2:30 or longer duration, then add powder detergent to the prewash detergent compartment.
We recommend adding the powder detergent immediately before the washing cycle. Otherwise, make sure the detergent compartment in the dispenser tray is completely dry before adding the powder detergent, as otherwise, the powder detergent may cake before the start of the washing process.
Liquid detergent
When using a liquid detergent, observe the detergent manufacturer's recommendations. When using thick detergents, we recommend always using the laundry balls. Use the barrier (3) in the detergent compartment; see figure in the chapter detergent tray. Add the liquid detergent in the front part of the detergent compartment in the dispenser tray (2).
Laundry ball or washing bag
If you are using a laundry ball or a washing bag, place it directly into the drum and choose a program without any prewash.
An excessive amount of detergent will not improve washing results. Rather, it will lead to foaming and increase the environmental impact. We recommend using less detergent. Only increase the dosage if you are not satisfi ed with the washing results.
Conditioner
Pour the conditioner into the dispenser tray, into the compartment with the symbol . Observe the recommendation on the conditioner packaging.
Do not fill the conditioner compartment over the max. indication (maximum indicated level). Otherwise, the conditioner will be added to the laundry too soon, leading to poorer washing effect.
STEP 5: CHOOSE THE PROGRAM.
Choose the program by rotating the Program selector knob in either direction.
The Program selector knob can be used when arrows appear on the display.
Choose the program depending on the type of laundry and how heavily soiled it is (see chapter "TIPS BEFORE WASHING").
Estimated program duration will appear on the display.
Extra program settings can also be selected for each program. See STEP 6.
STEP 6: CHOOSING THE PROGRAM SETTINGS
Using the program settings, the washing programs can be further adjusted to your wishes.
Some program settings may not be available for your selected program.
Selected program settings will remain stored after the end of the washing cycle and may be changed subsequently (except for delayed start which is not stored after the wash is complete).
Choose the program settings before pressing the START button.
Program settings cannot be changed during the progress of a program.
Press the button under the program setting to display the information (INFO) about the each program setting.
STEP 7: START THE WASH
Close the washing machine door and press the Start/Pause/Stop button.
Start (short press of the button – start/resume)
Pause (short press of the button – pause)
Stop (press and hold for 3 seconds – stop or cancel)
Remaining time
Depending on the selected program, anticipated washing time will be displayed in hours and minutes.
Actual washing time will depend on the selected program, load, type of laundry, spin speed etc.
Actual washing time may be longer or shorter than initially displayed.
Remaining time will be updated during the program duration, depending on the actual amount of laundry and amount of water pumped into the machine. The last remaining time update takes place before the final spinning cycle.
In case of uneven distribution of laundry, the time on the display will flash and it will not count down.
Once the laundry is evenly redistributed, the washing time will continue and it will stop flashing.
Adding or removing laundry after the start of the program
To add or remove laundry during the progress of a washing program, use the Pause button to pause the program. Then, press the button 5 to select "Add clothes".
The door may be opened when the water is pumped from the machine. Then, add or remove the laundry. Close the door and continue the program. Press the Start button.
The program will resume from the point at which it was interrupted.
If the door cannot be opened, it is possible that the temperature in the machine is too high.
Also, if the door cannot be opened, it is possible that the program has been running for too long and any laundry added at that point would not be effi ciently washed.
Pausing, stopping or changing the program
To pause the program, shortly press the Pause button.
To resume a program, press the Start button again.
To change or stop the washing program, press the Stop button and hold it for 3 seconds.
Use the button 1 to choose "Stop program". The program is canceled and the water is pumped out of the machine if necessary. Only then will you be able to open the washing machine door. Use the Program selector knob to select a new program. If necessary, add detergent, and then press the Start button.
A washing program can be paused by pressing the ON/OFF button.
The washing machine will switch off .
After the washing machine is switched on, press the Start button to resume the program.
Do not open the detergent dispenser tray while the appliance is operating.
STEP 8: END OF PROGRAM
After the end of the washing program, the display will indicate that the program has been successfully completed ("Cycle completed successfully").
If you have selected the Anti-Crease extra function, gentle tumbling will continue after the end of the washing program in order to prevent creasing.
Open the door towards you and remove the laundry from the washing machine.
Make sure the washing machine drum is empty.
If you do not take any action within 5 minutes after the end of the program, the display will switch off to standby mode in order to save power.
The display will light up again if you press the ON/OFF button or open the washing machine door.
After the washing cycle, close the water intake and pull out the washing machine plug from the power socket.
SYSTEM SETTINGS
In the main menu, use the Program selector knob to select System Settings. Confi rm the selection by pressing the button 2.
Then, use the Program selector knob to scroll the list of the following settings that you can adjust:
Child Lock,
Language (language selection),
Temperature (temperature unit),
Programs (set of programs),
Display (display unit: contrast & logo),
Sounds (acoustic signals),
Reset.
Use the button 6 (BACK) to return to System Settings or to the main menu.
Press the INFO button to display brief information about the setting.
CHILD LOCK
Child lock can be activated by pressing the button 1 . This will prevent children from switching on the machine.
Press the button 1 to deactivate the child lock.
When the child lock is activated, no other function can be selected.
To temporarily (for 3 minutes) switch off the child lock, press the 1 and 4 buttons simultaneously and keep them pressed for 3 seconds.
LANGUAGE
You can choose between 25 languages. Press the button 3 for the arrows to appear.
Use the Program selector knob or the button 3 to scroll the list of languages. Use the button 6 to confi rm the selected language.
Use the button 6 to return to System Settings.
TEMPERATURE (TEMPERATURE UNIT)
Choose either °C or °F.
Use button 1 to select °C;
Use button 2 to select °F.
Use the button 6 to return to System Settings.
PROGRAMS
The main menu includes the entire set of programs that you can choose using the Program selector knob. This setting allows only displaying the selected program in the main menu.
Press the button 1 for the arrows to appear. Use the Program selector knob or the button 1 to select a program. Use the button 3 to set whether this program is to be displayed or not: On / Off .
Use the button 6 to return to System Settings.
DISPLAY UNIT
Set the contrast and logo display.
Use the buttons 1 to 5 to set the contrast.
Use the button 1 to toggle logo display on or off .
If you choose on , the logo will be displayed on the display unit when the washing machine is turned on.
Use the button 6 to return to System Settings.
SOUNDS
Choose whether audible signals are switched on or off .
Use the button 1 to switch acoustic signal on or off .
Use the button 4 to choose between the following settings: low, mid, and high. As you scroll through the options, a sample audible signal will be sounded.
Use the button 6 to return to System Settings.
RESET
This means that all settings will return to the default settings and your own settings will be deleted.
Confirm the selection by pressing the button 3 (YES).
Use the button 6 to return to System Settings.
CLEANING AND MAINTENANCE
CLEANING THE FILTER
The washing machine has a filter that will retain smaller objects such as coins, buttons, hair etc.
1. Before cleaning, drain the water from the washing machine using the Drain program, and disconnect the washing machine from the power mains.
Open the pump filter cover using appropriate tools (emergency door opening tool is located on the back side of the dispenser).
2. Release the water drain hose from the holder.
Before cleaning the filter, drain the water from the washing machine by placing the end of the water drain hose over a large shallow container and opening the cap on the water drain hose.
3. Gradually rotate the filter in the counter-clockwise direction and pull it out.
4. Clean the filter thoroughly under running water.
5. Remove all objects and impurities from the filter housing and the impeller.
6. Replace the fi lter as shown in the figure and fasten it by rotating in the clockwise direction. For a good seal, the filter seal surface should be clean. Also re-install the drain hose.
CLEANING THE DISPENSER TRAY AND DOOR RUBBER GASKET
1. Press the tab to completely remove the dispenser tray from its housing.
2. Rinse and thoroughly clean the tray. You may also remove the cap from the plug in the conditioner compartment (A). Clean any residue from the cap and tube.
Clean the dispenser tray (B) interior.
Replace the cap on the plug.
3. Use a brush to clean the nozzles on the upper side of the dispenser tray housing.
After a washing program, nozzles that clean the interior of the dispenser are automatically switched on (only with some models).
4. Replace the detergent dispenser into its housing.
Close the dispenser tank!
Do not wash the dispenser tank in the dishwasher!
5. After every wash, wipe the rubber door seal to extend its useful life.
CLEANING THE APPLIANCE EXTERIOR
Wipe the washing machine exterior and the display unit using a soft damp cotton cloth and mild detergent.
Do not use any solvents or cleaning agents that could damage the washing machine (please observe the recommendations and warnings provided by the manufacturers of the cleaning agents).
Do not clean the washing machine with a jet of water!
Always disconnect the washing machine from the power mains before cleaning.
CLEANING THE WASHING MACHINE INTERIOR AGAINST ODOURS
Modern detergents often allow washing clothes at low temperatures. This means that residue may accumulate in the washing machine, which in turn could cause odours.
To avoid such odorous, we recommend running the self-cleaning program (Drum-cleaning) once per month.
Use a small amount of powder detergent and do not put any laundry in the drum.
CLEANING THE RINSING HOLES (UNDER THE AGITATOR IN THE DRUM)
If you believe that objects like nails or paper clips fell into the washing machine drum, check the area underneath the rib. Such objects may rust (corrode) and cause stains on your clothes. Nails and other sharp objects can also cause holes in the fabric.
Proceed as follows:
1. Insert a screwdriver or a similar tool into the slot in the rib and carefully push it to the left.
2. Hold the rib with the other hand and pull it towards you.
3. Lift the drum rib.
4. Remove any objects.
5. Place the rib into the installation slot indicated with "F" towards you. Make sure all ribs are fi rmly in place in their respective slots in the drum. Push the rib inwards (as indicated by the arrow in the fi gure) until it snaps.
If you are using hard water
If you are washing with hard water (causing limescale build-up), a greyish-white fi lm may appear on the washing machine drum. To remove this fi lm, add vinegar into the washing machine drum and select any program with a temperature of 90 °C, or the Drum Cleaning program. See STEP 5: Choose the program. Repeat the process as necessary.
ERRORS – WHAT TO DO?
Disturbances from the environment (e.g. the power grid) may result in various error reports (see Troubleshooting table). In such case:
Switch off the appliance, wait for 1 minute, switch the appliance back on, and repeat the washing program.
If the error persists, call an authorized service unit.
You will be able to solve most of the problems in appliance operation by yourself (see Troubleshooting table below).
Repairs may only be carried out by an adequately trained person.
Repair or any warranty claim resulting from incorrect connection or use of the washing machine shall not be covered by the warranty. In such cases, the costs of repair shall be charged to the user.
The warranty does not cover the errors or failures resulting from disturbances from the environment (lightning strike, power grid failures, natural disasters etc.).
Problem/error
Cause
What to do?
Washing machine door does not open.
• Water level too high.
• Drain the water using the Drain or Spinning program. See "Step 5: Choose the program".
• Water temperature in the washing machine is too high.
• Wait for the water temperature to drop and pump out the water. If you still cannot open the door, use the emergency door opening tool (see chapter "ERRORS – WHAT TO DO? / Manual opening of washing machine door").
The machine will not start.
• Power supply failure.
• Press the Start button to resume the program.
Washing program is not in progress.
• Washing machine door is not properly closed.
• Firmly press on the washing machine door until you hear two clicks when it is closed.
• There is no voltage in the power outlet.
• Check if the plug is connected to the power outlet and whether there is electric current (or voltage) in the outlet.
• Delayed start function has been selected.
• To cancel the delayed start function, press the Start button and hold it for three seconds.
Washing time is longer than anticipated (the time is regularly updated on the display unit).
• Low inlet water temperature.
• Program duration can be up to 60% longer than initially anticipated in the normal progress.
• UKS* (*unbalance system) stability system engaged due to unevenly distributed laundry.
• Program time is extended due to the need to redistribute the laundry in the drum.
• Low mains voltage.
• Washing machine needs more time because the power mains voltage is too low.
• Power supply failure.
• Program time is extended by the duration of the power supply failure.
Display does not light up.
• There is no voltage in the appliance.
• Check if the plug is connected to the power outlet and whether there is electric current (or voltage) in the outlet.
The wording on the display unit is not in your language.
• You have not selected your preferred language yet.
• Choose the preferred language (see "STEP 5 / System Settings / Choosing the language").
Wet laundry
• A small amount of laundry will often be unevenly distributed.
• Loosen and redistribute the laundry and select the Drain or Spinning program.
• Increase the amount of laundry in the washing machine and restart the program (see "STEP 7: Start the wash / Adding or removing laundry after the start of the program").
There are traces of grease (or grease rolls) on the clothes.
• The laundry was very greasy.
• Wash the laundry again. When your laundry is this heavily soiled, add more washing powder or use a liquid detergent.
There are still stains on the laundry.
• You used bleach-free liquid detergent or powder detergent for coloured laundry.
• Use a detergent that contains bleach.
• You selected an unsuitable program.
• Use special stain removers.
There are white residues of washing powder on the laundry
• This is not due to poor rinsing by your washing machine, but rather due to phosphatefree detergents which contain ingredients (zeolites) for water softening. These ingredients may be deposited on the laundry.
• Immediately rinse the laundry again.
• Use liquid detergents that do not contain zeolites.
• Try removing any residues with a brush.
There is powder detergent left in the main wash compartment of the detergent dispenser tray
• Water pressure not high enough.
• Clean the net on the water supply hose.
• Some washing powders may stick strongly to the dispenser tray if it is empty.
• Choose higher water level or extra rinse (see "Step 6 / Choose program settings").
• Wipe the dispenser tray before adding the powder detergent.
There is conditioner left in the conditioner compartment of the dispenser tray.
• Plug cap is not positioned correctly or it is clogged.
• Make sure the plug cap in the conditioner compartment of the dispenser tray is positioned correctly.
• Clean the plug cap (see chapter "CLEANING AND MAINTENANCE / Cleaning the dispenser tray").
Odour in the washing machine drum.
• Residues of fabric, washing detergent, and conditioner in the filter.
• Check if the filter is clean.
• Development of germs and bacteria.
• Choose a self-cleaning (Drum Cleaning) program (see "STEP 5: Choose the program").
Machine is moving during operation.
• Feet not adjusted correctly.
• Level the feet (see chapter "INSTALLATION AND CONNECTION / Adjusting the feet").
• Transport bolts not removed.
• Remove the transport bolts (see chapter "BEFORE USING THE APPLIANCE FOR THE FIRST TIME / Transport protection").
Machine is moving during spinning.
• Unevenly distributed laundry or not enough laundry.
• The washing machine will automatically decrease the spin speed if vibration is too strong.
• Increase the amount of laundry in the washing machine and restart the program (see "STEP 7: Start the wash / Adding or removing laundry after the start of the program").
Manual opening of washing machine door
Washing machine door may be opened manually if the appliance is not connected to the power mains and if the water has been pumped out of the machine.
A. Choose the Spinning or Drain program to pump the water from the machine. If this does not work, water has to be drained from the washing machine drum manually. See chapter "Cleaning the trap and drain pump" in the chapter "CLEANING AND MAINTENANCE".
B. Make sure the main switch is off and that the plug is disconnected from the power outlet.
C. Take the emergency door opening tool (found at the back of the dispenser) and insert it into the upper part of the slot on the right-hand side of the washing machine door latch.
D. Press the key (key=the emergency door opening tool) downwards (all the way, until you hear a click) to unlock the washing machine door. When the door is unlocked, open it by pulling towards you.
If the washing machine door still cannot be opened, call a service technician.
FAILURE DISPLAY
In case of a failure while a program is in progress, the relevant Error X is indicated on the display unit.
Press the INFO button to display the error description.
Switch off the appliance and turn it back on.
Errors indicated on the display unit may include the following:
Error
Error indication on the display unit
What to do?
E1
THERMISTOR ERROR
Temperature sensor error.
• Inlet water too cold. Repeat the washing program.
• If the appliance reports this error again, call a service technician.
E2
DOOR LOCK ERROR
Restart the program. If the error reoccurs, call a service technician.
E3
WATER FILLING ERROR
Check the following:
• is the water inlet valve open,
• is the filter on the water inlet hose clean,
• is the water supply hose deformed (clipped, clogged etc.).
Then, press the START button to resume the program. If the error reoccurs, call a service technician.
E6
HEATING ERROR
Water heating error.
Restart the program. If the error reoccurs, call a service technician.
E7
DRAINING ERROR
Water draining error.
Check the following:
• is the pump filter clean,
• is the drain hose clogged,
• is the drain clogged,
• is the drain hose fitted at the right height (see chapter on drain hose installation in the instruction manual).
Then, press the Start button again. If the error reoccurs, call a service technician.
E7.1
DRAIN SYSTEM ALERT
Water drain system alert.
Alert about reduced water flow in the pumping stage. Check the following:
• is the pump filter clean,
• is the drain hose clogged,
• is the drain clogged,
• is the drain hose fitted at the right height (see chapter on drain hose installation).
E10
WATER LEVEL SENSOR ERROR
Restart the program. If the error reoccurs, call a service technician.
E11
OVERFLOW
Water overflowing.
Restart the program. If the error reoccurs, call a service technician.
E12
MOTOR ERROR
Restart the program. If the error reoccurs, call a service technician.
E22
DOOR LOCK ERROR
Error while locking the door.
Door is closed, but it cannot be locked. Close the door again. Turn the washing machine off, then restart the washing program. If the error reoccurs, call a service technician.
E23
DOOR UNLOCK ERROR
Error while unlocking the door.
Door is closed, but it cannot be unlocked. Turn off the washing machine, then turn it back on. If the error reoccurs, call a service technician. See instructions for opening the door – chapter on manual door opening.
E36
COMMUNICATION UI AND PMCU
Error in UI and PMCU communication.
Turn off the appliance and turn it back on. If the error reoccurs, call a service technician.
UNBALANCE
Unevenly distributed laundry.
Manually distribute the laundry and run the spinning program.
STERIL TUB ALERT
Warning – Self-cleaning program
Use the self-cleaning program (DRUM CLEANING); see STEP 5.
Unevenly distributed laundry or lumps of laundry in the washing machine drum may cause problems such as vibration and noisy operation. The washing machine will sense this and activate the UKS* (*unbalance system).
Smaller loads (e.g. one towel, one sweater, one bathrobe etc.) or clothes made of materials with special geometrical properties are virtually impossible to distribute evenly across the washing machine drum (slippers, large items etc.). This results in several attempts to redistribute the laundry, which in turn leads to longer program duration. In extreme cases of unfavourable conditions, the program can be completed without the spinning cycle.
UKS* (*unbalance system) allows stable operation and extends the useful life of the appliance.


 If you wish to transport the washing machine, reinstall the bolts and plastic caps to lock the machine. This will prevent any damage to the machine due to vibrations during transport. If you have lost the transport bolts or plastic caps, replacements can be ordered at your dealer.


 on/off button.
 . Observe the recommendation on the conditioner packaging.
 appear on the display.


 After the washing cycle, close the water intake and pull out the washing machine plug from the power socket.

 . This will prevent children from switching on the machine.
 to deactivate the child lock.

 to appear.


 / Off
/ Off  .
.


 Always disconnect the washing machine from the power mains before cleaning.


 button to resume the program.