Loading ...
Loading ...
Loading ...

4
Step 4. Verify System Operation
Battery Pull Tab
To activate the internal battery, grasp the yellow pull-tab
on the side of the timer and pull it out.
Apply Power
Indoor Model
Plug the transformer into a wall outlet.
Outdoor Model
Turn on main power supply or plug the power cord into a
waterproof receptacle.
NOTE: Do not plug the timer into a socket that is con-
trolled by a secondary ON/OFF light switch or GFI outlet.
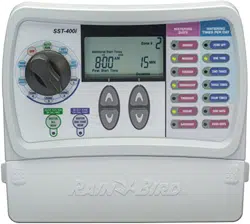
Test Watering
Turn the dial to the ZONE 1 position.
Press the WATER ONE ZONE NOW button. The zone
should start watering for a default run time of 10 minutes.
To stop watering before time is up, turn the dial to the
next position.
Repeat the above steps until all zones have been tested.
Replace the wiring bay cover on front of the unit.
REMOVE
PULL-TAB
OUTDOOR
APPLY
POWER
INDOOR
PLUG IN
TRANSFORMER
TEST
WATERING
Optional Accessories
Rain Sensor
Connect an optional Rain Sensor to the Timer
Remove the wiring bay cover at the bottom of the unit.
Remove the yellow jumper wire from the terminals
marked RAIN SENSOR on the terminal block.
REMOVE
JUMPER WIRE
NOTE: Do not remove the jumper wire unless connecting
a rain sensor. The timer will not function if the jumper wire
is removed and a rain sensor is not connected.
Connect the two wires from the sensor to the RAIN
SENSOR terminals.
CONNECT
WIRES
Loading ...
Loading ...
Loading ...