Loading ...
Loading ...
Loading ...
10 Philips · Screeneo S6
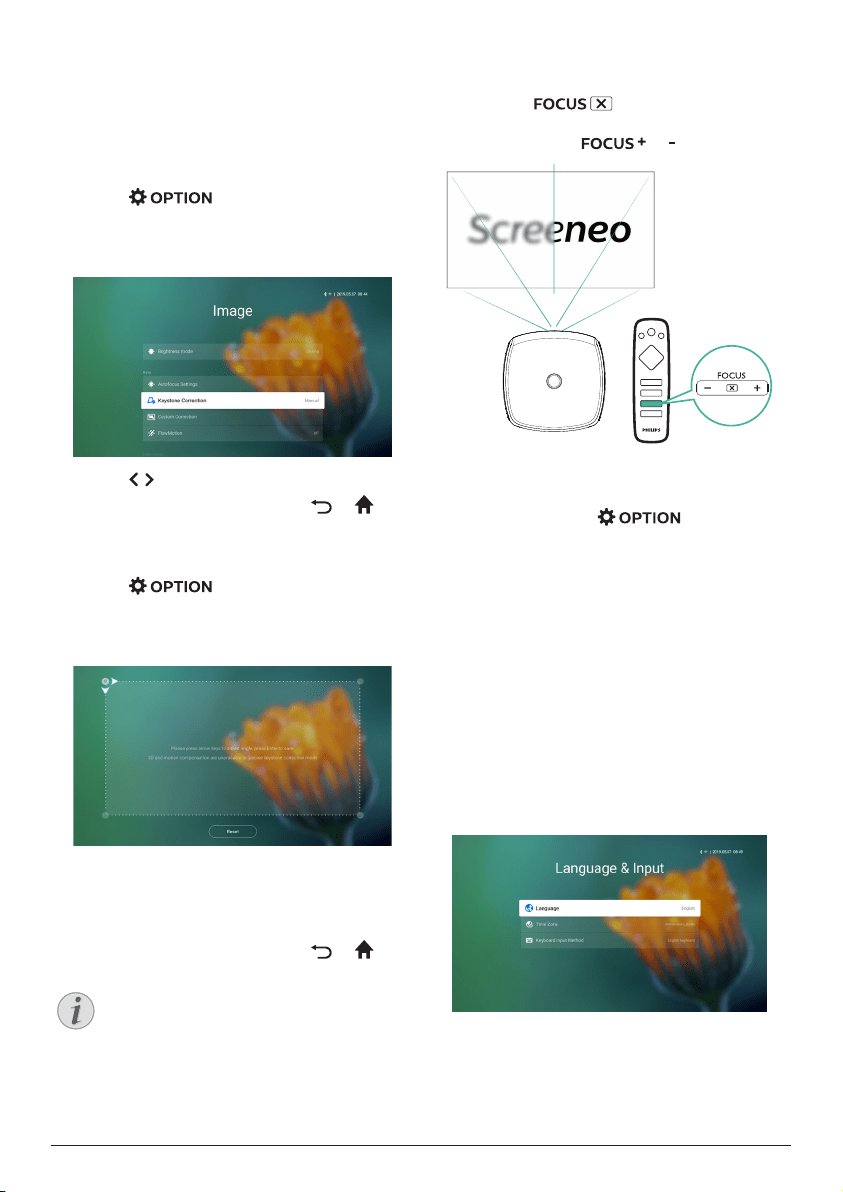
Image shape correction
You can correct distorted images to be
rectangular or square. Two image correction
methods are available.
Keystone correction
1 Press to access the settings
menu.
2 Use the Navigation buttons and OK to
select Image - Keystone Correction.
3 Press / to adjust the screen position.
4 To exit correction mode, press or .
Customized correction
1 Press to access the settings
menu.
2 Use the Navigation buttons and OK to
select Image - Custom Correction.
3 Use the Navigation buttons and OK to
select and change a screen corner position.
If needed, repeat the same step to change
the position for other three screen corners.
4 To exit correction mode, press or .
Notice
For the best and optimal image quality,
the projector should always be in front
of the projection screen.
Image focus adjustment
You can adjust image focus or clearness.
1 Press the button on the remote
control to adjust image focus. To fine tune
focus, press the or button.
Screeneo S6
• Auto focus adjustment is also available.
You can enable or disable auto focus
adjustment. Press and go to
Image - Autofocus Settings. If enabled, the
projector will re-focus automatically when
you reposition the projector.
First time setup
When you turn on the projector for the first
time, you are prompted to make the following
initial setup.
Step 1: set up the language
1 When Step 1 interface is displayed, use the
Navigation buttons and OK on the remote
control to access Select Language & Time
Zone. The following
Language & Input
menu appears.
• Language: Select your desired language for
on-screen menus.
Loading ...
Loading ...
Loading ...