These instructions apply to several appliance variants. It is possible that individual features are described which do not apply to your appliance.
Note: Switch on the extractor hood when you start cooking and switch it off again several minutes after you have finished cooking. This is the most effective way of removing the kitchen fumes.
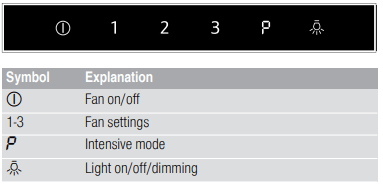
Control panel
Setting the fan
Switching on
Touch the symbol.
The fan starts at fan setting 2.
Selecting the fan setting
Touch symbol 1, 2 or 3 to set a different fan setting.
Switching off
Touch the symbol.
Intensive setting
You can use the intensive setting if there is a large build-up of odours and fumes/vapours.
Switching on
Touch the symbol.
Note: After approx. 6 minutes, the extractor hood automatically switches back to fan setting 3.
Switching off
If you want to end intensive mode before the preset time expires, touch the symbol.
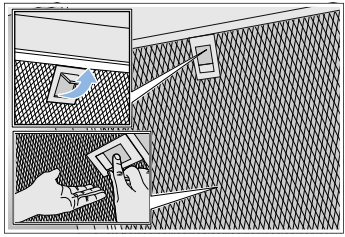
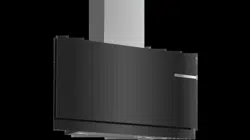
Intermediate position for the glass front
On some appliances, the glass front can be adjusted to an intermediate position. The intermediate position can be used for eliminating particularly strong cooking smells and large amounts of steam.
Take hold of the glass front in the centre and open it carefully
Lighting
The lighting can be switched on and off independently of the fan.
Touch the symbol.
Cleaning and maintenance
Cleaning agents
To ensure that the different surfaces are not damaged by using the wrong cleaning product, follow the instructions in the table. Do not use any of the following:
Harsh or abrasive cleaning agents, e.g. scouring powder or liquid scouring cleaner,
Cleaning products with a high alcohol content,
Hard scouring pads or cleaning sponges,
Pressure washers or steam cleaners,
Cleaning products that dissolve limescale,
Aggressive all-purpose cleaning products,
Oven spray
Note: Wash new sponge cloths thoroughly before use.
Note: Follow all instructions and warnings included with the cleaning products.
Area
Cleaning products
Stainless steel
Hot soapy water:
Clean with a dish cloth and then dry with a soft cloth.
Clean stainless steel surfaces in the direction of the grain only.
Special stainless steel cleaning products are available from our after-sales service or from specialist retailers.Apply a very thin layer of the cleaning product with a soft cloth.
Painted surfaces
Hot soapy water:
Clean using a damp dish cloth and then dry with a soft cloth.
Do not use stainless steel cleaner.
Aluminium and plastic
Hot soapy water:
Clean with a soft cloth.
Glass
Glass cleaner:
Clean with a soft cloth. Do not use a glass scraper.
Controls
Hot soapy water:
Clean using a damp dish cloth and then dry with a soft cloth.
Risk of electric shock caused by penetrating moisture.
Risk of damage to the electronics caused by penetrating moisture. Never clean controls with a wet cloth.
Do not use stainless steel cleaner.
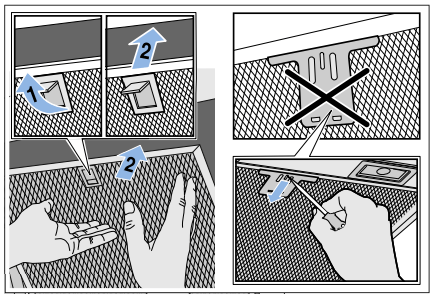
Removing metal grease filter
1. Open the glass front slowly and fully. Hold the glass front in the centre when doing so, gripping it firmly.
2. Open the lock and swing down the metal grease filter. When you do this, take hold of the metal grease filter from underneath with your other hand.
3. Take the metal grease filter out of the holder.
Notes
– Fat may accumulate in the bottom of the metal grease filter.
– Hold the metal grease filter level to prevent grease from dripping out.
Cleaning the metal mesh grease filters
These instructions apply to several appliance variants. It is possible that individual features are described which do not apply to your appliance.
Notes
Do not use aggressive, acidic or alkaline cleaning products.
We recommend cleaning the grease filters every 2 months.
When cleaning the metal grease filters, also clean the metal grease filter holder in the appliance using a damp cloth.
The metal grease filters can be cleaned in the dishwasher or by hand.
By hand:
Note: You can use a special degreaser to remove stubborn dirt. This can be ordered from the online shop.
Soak the metal grease filters in hot soapy water.
Clean the filters with a brush and then rinse them thoroughly.
Leave the metal grease filters to drain on an absorbent material.
In the dishwasher:
Note: Slight discolouration may occur if the metal grease filters are cleaned in the dishwasher. This discolouration has no effect on the performance of the metal grease filters.
Use normal domestic dishwashing detergents.
Do not clean heavily soiled metal grease filters together with cookware.
Place the metal grease filters in the dishwasher, leaving plenty of space around them. Do not trap the metal grease filters.
Select a temperature of no more than 50 °C.
Installing the metal mesh grease filter
Note: Clean all accessible parts of the housing.
1. Insert the metal grease filter and lock it in place. When you do this, take hold of the metal grease filter from underneath with your other hand.
Note: Make sure that the metal grease filter is positioned correctly.
2. If the metal grease filter has not been inserted correctly, open the lock and reinsert the metal grease filter correctly.
Trouble shooting
Malfunctions often have simple explanations. Please read the following notes before calling the after-sales service.
Malfunction table
Problem
Possible cause
Solution
The appliance does not work
The plug is not plugged in
Connect the appliance to the electricity supply
Power cut
Check whether other kitchen appliances are working
Faulty fuse
Check in the fuse box to make sure that the fuse for the appliance is OK
The lighting does not work.
The LED lights are defective.
Call the after-sales service.
The button illumination does not work.
The control unit is faulty.
Call the after-sales service.
LED lights
Defective LED lights may be replaced by the manufacturer, their customer service or a qualified technician (electrician) only.
Customer service
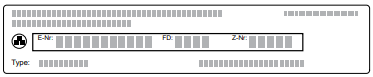
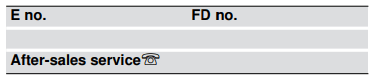
When calling us, please quote the product number (E no.) and the production number (FD no.) so that we can provide you with the correct advice. These numbers can be found on the rating plate on the top of the appliance.
You can make a note of the numbers of your appliance and the telephone number of the after-sales service in the space below to save time should it be required.
Please be aware that a visit by an after-sales engineer will be charged if a problem turns out to be the result of operator error, even during the warranty period.
Please find the contact data of all countries in the enclosed customer service list.
To book an engineer visit and product advice
GB 0344 892 8989
Calls charged at local or mobile rate.
IE 01450 2655
0.03 € per minute at peak. Off peak 0.0088 € per minute.
Rely on the professionalism of the manufacturer. You can therefore be sure that the repair is carried out by trained service technicians who carry original spare parts for your appliances.
 symbol.
 symbol.
 symbol.