Loading ...
Loading ...
Loading ...
3.2 Control knob
Symbol Description
no gas supply / off posi‐
tion
Symbol Description
ignition position / maxi‐
mum gas supply
minimum gas supply
4. DAILY USE
WARNING!
Refer to Safety chapters.
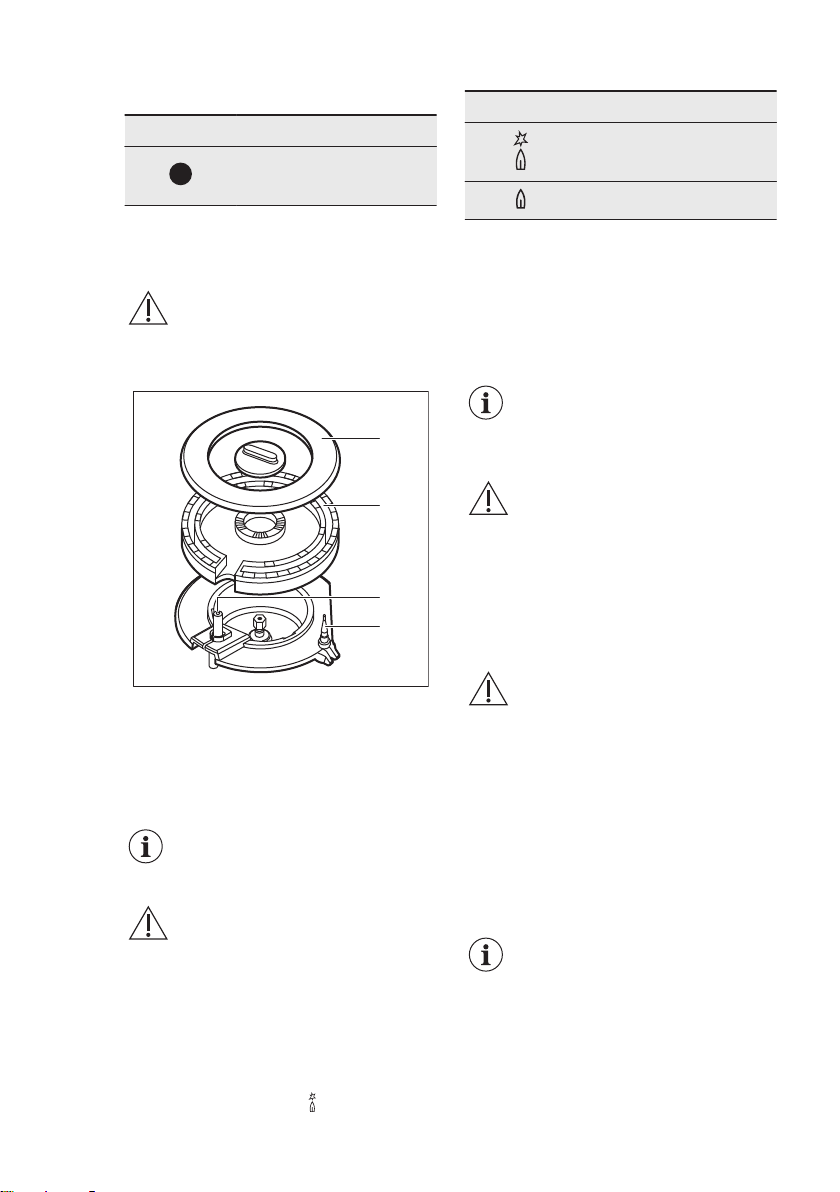
4.1 Burner overview
A
B
C
D
A. Burner cap
B. Burner crown
C. Ignition candle
D. Thermocouple
4.2 Ignition of the burner
Always light the burner
before you put on the
cookware.
WARNING!
Be very careful when you
use open fire in the kitchen
environment. The
manufacturer declines any
responsibility in case of the
flame misuse.
1. Push the control knob down and turn
it counterclockwise to the maximum
gas supply position ( ).
2. Keep the control knob pushed for
equal or less than 10 seconds. This
lets the thermocouple warm up. If
not, the gas supply is interrupted.
3. Adjust the flame after it is regular.
If after some tries the burner
does not light, check if the
crown and its cap are in
correct positions.
WARNING!
Do not keep the control knob
pushed for more than 15
seconds. If the burner does
not light after 15 seconds,
release the control knob,
turn it into off position and try
to light the burner again after
minimum 1 minute.
CAUTION!
In the absence of electricity
you can ignite the burner
without electrical device; in
this case approach the
burner with a flame, turn the
control knob counter-
clockwise to maximum gas
supply position and push it
down. Keep the control knob
pushed for equal or less
than 10 seconds to let the
thermocouple warm up.
If the burner accidentally
goes out, turn the control
knob to the off position and
try to light the burner again
after minimum 1 minute.
www.electrolux.com8
Loading ...
Loading ...
Loading ...