Loading ...
Loading ...
Loading ...
7
MAINTENANCE AND CLEANING
External cleaning
An accumulation of dust will affect the performance
of the appliance and cause excessive electricity
consumption.
Once or twice a year dust the condenser (black grill)
and the compressor at the back of the appliance,
with a brush or vacuum cleaner, see figure.
Before any maintenance or cleaning work is carried
out, DISCONNECT the appliance from the
ELECTRICITY supply.
Internal cleaning
Clean the inside and accessories with warm water
and bicarbonate of soda (5ml to 0.5 litre of water).
Rinse and dry thoroughly.
NEVER USE DETERGENTS, ABRASIVE
POWDERS, HIGHLY PERFUMED CLEANING
PRODUCTS OR WAX POLISHES, TO CLEAN THE
INTERIOR AS THESE WILL DAMAGE THE
SURFACE AND LEAVE A STRONG ODOUR.
When the appliance is not in use
When the appliance is not in use for long periods,
disconnect from the electricity supply, empty all
foods and clean the appliance, leaving the doors ajar
to prevent unpleasant smells.
PR259
Defrosting
The refrigerator automatically defrosts every time the
compressor stops. The water is discharged, via the
pipe, into a tray located at the back of the appliance
above the compressor, where it evaporates.
Important
To avoid defrost water overflowing into the fridge,
periodically clean the water discharge hole in the
centre of the V shaped drip collector at the back of
the refrigerator compartment behind the salad
crispers. Use the defrost cleaner provided which you
will find already inserted into the discharge hole.
Remember to wash the defrost cleaner in hot soapy
water at regular intervals. Dry throughly before
replacing.
D037
Changing the light bulb
If it becomes necessary to replace the lamp, press on
the rear hook and at the same time slide the cover in
the direction indicated by the arrow.
Unscrew the bulb and replace it with one of the same
power (the maximum power is shown on the light
diffuser) available from your nearest Service Force
Centre.
Replace the light cover by sliding it into its original
position.
14
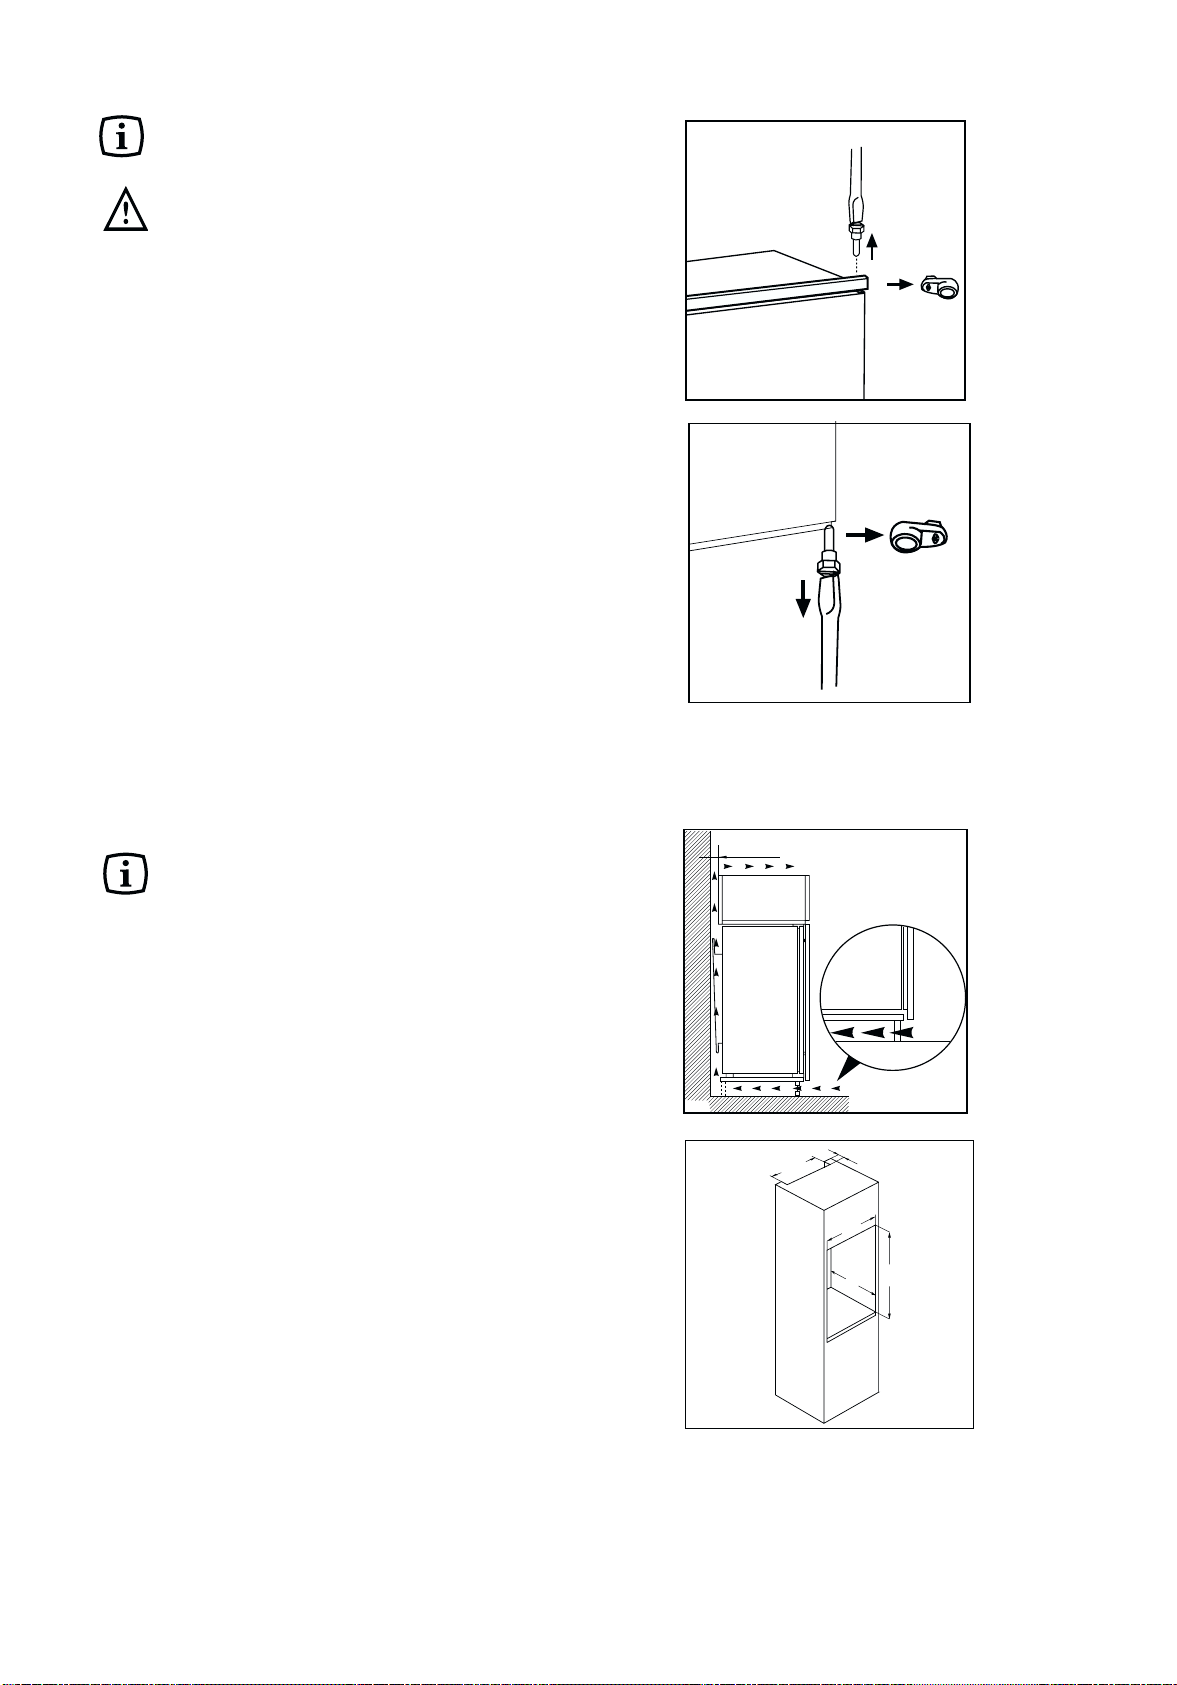
Instructions for totally built-in
appliances
Recess dimensions
Height (1) 1780 mm
Depth (2) 550 mm
Width (3) 560 mm
The appliance’s door has been locked in position
for transport by means of pins on both sides.
According to the door opening direction, remove
relevant pins at the top and at the bottom.
To ensure adequate ventilation, allow the clearances
shown in figure.
Furthermore, it is necessary that the cabinet has a
ventilation recess with the following dimensions:
depth 50 mm
width 540 mm
50 mm
min.
200 cm
2
200 cm
2
min.
D567
PR0
540
50
3
2
1
Door Reversibility
The appliance is supplied with the door
opening to the right.
For door opening in the opposite direction,
perform the following actions prior to
installation
1. Unscrew the upper pin and remove the spacer
2. Remove the door.
3. Unscrew the lower pin and remove the spacer;
replace them on the opposite side.
4. Reinsert the door and screw the pin and the
spacer back in place on the opposite side.
Loading ...
Loading ...
Loading ...