Loading ...
Loading ...
Loading ...
14
INSTALLATION
EN
guide plate before inserting the tap into the
adaptor.
Installing the Drain Hose
Before connecting the drain hose, check your drain
hose model and choose the correct instruction.
Installing the Drain Hose with
the Elbow Bracket
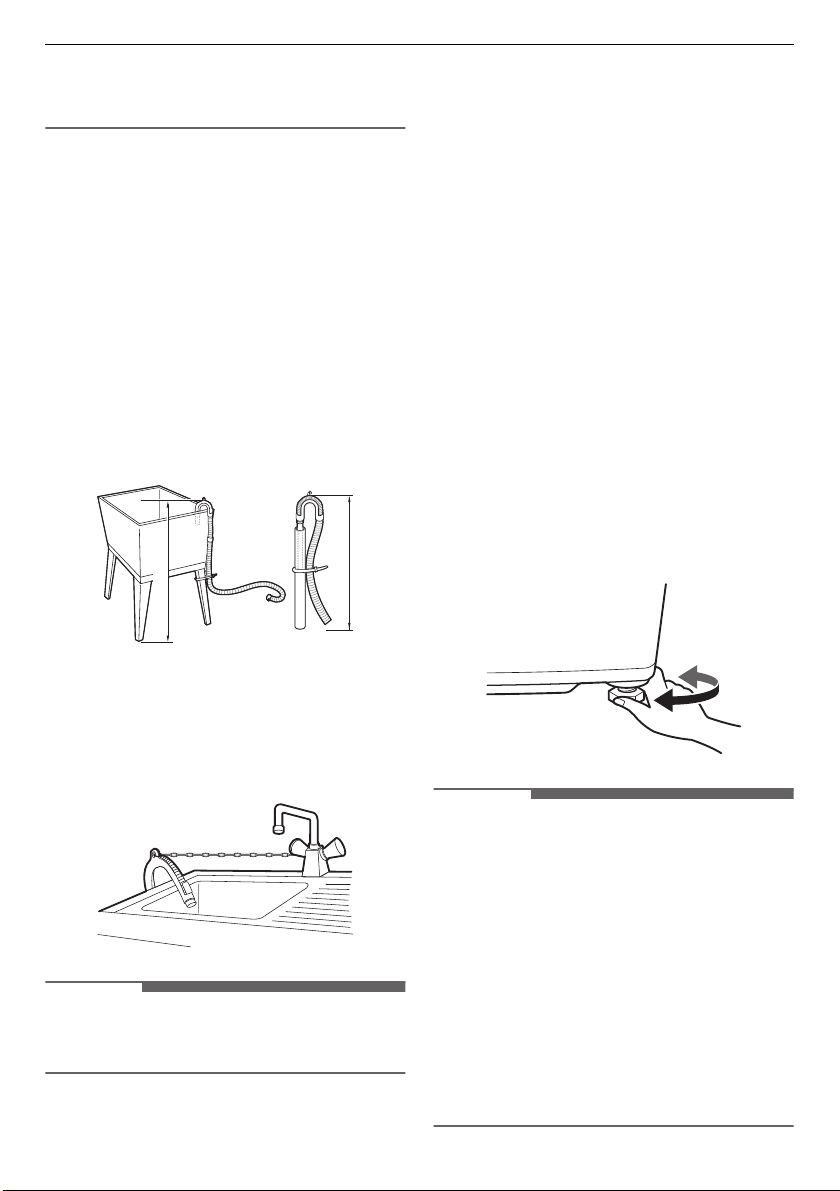
The drain hose must not be placed higher than 120
cm above the floor. Water in the appliance may not
drain or may drain slowly.
• Securing the drain hose correctly will protect the
floor from damage due to water leakage.
• If the drain hose is too long, do not force the
drain hose further into the drain outlet. This will
cause abnormal noise.
• When installing the drain hose to a sink, secure it
tightly with the some string, cable tie, or chain.
NOTE
• The discharge height should be approximately
90 - 120 cm from the floor.
Levelling the Appliance
Checking the Level
Levelling the appliance prevents unnecessary
noise and vibration. Check whether the appliance is
perfectly level after installation.
• If the appliance rocks when pushing the top
plate of the appliance diagonally, adjust the feet
again.
Adjusting and Levelling the
Feet
When the appliance is not perfectly level, turn the
adjustable feet until the appliance no longer
wobbles.
• Turn the adjustable feet clockwise to raise or
turn the adjustable feet counterclockwise to
lower from front-to-back, side-to-side and
corner-to-corner.
NOTE
• Do not insert pieces of wood etc. under the feet.
• Timber or suspended type flooring will
contribute to excessive vibration and unbalance.
Reinforcing or bracing the timber floor may
need to stop or reduce excessive noise and
vibration.
• Do not install the appliance on any elevated
surface or platform, as it may become unstable
and cause serious injury and damage.
• If the appliance is installed on a uneven, weak or
tilted floor causing excessive vibration, spin
failure or UE error can occur. It must be placed
on a firm and level floor to prevent spin failure.
FP
FP
Loading ...
Loading ...
Loading ...