Loading ...
Loading ...
Loading ...
8
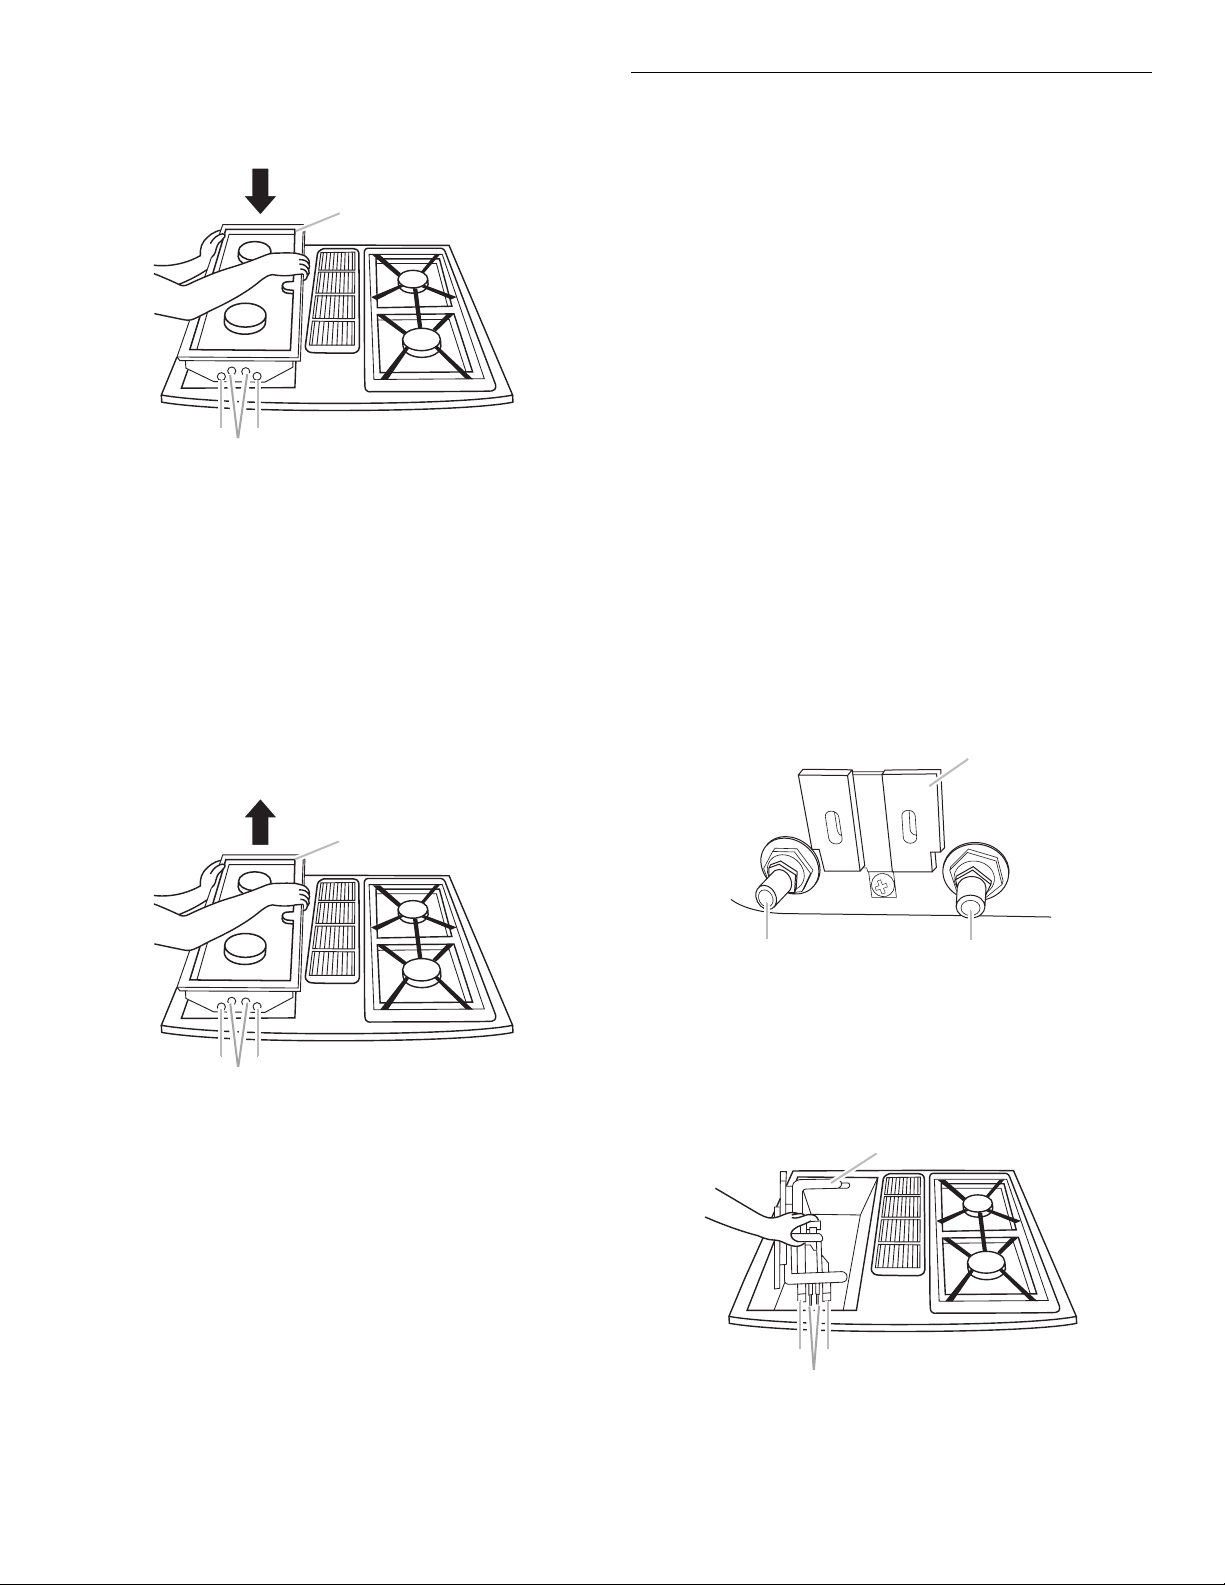
4. Position burner cartridge with the mixer tube openings and
igniter rods toward the orifices and terminal receptacle. Slide
cartridge until the tubes and igniters engage, then lower the
cartridge so that it rests on the cooktop surface.
To Remove Sealed Burner Cartridge:
1. Be sure control knobs are in the “Off” position and cooktop is
cool.
2. Lift up the edge of the cartridge until the bottom of the
cartridge clears the basin.
NOTE: Lifting the cartridge too high while still engaged could
damage the igniter rods and mixer tubes.
3. To disengage the cartridge, hold by the sides and pull away
from the terminal receptacle and orifices. Lift out when fully
unplugged.
IMPORTANT: Optional Sealed Burner Cartridge, model
JGA8150AD, can replace the grill burner assembly. For more
information see “Accessories” section.
Install Grill
The Grill can only be installed on the left side of the cooktop.
When using the grill, follow the guidelines below.
■ Trim excess fat to reduce spattering. Slit the remaining fat on
the edges to avoid curling.
■ Allow space between food on the grill. Crowding food will
result in uneven cooking.
■ Use a metal spatula or tongs to turn food.
■ Steaks, chops and hamburgers should be turned only once
to avoid loss of juices.
■ For best results, use top grade meat. Thicker meat will grill
better than thinner cuts.
■ When basting meats or applying sauces to foods, remember
that excessive amounts accumulate inside your grill and do
not improve the food flavor.
■ Use only nonmetallic spatulas or utensils to avoid damaging
the nonstick grill grate finish.
■ Do not leave the grill unattended while cooking.
■ To avoid damage to the grill, do not use aluminum foil,
charcoal or wood chips.
■ To avoid damage to cookware, do not place cookware on the
grill when in use. Food should be cooked directly on the grill
grate.
To Install Grill:
1. Be sure control knobs are in the “Off” position.
2. The orifices and terminal receptacle are located in the basin
at the front of the cooktop.
3. Position the grill burner with mixer tubes and igniter rod
toward the orifices and terminal receptacle. Slide the burner
until the tubes and igniter engage, then lower the burner until
it rests in the burner basin.
A. Sealed burner cartridge
B. Mixer tubes
C. Igniter rods
A. Sealed burner cartridge
B. Mixer tubes
C. Igniter rods
A
B
C
B
B
A
C
B
A. Terminal receptacle
B. Orifices
A. Grill burner
B. Mixer tubes
C. Igniter rods
A
BB
B
C
B
A
Loading ...
Loading ...
Loading ...