Loading ...
Loading ...
Loading ...
37
Computer input
Screen size adjust
The size of the screen can be reset to the value the
user desires.
1 Press MENU button on the remote control to
display the on screen menu. Press ▲▼to select
Screen icon and press ► or OK.
2 Press ▲▼ to select your required item and then
press OK.
Remote control
2930058502
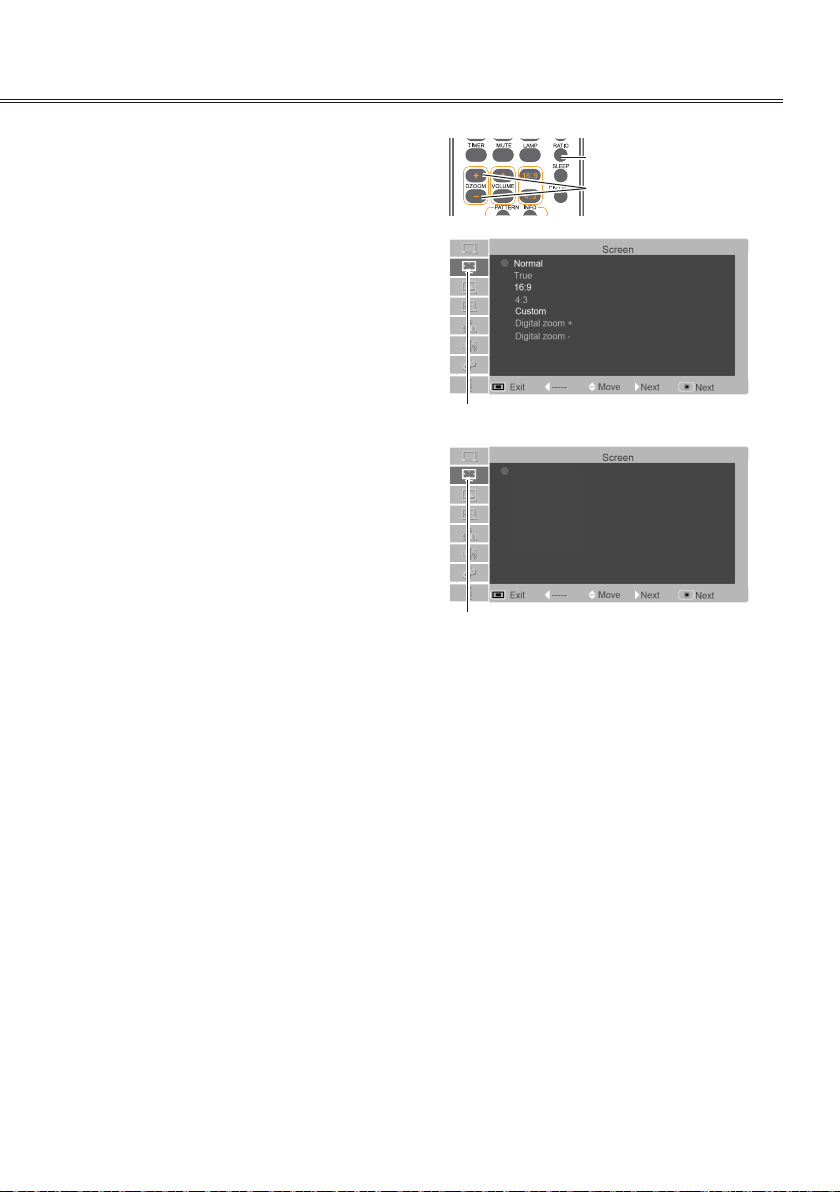
Screen Menu (BD430, BD450, BD470)
Screen Menu (BD460)
Normal
True
16:9
4:3
Full
Custom
Digital zoom +
Digital zoom -
RATIO buttons
DZOOM +/-button
Screen icon
Screen icon
√ Note:
● To get the the best picture quality (BD430, BD450, BD470), you should adjust the resolution to XGA(1024x768).
● To get the the best picture quality (BD460), you should adjust the resolution to WXGA(1280x800).
● When True or 4:3 is selected, Digital zoom +/- will be disabled.
●True, Custom and Digital zoom +/- menus might be disabled when Pixel Clock is higher than 140MHz.
●True can not be selected when 480i, 576i, 480p, 576p, 720P50, 720P60, 1080i is selected in PC system menu.
Normal
This function will make the width-height proportion of
the projected image consistent with the input signals.
True
This item provides the image with the original size. If
the original image is larger than the screen
(1024X768(BD430, BD450, BD470)/
1280X800(BD460)) , the projector will automatically
enter the window moving mode for image display. The
user can press ▲▼ ◄► to move the display image
to adjust.
16:9
This item provides images with a width-height ratio of
16:9.
4:3
This item provides normal images with a width-height
proportion 4:3.
Custom
This item can help users manually adjust the
proportion and position of the screen.
Adjustable range depends on the input signal formats.
Some have a limitation to adjust.
When this item is selected, press ►. The indication
of self-denition will appear on the screen. You can
press ▲▼ to select the items to be adjusted.
Scale H/V: To adjust the horizontal/vertical proportion of the
screen.
H&V: When this item is enabled, the width-height proportion
will be locked. The vertical proportion is displayed in gray,
meaning “disabled”. You can adjust the horizontal proportion,
and then modify the proportion of the screen on the basis
of the width-height proportion.If you reset the H&V settings,
then H&V data will be initialized.
Position H/V: To adjust the horizontal/vertical position of the
screen.
Apply to all inputs: Use this item to save input adjusted
proportion.When you press Select at this item, a dialog box
will pop up for conrmation. To save the proportion, press
Select at Yes. If you select self-denition, the system will use
the saved proportion.
Reset: This item allows you to reset the all adjusted values.
In the initial state, press Select, and a dialog box will pop up
for confirmation. To reset the parameters, press Select at
Yes.
Digital zoom +
After you select the Digital zoom +, the on screen
menu will disappear, while the information on Digital
zoom + appears. You can press OK to zoom in the
image size, and press ▲▼◄►to move the image
horizontally and vertically.
The moving is effective only when the image is larger
than the size of the screen.
You can also press DZOOM + or select on the remote
control to zoom in the projected image.
Digital zoom -
After you select the Digital zoom -, the on screen
menu will disappear, while the information on Digital
zoom - appears. You can press OK to zoom out the
image size. You can also press DZOOM - or select on
the remote control to zoom out the projected image.
To exit the “Digital zoom +/-“mode, press any button
except the DZOOM +/- and the OK button. To return
to Normal size, select “ Screen” in the menu to
adjust screen size, or enter a new input source in the
menu “Input”. and press ▲▼◄►to move the image
horizontally and vertically.
Full
Full screen will be displayed.
Loading ...
Loading ...
Loading ...