23PFL4509/F7
32PFL4709/F7
Register your product and get support at
www.philips.com/support
EN: For further assistance, call the customer support service in your
country.
• Toobtainassistance,contactPhilipsCustomerCareCenter;
IntheU.S.A.,Canada,PuertoRico,ortheU.S.VirginIslands1866 309 8147
MéxicoD.F.andÁreaMetropolitana;58 87 97 36
InteriordelaRepublica;01 800 839 19 89
ES: Para obtener más información, llame al servicio de soporte al cliente
de su país.
• Paraobtenerasistencia,comuníqueseconCentrodeatenciónalclientedePhilips;
EnlosEstadosUnidos,enCanadá,PuertoRicooenlasIslasVírgenesde
losEstadosUnidos;1 866 309 8147
MéxicoD.F.yÁreaMetropolitana;58 87 97 36
InteriordelaRepublica;01 800 839 19 89
FR: Pour obtenir de l’aide supplémentaire, communiquez avec le centre de
service à la clientèle de votre pays.
• Pourobtenirdel’aide,communiquezaveclecentredeserviceàlaclientèlePhilipsau;
DansleÉtats-Unis,auCanada,àPuertoRicoouauxÎlesVierges
américaines;1 866 309 8147
MéxicoD.F.etÁreaMetropolitana;58 87 97 36
InteriordelaRepublica;01 800 839 19 89
EN User Manual
Toobtainamoredetailedelectroniccopyofthis
manual,gotowww.philips.com/support
ES Manual del Usuario
Paraobtenerunacopiaelectrónicamásdetallada
deestemanual,visitewww.philips.com/support
FR Manuel d’Utilisation
Pourobtenirunecopieélectroniqueplusdétaillée
decemanuel,allezsurwww.philips.com/support

2
English
Contents
1 Notice
5
2 Important
7
PositioningtheTV 7
Regulatorynotices 7
Environmentalcare 7
Downloadinganelectroniccopy 7
3 Get started
8
Features 8
Suppliedaccessories 8
SymbolsusedinthisUserManual 8
Attachingthebase 9
Installingtheremotecontrolbatteries 9
Remotecontrolfunction 10
Controlpanel 11
Terminals 11
Connectingtheantennaorunencryptedcable 12
PluggingintheACpowercord 12
Initialsetup 13
4 Use your TV
15
SwitchingonyourTVandputtingitinStandbymode 15
Adjustingvolume 15
Switchingchannels 15
Watchingchannelsfromanexternaldevice 16
AccesstheHomemenu 16
Sleeptimer 16
Changingpictureformat 16
TVscreeninformation 17
5 Use more of your TV
18
Picture 18
Sound 19
Setup 20
Autoprogram 21
Language 22
Features 22
Childlock 23
Captionsettings 25
Sleeptimer 26
EasyLink 26
Location 26
E-sticker 27
USB 27
PHOTO 28
MUSIC 28
MOVIE 28
Upgradingthesoftware 29
6 Connecting devices
29
Selectingyourconnectionquality 29
Connectingyourdevices 30
7 Useful tips
32
FAQ 32
Troubleshooting 33
8 Information
35
Glossary 35
Maintenance 36
9 Specications
37
10 Warranty
38

3
English
Know these safety symbols
The lightning flash with arrowhead symbol, within an equilateral triangle, is intended to alert
the user to the presence of uninsulated “dangerous voltage” within the apparatus’s enclosure
that may be of sufficient magnitude to constitute a risk of electric shock to persons.
The exclamation point within an equilateral triangle is intended to alert the user to the
presence of important operating and maintenance (servicing) instructions in the literature
accompanying the apparatus.
WARNING:
To reduce the risk of fire or electric shock, do not expose this apparatus
to rain or moisture. Apparatus shall not be exposed to dripping or
splashing and no objects filled with liquids, such as vases, shall be placed on
the apparatus.
ATTENTION
:
Pour éviter les choc électriques,introduire la lame la plus large de la fiche
dans la borne correspondante de la prise et pousser jusqu’au fond.
The caution marking is located on the rear or bottom of the cabinet.
*Product Safety Notification *Additional Benefits
By registering your product, you'll receive notification -
directly from the manufacturer - in the rare case of a
product recall or safety defect.
Registering your product guarantees that you'll receive
all of the privileges to which you're entitled, including
special money-saving offers.
Registe
ring your model with Philips makes you eligible for all of the valuable benefits listed below, so don't miss out.
Complete and
return your Product Registration Card at once
or visit at www.philips.com/support to ensure:
Visit our World Wide Web Site at www.philips.com/support
Return your Product Registration Card or visit at
http://www.productrecords.com/philips/ today to get the very most from your purchase.
4
English
Important Safety Instructions
1. Readtheseinstructions.
2. Keeptheseinstructions.
3. Heedallwarnings.
4. Followallinstructions.
5. Donotusethisapparatusnearwater.
6. Cleanonlywithdrycloth.
7. Donotblockanyventilationopenings.Installinaccordancewiththe
manufacturer’sinstructions.
8. Donotinstallnearanyheatsourcessuchasradiators,heatregisters,
stoves,orotherapparatus(includingampliers)thatproduceheat.
9. Donotdefeatthesafetypurposeofthepolarizedorgroundingtype
plug.Apolarizedplughastwobladeswithonewiderthanthe
other.Agroundingtypeplughastwobladesandathirdgrounding
prong.Thewidebladeorthethirdprongareprovidedforyour
safety.Iftheprovidedplugdoesnottintoyouroutlet,consultan
electricianforreplacementoftheobsoleteoutlet.
10. Protectthepowercordfrombeingwalkedonorpinched
particularlyatplugs,conveniencereceptacles,andthepointwhere
theyexitfromtheapparatus.
11. Onlyuseattachments/accessoriesspeciedbythemanufacturer.
12. Useonlywiththecart,stand,tripod,bracket,or
tablespeciedbythemanufacturer,orsoldwiththe
apparatus.Whenacartisused,usecautionwhen
movingthecart/apparatuscombinationtoavoidinjury
fromtip-over.
13. Unplugthisapparatusduringlightningstormsorwhenunusedfor
longperiodsoftime.
14. Referallservicingtoqualiedservicepersonnel.Servicingisrequired
whentheapparatushasbeendamagedinanyway,suchaspower-
supplycordorplugisdamaged,liquidhasbeenspilledorobjects
havefallenintotheapparatus,theapparatushasbeenexposedto
rainormoisture,doesnotoperatenormally,orhasbeendropped.
Note to the CATV system installer:
ThisreminderisprovidedtocalltheCATVsysteminstaller’sattention
toArticle820-40oftheNECthatprovidesguidelinesforproper
groundingand,inparticular,speciesthatthecablegroundshallbe
connectedtothegroundingsystemofthebuilding,asclosetothe
pointofcableentryaspractical.
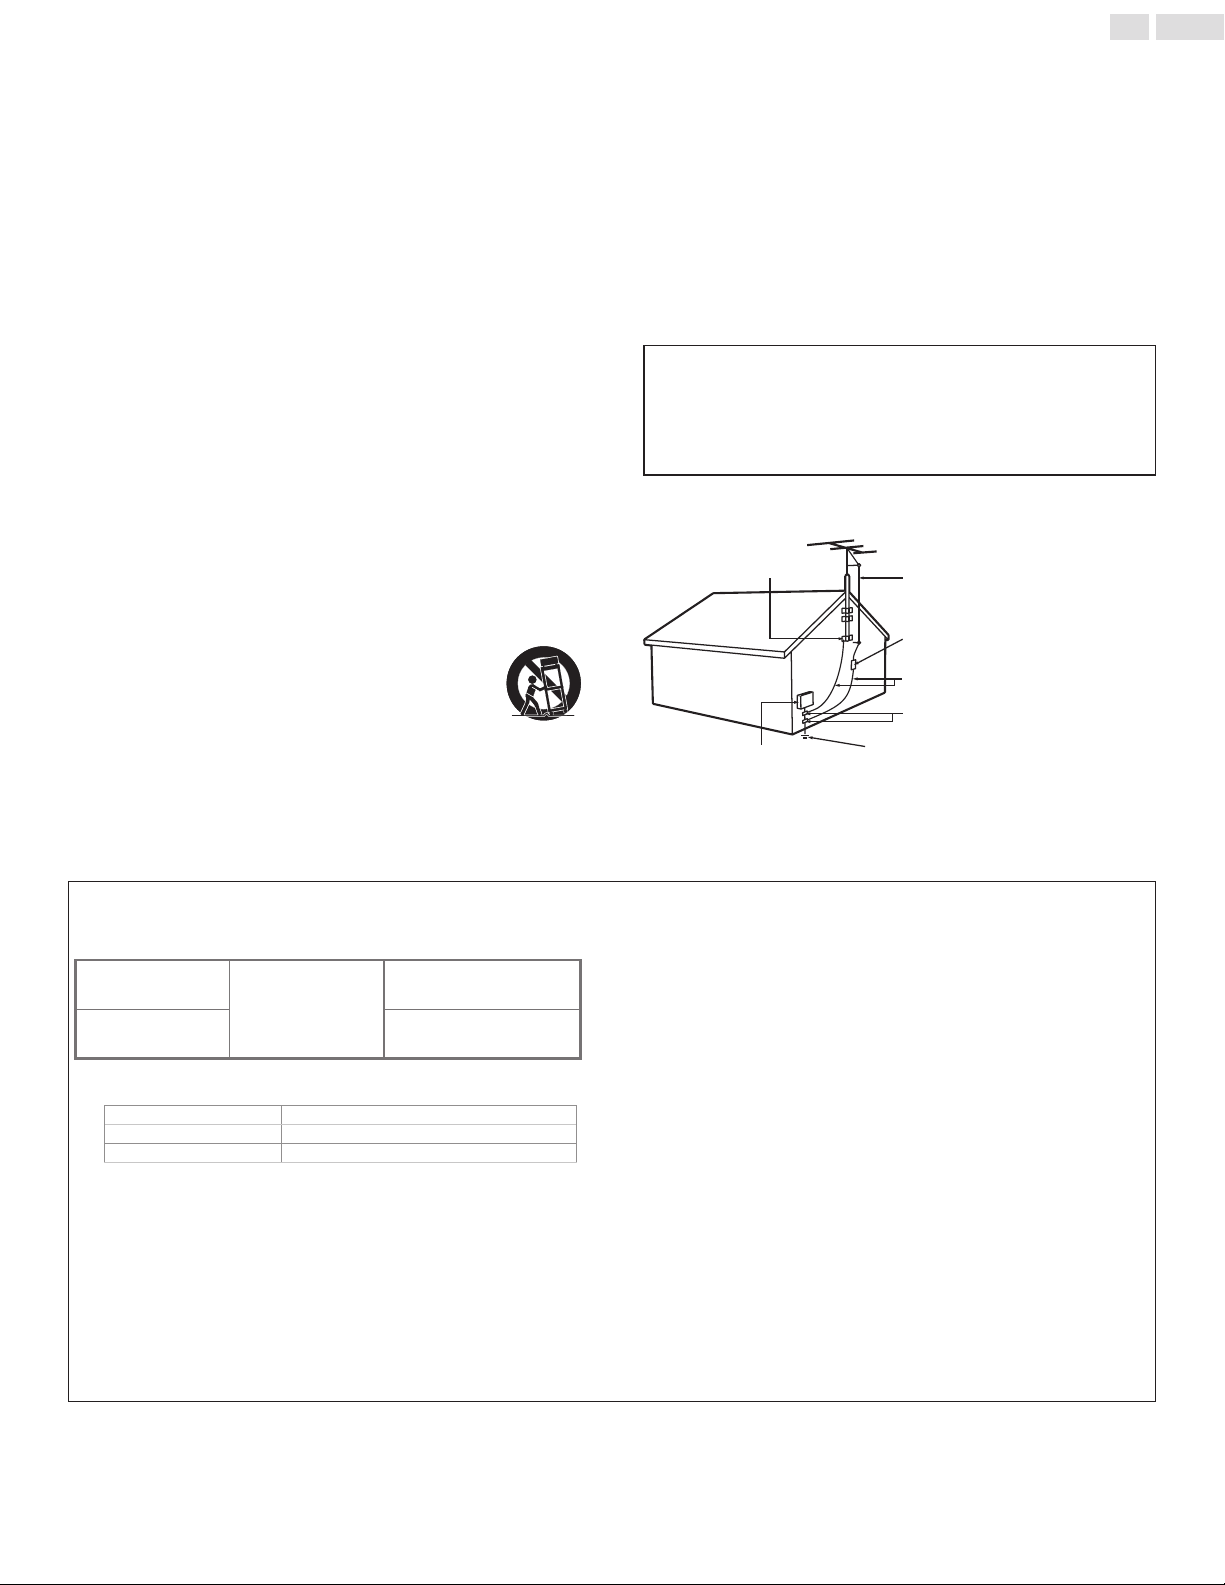
ExampleofAntennaGroundingasperNEC−NationalElectric
Code
ANTENNA DISCHARGE
UNIT (NEC SECTION 810-20)
GROUNDING CONDUCT
ORS
(NEC SECTION 810-21)
POWER SERVICE GROUNDING
ELECTRODE SYSTEM
(NEC ART 250, PART H)
ANTENNA LEAD IN WIRE
GROUND CLAMPS
ELECTRIC SER
VICE
EQUIPMENT
GROUND CLAMP
Wall Mount Bracket Kit
Brand: SANUS
Model # Screw dimension
23PFL4509/F7
SQM6485/17
M4(9mm)x4
withspace
32PPF4709/F7
M4(15mm)x4
withspace
• ForuseonlywithULlistedWallMountBracketwithminimum
weight/load:pleaserefertobelowtable.
Model #
minimum weight required
23PFL4509/F7
3.4 kg (7.4lb)
32PFL4709/F7
5.8 kg (12.8lb)
• TherecommendedWallMountBracketKit(soldseparately)
allowsthemountingoftheTVonthewall.
• Fordetailedinformationoninstallingthewallmount,refertothe
WallMountInstructionBook.
• P&FUSAisnotresponsibleforanydamagetotheproductor
injurytoyourselforothersifyouelecttoinstalltheTVonawall
mountofyourownchoiceonyourown.
• TheWallMountBracketmustbeinstalledbyexperts.
P&F USA is not liable for these types of accidents or injury noted
below.
• InstalltheWallMountBracketonasturdyverticalwall.
• Ifinstalledontoaceilingorslantedwall,theTVandWallMount
Bracketmayfallwhichcouldresultinasevereinjury.
• Donotusescrewsthatarelongerorshorterthantheirspecied
length.Ifscrewstoolongareusedthismaycausemechanicalor
electricaldamageinsidetheTVset.Ifscrewstooshortareused
thismaycausetheTVsettofall.
• Donotfastenthescrewsbyexcessiveforce.Thismaydamagethe
productorcausetheproducttofall,leadingtoaninjury.
• Forsafetyreasonsuse2peopletomounttheTVontoaWall
MountingBracket.
• DonotmounttheTVontotheWallMountingBracketwhileyour
TVispluggedinorTurnedOn.Itmayresultinanelectricalshock
injury.
When installing the unit on the wall, allow this much space.
Top: 11.8inches(30cm)
Left and right side: 5.9inches(15cm)
Bottom: 3.9inches(10cm)

5
English
1 Notice
TrademarksarethepropertyofKoninklijkePhilipsN.V.ortheir
respectiveowners.
P&FUSAreservestherighttochangeproductsatanytimewithout
beingobligedtoadjustearliersuppliesaccordingly.
ThematerialinthisUserManualisbelievedadequatefortheintended
useofthesystem.Iftheproductoritsindividualmodulesorprocedures
areusedforpurposesotherthanthosespeciedherein,conrmationof
theirvalidityandsuitabilitymustbeobtained.P&FUSAwarrantsthatthe
materialitselfdoesnotinfringeanyUnitedStatespatents.Nofurther
warrantyisexpressedorimplied.
P&FUSAcannotbeheldresponsibleneitherforanyerrorsinthe
contentofthisdocumentnorforanyproblemsasaresultofthe
contentinthisdocument.ErrorsreportedtoP&FUSAwillbeadapted
andpublishedontheP&FUSAsupportwebsiteassoonaspossible.
Pixel characteristics
ThisLCDproducthasahighnumberofcolorpixels.Althoughithas
effectivepixelsof99.999%ormore,blackdotsorbrightpointsoflight
(red,greenorblue)mayappearconstantlyonthescreen.Thisisa
structuralpropertyofthedisplay(withincommonindustrystandards)
andisnotamalfunction.
Warranty
Nocomponentsareuserserviceable.Donotopenorremovecoversto
theinsideoftheproduct.RepairsmayonlybedonebyServiceCenters
andofcialrepairshops.Failuretodososhallvoidanywarranty,stated
orimplied.
AnyoperationexpresslyprohibitedinthisUserManual,anyadjustments
orassemblyproceduresnotrecommendedorauthorizedinthisUser
Manualshallvoidthewarranty.
Federal Communications Commission Notice
This equipment has been tested and found to comply with the limits
for a Class B Digital device, pursuant to part 15 of the FCC Rules.
These limits are designed to provide reasonable protection against
harmful interference in a residential installation. This equipment
generates, uses and can radiate radio frequency energy and, if not
installed and used in accordance with the instructions, may cause
harmful interference to radio communications. However, there is no
guarantee that interference will not occur in a particular installation. If
this equipment does cause harmful interference to radio or television
reception, which can be determined by Turning the equipment Off
and On, the user is encouraged to try to correct the interference by
one or more of the following measures:
• Reorientorrelocatethereceivingantenna.
• Increasetheseparationbetweentheequipmentandthereceiver.
• Connecttheequipmentintoanoutletonacircuitdifferentfrom
thattowhichthereceiverisconnected.
• Consultthedealeroranexperiencedradioortelevisiontechnician
forhelp.
Declaration of Conformity
Trade Name : PHILIPS
Responsible Party : P&FUSA,Inc.
Model : 23PFL4509/32PFL4709
Address : POBox2248,Alpharetta,GA30023-2248
U.S.A.
Telephone Number : 18663098147
Modications
Thisapparatusmaygenerateoruseradiofrequencyenergy.Changesor
modicationstothisapparatusmaycauseharmfulinterferenceunless
themodicationsareexpresslyapprovedintheUserManual.Theuser
couldlosetheauthoritytooperatethisapparatusifanunauthorized
changeormodicationismade.
Cables
Connectionstothisdevicemustbemadewithshieldedcableswith
metallicRFi/EMIconnectorhoodstomaintaincompliancewithFCC
RulesandRegulations.
Canadian notice
CAN ICES-3 (B)/NMB-3(B)
Standard Television Receiving Apparatus-Appareil de réception
télévision ordinaire, Canada, BETS-7/NTMR-7.
TomaintaincompliancewithFCCRFexposurerequirements,use
onlybelt-clips,holstersorsimilaraccessoriesthatdonotcontain
metalliccomponentsinitsassembly.Theuseofaccessoriesthatdo
notsatisfytheserequirementsmaynotcomplywithFCCRFexposure
requirementsandshouldbeavoided.
FCC Radiation Exposure Statement
ThisequipmentiscompliancewithSARforgeneralpopulation/
uncontrolledexposurelimitsinANSI/IEEEC95.1-1999andhadbeen
testedinaccordancewiththemeasurementmethodsandprocedures
speciedinOETBulletin65SupplementC.Thisequipmentshould
beinstalledandoperatedwithminimumdistance2.5cmbetweenthe
radiator&yourbody.
ThisdevicecomplieswithIndustryCanadalicense-exemptRSS
standard(s).Operationissubjecttothefollowingtwoconditions:
(1)thisdevicemaynotcauseinterferenceand(2)thisdevicemust
acceptanyinterference,includinginterferencethatmaycause
undesiredoperationofthedevice.
ThisequipmentcomplieswithFCCradiationexposurelimitsset
forthforanuncontrolledenvironmentandmeetstheFCCradio
frequency(RF)ExposureGuidelinesinSupplementCtoOET65.
ThisequipmenthasverylowlevelsofRFenergythatitdeemedto
complywithoutmaximumpermissiveexposureevaluation(MPE).
Butitisdesirablethatitshouldbeinstalledandoperatedkeepingthe
radiatoratleast20cmormoreawayfromperson’sbody(excluding
extremities:hands,wrists,feetandankles).

6
English
Copyright
Allotherregisteredandunregisteredtrademarksarethepropertyof
theirrespectiveowners.
ThetermsHDMIandHDMIHigh-Denition
MultimediaInterface,andtheHDMILogoare
trademarksorregisteredtrademarksofHDMI
LicensingLLCintheUnitedStatesandother
countries.
ForDTSpatents,seehttp://patents.dts.com.
ManufacturedunderlicensefromDTSLicensingLimited.
DTS,theSymbol,&DTSandtheSymboltogether
areregisteredtrademarks,andDTSTruSurroundisa
trademarkofDTS,Inc.©DTS,Inc.AllRightsReserved.
Dolby License Notice and Trademark Acknowledgement
ManufacturedunderlicensefromDolbyLaboratories.
Dolbyandthedouble-Dsymbolaretrademarksof
DolbyLaboratories.
ENERGYSTAR
®
isajointprogramoftheU.S.
EnvironmentalProtectionAgencyandtheU.S.
DepartmentofEnergyhelpingusallsavemoney
andprotecttheenvironmentthroughenergy
efcientproductsandpractices.
Consumer Notice:
ThisTVhasbeensettomaximizeenergyefciencywhiledelivering
thebestpossiblepictureusingthefactoryinstalledhomemode
settings.ChangingorenablingotherfeaturesinthisTV(e.g.brightened
backlighting)willpossiblyincreaseenergyconsumptionbeyondthe
originalENERGYSTAR
®
qualiedlimits.

7
English
2 Important
Positioning the TV
• LargescreenTVsareheavy.Twopeoplearerequiredtocarryand
handlealargescreenTV.
• Makesuretoholdtheupperandbottom
framesoftheunitrmlyasillustrated.
• Installtheunitinahorizontalandstable
position.
• Donotinstalltheunitindirectsunlight
orinaplacesubjecttodustorstrong
vibration.
• Dependingontheenvironment,thetemperatureofthisunitmay
increaseslightly.Thisisnotamalfunction.
• Avoidaplacewithdrastictemperaturechanges.
• Donotplaceanythingdirectlyontoporbottomoftheunit.
• Dependingonyourexternaldevices,noiseordisturbanceofthe
pictureand/orsoundmaybegeneratediftheunitisplacedtoo
closetothem.Inthiscase,pleaseensureenoughspacebetweenthe
externaldevicesandtheunit.
• DonotinserttheACpowercordintothepowersocketoutlet
beforealltheconnectionsaremade.
• EnsurethatyoualwayshaveeasyaccesstotheACpowercordor
plugtodisconnecttheTVfromthepower.
• BeforeyoumovetheTV,disconnectattachedcablestoprevent
damagetoconnectors.
• BesuretounplugtheACpowercordfromtheACoutletbefore
movingorcarryingtheunit.
Regulatory notices
Do not place the unit on the furniture that is capable of being tilted by
a child and an adult leaning, pulling, standing or climbing on it. A falling
unit can cause serious injury or even death.
This apparatus should not be placed in a built-in installation such as a
bookcase or rack unless proper ventilation is provided.
Make sure to leave a space of 4 inches (10cm) or more around this
apparatus.
Press to Turn the unit On and go into Standby mode.
To completely Turn Off the unit, you must unplug the AC power
cord. Disconnect the AC plug to shut the unit off when trouble is
found or not in use. The AC plug shall remain readily available.
Never use a gas duster on this TV.
The gas trapped inside of this unit may cause ignition and explosion.
CAUTION: Dangerofexplosionifbatteryisincorrectlyreplaced.
Replaceonlywiththesameorequivalenttype.
WARNING: Batteries(batterypackorbatteryinstalled)shallnotbe
exposedtoexcessiveheatsuchassunshine,reorthe
like.
WARNING: Topreventinjury,thisapparatusmustbesecurely
attachedtothefurniture/wallinaccordancewiththe
instructions.Tipping,shakingorrockingtheunitmay
causeinjury/death.
CAUTION: These servicing instructions are for use by qualified service personnel only. To
reduce the risk of electric shock, do not perform any servicing other than that contained in the
operating instructions unless you are qualified to do so.
Environmental care
Thepackagingofthisproductisintendedtoberecycled.
Contactyourlocalauthoritiesforinformationabouthow
torecyclethepackaging.
Forproductrecyclinginformation,pleasevisit
-www.recycle.philips.com
End of life directives
Philipspaysalotofattentiontoproduceenvironment-friendlyproducts
ingreenfocalareas.YournewTVcontainsmaterialswhichcanbe
recycledandreused.Attheendofitslife,specializedcompaniescan
dismantlethediscardedTVtoconcentratethereusablematerialsand
tominimizetheamountofmaterialstobedisposedof.Pleaseensure
youdisposeofyouroldTVaccordingtolocalregulations.
Disposal of used batteries
The batteries supplied do not contain the heavy metals mercury and
cadmium. Nevertheless, in many areas batteries may not be disposed
of with your household waste. Please ensure you dispose of batteries
according to local regulations.
Downloading an electronic copy
ToobtainamoredetailedelectroniccopyofthisUserManual:
1
Pointyourbrowsertowww.philips.com/support
2
Chooseyourcountryoflocationwithlanguage.
3
Entertheproductnameornumberinthesearcheld.Alternatively,youcanbrowsethe
catalog.
4
ClicktheDescriptionorModel.
5
UnderProductsupport,click“Usermanual”.
8
English
3 Get started
Features
• DTV / TV / CATV
Youcanuseyourremotecontroltoselectchannelswhicharebroadcastin
DigitalformatandconventionalAnalogformat.Also,cablesubscriberscan
accesstheircableTVchannels.
• Information display
Youcandisplaythetitle,contentsandotherinformationofthecurrent
programontheTVscreen.
• AutoProgram
Thisunitautomaticallyscansandmemorizeschannelsavailableinyourarea,
eliminatingdifcultsetupprocedures.
• Child lock
Thisfeatureallowsyoutoblockchildren’saccesstoinappropriateprograms.
• Closed Caption decoder
Built-inClosedCaptiondecoderdisplaystextforClosedCaptionsupported
programs.
• MTS / SAP tuner
Audiocanbeselectedfromtheremotecontrol.
• Auto Standby
IfthereisnoInputsignalandnooperationfor15minutes,theunitwillgo
intoStandbymodeautomatically.
• Sleep timer
YoucansettheunittogointoStandbymodeafteraspecicamountof
time.
• Choices for on-screen language
Selectyouron-screenlanguage:English,SpanishorFrench.
• Stereo sound function
• PLL frequency synthesized tuning
Providesfreeandeasychannelselectionandletsyoutunedirectlytoany
channelusingthenumberanddecimalpoint“•”buttonsontheremote
control.
• Various adjustment for picture and sound
Customizesimagequalitysuitableforyourroomandsetsyoursound
preference.
• EasyLink via HDMI link
EasyLinkallowsyourotherHDMIlinkdevicestobecontrolledbytheHDMI
cableconnectedtoyourTV.
• HDMI Input
• HDMI-DVI Input
IfyourvideodevicehasDVIOutputjack,useanHDMI-DVIconversion
cabletoconnecttheunit.
• Component Video Input
• PC Input
• AV Input
• USB terminal
Thepicture(JPEG),music(MP3)andvideolesstoredonaUSBMemory
Stickcanbeplayedbackonthisunit.
• Digital Audio Output
• Headphone Audio Output
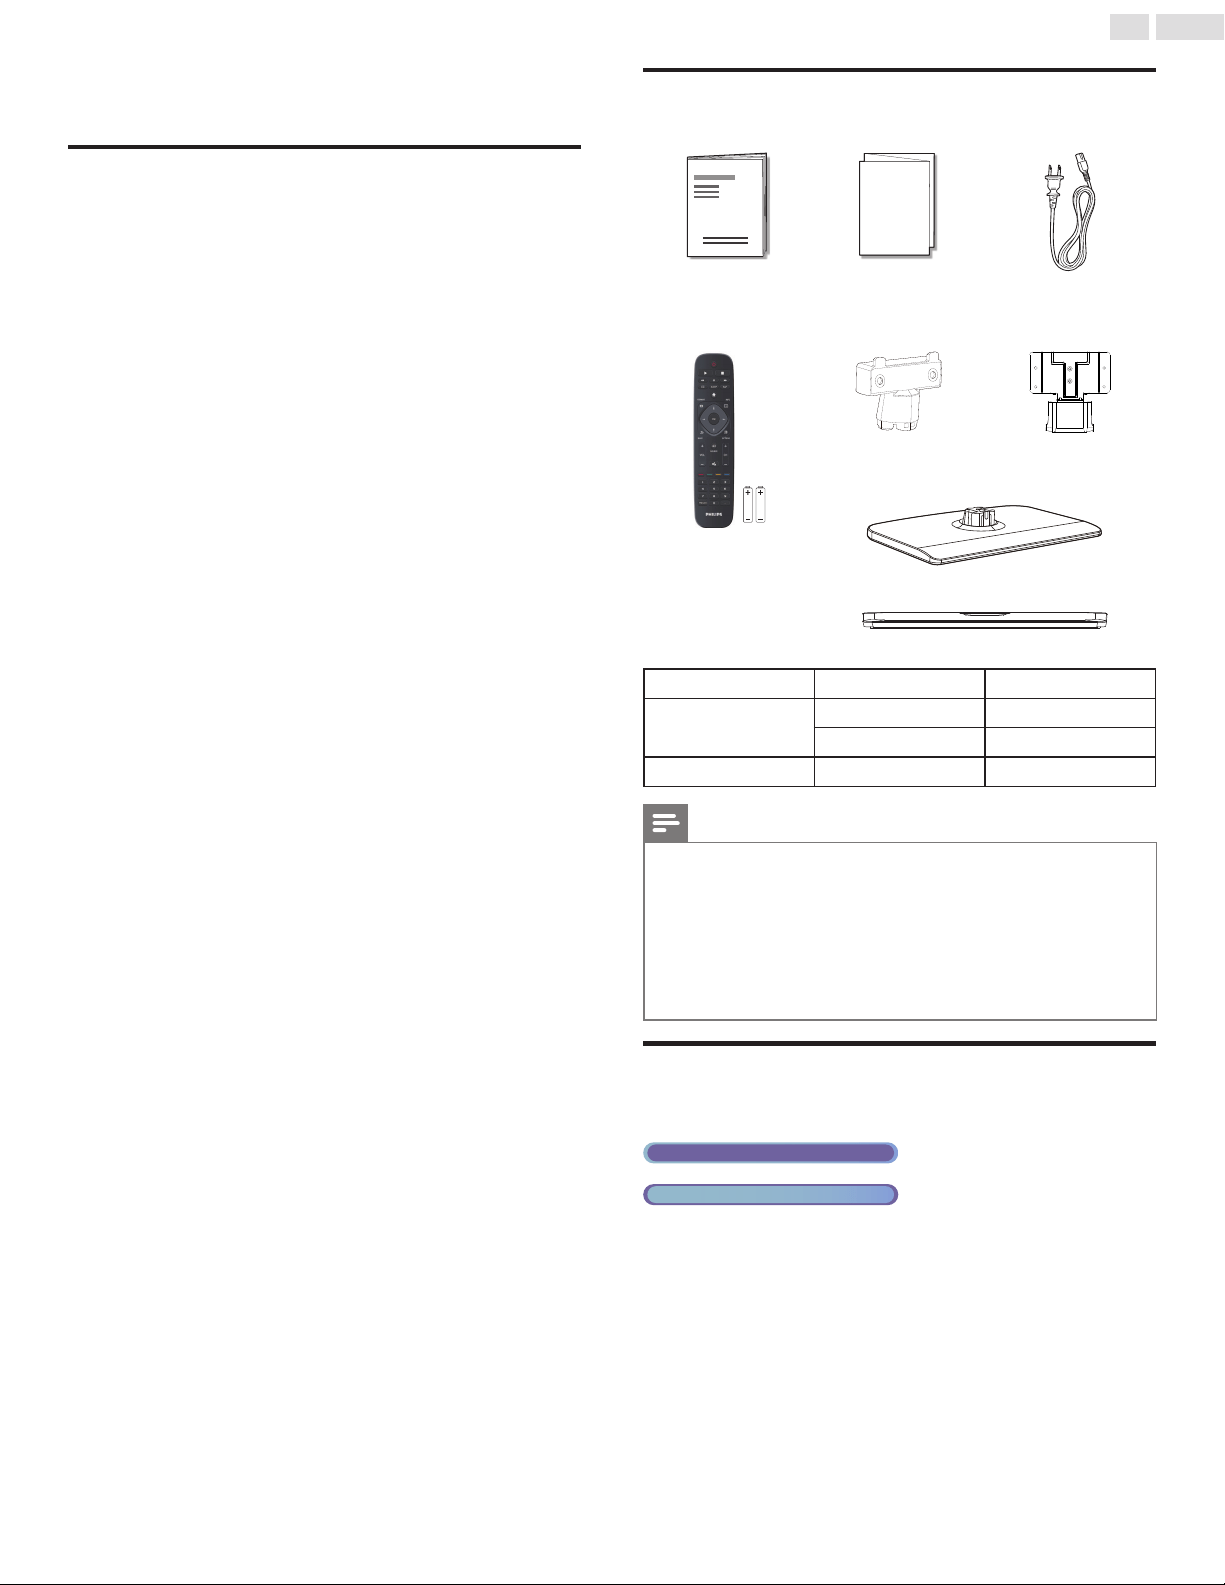
Supplied accessories
User Manual Quick Start guide AC power cord
Quick
Start
Remote Control and
batteries
(AAA, 1.5V x 2)
Neck
(23PFL4509/F7)
Neck
(32PFL4709/F7)
AAA
AAA
TV base and screws
23PFL4509/F7
32PFL4709/F7
Screws packed with this unit:
Model Quantity Size
23PFL4509/F7
2 Q4x25
1 Q4x16
32PFL4709/F7 9 M4x12
Note
• Ifyoulosethescrews,pleasepurchasetheabove-mentionedPhillipsheadscrewsat
yourlocalstore.
• Ifyouneedtoreplacetheseaccessories,pleaserefertothepartnameorNo.withthe
illustrationsandcallourtollfreecustomersupportlinefoundonthecoverofthisUser
Manual.
When using a universal remote control to operate this unit.
• Makesurethecomponentcodeonyouruniversalremotecontrolissettoourbrand.
Refertotheinstructionbookaccompanyingyourremotecontrolformoredetails.
• Wedonotguarantee100%interoperabilitywithalluniversalremotecontrols.
Symbols used in this User Manual
ThefollowingisthedescriptionforthesymbolsusedinthisUser
Manual.Descriptionrefersto:
Digital TV operation
Analog/Cable TV operation
• Ifneithersymbolappears,theoperationisapplicabletoboth.
9
English
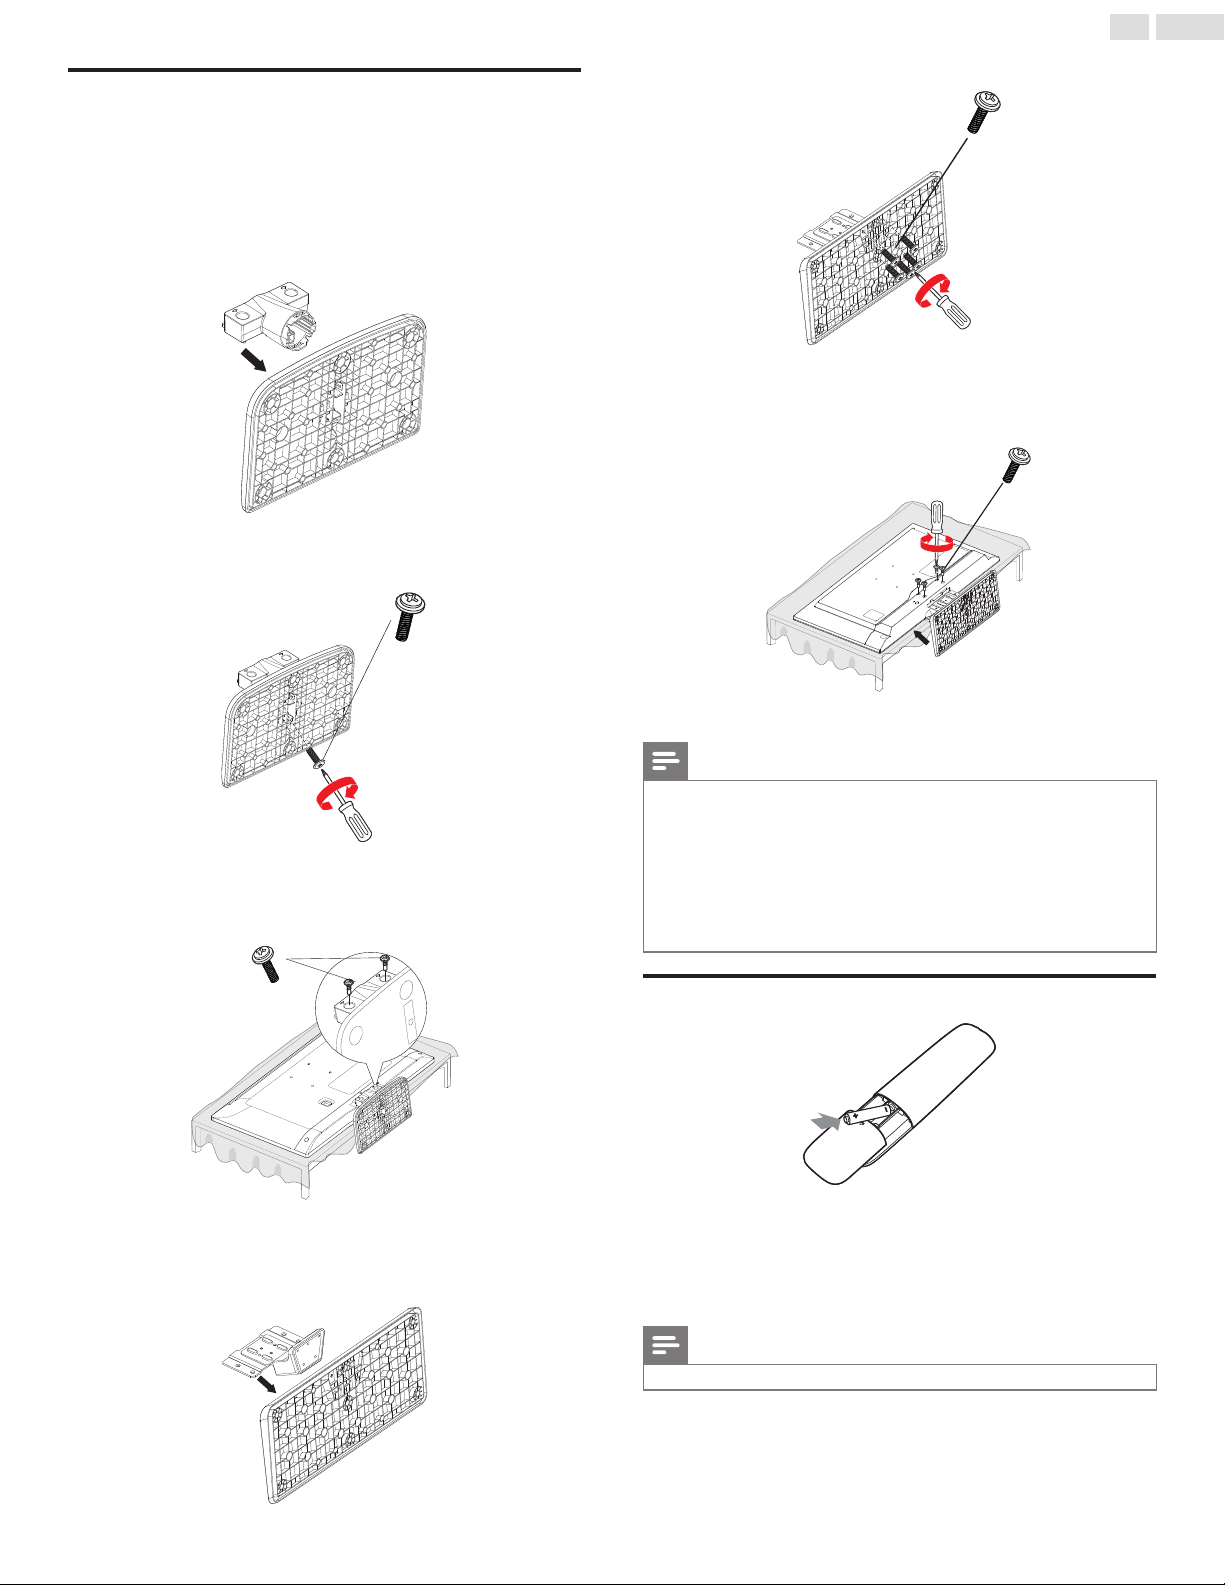
Attaching the base
Youmustattachthebasetotheunittohaveitasatabletopunit.
Besurethefrontandrearofthebasematchtheproperdirection.
ForlargescreenTVs,atleast2peoplearerequiredforthesesteps.
23PFL4509/F7
1
2
Q4-16mm
3
Q4-25mm
32PFL4709/F7
1
2
M4-12mm
3
M4-12mm
Note
• Makesuretouseatablewhichcansupporttheweightofthisunitandislargerthanthis
unit.
• Makesurethetableisinastablelocation.
• Whenattachingthebase,ensurethatallscrewsaretightlyfastened.Ifthebaseisnot
properlyattached,itcouldcausetheunittofall,resultingininjuriesaswellasdamageto
theunit.
• Toremovethebasefromthisunit,unscrewthePhillipsheadscrewsinstep2.
Becarefulnottodropthebasewhenyouremoveit.
Installing the remote control batteries
1
Slidethebatterycoveroffthebackoftheremotecontrol.
2
Insertthe2suppliedbatteries(AAA,1.5V).Besurethe+and−
endsofthebatterieslineupwiththemarkingsinsidethecase.
3
Slidethecoverbackintoposition.
Note
• Removethebatteriesifnotusingtheremotecontrolforanextendedperiodoftime.
10
English
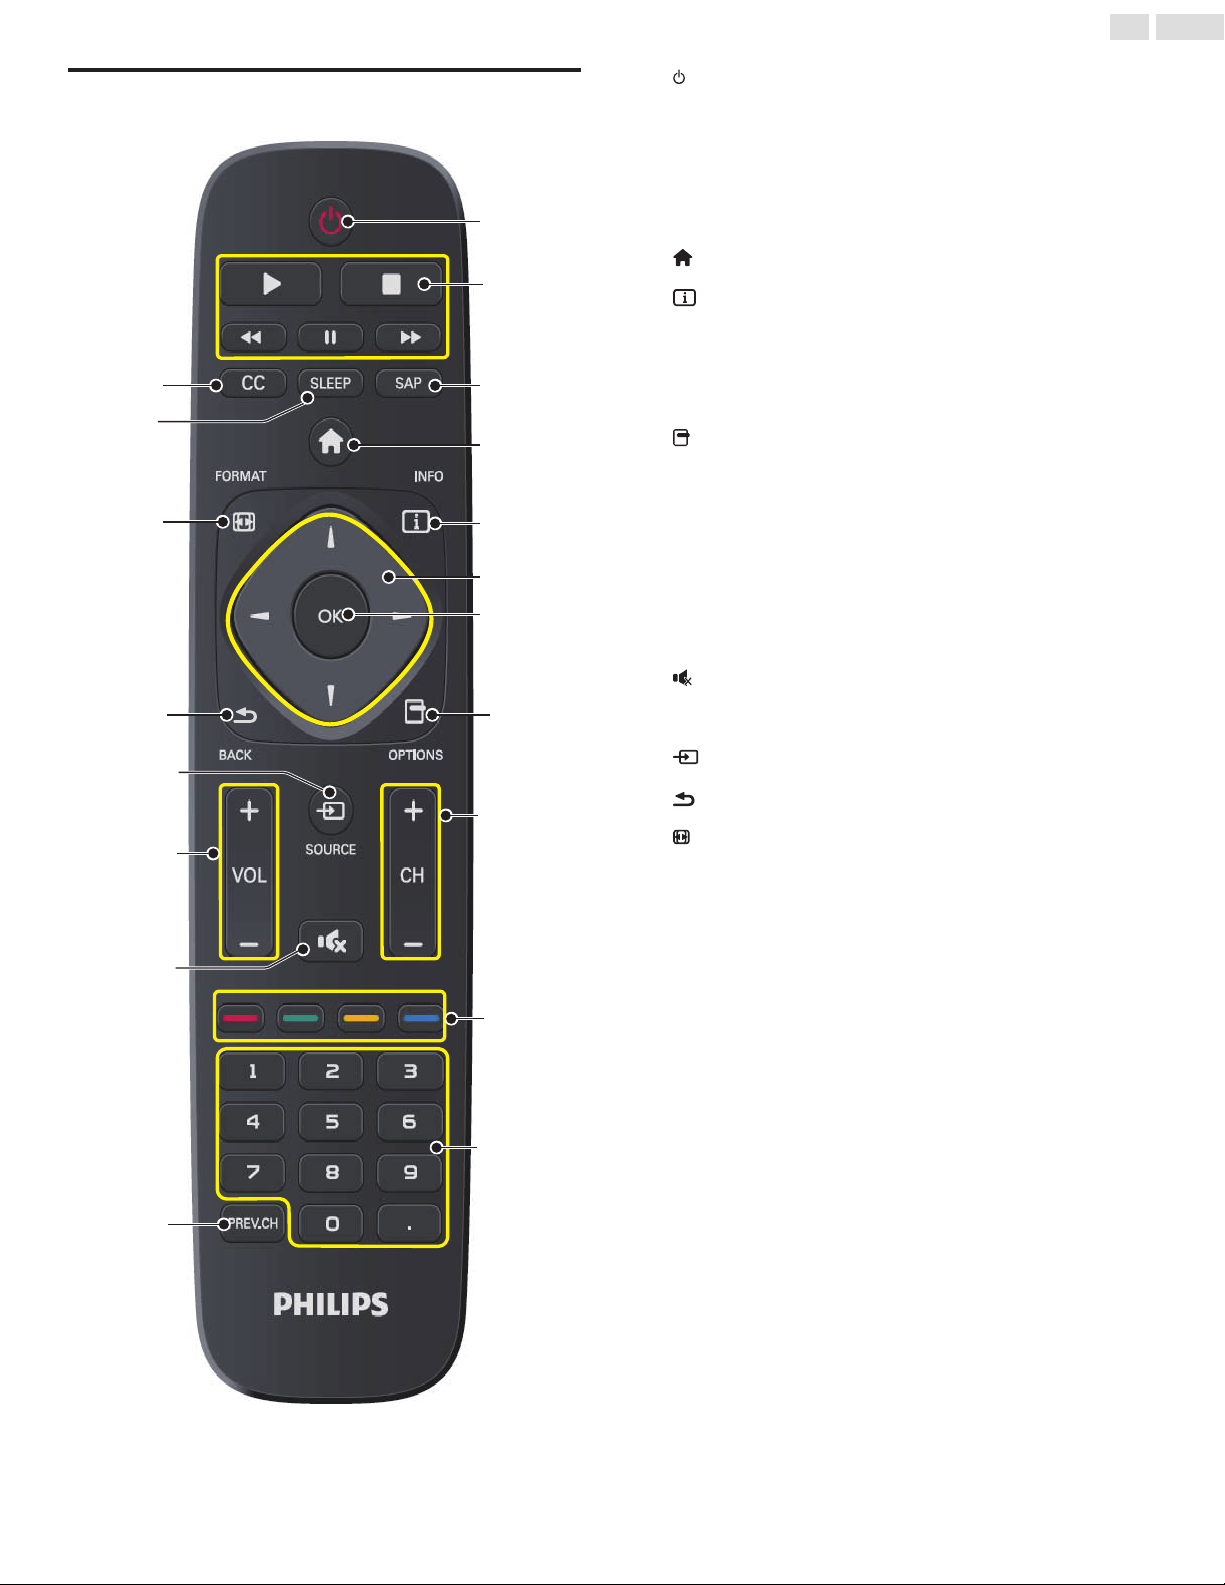
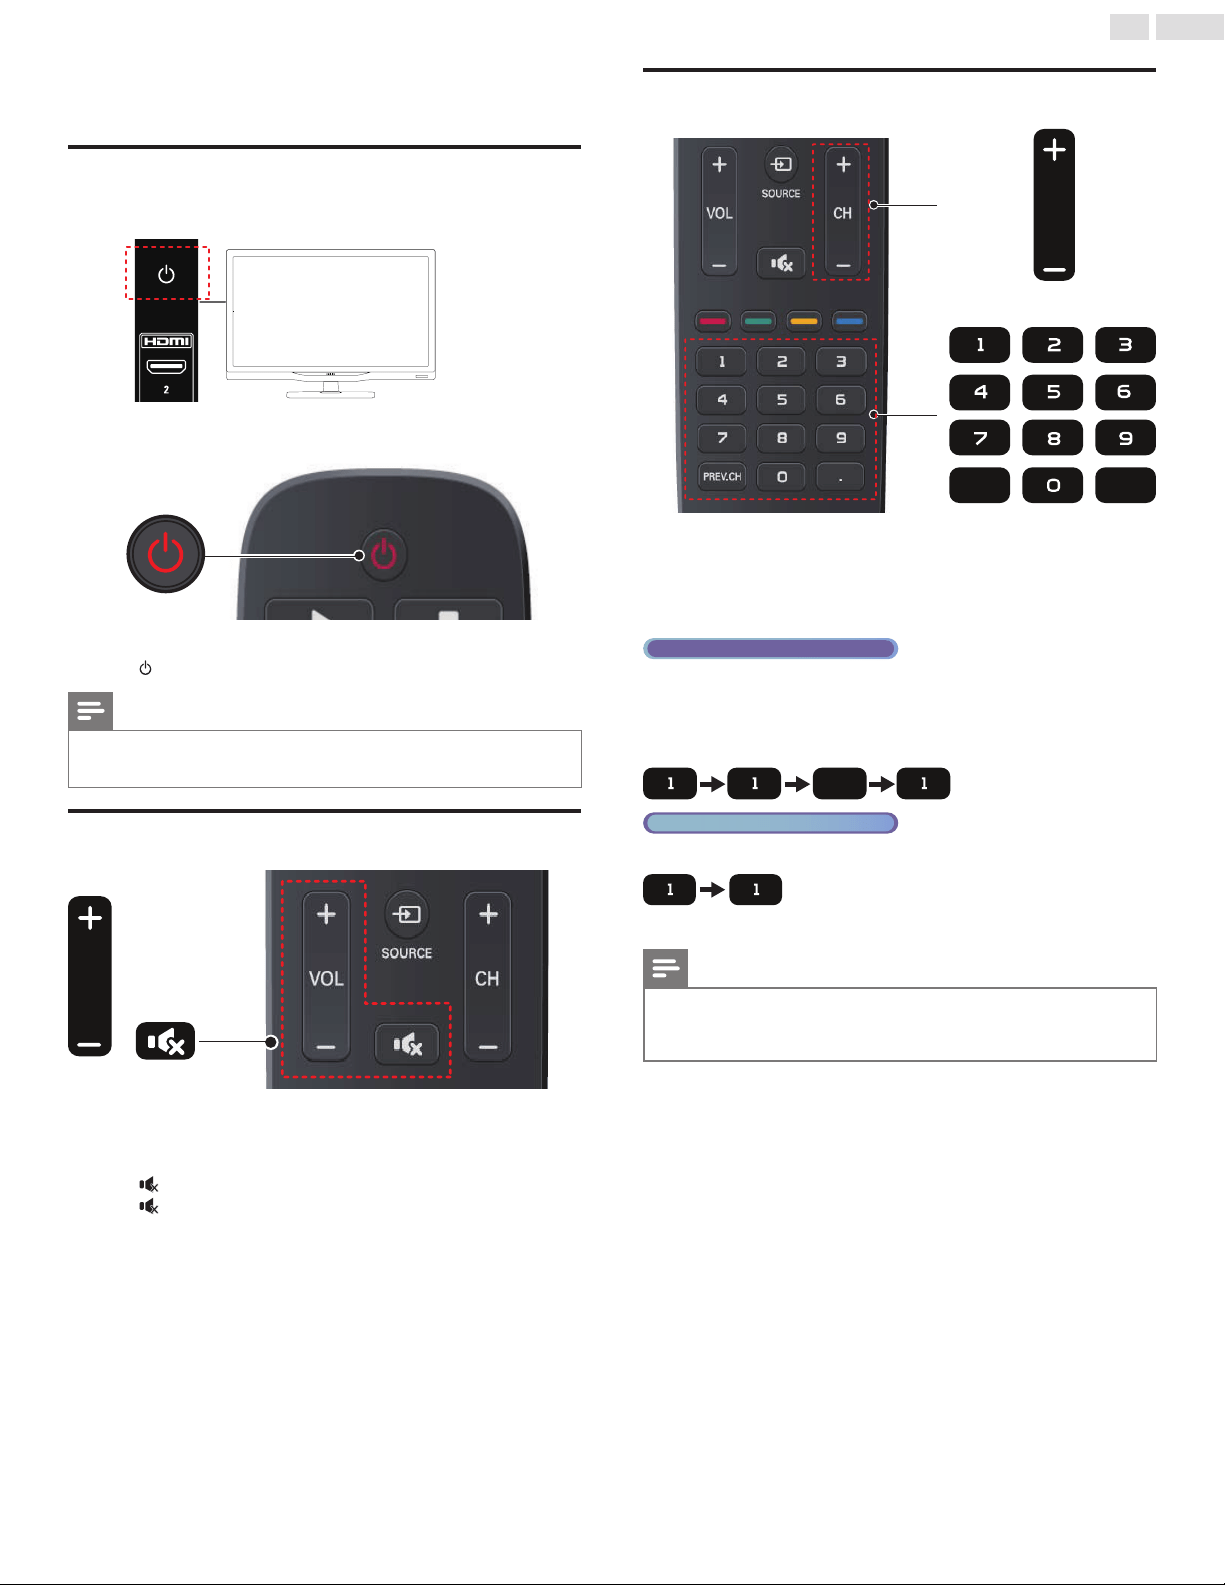
Remote control function
b
a
c
d
f
e
g
k
q
o
l
m
n
p
i
h
j
s
r
①
(POWER-ON / STANDBY-ON)
PresstoturntheunitOnandgointoStandbymode.
TocompletelyturnOfftheunit,youmustunplugtheACpower
cord.
②
Playback control buttons
Controltheplaybackofpictures,music,videos,andDVDplayers
whenuserisviewingcontentfromconnectedHDMI-CECdevices.
③ SAP
SecondaryAudioProgrammingletsyouchangeaudiolanguage.
④
(MENU
button)
Accesstomenu.
⑤
INFO
DisplaysinformationabouttheTVchanneloraccessorydevice.
⑥
◄►▲▼- (NAVIGATION buttons)
Presstomoveleft/right/up/downthroughtheitems.
⑦
OK
PresstodecidethecommandofsettingwhentheHomemenuis
displayed.
⑧
OPTIONS
Displaysalistofmenuitemsapplicabletoconnectedexternal
device.
⑨
CH+/−
Presstoselectchannels.
⑩
Color buttons
Selecttasksoroptionsifindicated.
⑪
0−9(NUMBERbuttons)
Presstoselectchannels.
• (DOT)Presstoshiftthesubchannelfromthemainchannel.
⑫
PREV.CH
Presstoreturntothepreviouslyviewedchannel.
⑬
(MUTE)
PresstoturnthesoundOnandOff.
⑭ VOL
+/−(VOLUME)
Presstoadjustthevolume.
⑮
SOURCE
Togglestoselectconnecteddevices.
⑯
BACK
Presstoreturntothepreviouslyviewedchannel.
⑰
FORMAT
Selectsapictureformat.
⑱
SLEEP
Presstoactivatethesleeptimer.
⑲
CC
PresstoturnClosedControltoCCOn,CCOff,orCCw/mute.
11
English
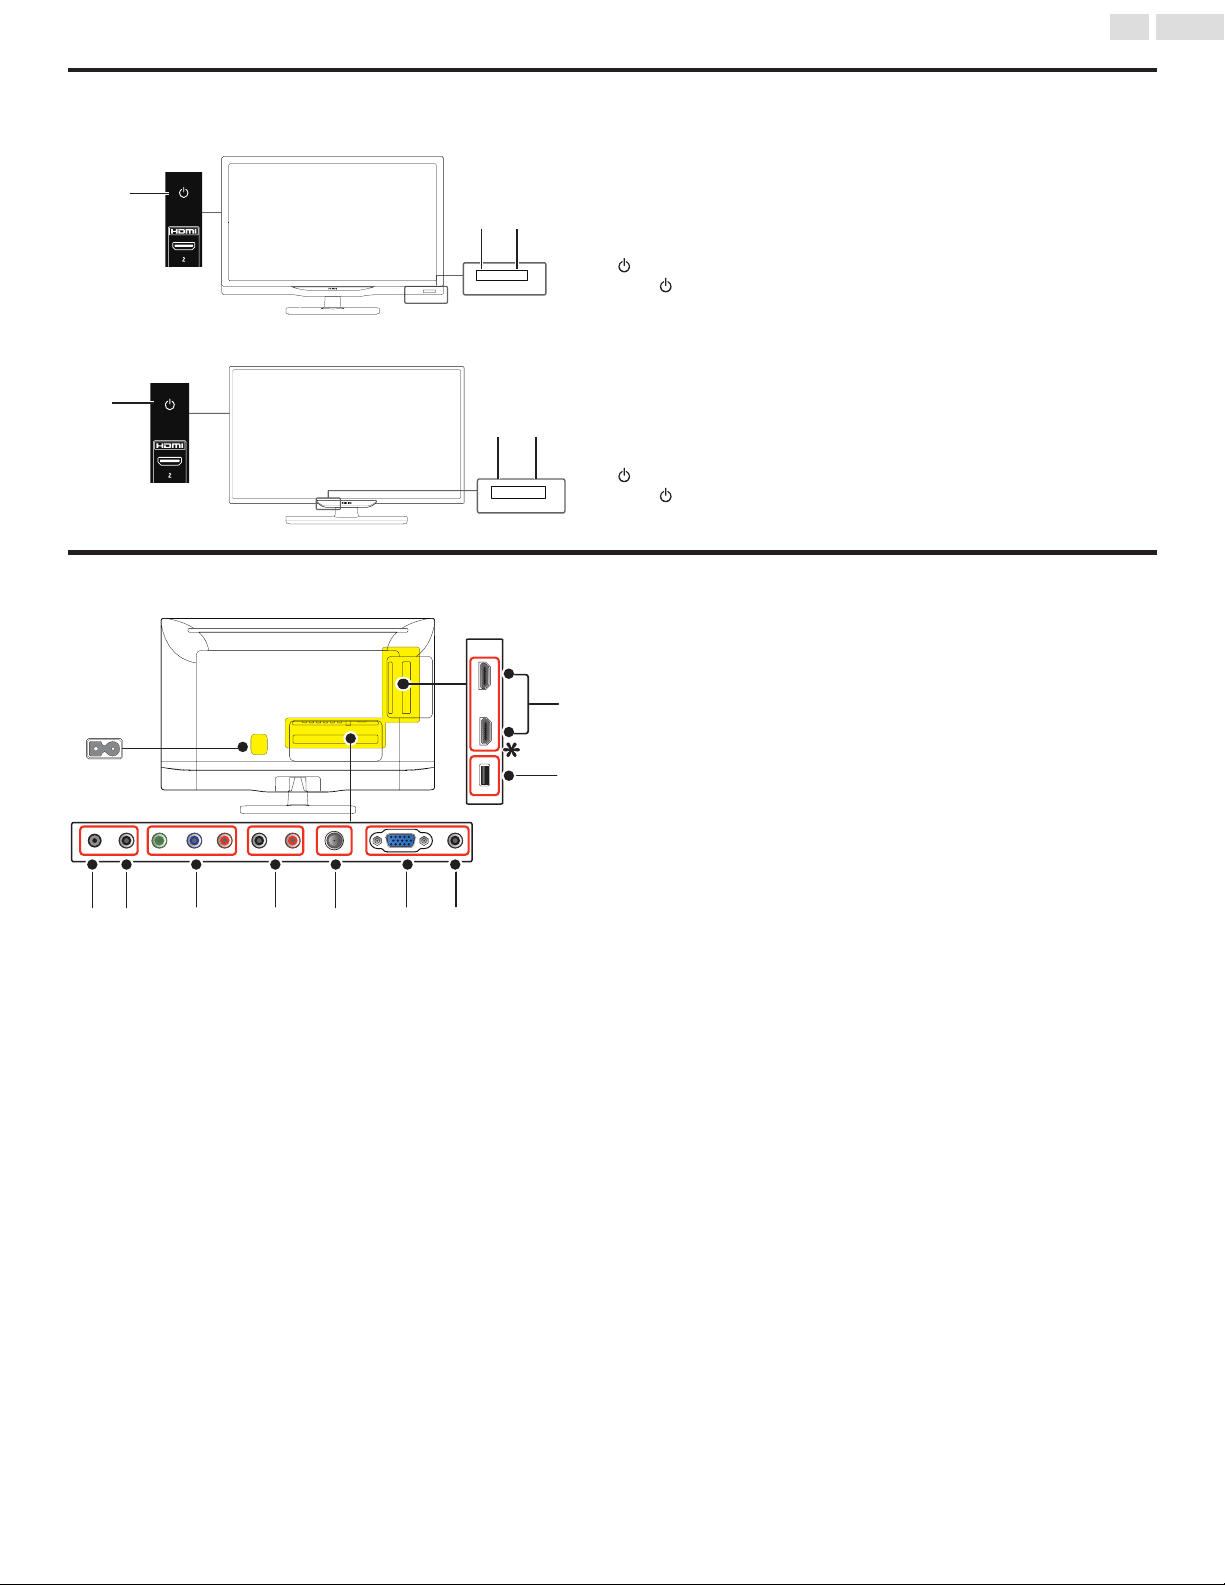
Control panel
23PFL4509/F7
a
b
c
①
Power On indicator
LightsupwhitewhentheunitisturnedOnandasheswhiletheunitis
turningOn.
②
Infrared sensor
ReceivesIRsignalsfromremotecontrol.
③
(POWER/STANDBY)
Press toturntheunitOnandgointoStandbymode.
TocompletelyTurnOfftheunit,youmustunplugtheACpowercord.
32PFL4709/F7
a
b
c
①
Power On indicator
LightsupwhitewhentheunitisturnedOnandasheswhiletheunitis
turningOn.
②
Infrared sensor
ReceivesIRsignalsfromremotecontrol.
③
(POWER/STANDBY)
Press toturntheunitOnandgointoStandbymode.
TocompletelyTurnOfftheunit,youmustunplugtheACpowercord.
Terminals
ཱཱུུ ཱིི ྲྀ
ཷ
ླྀ
①
Headphone Audio Output jack
Headphone3.5mmstereojackforpersonallistening.
②
Digital Audio coaxial cable
Digitalaudiooutputtohometheatersandotherdigitalaudiosystems.
③
Component/Composite Video Input jacks
④
Component/Composite shared Audio Input jacks
Component/Compositeanalogaudio(L/R)jackssignal.
⑤
75 ohm Cable / Antenna connection
SignalInputfromanantenna,cableorsatellite.
⑥
VGA cable connection for PC
⑦
PC Audio Input jack
PCanalogaudiojacksignalwithstereomini3.5mmplugaudiocableonPC.
⑧
HDMI Input jacks
DigitalaudioandvideoInputfromhighdenitiondigitaldevicessuchas
Blu-raydiscplayers,cableboxesandsatelliteset-topboxes.
*
ForHDMI1only
InadditiontonormalHDMIandHDMI-DVIfunctionality,itoutputsTV
AudiotoanHDMI-ARC-compliantdevice,suchasahometheatersystem.
⑨
USB terminal
DatainputfromUSBMemoryStickonly.
Donotconnectanydevicetothisterminalsuchas;digitalcamera,
keyboard,mouse,etc.
12
English
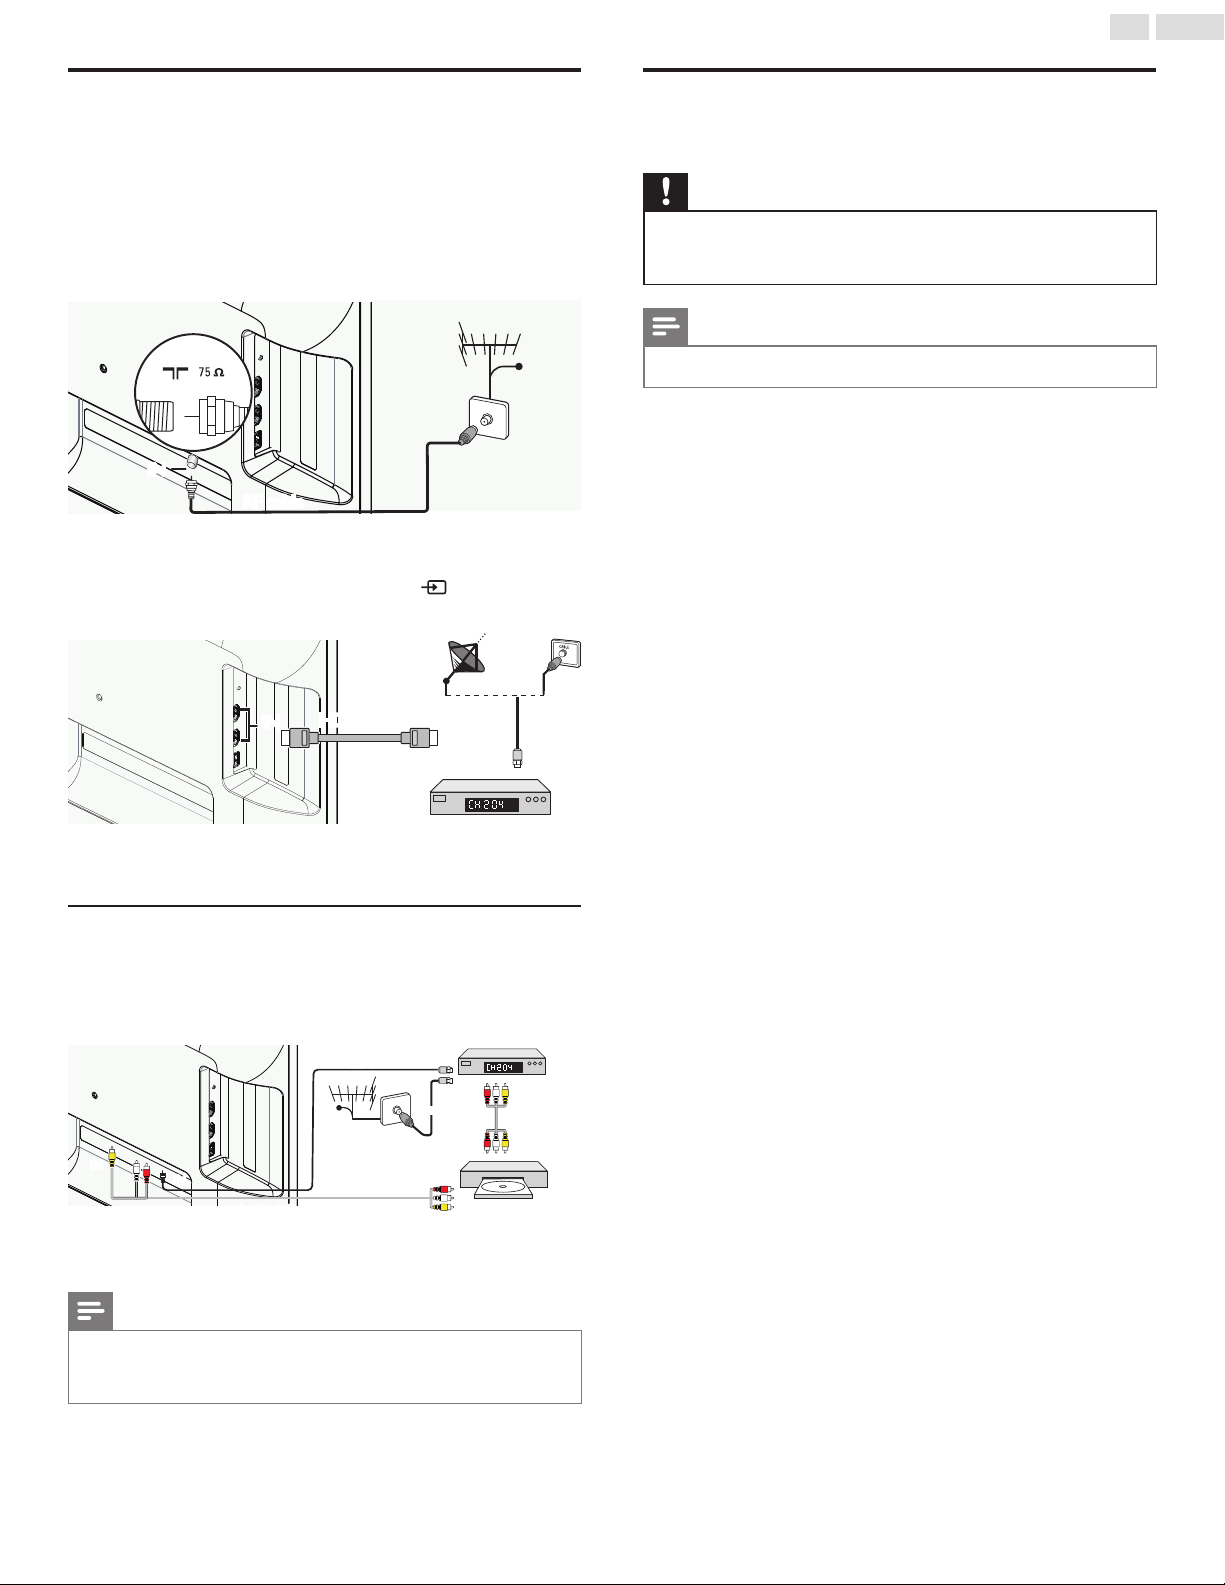
Connecting the antenna or unencrypted
cable
Besureyourantennaorotherdeviceisconnectedproperlybefore
pluggingintheACpowercord.
If you connect to an antenna through RF cable
AnyDTVprogramsthatarebroadcastedinyourareacanbereceived
forfreethroughanantennaconnection.
IN
RF cable
OUT
cable
If you connect a set-top box through HDMI
IftheTVisconnectedtoacableboxorsatelliteset-topboxviaHDMI,
makesureyouselectthecorrectSourcebyusing
SOURCE.
set-top box
HDMI cable
RF cable
IN
OUT
IN
Connecting a set-top box, Blu-ray / DVD recorder via
composite connectors and Analog Audio
Donotplaceyourrecordertooclosetothescreenbecausesome
recorderscanbesusceptibletosignals.
OUT
ININ
IN
IN
OUT
OUT
OUT
IN
OUT
OUT
ININ
RF cable
RF cable
cable
set-top box
Blu-ray/DVD recorder
Audio L/R + video cable
Audio L/R +
video cable
Note
• Onlytheleftloudspeakerreproducessoundformonoequipment.Useamonoto
stereoadapter(notsupplied)forsoundreproductionviaallinternalloudspeakers.
• Ifthereisnoinputsignalandnooperationfor15minutes,theunitwillgointostandby
modeautomatically.
Plugging in the AC power cord
MakesurethattheACpowercordmustbepluggedtoanACoutlet
afterallthenecessaryconnectionsaremade.
Caution
• DonotconnecttheACpowercordtoapowersupplyoutsidetheindicatedvoltageof
thisunit(AC120V).
• ConnectingtheACpowercordtoapowersupplyoutsideofthisrangemayresultin
reorelectricalshocks.
Note
• EachtimeyouplugintheACpowercord,nooperationswillbeperformedforafew
seconds.Thisisnotamalfunction.
RF cable
13
English
These operations are accessible by remote control.
Initial setup
Thissectionwillguideyouthroughtheunit’sinitialsettingwhichincludes
selectingalanguageforyouron-screenmenu,country,locationand
AutoProgram,whichautomaticallyscansandmemorizesviewable
channels.Youcanalsosetthenetworkconnectioninthissetting.
Before you begin:
Makesuretheunitisconnectedtoantennaorcable.
1
Aftermakingallthenecessaryconnections,press toturnOnthe
unit.
• ItmaytakeafewmomentstoturnOntheunitforthersttime.
• Initialsetupmenuappearsautomaticallyaftertheunitisturned
On.
2
Use▲▼toselecttheon-screenlanguage
ontherightsideofthe
TVscreen,thenpressOK.
Setup Wizard (1/6)
Please select language
Cancel
English
Français
Español
Select
OK
OK
Fi
E
n
gl
is
h
3
Use▲▼toselecttheon-screenlocationontherightsideofthe
TVscreen,thenpressOK.
• YoumustsetHomeinlocationsetting.Otherwise,Pictureand
Soundsettingsyouadjustedwillnotbememorizedaftertheunit
goesintoStandbymode.
Setup Wizard (2/6)
Please select Home/Retail
Home
Retail
Rt
il
H
om
e
Home mode default settings are recommended for
in-house use. ENERGY STAR® qualified.
Retail mode is intended for in-store display and resets
video settings at Power On.
Select
OK
OK
Previous
Cancel
4
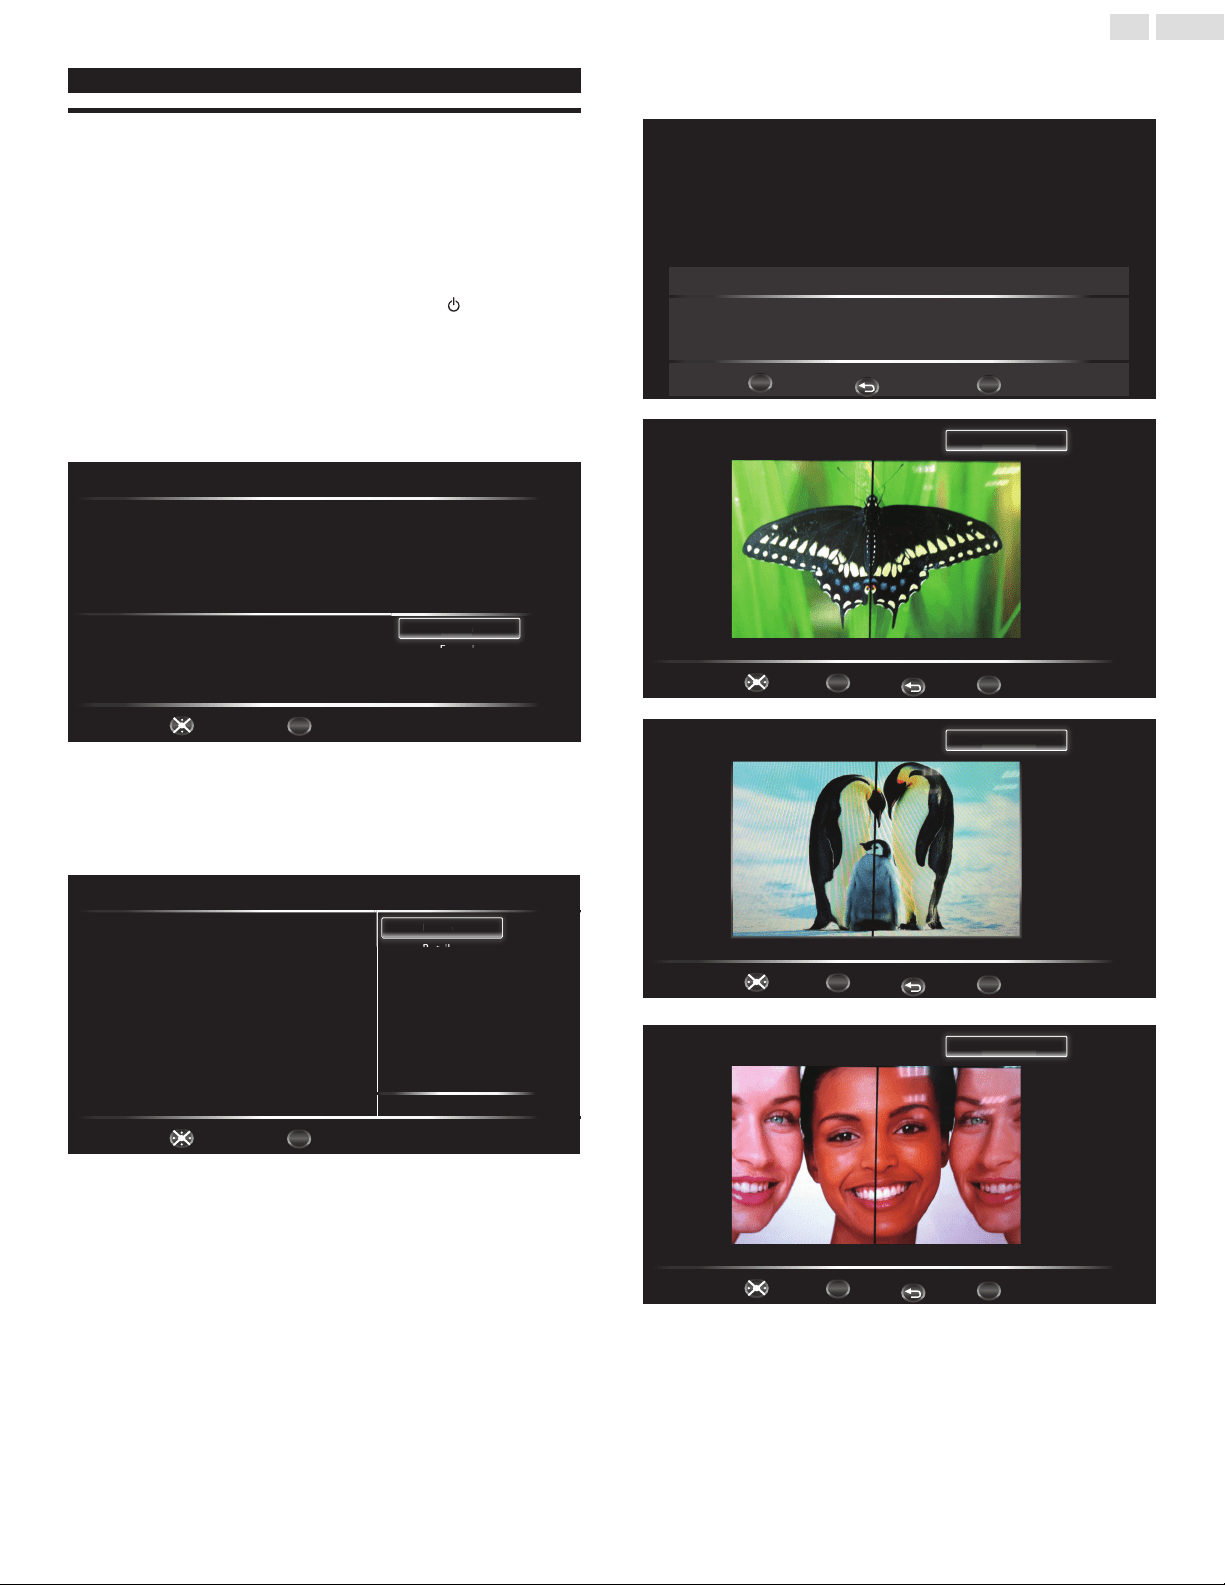
PressOKtobeginSettings assistant,thenfollowtheon-screen
instructions.
Settings assistant
Exit
OK
OK
Settings assistant helps you customize picture settings. Yo u will see a
series of test pictures where the right side and left side differ. Select
the side that is most pleasing to you with the Left/ right keys.
MENU
BACK
Back
OK
OK
1/3 Select the picture setting that you prefer.
Exit
MENU
Left side Right side
R
i
gh
t si
d
e
BACK
Back
Select
OK
OK
2/3 Select the picture setting that you prefer.
Exit
MENU
Left side Right side
R
i
gh
t si
d
e
BACK
Back
Select
OK
OK
3/3 Select the picture setting that you prefer.
Exit
MENU
Left side Right side
R
i
gh
t si
d
e
BACK
Back
Select
14
English
OK
Store
Settings assistant
Yo u have set up your viewing preferences.
Exit
MENU
BACK
Back
5
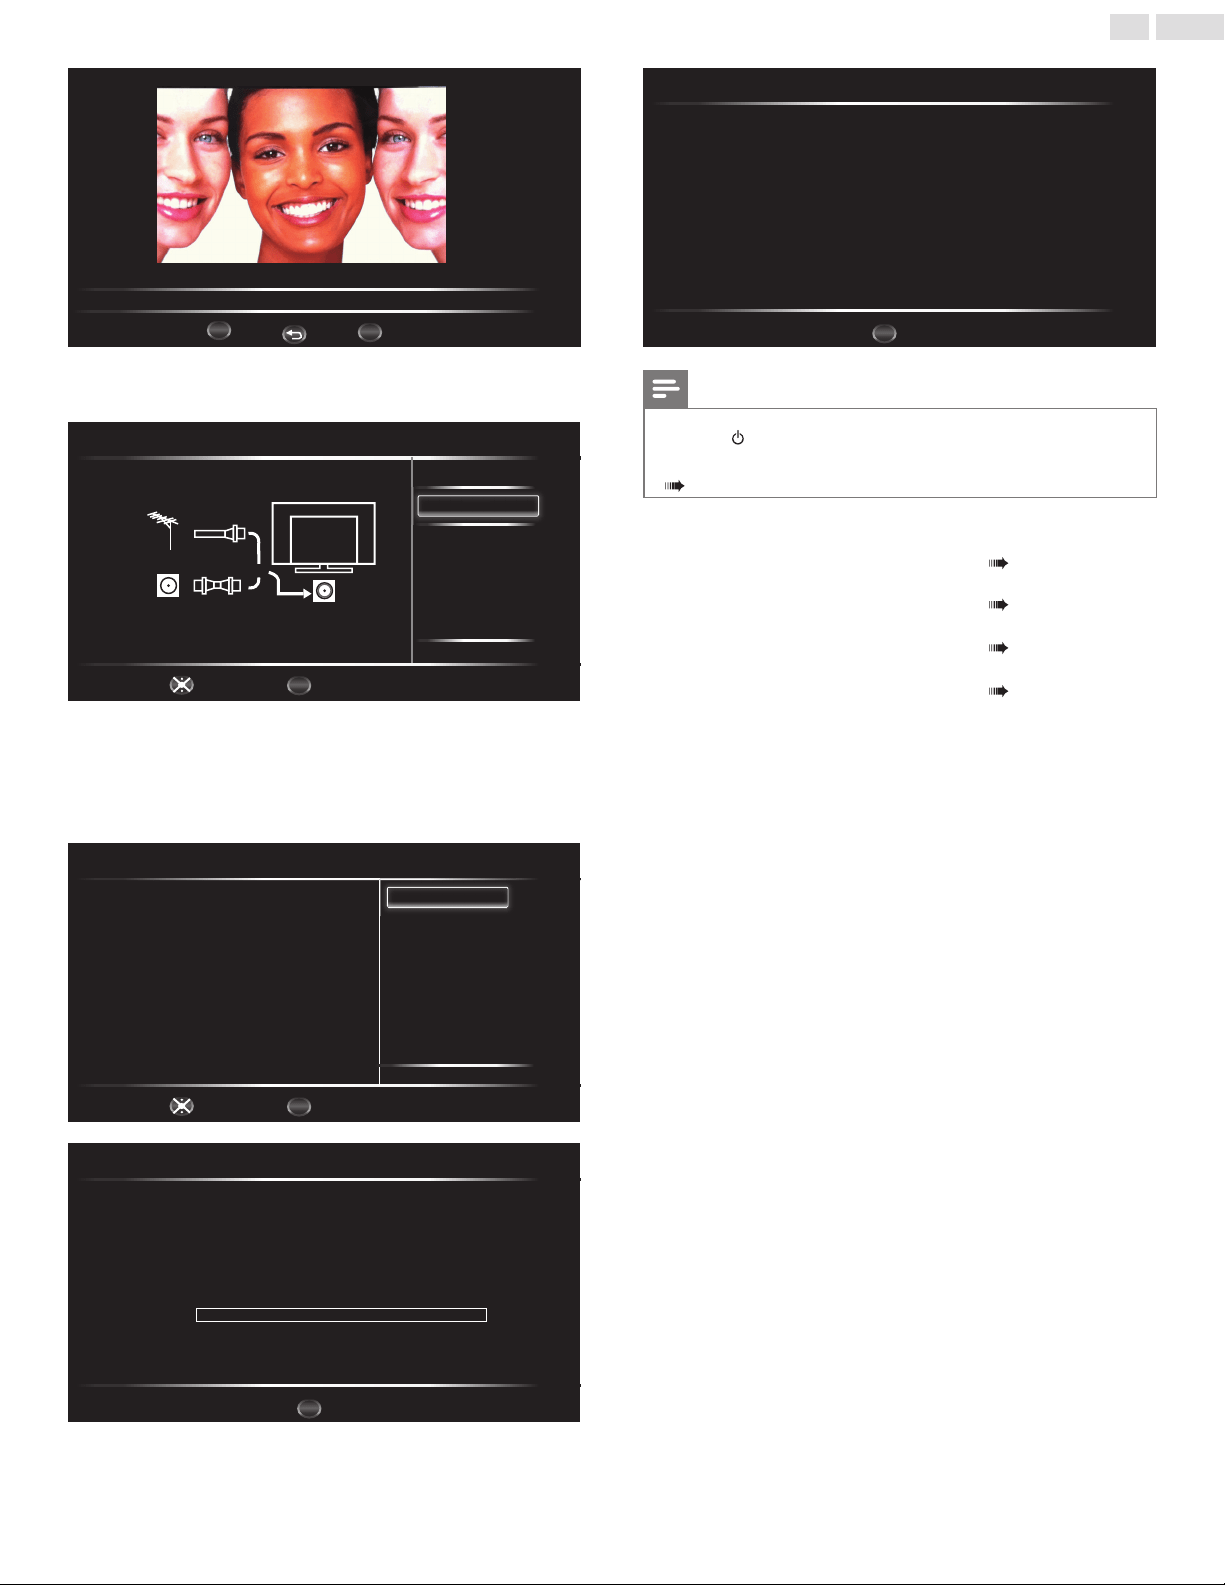
Use▲▼toselectAntennaforTVchannelsorCableforCATV
channels,thenpressOK.
Setup Wizard (3/6)
Please select TV RF tuning band
Antenna
Other source
Cable
Previous
Cancel
Select
OK
OK
C
able
– WhenAntennaisselected,theTVdetectsantennasignals.Itsearches
forDTVandAnalogTVchannelsavailableinyourarea.
– WhenCableisselected,theTVdetectssignalssuppliedbycable.It
searchesforDTV,AnalogTVandCablechannelsavailableinyour
area.
• Autoprogramwillbegin.
Setup Wizard (4/6)
Please check that the RF cable is connected properly.
Scan time may take over 20 minutes.
Select
OK
OK
START
Previous
Cancel
Setup Wizard (5/6)
Searching. Please wait
Searching CH
Digital Channels Found
Analog Channels Found
Channel 1
0
0
0%
Exit
MENU
Setup Wizard (6/6)
Congratulations. TV Setup is done.
Exit
MENU
Note
• Ifyouarenotreceivingasignalfromyourcableservice,contacttheCableprovider.
• Ifyoupress duringAutoProgram,thissetupofTVchannelswillbecanceled.
• TheinitialAutoProgramfunctioncanbeexecutedforeitherAntennaorCableonly
once.Whenyouchangetheconnection(Antenna/Cable),setAutoprogramagain.
p. 21
After an initial setup is completed...
• Ifyouwanttoscanthechannelsautomaticallyagain.
Autoprogram p. 21
• Ifyouwanttochangetoanotherlanguage.
Language p. 22
• Ifyouwanttochangethelocationsetting.
Location p. 26
• Ifyouwanttorestorethepicturesetting.
Settings assistant p. 18
15
English
4 Use your TV
Switching on your TV and putting it in
Standby mode
To Turn Power On or to Turn Standby On
• Press onthepanelortheremotecontrol.
Note
• Energyconsumptioncontributestoairandwaterpollution.WhentheACpower
cordispluggedin,yourTVconsumesenergy.YourTVhasverylowStandbypower
consumption.
Adjusting volume
VOL
To increase or decrease volume
• Press VOL+/VOL−ontheremotecontrol.
To mute or unmute sound
• Press
(MUTE) ontheremotecontroltomutethesound.
• Press
(MUTE)againorVOL+/VOL−torecovertheoriginal
sound.
Switching channels
PREV.CH
.
CH
ToselectChannelsbyusingCH+/CH−
• PressCH + (up)/CH−(down)ontheremotecontrol.
To select Channels by using the NUMBER buttons
Digital TV operation
• ForDigitalchannels,pressanumberfollowedbyadot“•”andthe
correspondingsubchannelnumber.
–WhenselectingDigitalchannel11.1
Besuretopress•beforeenteringthesubchannelnumber.
.
Analog/Cable TV operation
–WhenselectingcableorAnalogchannel11
PressPREV.CHtoreturntothepreviouslyviewedchannel.
Note
• Toselectthenon-memorizedchannels,usetheNUMBER buttons.
• Channel not available orNo Signal willappearontheTVscreenafterthesubchannel
broadcastisover.
• Audio onlymessagewillappearontheTVscreen,whenyoureceiveonlysoundsignal.

16
English
Watching channels from an external device
Switchingeachinputmodecaneasilyswitchwiththeremotecontrol
betweenTV(DTVorAnalogTV)andexternaldeviceswhentheyare
connectedtotheunit.
1
TurnOnaset-topboxortheconnecteddevice.
• Thepicturefromyourset-topboxortheconnecteddevice
mightappearautomaticallyontheTVscreen.
If the picture does not appear
2
Press
SOURCE
repeatedlytoselecttheset-topboxorthe
connecteddevice,thenpressOKtoenter.
• Pressing▲▼toselecttheInputmodes.
TV
AV
Component
HDMI 1
HDMI 2
VGA
USB
Access the Home menu
Press (MENU)toopenHomemenu.
Sleep timer
SleeptimercansettheunittogointoStandbymodeafteran
incrementalperiodoftime.
PressSLEEP repeatedlytochangetheamountoftime(increases
thetimeupto240minutes).
• PressSLEEP oncetocallupthedisplayforcheckingthe
remainingtime.
• Tocancelsleeptimer,pressSLEEPuntilOff isdisplayed.
Changing picture format
DisplaymodescanbeselectedwhenyourTVreceivesa16:9or4:3
videosignal.
ThreetypesofdisplaymodescanbeselectedforaPCInputsignal.
Press
FORMAT repeatedlytoswitchtheTVaspectratio.

17
English
For 16:9 video signal
Auto
Cinema Normal
Zoom
Wide
Normal Displaysa16:9pictureatitsoriginalsize
Zoom
Removestheblackbarsonthesideof4:3TVbroadcasts.Thisactionwill
causeminimaldistortiononthescreen.
Wide Displaysa16:9picturethatisstretchedhorizontallyandvertically.
Cinema Scales4:3pictureformatto16:9.
Auto
OtherthanDTVandHDMIconnecteddevices,enlargesthepicturetobest
tthescreen.DTVandHDMIconnecteddevicesdisplaythepictureatits
originalsize.Thesubtitlesmayremainvisible.
For 4:3 video signal
Auto Cinema
Wide
Zoom Normal
Normal Displaysa4:3pictureatitsoriginalsize
Zoom
Removestheblackbarsonthesideof4:3TVbroadcasts.Thisaction
willcauseminimaldistortiononthescreen.
Wide Displaysa4:3picturethatisstretchedhorizontallyandvertically.
Cinema Scales4:3pictureformatto16:9.
Auto
OtherthanDTVandHDMIconnecteddevices,enlargesthepicture
tobesttthescreen.DTVandHDMIconnecteddevicesdisplaythe
pictureatitsoriginalsize.Thesubtitlesmayremainvisible.
For PC Input signal
• ThisunitcanalsobeconnectedtoyourPCthathasaDVIterminal.UseanHDMI-DVI
conversioncableforthisVideoconnectionanditrequiresStereomini3.5mmplugAudio
cableforAnalogAudiosignalaswell.
• Referto16:9videosignalonthispageifPChasHDMIOutput.
TV screen information
Youcandisplaythecurrentlyselectedchannelorotherinformationsuch
astheaspectratioontheTVscreen.
IntheDigitalmode,thedetailedbroadcastinginformationforthe
currentoff-the-airchannelsuchasprogramtitleandprogramguidesare
displayed.
1
Press INFO.
④
⑤
⑥
①
Sesame Street
Rating information:
TV-Y
English 1/3
1080i
KQED-HD
9.1
16:9
HD
Rating CC
③
②
①
programtitle(forDTVonly)
②
childlockrating
Child lock p. 23
③
channelnumber/Inputmode
Switching channels p. 15
Watching channels from an external device p. 16
④
audiolanguage(DTV)/audiomode(AnalogTV)
Sound p. 20
⑤
program’simageaspectratio
Changing picture format p. 16
⑥
CC(notavailableifClosedCaptionissettoOff)
Caption settings p. 25
2
Press INFO tohidetheinformation.
Note
• Whiletheprogramguideisdisplayed,theClosedCaptionfunctionisinterrupted.
• Theinformationdisplaywillautomaticallydisappearin5seconds.
18
English
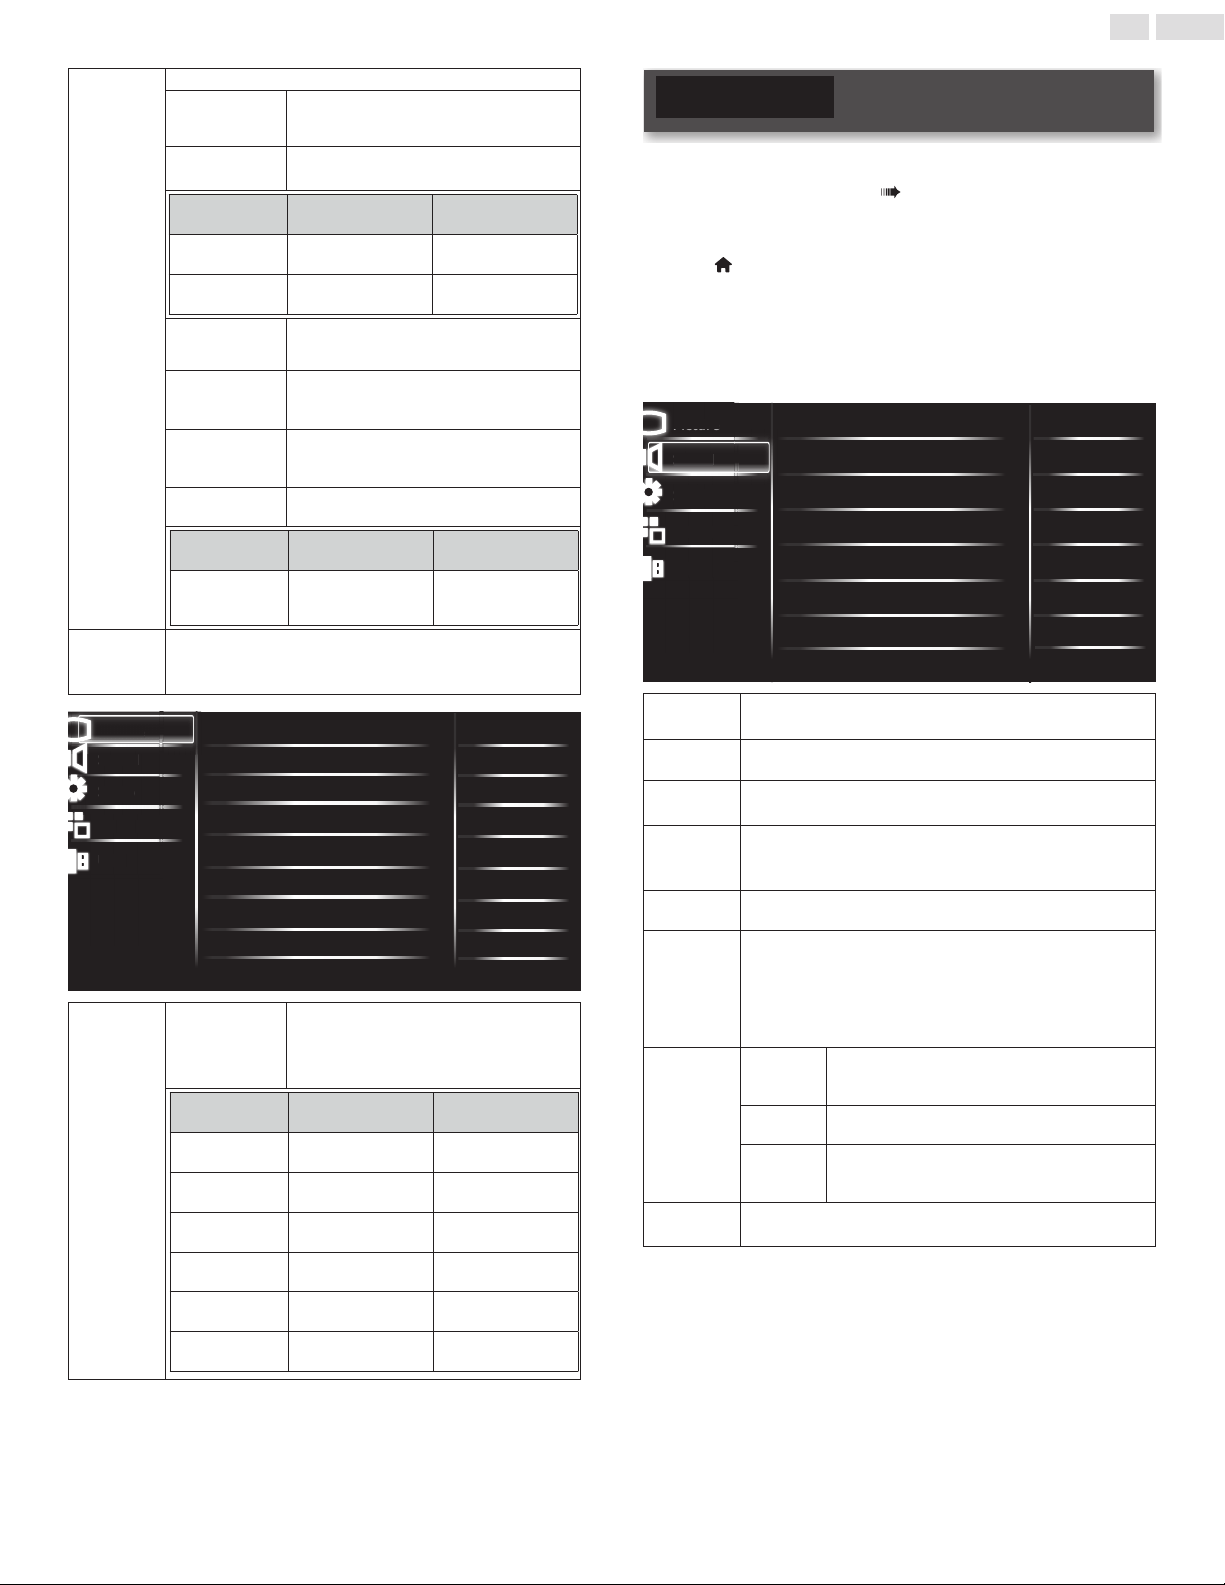
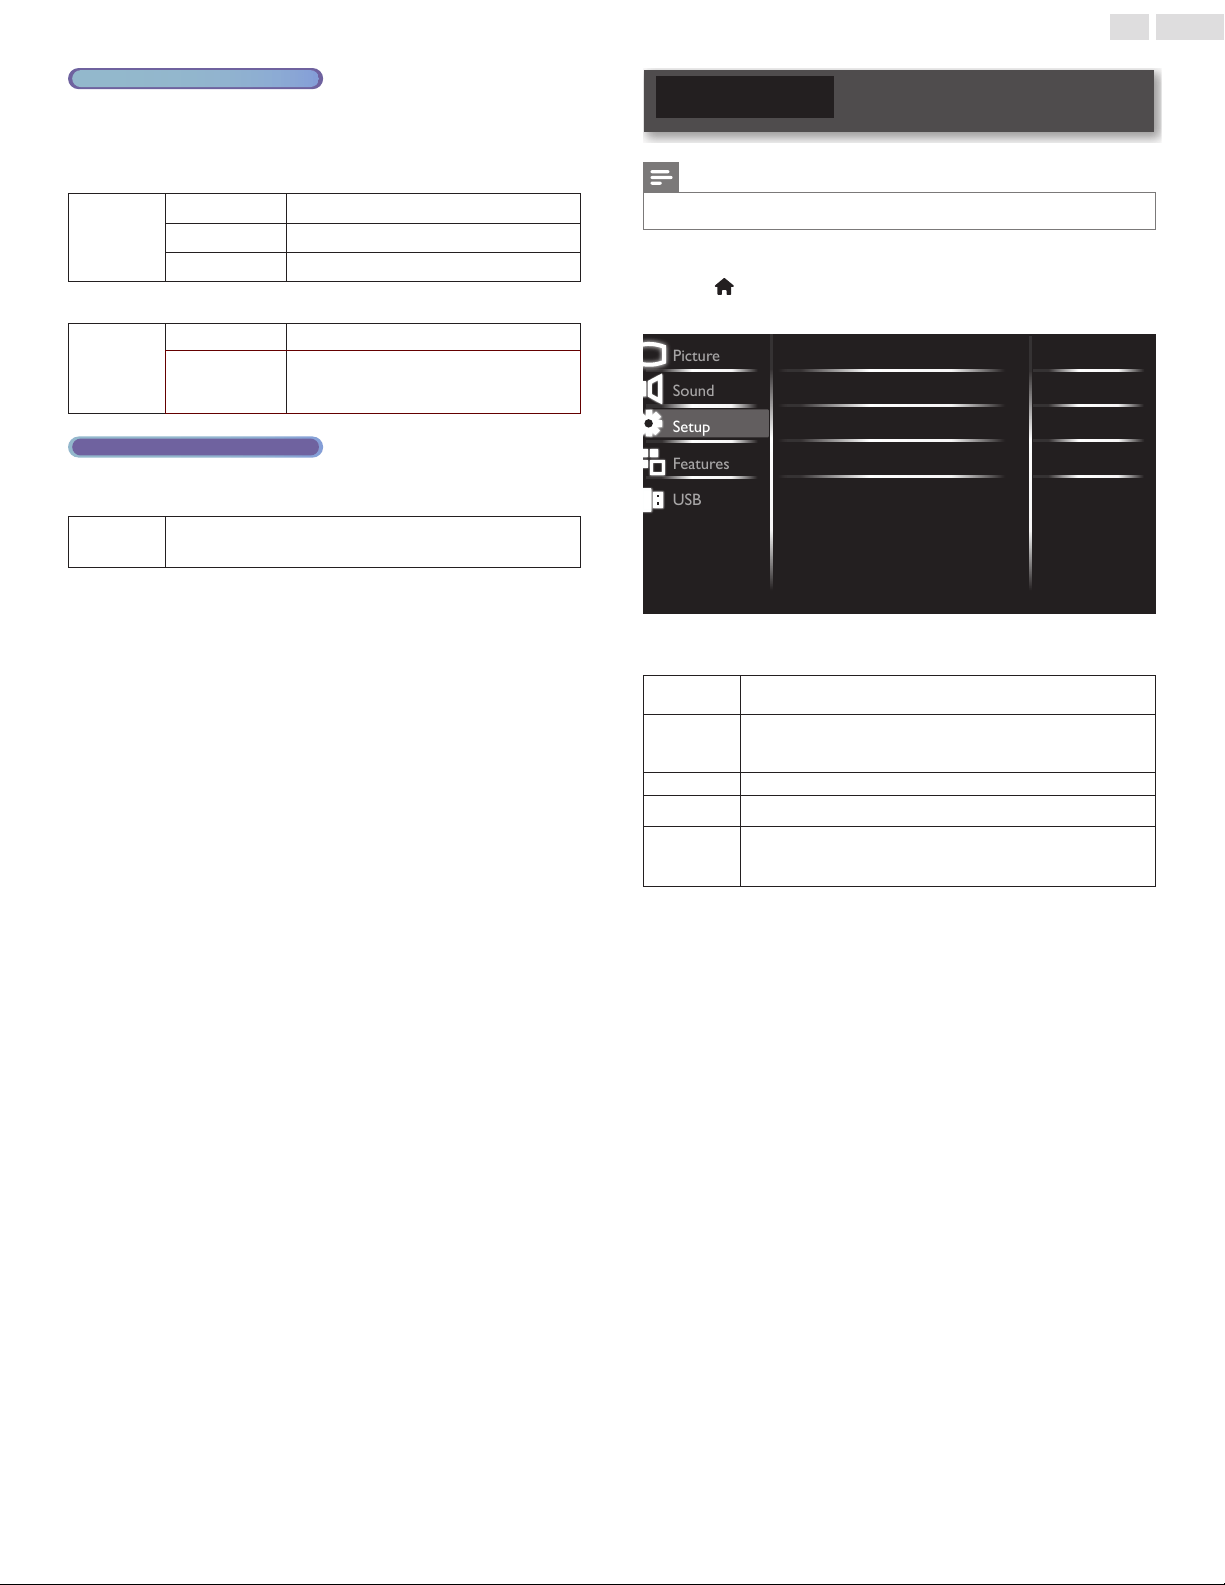
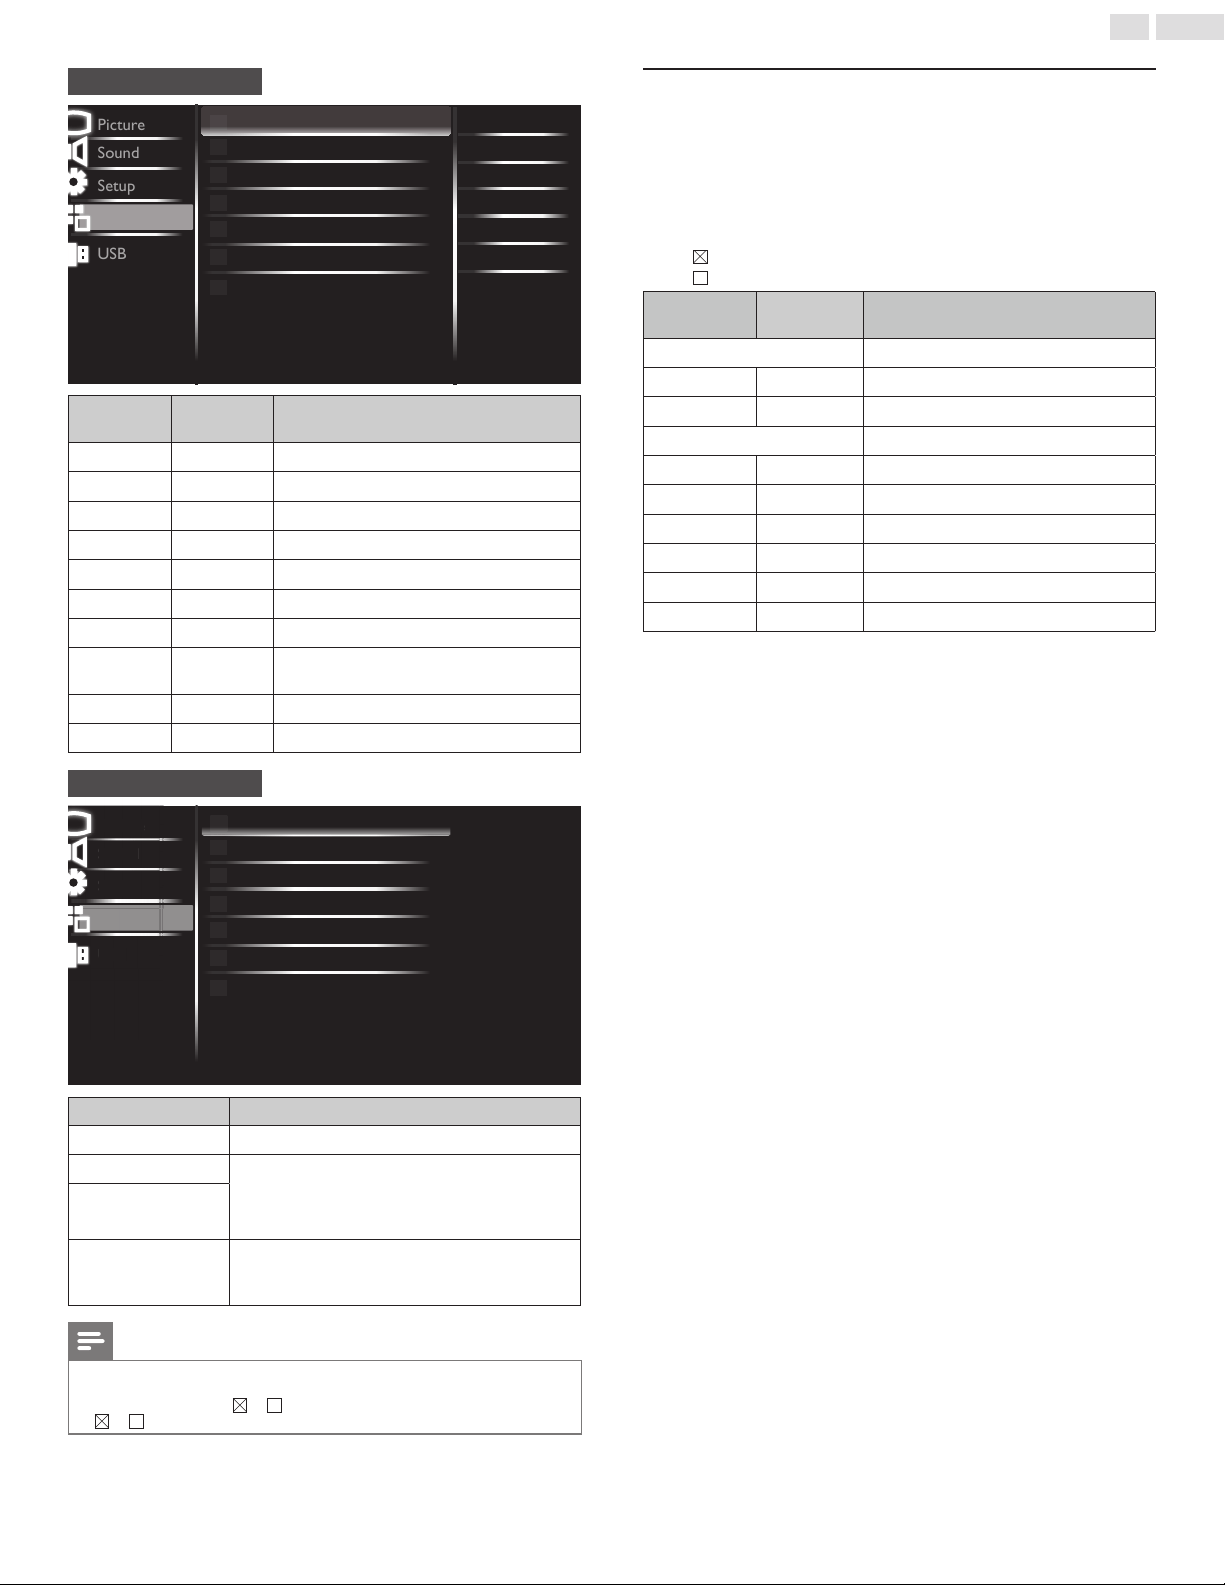
5 Use more of your TV
ThissectiondescribestheoverviewoftheSetup menudisplayedwhen
youpress
(MENU) anduse▲▼◄►toselectSetup.
TheSetup menuconsistsofthefunctionsettingitemsbelow.
1
Press
(MENU) todisplayHomemenu.
2
Use▲▼toselectSetup,thenpressOK.
3
Use▲▼toselectthedesiredmenuandanitem,thenpressOK
oruse◄►todeterminethesetting.
Picture
Sound
Setup
Features
USB
Settings assistant
Auto picture
Brightness
Contrast
Color
Advanced settings
Reset picture settings
Eco
50
50
50
Picture
Sound
Setup
Adjustingthepicturemodeorcustomizethepicture
qualityasyourpreference.
Adjustingthesoundmode,equalizerandsomeother
soundfunctions.
Setupallowsusertodochannelinstallationandother
settingsfortunersources.
p. 18
p. 19
p. 20
Features
USB
AdjustingtheClosedCaption,parentalguideandsome
otherusefulfunctions.
YourTVisttedwithaUSBconnectionthatenables
youtoviewphotos,listentomusicorwatchvideos
storedonaUSBmemorystick
p. 22
p. 27
4
Whenthesettingiscompleted,press (MENU) or
BACK to
exit.
Picture
Before you begin:
YoumustsetHome inLocation. p. 26
Otherwise,personalizedpictureandsoundsettingswillnotbe
memorizedaftertheunitgoesintoStandbymode.
1
Press
(MENU) todisplayHome Menuanduse▲▼toselect
Picture,thenpressOK.
Picture
Sound
Setup
Features
USB
Settings assistant
Auto picture
Brightness
Contrast
Color
Advanced settings
Reset picture settings
Eco
50
50
50
2
Use▲▼◄►toselecttheitemyouwanttoadjust,thenpress
OK.
• Thefollowingpicturesettingscanbecongured.Dependingon
theformatofthepicturesource,somepicturesettingsarenot
available.
Settings
assistant
toguideyouthroughthebestpicturesetting
Auto
picture
toselectthedesiredsetting,thenpressOK.
(Vivid,Standard,Eco,Movie,Sports, andPersonal)
Whenyouadjustthefollowingsettings,Personal willbeset
automatically.
Cursor ◄ Cursor ►
Brightness
todecreasebrightness toincreasebrightness
Contrast
todecreasecontrast toincreasecontrast
Color
todecreasecolorintensity toincreasebrightness
19
English
Advanced
Settings
Accessadvancedsettings.
Color
alignment
Selectapredenedcolortemperature,or
adjustRed/Green/Bluegainandoffset.
Noise
reduction
Selecttheamountofnoisereductionforthe
picture.(Off,Low, Middle,andHigh)
Cursor ◄ Cursor ►
Tint
toaddgreen toaddred
Sharpness
tosoften tosharpen
Dynamic
contrast
Dynamicallyenhancethedetailsinthedark,
medium,andlightareasofthepicture.
Dynamic
backlight
Dynamicallyadjustsbacklightlevelbasedon
averagebrightnessofthepictureframe.
Aspect ratio
Selectthepictureratiotosuitthevideo
source.
(Normal,Zoom, Wide, Cinema, andAuto)
Overscan
SelecttoturnOn orOff theoverscan
function.
Cursor ◄ Cursor ►
Backlight
toreducepower
consumption
tosetthebacklight
brighter
Reset
Picture
Settings
Selecttorestorethedefaultpicturesettings,whilechannel
installationsettingsremainthesame.
Picture
Sound
Setup
Features
USB
Color alignment
Noise reduction
Tint
Sharpness
Dynamic contrast
Dynamic backlight
Aspect ratio
Overscan
Middle
0
55
55
On
On
Backlight
Off
Normal
P
i
ctu
r
e
S
oun
d
U
S
B
Featu
r
es
S
etu
p
Color
alignment
Color
temperature
mode
tosetthecolortemperaturetoCool,
Normal, Warm andPersonal.
Whenyouadjustthefollowingsettings,
Personal willbesetautomatically.
Cursor ◄ Cursor ►
Red gain
todecreasecontrast
withred
toincreasecontrast
withred
Green gain
todecreasecontrast
withgreen
toincreasecontrast
withgreen
Blue gain
todecreasecontrast
withblue
toincreasecontrast
withblue
Red offset
todecreasebrightness
withred
toincreasebrightness
withred
Green offset
todecreasebrightness
withgreen
toincreasebrightness
withgreen
Blue offset
todecreasebrightness
withblue
toincreasebrightness
withblue
Sound
Before you begin:
YoumustsetHome inLocation. p. 26
Otherwise,personalizedpictureandsoundsettingswillnotbe
memorizedaftertheunitgoesintoStandbymode.
1
Press (MENU) todisplay Home Menu anduse▲▼toselect
Sound,thenpressOK.
2
Use▲▼◄►toselecttheitemyouwanttoadjust,thenpress
OK.
• Thefollowingsoundsettingscanbecongured.Dependingon
thesoundsource,somesoundsettingsarenotavailable.
Picture
Sound
Setup
Features
USB
Auto sound
Equalizer
DTS TruSurround
Auto volume leveling
On
Standard
Balance
Advanced sound
Reset sound settings
Off
0
TV speaker
sS
peakers EasyLink
Picture
Pictur
e
S
oun
d
US
B
Featu
r
es
S
etu
p
Auto sound
toselectthedesiredsetting,thenpressOK
(Standard,Movie, Music,Sports,News, andPersonal)
Equalizer
toselectthespecicfrequencyanduse▲▼toadjustthelevel,
thenpressOK
DTS
TruSurround
EnableDTSTruSurroundtoenhanceyouraudioexperience.
Auto
volume
leveling
Dynamicallyadjustsvolumeacrossdifferentchannelsandsources
tomaintainaconsistentlevel.
Balance
Adjustthebalanceoftherightandleftspeakerstobestsuityour
listeningposition.
TV speakers
SelectOntooutputsoundfromTVspeakers,Offtomanually
turnoffTVspeakersandenableDigitalAudioOutput.
Speakers EasyLink usesHDMI-CECtoautomaticallyturnoffTV
speakersanddirectsoundtoconnectedHDMI-CECcompliant
HomeTheaterSystemusingHDMI-ARCorDigitalAudioPortif
itdetectsone.
Advanced
sound
Digital
output
format
Selectthetypeofdigitalaudiooutput:Bitstream,
PCM.
Audio
setting
Selecttheaudiomodefrom:Mono,Stereo,and
SAP.ForuseofAnalogTVonly.
Audio
Language
Youcanselectyourpreferredaudiolanguage
whenTVchannelbroadcastsmultiple/dualaudio
languages.
Reset sound
settings
Selecttorestorethedefaultsoundsettings,whilechannel
installationsettingsremainthesame.
20
English
Analog/Cable TV operation
YoucanselectMono orStereo iftheAnalogbroadcastingissending
theMTS(Multichanneltelevisionsound).
YoucanselectSAP whileyourTVisreceivingtheAnalogbroadcasting
thathastheSAP(SecondAudioProgram).
Audio
setting
Mono
tooutputmono-audio
Stereo
tooutputstereo-audio
SAP
tooutputsecond-audioprogram
Youcansetthedigitalaudiooutputformat.
Digital
output
format
PCM tooutputPCM
Bitstream
tooutputBitstream(Whentheaudioofthe
contentisPCM,itwillbeoutputinPCM
evenifBitstreamisselected.)
Digital TV operation
YoucanselecttheAudiolanguagewhileyourTVisreceivingtheDigital
broadcasting.
Audio
Language
toselectthelanguageaccordingtoyourpreference.
(Itdiffersdependingontheprogram.)
Setup
Note
• TheSetupmenuitemisdisabledfornon-tunersources..
Setupallowsusertodochannelinstallationandothersettingsfortuner
sources.
1
Press
(MENU) todisplayHome Menuanduse▲▼toselect
Setup,thenpressOK.
Picture
Sound
Setup
Features
USB
Autoprogram
Antenna
Channel list
Audio only
On
Auto aspect ratio
Off
2
Use▲▼◄►toselecttheitemyouwanttoadjust,thenpress
OK.
Autoprogram
Selectoneoptiontoinstallchannels:AntennaorCable.
Antenna
ThisitemisonlyapplicablewheninputsourceisinDTV.A
Channel Strength menuwillappearontheTVscreenindicating
thesignalstrengthofDTV.
Channel list
Displaysalistofavailablechannels.
Audio only
Selecttoturnoffthepanelscreenandkeeponlythesoundon.
Auto aspect
ratio
SelectOntoselecttheappropriatevideoaspectratiobasedon
informationpresentininputMPEGstreamfromtunersource.
SelectingOffusesTV'scurrentAspectratiosetting.
21
English
Autoprogram
Ifyouswitchwires(e.g.betweenantennaandCATV)orifyoumove
theunittoadifferentareaaftertheinitialsetting,orifyourestorethe
DTVchannelsyoudeleted,itisrecommendedtouseAutoProgramto
performanewchannelsearch.
1
Press
(MENU) todisplayHome Menuanduse▲▼toselect
Setup,thenpressOK.
2
Use▲▼toselectAutoprogram,thenpressOK.
3
Use▲▼toselectCableorAntenna,thenpressOK.
4
PressOK toselectStart now.
• Autoprogramwillstartautomatically.
Picture
Sound
Features
USB
Autoprogram
Please wait while the system is scanning for channels.
Digital Channels
0 CHAnalog Channels
7 CH
BACK
Exit
Auto programming may take more than 20 minutes to
complete.
59%
Setup
5
Followtheon-screeninstructionstocompletetheinstallation.
Note
• AftersettingAutoprogram,usingCH+/CH−skipsunavailableprograms
automatically.
• Ifyouarenotreceivingasignalfromyourcableservice,contactthecableprovider.
•
Ifyoupress orduringAutoprogram,thesetupofTVchannelswillbecanceled.
• EvenifAutoprogram iscompleted,thechannelsettingwillbelostiftheACpowercord
isunpluggedbeforetheunitgoesintoStandbymodebypressing .
• ThePINcodewillberequiredonceyousetaPINcodeintheChild lock. p. 23
• IfyouwanttochangeyourPINcode,followtheinstructionofChange PIN. p. 25
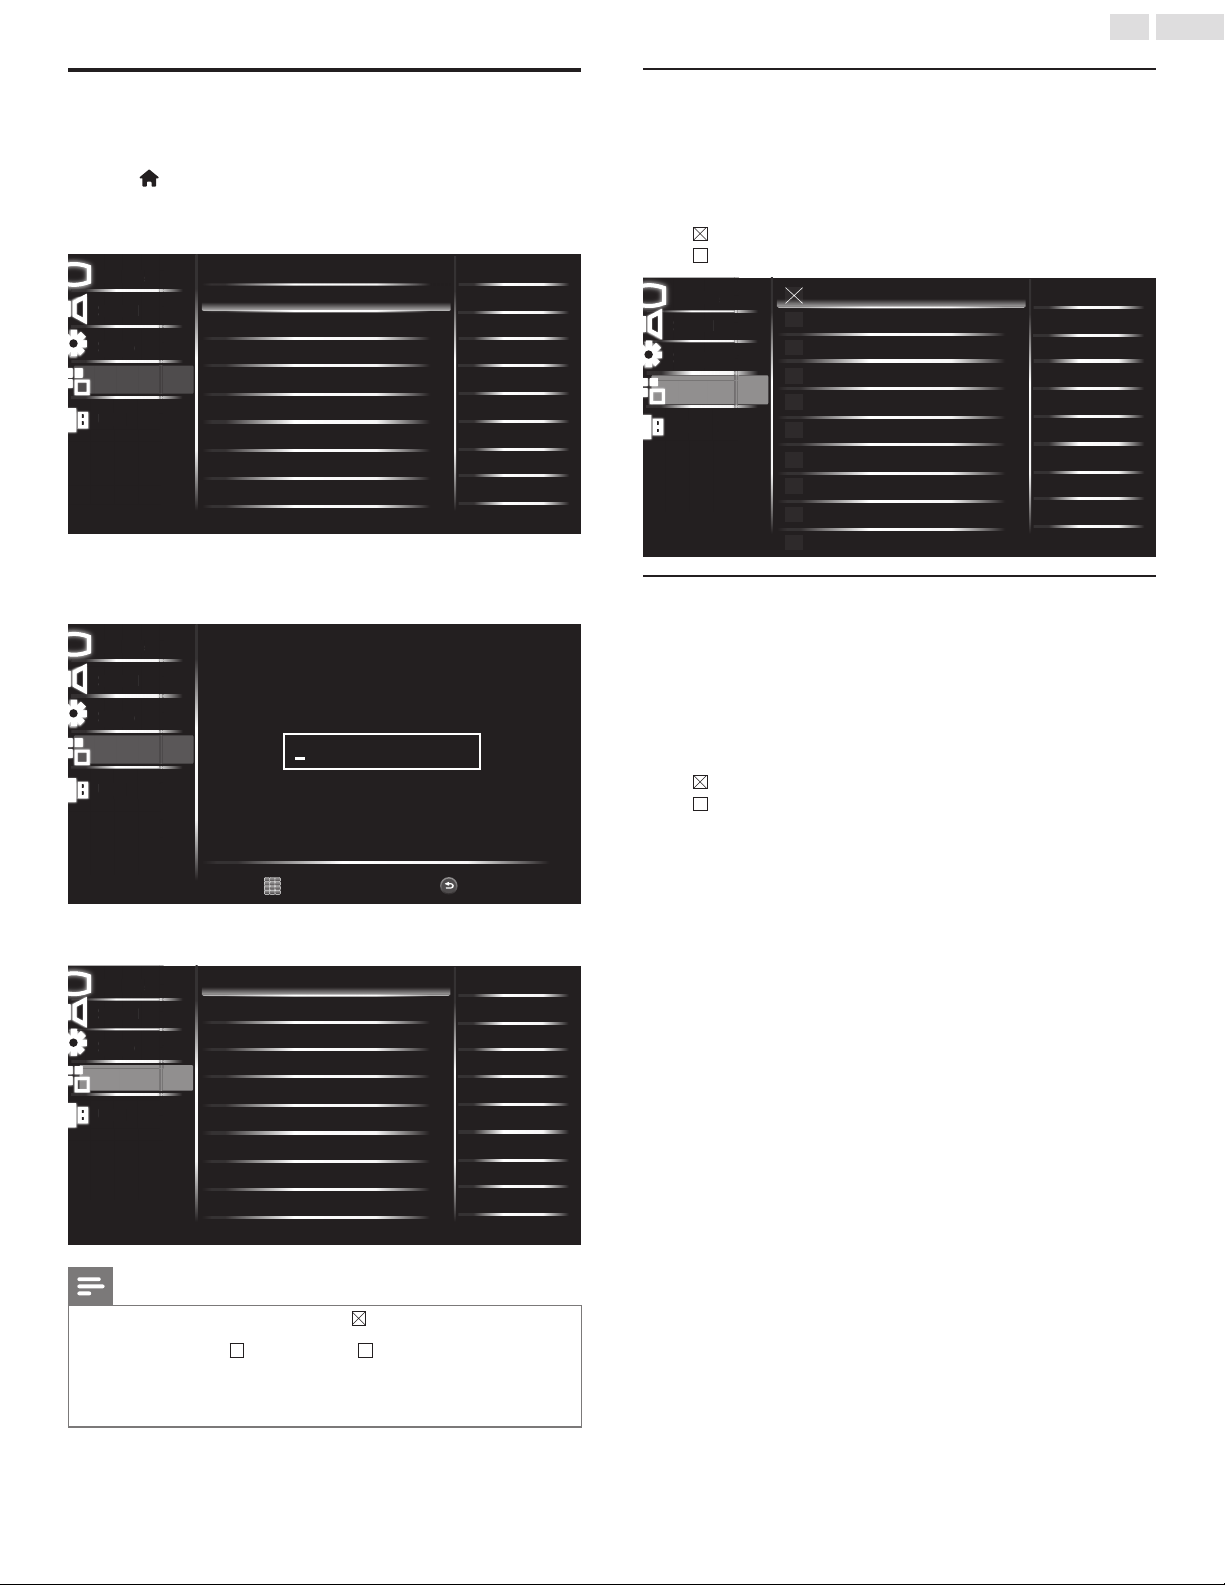
Channel list
YoucanmakealistofyourpreferredTVchannelssothatyoucannd
thosechannelsmoreeasily.
1
Press
(MENU) todisplayHome Menuanduse▲▼toselect
Setup,thenpressOK.
2
Use▲▼toselectChannel list,thenpressOK.
Picture
Sound
Features
USB
BackWatch / SkipNavigate
BACK
OK
Highlight channels for Ch Up/Down key
selection.
DTV 1.2
ATV 10.0
ATV 66.0
DTV 10.1
DTV 10.2
Setup
3
Use▲▼toselectthedesiredchannel,thenpressOKrepeatedly
toswitchbetweenskip/watch.
• Thegreyedoutchannelsindicatesexclusion,whichmeansthose
channelswillbeskippedwhenusingCH +/CH−key(onyour
TVremotecontrol)forchannelbrowsing.
• Thewhitechannelsindicatesinclusion,whichmeansthose
channelswillbeshownwhenusingCH +/CH−key(onyour
TVremotecontrol)forchannelbrowsing.

22
English
Features
1
Press
(MENU) todisplayHome Menuanduse▲▼toselect
Features,thenpressOK.
Picture
Sound
Setup
Features
USB
Language
Child lock
Caption settings
Sleep timer
PC settings
EasyLink
Location
E-sticker
Software upgrade
Reset AV & features
English
Off
Home
Off
2
Use▲▼◄►toselecttheitemyouwanttoadjust,thenpress
OK.
Language
Selectamenulanguagefromthelist,thenpressOK:English,
Français,andEspañol.
Child lock
Thisinterfaceofferavarietyoffeaturestolimitchild’saccessto
inappropriateTVcontents.PleaserefertothesectionofChild
lockonp. 23fordetailedinformation.
Caption
settings
PleaserefertothesectionofCaption settingsonp. 25for
detailedinformation.
Sleep timer
YoucanswitchtheTVtostandbyafteraspeciedtime.
Duringthecountdowntothespeciedtime,youcanswitchoff
yourTVearlierorresetthesleeptimer.
SelectavaluebetweenOff~240 min.
PC settings
AccessesoptionsofPC-relatedsettings.Youcanmake
adjustmentsin:Horizontal position,Vertical position,Clock,
andPhasebyusingtheon-screencursorbarswhenPCis
connectedtotheTV.YoucanalsoselectAuto adjustment,the
optionwillautomaticallyadjustthepictureposition.
SelectReset PC settingstoresetthememoryofPCsettings.
EasyLink
YoucangetthemostoutofyourHDMI-CEC-compliantdevices
withPhilipsEasyLinkenhancedcontrolfeatures.
ConnectyourHDMI-CECcompliantdevicesthroughHDMI
toyourTVandcontrolthematthesametimewithyourTV
remotecontrol.
Fordetailedinformation,pleaserefertothesectionofEasyLink
onp. 26.
Location
SelectHomeorRetail asthelocationmodeforyourTV.
Fordetailedinformation,pleaserefertothesectionofLocation
onp. 26.
E-sticker
EnablesordisablesE-sticker.OnlyavailablewhenLocationisin
Retailmode.
Software
upgrade
Youcandownloadtheupgradelefromourofcialwebsiteto
yourUSB.ConnecttheUSBtoyourTVandselectSoftware
upgrade,thenfollowtheon-screeninstructionstoupgradethe
TVsoftware.
Reset AV &
features
YoucanresettheAV&Featuresmemorycompletely.
Language
1
Press
(MENU) todisplayHome Menuanduse▲▼toselect
Features,thenpressOK.
2
Use▲▼toselectLanguage,thenpressOK.
Picture
Sound
Setup
USB
Language
Child lock
Caption settings
Sleep timer
PC settings
EasyLink
Location
E-sticker
Software upgrade
Reset AV & features
English
Off
Home
Off
Lan
g
ua
ge
P
i
ctu
r
e
S
oun
d
U
S
B
S
etu
p
Features
3
Use▲▼toselectEnglish,Français, orEspañol,thenpressOK.
Picture
Sound
Setup
USB
Select your menu language.
Seleccione rl idioma para el menú.
Sélectionnez la langue du menu.
English
Français
Español
En
g
lish
P
i
ctu
r
e
S
oun
d
U
S
B
S
etu
p
Features
23
English
Child lock
Youcanpreventyourchildrenfromwatchingcertainprogramsorcer-
tainchannelsbylockingtheTVcontrolsandbyusingratings.
1
Press
(MENU) todisplayHome Menuanduse▲▼toselect
Features,thenpressOK.
2
Use▲▼toselectChild lock,thenpressOK.
Picture
Sound
Setup
USB
Language
Child lock
Caption settings
Sleep timer
PC settings
EasyLink
Location
E-sticker
Software upgrade
Reset AV & features
English
Off
Home
Off
Child loc
k
P
i
ctu
r
e
S
oun
d
U
S
B
S
etu
p
Features
3
UsetheNUMBER buttons toenterthe4-digitnumbersforyour
PINcode.
• WhenyouhavenotsetupyourPINcode,enter0,0,0,0.
Picture
Sound
Setup
USB
PIN Code
Back
BACK
P
i
ctu
r
e
S
oun
d
U
S
B
S
etu
p
Enter PIN.
Features
• WhenthePINcodeiscorrect,Child lock menuisdisplayed.
Seethefollowingdescriptionforsettingeachitem.
Picture
Sound
Setup
USB
Button lock
Block unrated TV
Channel lock
US movie ratings lock
US TV ratings lock
Canadian English rating
Canadian French rating
Change PIN
Region ratings lock
Reset region ratings lock
Off
Off
P
i
ctu
r
e
S
oun
d
U
S
B
S
etu
p
Button loc
k
Features
Note
• Whenyouselectthehigherratingandsetitto ,thelowerratingswillbeblocked
automatically.
• WhenyousettheAll to ,allratingsreturnto automatically.
• Region ratings lock willbeavailablewhentheunitreceivesaDigitalbroadcastusingthe
newratingsystem.
• Toblockanyinappropriateprograms,setyourlimitsinUS TV ratings lock,US movie
ratings lock andRegion ratings lock.
Channel lock
ParticularchannelsorexternalInputmodescanbeinvisibleinthis
function.
1
Use▲▼toselectChannel lock,thenpressOK.
2
Use▲▼toselecttheparticularchannelsorexternalInput,then
pressOK repeatedlytoswitchbetweenviewandblock.
• indicatesthatthechannelorInputSourceislocked.
• indicatesthatthechannelorInputSourceisnotlocked.
Picture
Sound
Setup
USB
AV
Component
HDMI 1
HDMI 2
VGA
ATV 10.0
DTV 10.1
DTV 10.2
DTV 20.1
DTV 20.2
P
i
ctu
r
e
S
oun
d
U
S
B
S
etu
p
A
V
Features
US TV and movie ratings
MovieratingslockistheratingsystemcreatedbyMPAA.TVratingslock
hascontrolledaccesstoindividualprogramsbasedontheirageratings
andcontentrating.
1
Use▲▼toselectUSmovie ratings lock orUS TV ratings lock,
thenpressOK.
2
Use▲▼toselectthedesiredrating,thenpressOK repeatedlyto
switchbetweenviewandblock.
• indicatesthattheratingislocked.
• indicatesthattheratingisnotlocked.
24
English
Picture
Sound
Setup
USB
None
G
PG
PG-13
R
NC-17
X
Features
USmovieratingslock
US movie
ratings
US TV ratings Description
None None
Clearlockedrating
− TV-Y
Appropriateforallchildren
− TV-Y7
Appropriateforallchildren7andolder
G TV-G
Generalaudience
PG TV-PG
Parentalguidancesuggested
PG-13 −
Unsuitableforchildrenunder13
− TV-14
Unsuitableforchildrenunder14
R −
Restrictedunder17requiresaccompanying
parentoradultguardian
NC-17 −
Nooneunder17admitted
X TV-MA
Matureaudienceonly
Picture
Sound
Setup
USB
None
TV-Y
TV-Y7
TV-G
TV-PG
TV-14
TV-MA
P
i
ct
u
r
e
S
oun
d
U
SB
S
etu
p
N
on
e
Features
USTVratingslock
US TV ratings Sub Rating
TV-Y7
FantasyViolence
TV-PG
Language
Sex
Violence
Dialog
TV-14
TV-MA
Language
Sex
Violence
Note
• BlockedsubratingwillappearbesidethemainratingcategoryinUSTV ratings lock
menu.
• Changingthecategoryto or automaticallychangesallitssubratingstothesame
( or ).
Canada English or Canada French ratings
YoucanselecttheratingforCanadaEnglishorCanadaFrench
broadcasting.
1
Use▲▼toselectCanada English ratings orCanada French
ratings,thenpressOK.
2
Use▲▼toselectthedesiredrating,thenpressOK repeatedlyto
switchbetweenviewandblock.
• indicatesthattheratingislocked.
• indicatesthattheratingisnotlocked.
Canada English
rating
Canada French
rating
Description
E
Clearlockedrating
C −
Forallchildren
C8+ −
Forchildrenover8
G
Generalaudience
− 8ans+
Unsuitableforagesunder8
PG −
Parentalguidancesuggested
− 13ans+
Unsuitableforagesunder13
14+ −
Unsuitableforagesunder14
− 16ans+
Unsuitableforagesunder16
18+ 18ans+
Adultaudienceonly
25
English
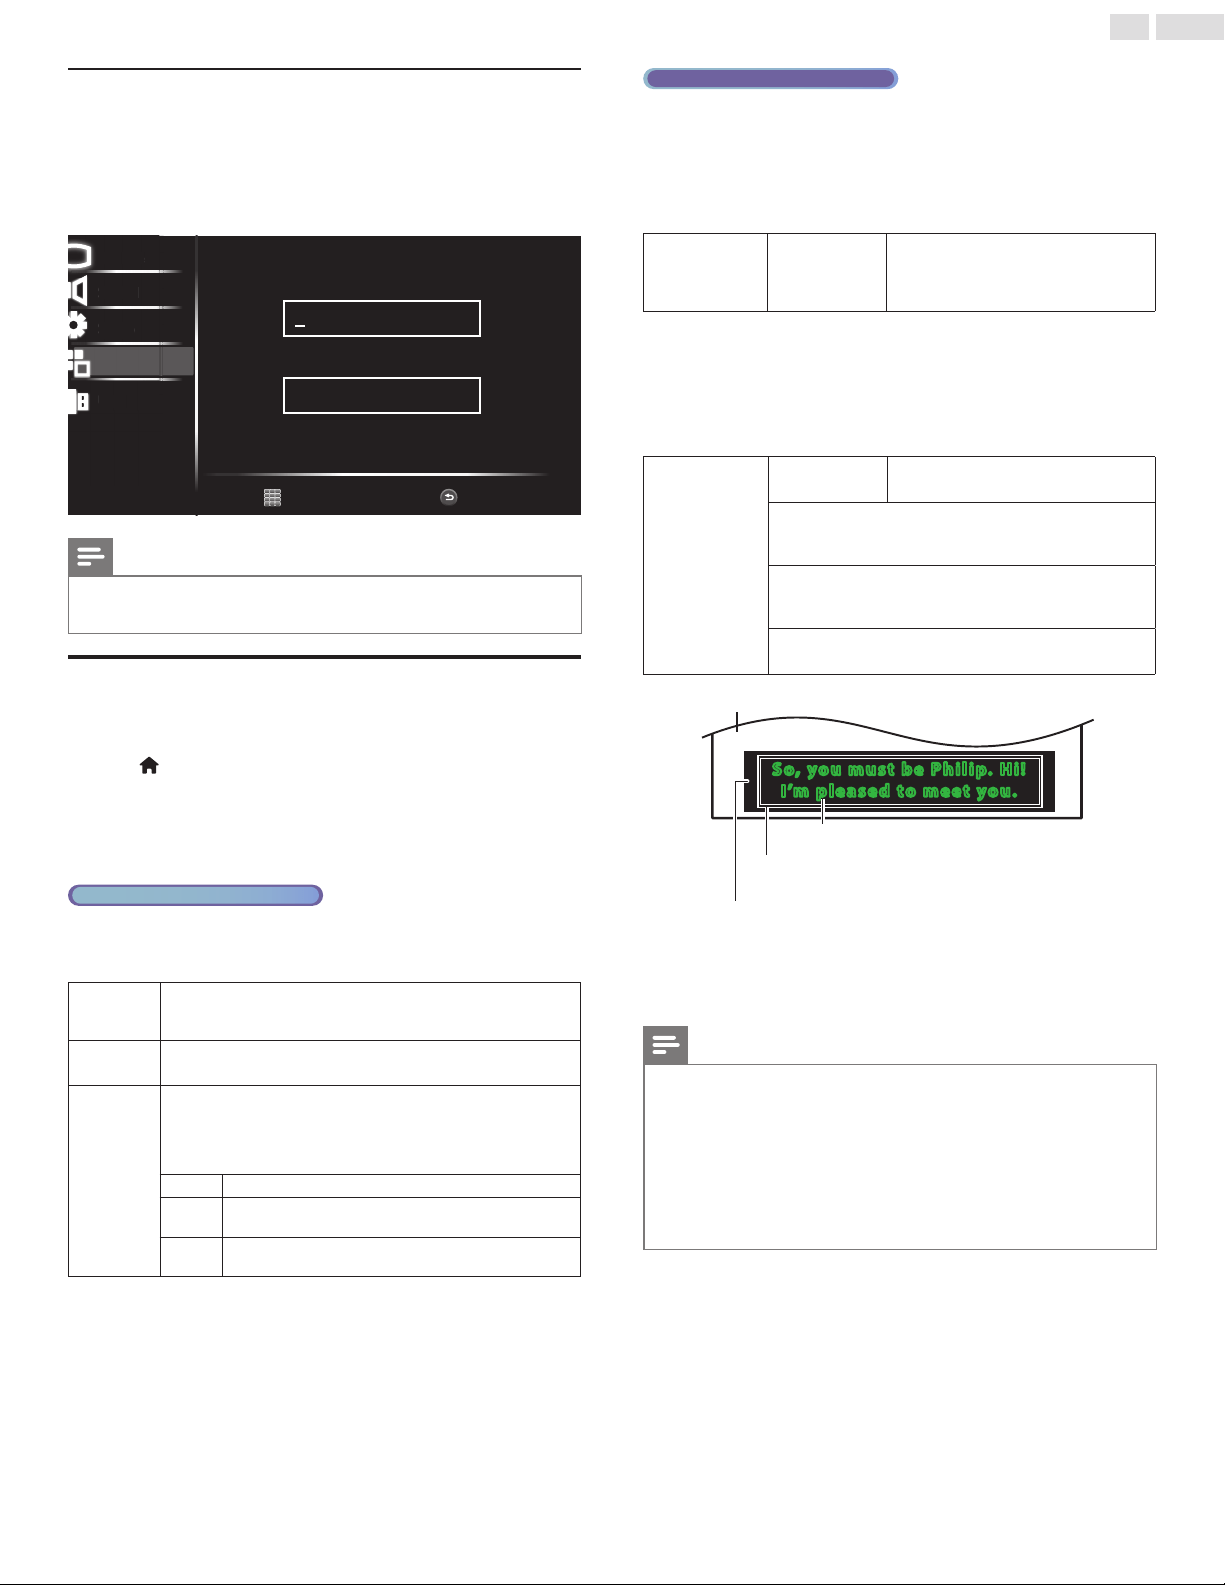
Change PIN
AlthoughthedefaultPINcode(0000)issuppliedwiththeunit,youcan
setyourownPINcode.
1
Use▲▼toselectChange PIN,thenpressOK.
2
Pressthe NUMBER buttons toenterthenew4-digitPINcode.
• EnterPINcodeagaintoconrm.
Picture
Sound
Setup
USB
PIN Code
Back
BACK
P
i
ctu
r
e
S
oun
d
U
S
B
S
etu
p
Enter PIN.
Confirm PIN.
Features
Note
• MakesurenewPINcodeandconrmPINcodemustbeexactlythesame.Iftheyare
different,thespaceisclearedforreentering.
• IfyouhaveforgottenyourPINcode,enter9999toresetthePINcode.
Caption settings
ClosedCaptioningdisplaystheAudioportionofprogrammingastext
superimposedoverthevideo.
1
Press
(MENU) todisplayHome Menuanduse▲▼toselect
Features,thenpressOK.
2
Use▲▼toselectCaption settings,thenpressOK.
• [Caption control]: Use▲▼toselect,thenselectCC Off,CC
OnorCC on w/mute,thenpressOK.
Analog/Cable TV operation
• [Analog captions]:Use▲▼toselect,thenselectthedesired
captionfromCC1~CC4orText1~Text4,pressOK.
ThisoptionisonlyavailableinATVandCVBS.
CC1and
Text1
Theprimarycaptionandtextservices.Thecaptioningortextis
displayedinthesamelanguageastheprogram’sdialog(upto4
linesofscriptontheTVscreen).
CC3and
Text3
Serveasthepreferreddatachannels.
Thecaptioningortextisoftenasecondarylanguage.
CC2, CC4,
Text2and
Text4
Rarelyavailableandbroadcastersusethemonlyinspecial
conditions,suchaswhenCC1andCC3orText1andText3are
notavailable.
•Thereare3displaymodesaccordingtoprograms:
Paint-on
DisplaysinputcharactersontheTVscreenimmediately.
Pop-on
Oncecharactersarestoredinmemory,theyare
displayedallatonce.
Roll-up
Displaysthecharacterscontinuouslybyscrolling(max.
4lines).
Digital TV operation
• [Digital captions]: Use▲▼toselect,thenselectthedesired
digitalcaptionservicefrom CS1~CS6 or CC1~CC4, press OK.
ThisoptionisonlyavailableinDTV.
InadditiontothebasicClosedCaption,DTVhasitsownClosedCap-
tioncalledDigitalcaptionservice.Usethismenutochangethesettings
forDigitalcaptionservice.
Digital caption
service
CS-1
to
CS-6
Selectsoneofthesebeforechanging
anyotheriteminCaptionsettings
menu.ChooseCS-1undernormal
circumstances.
Youcanchoosethesize,font,color,backgroundandothercharacteris-
ticsofthecaptiontext.
• [Caption style]: Use▲▼toselect,rstenableUser Setting,
thenshiftbacktopreviouslevelofoptions.
• Use▲▼toselectanitemandpressOK,thenuse▲▼to
selectthedesiredsettingandpressOK.
Caption style
User setting
YoucanresetthestatusofCaption
style.
YoucanchangeClosedCaptioningfontsize,style,color
andtransparency.(Font Size,Font Style,Font Color,and
Font opacity)
Youcanchangebackgroundcolorandtransparencyofthe
displayedcaption.(Background colorandBackground
opacity)
Youcanchangeedgecolorandtypeofthedisplayed
caption.(Edge typeandEdge color)
So, you must be Philip. Hi!
I’m pleased to meet you.
So, you must be Philip. Hi!
I’m pleased to meet you.
Background
( Background color and Background opacity)
Picture display
Font
( Style, Size, Te xt Color and Text opacity)
Edge
(Edge color and Edge type)
• Reviewyoursettingchoicemadebelowbylookingintheupper
leftcornerofthedisplayedsettingbox(notallselectionsshow
thedifferencesselected).
Note
• ClosedCaptioningservicemaynotbecontrolledbythisunit’smenuoptionsifyouare
watchingtelevisionthroughanexternalcableorsatelliteset-topbox.Inwhichcase
youwillneedtousethemenuoptionsontheexternalset-topboxtocontrolClosed
Captioning.
• Thecaptionsdonotalwaysusecorrectspellingandgrammar.
• NotallTVprogramsandproductcommercialsincludeClosedCaptioninformation.
RefertoyourareaTVprogramlistingsfortheTVchannelsandtimesofClosedCaption
shows.ThecaptionedprogramsareusuallynotedintheTVlistingswithservicemarks
suchasCC.
• NotallcaptioningservicesareusedbyaTVchannelduringthetransmissionofaClosed
Captionprogram.
26
English
Sleep timer
SleeptimercansettheunittogointoStandbymodeafteran
incrementalperiodoftime.
1
Use▲▼toselectSleep timer,thenpressOK.
2
Use▲▼toselectavaluebetweenoffand240min.
Note
• YoucanalsopressSLEEP directlytoswitchthedesiredsetting. p. 10
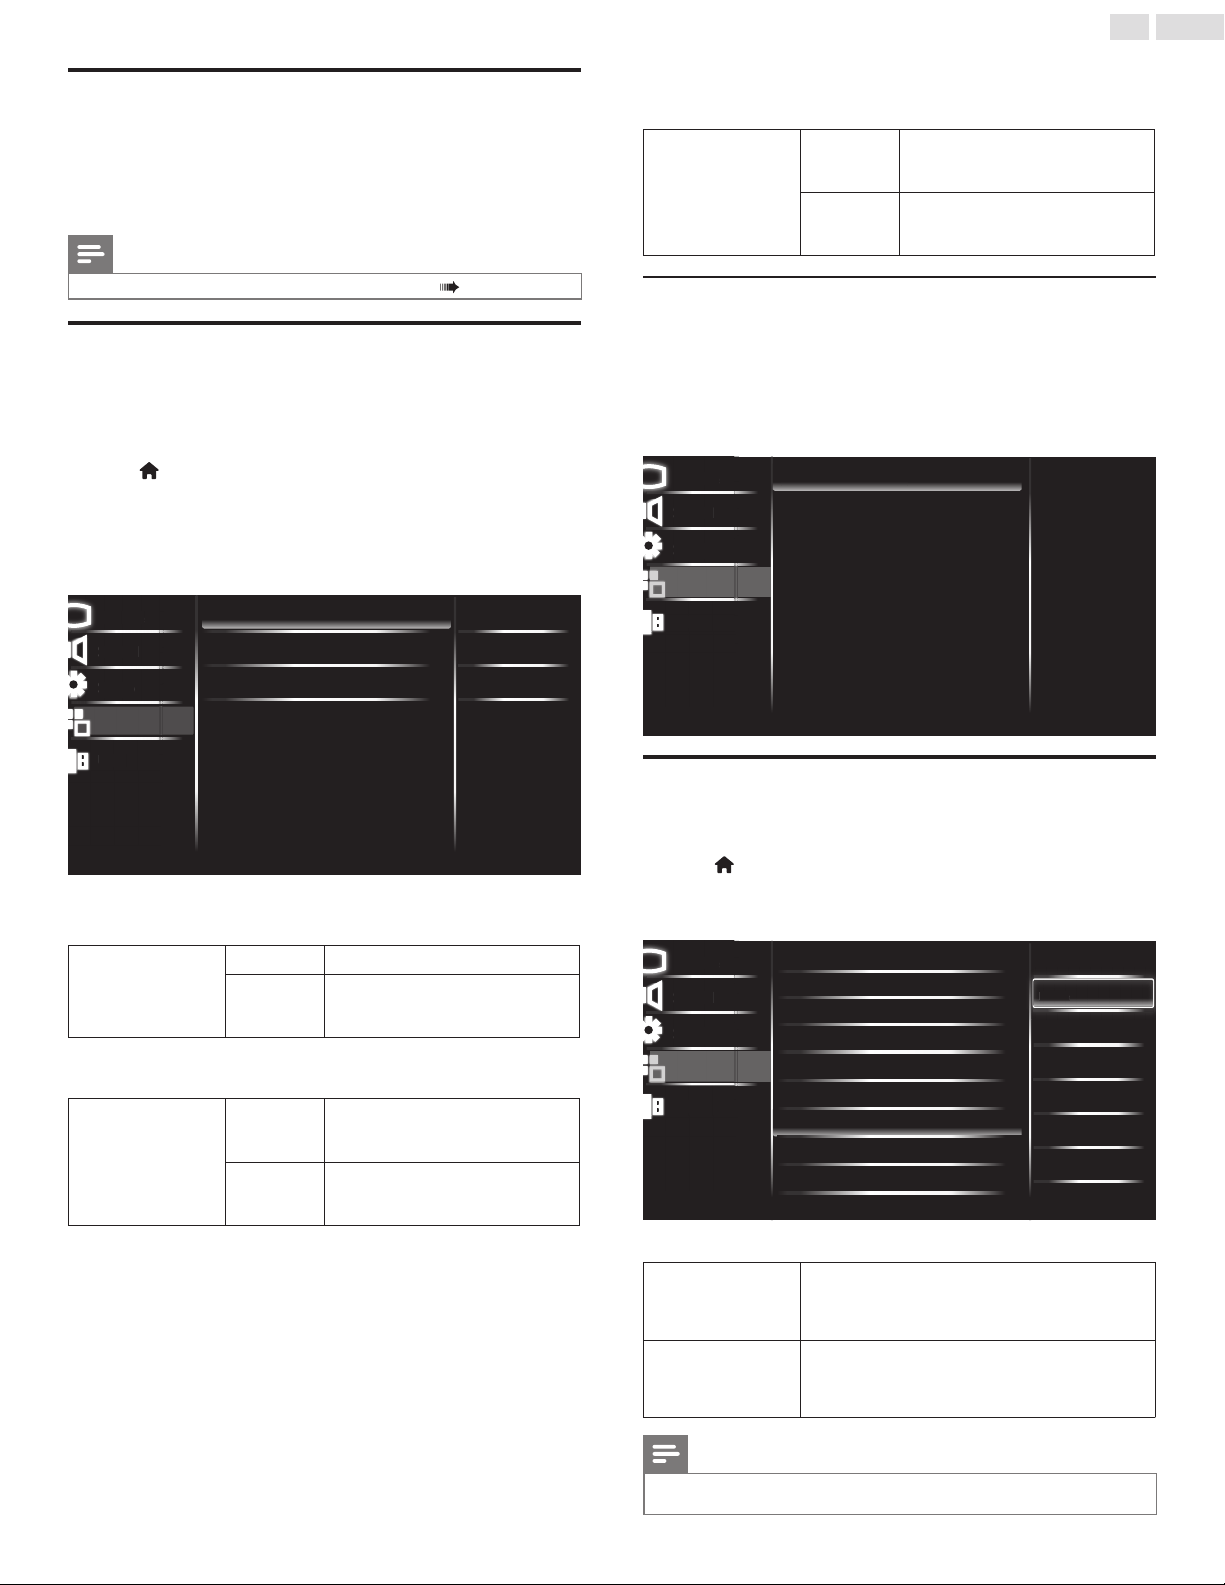
EasyLink
Thisfunctionallowsyoutooperatethelinkedfunctionsbetweenour
branddeviceswithaEasyLinkfeatureandthisunitconnectingthrough
anHDMIcable.YoumustconnectthisunittoourbrandEasyLink
devicesandbesureitsEasyLinksettingisalsosettoOn.
1
Press
(MENU) todisplayHome Menuanduse▲▼toselect
Features,thenpressOK.
2
Use▲▼toselectEasyLink,thenpressOK.
3
Use▲▼◄►toselecttheitemyouwanttoadjust,thenpress
OK.
Picture
Sound
Setup
USB
Master EasyLink
Auto device off
Auto TV on
Device list
On
On
On
Master Eas
y
Lin
k
P
i
ctu
r
e
S
oun
d
U
S
B
S
etu
p
Features
SettheMaster EasyLink toOn orOff.Thefollowingadditionalsettings
willbegrayedoutwhenyousettoOff.
Master EasyLink
Off
DisablesallEasyLink.
On
Selectsifyouhaveconnectedan
externaldevicethatiscompatiblewith
theEasyLinkfunction.
AutomaticallyturnoffyourconnectedEasyLinkdevicewhentheTVis
turnedoff.
Auto device off
Off
YourconnectedEasyLinkdevicestays
inoriginalmode,eveniftheTVis
turnedoff.
On
ThisunitturnstoStandbymode
automaticallywhenyourconnected
EasyLinkdevicehasbeeninactive.
ThisunitwillturnOnwhenthepowerOnsignalissentfromyour
connectedEasyLinkdevice.
Auto TV on
Off
ThisunitstaysinStandbymodeevenif
youTurnOnyourconnectedEasyLink
device.
On
ThisunitturnsOnautomaticallywhen
youturnOnyourconnectedEasyLink
device.
Device list
Thisfunctionletsyouseetheproductmodelnumberornameof
connecteddevices.
Use▲▼toselectthedesiredEasyLinkdevicelistedontheTVscreen,
thenpressOK.
YourconnectedEasyLinkdevicewillbeturnedOnifthedeviceisin
Standbymode.
Picture
Sound
Setup
USB
HDMI 2 : Playback1: DVD
HDMI 1 : Audio Sys: NS-AV511
P
i
ctu
r
e
S
oun
d
US
B
S
etu
p
HDMI 2 : Pla
y
back1: DV
D
Features
Location
ChoosingHome givesyoufullexibilitytochangepredenedsettings
forpictureandsound.
1
Press
(MENU) todisplayHome Menuanduse▲▼toselect
Features,thenpressOK.
2
Use▲▼toselectLocation,thenpressOK.
Picture
Sound
Setup
USB
Home
Retail
Hom
e
P
i
ctu
r
e
S
oun
d
US
B
S
etu
p
Features
Language
Child lock
Caption settings
Sleep timer
PC settings
EasyLink
Location
E-sticker
Software upgrade
Reset AV & features
3
Use▲▼toselectHome,thenpressOK.
Retail
Theunitwillbesetupwithpredenedsettingsfor
retaildisplays.Inthissetting,thepowerconsumption
maypossiblyexceedthelimitrequirementofthe
ENERGYSTAR
®
qualication.
Home
ThissettingisENERGYSTAR
®
qualied.Theunitis
settomaximizetheenergyefciencyforhomesetting
anditcanbeadjustedthroughachoiceofpictureand
soundqualityaccordingtoyourpreference.
Note
• YoumustsetHome.Otherwise,personalizedpictureandsoundsettingswillnotbe
memorizedaftertheunitgoesintoStandbymode.
27
English
E-sticker
WhenyousetLocation toRetail,E-sticker(ElectronicSticker)is
displayed.E-stickercanbeturnedOffusingprocedurebelow.
1
Use▲▼toselectE-sticker,thenpressOK.
2
Use▲▼toselectOff,thenpressOK.
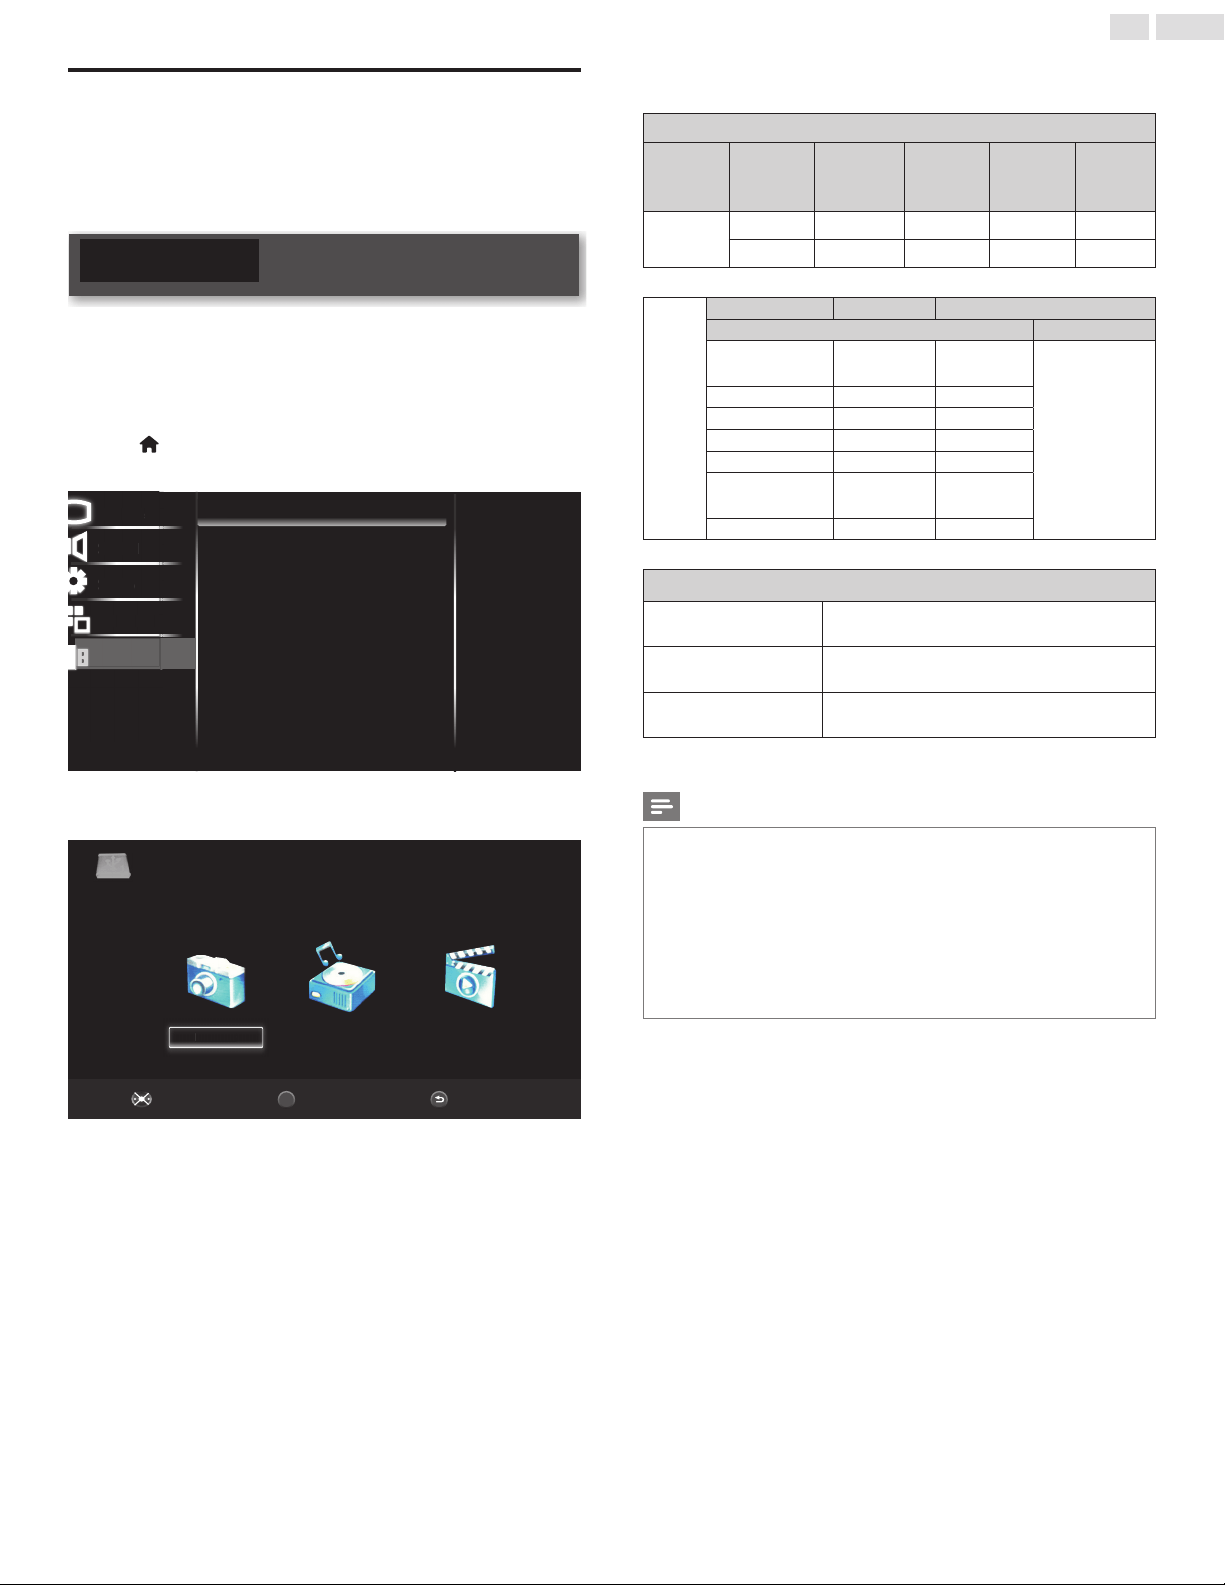
USB
YourTVisttedwithaUSBconnectionthatenablesyoutoview
photos,listentomusicorwatchvideolesstoredonaUSBMemory
Stick.
1
ConnecttheUSBMemorySticktotheUSBterminalonthesideof
yourTV.
2
Press
(MENU) todisplayHome Menuanduse▲▼toselect
USB,thenpressOK.
Picture
Sound
Setup
Features
USB
P
i
ctu
r
e
S
oun
d
Featu
r
es
S
etu
p
USB
USB
3
Use◄►toselectthePHOTO, MUSIC, orMOVIE
,
thenpress
OK.
NoneSelectNavigate
BACK
OK
MUSIC MOVIEPHOTOPH
O
T
O
• Filesencodedinthefollowingformatsaresupported.
• Thelesrecordedunderthefollowingspecicationsarerequired.
Picture (JPEG)
Image Photo Resolution
Req.
DRAM
size(MB)
width height
JPEG
Base-line 15360x8640 3.96 15360 8640
Progressive 1024x768 6 1024 768
VIDEO
FileExtention Container Codec
Video Audio
dat,mpg,mpe
MPG,
MPEG
MPEG1,2
MPEG1layer2,
MPEG1layer3,
MPEG2leyer3,
AC-3,
LPCM,ADPCM
ts,trp,tp,m2ts MPEG2-TS MPEG2
vob MPEG2-PS MPEG2
mp4 MP4 MPEG4
mkv MKV MPEG1,2,4
avi AVI
MPEG2,
MPEG4
avi,mov MotionJPEG JPEG
Music (MP3)
MPEG1Layer2
32Kbps~448Kbps(Bitrate)
32KHz~48KHz(Samplingrate)
MPEG1Layer3
32Kbps~320Kbps(Bitrate)
32KHz~48KHz(Samplingrate)
MPEG2Layer3
32Kbps~320Kbps(Bitrate)
32KHz~48KHz(Samplingrate)
Note
• ThisunitacceptsUSBmemorystickonly.OtherstoragedevicessuchasexternalHDD
byUSBbuspowerwillnotwork.
• DonotuseanextensioncordandUSBHubtoconnectdevicestothisunit.Always
inserttheUSBashmemoryintothisunitdirectly.
• WecannotbeheldresponsibleifyourUSBmemorystickisnotsupported,norwillwe
acceptanyliabilityfordamageorlossofstoreddata.
• TheUSBmemorystickisnotsuppliedwiththisTV.
• Amaximumof1,023foldersorlescanberecognized.
• Alenameexceeding256charactersisnotsupportedonthisTV.
• AAC/HE-AACaudioformatplaybackisnotsupportedinmusicmodeorinvideoles.
• ProgressiveJPEGleswitharesolutionofgreaterthan1024x768arenotsupported.
• MPEG4-Part10(AVC/H.264)isnotsupported.
28
English
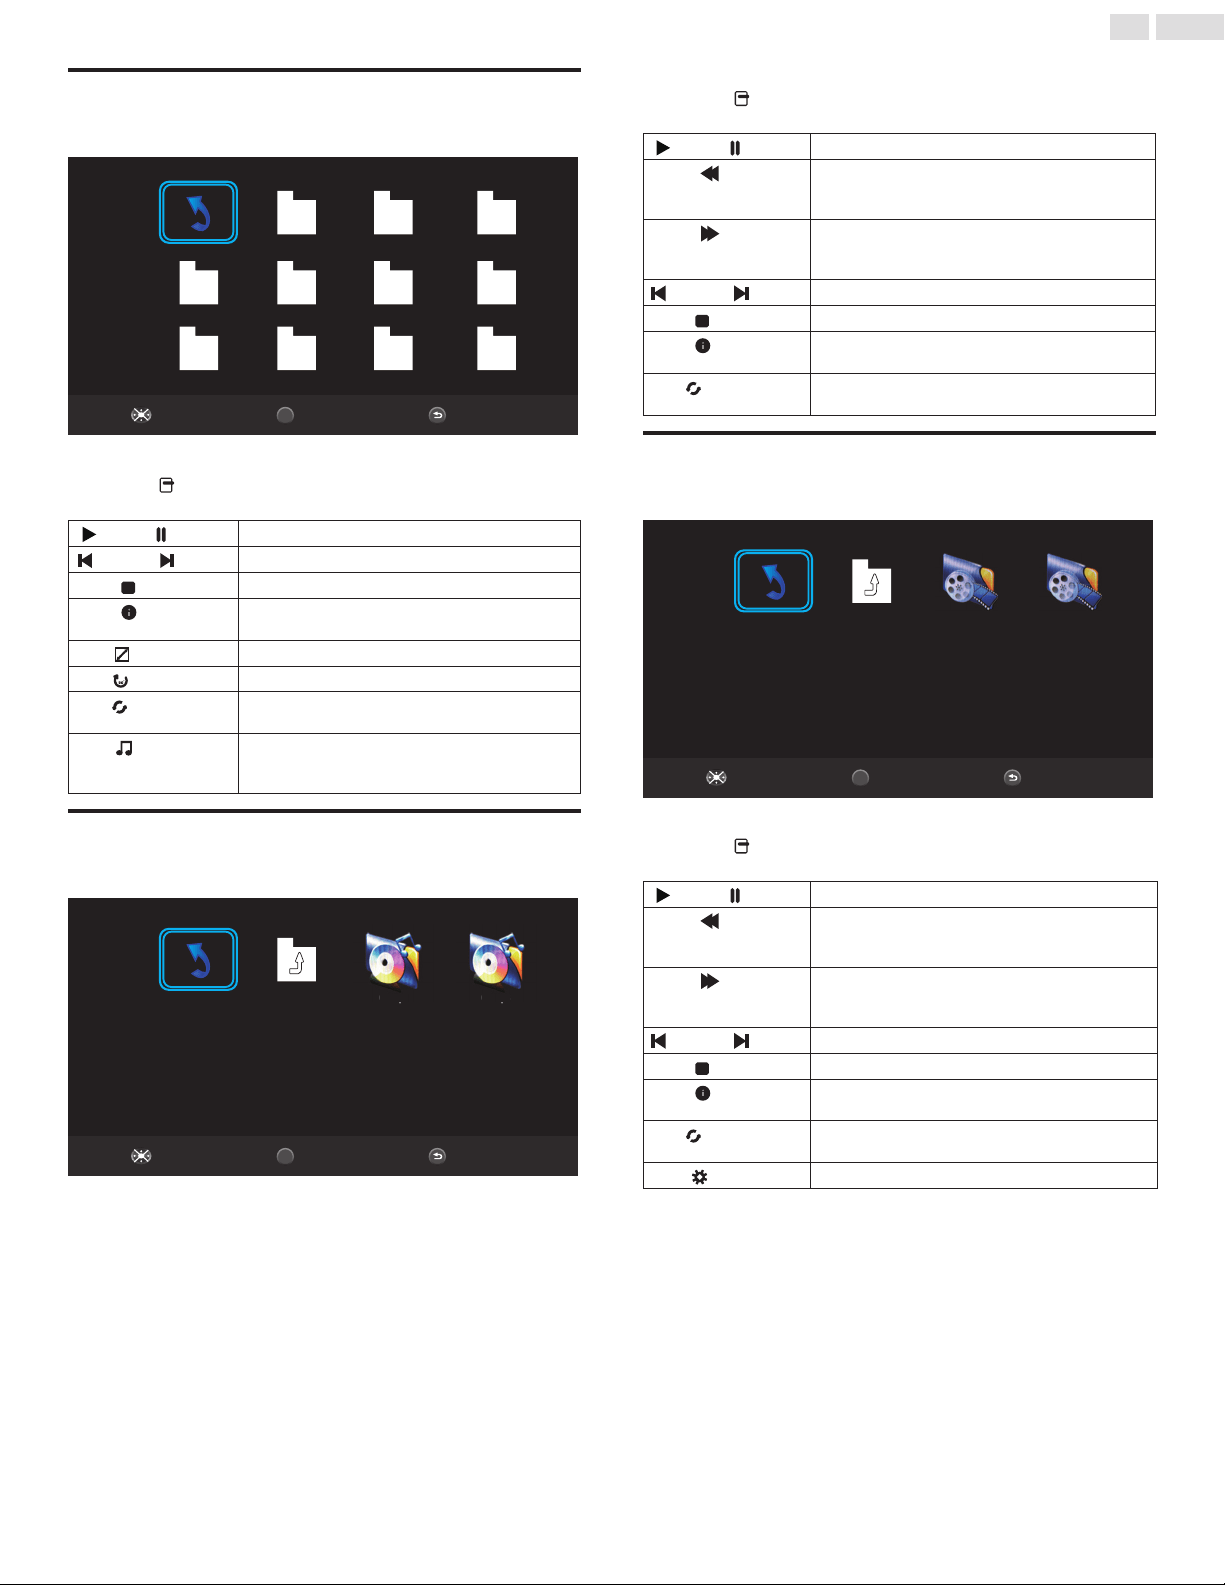
PHOTO
1
Use▲▼◄►toselectaleorafolder.
BackPlay/SelectNavigate
USB PHOTO:\
BACK
OK
Root image image1 image2
image4image3 image5 image6
image8image7 image9 image10
2
PressOK or►tostartaSlideshowoftheles.
• Press OPTIONS todisplaytheoptionalmenu,thenuse◄►
toselectthedesireditem.
(Play) / (Pause)
PressOKorplay/pauseslideshow.
(Prev.) / (Next)
Gototheprevious/nextphoto.
(Stop)
Stopslideshow.
(Info.)
Displayphotoinformation.(Resolution/Size/Date/
Time)
(Zoom)
Changedisplaysize.(Full/2X/4X/8X)
(Rotate)
PressOKtorotatethepicture.
(Repeat)
Selecttherepeatmode.(RepeatNone/RepeatOne/
RepeatAll)
(Music)
Playbackgroundmusicinslideshowmode.Forthis
featuretowork,theMP3leshavetobeinthe
samefolderasthecurrentlyplayingpictures.
MUSIC
1
Use▲▼◄►toselectaleorafolder.
BackPlay/SelectNavigate
USB MUSIC:\Track
BACK
OK
Root up Folder 01.mp3 02.mp301.m
p
3
02
.m
p
3
2
PressOK or►toplaytheselectedles.
• Press OPTIONS todisplaytheoptionalmenu,thenuse◄►
toselectthedesireditem.
(Play) / (Pause)
PressOKorplay/pausetoplayorpausethemusic.
(FB)
PressOKtoFastBackwardthemusic.Repeatedly
pressOKtoincreasethespeed:FBX2/FBX4/FBX8/
FBX16/PLAY.
(FF)
PressOKtoFastForwardthemusic.Repeatedly
pressOKtoincreasethespeed:FFX2/FFX4/FFX8/
FFX16/PLAY.
(Prev.) / (Next)
Gototheprevious/nexttrack.
(Stop)
Stopmusicplayback.
(Info.)
Displaytheinformation.
(Album/Title/BitRate/Artist/Sampling/Year/Size)
(Repeat)
Selecttherepeatmode.
(RepeatNone/RepeatOne/RepeatAll)
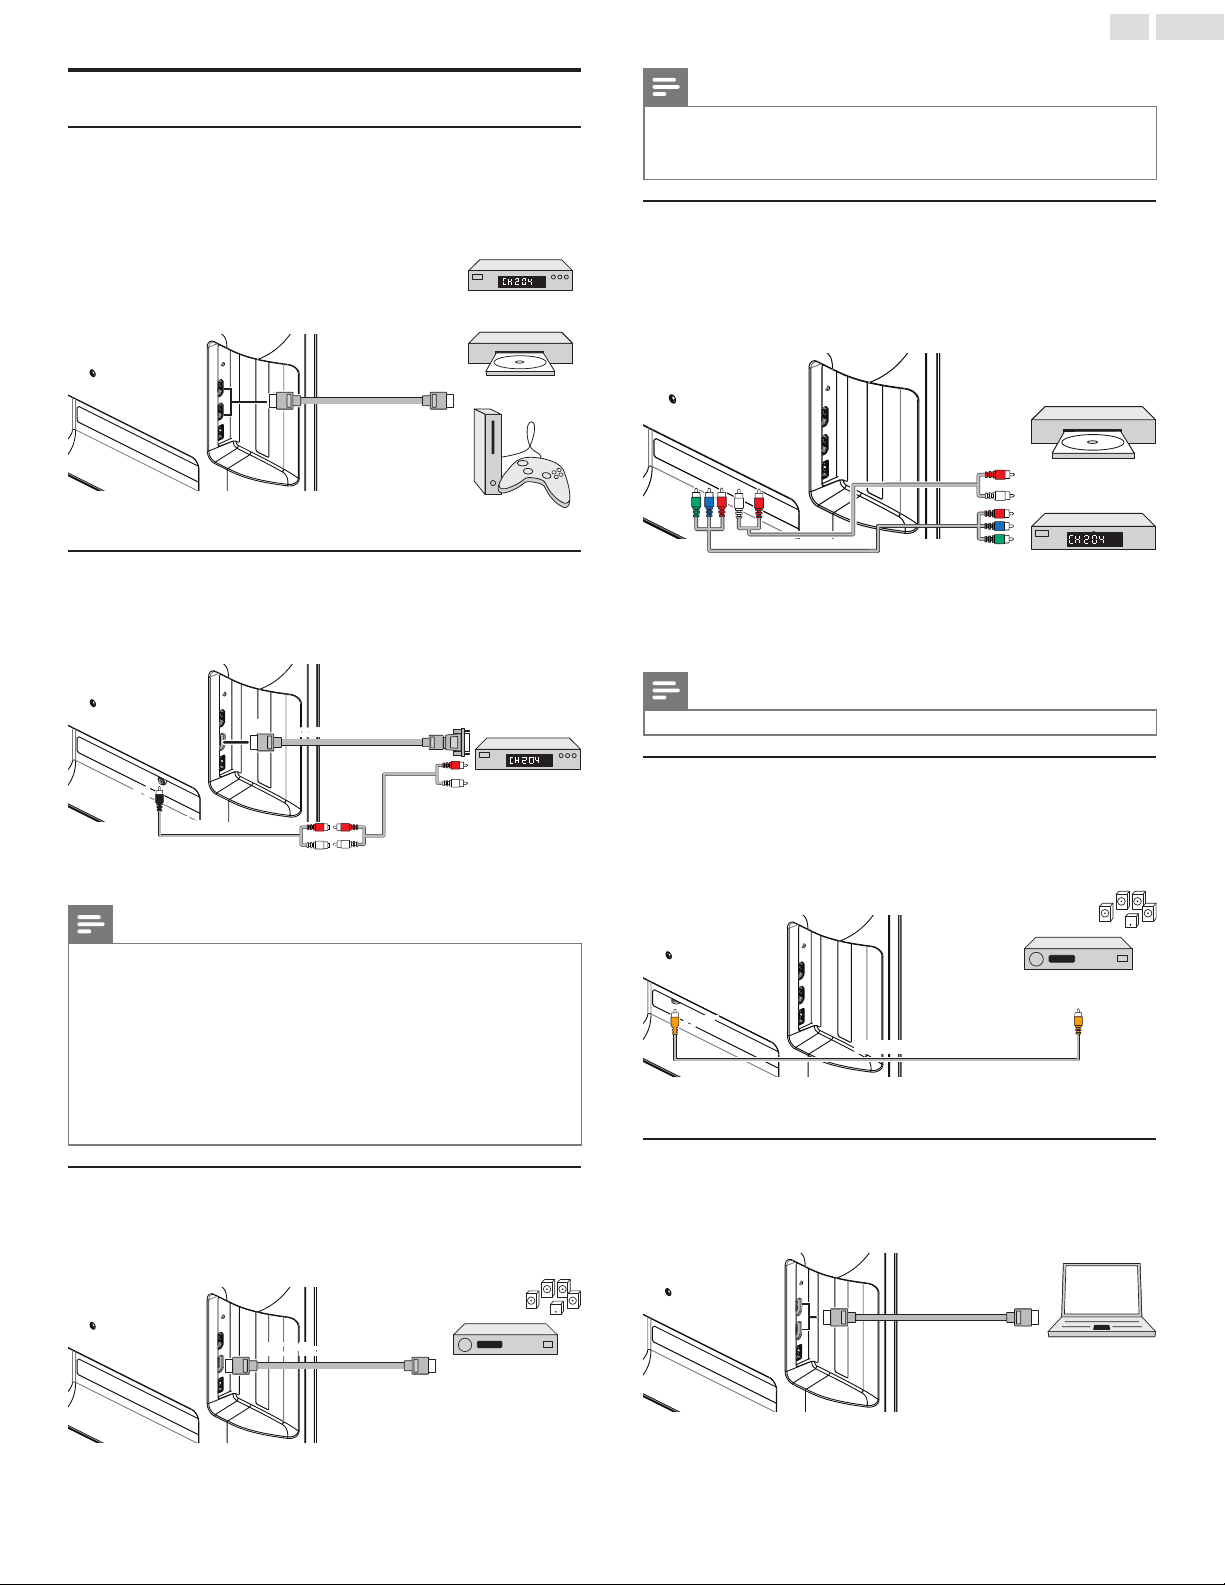
MOVIE
1
Use▲▼◄►toselectaleorafolder.
BackPlay/SelectNavigate
USB MOVIE:\avi
BACK
OK
Root up Folder Movie1.avi Movie2.avi
2
PressOK or►toplaytheselectedles.
• Press OPTIONS todisplaytheoptionalmenu,thenuse◄►
toselectthedesireditem.
(Play) / (Pause)
PressOKorplay/pausetoplayorpausethemovie.
(FB)
PressOKtoFastBackwardthemovie.Repeatedly
pressOKtoincreasethespeed:FBX2/FBX4/FBX8/
FBX16/FBX32/Play.
(FF)
PressOKtoFastForwardthemovie.Repeatedly
pressOKtoincreasethespeed:FFX2/FFX4/FFX8/
FFX16/FFX32/Play.
(Prev.) / (Next)
Gototheprevious/nexttrack.
(Stop)
Stopmovieplayback.
(Info.)
Displaytheinformation.
(Resolution/AudioTrack/Subtitle/Program/Size)
(Repeat)
Selecttherepeatmode.
(RepeatNone/RepeatOne/RepeatAll)
(Ratio)
Changedisplayaspectratio.(Auto/4:3/16:9)
29
English
Upgrading the software
USB upgrade
YoucanupgradethesoftwarebyusingUSBMemoryStick.
1
ConnectyourUSBMemoryStickwiththeupgradeletotheUSB
terminalonthesideofyourTV.
2
Press
(MENU) todisplayHome Menuanduse▲▼toselect
Features,thenpressOK.
3
Use▲▼toselectSoftware upgrade,thenpressOK.
4
Use▲▼toselectUpgrade,thenpressOK.
5
Use▲▼toselectUSB.
6
Use▲▼toselectCheck,thenpressOK.
7
Readtheon-screeninstructionsandconrmthatyouwantto
continuewiththeinstallation.
Picture
Sound
Setup
USB
P
i
ctu
r
e
S
oun
d
U
S
B
S
etu
p
Software upgrade
Software upgrade in progress. Please wait.
50%
Current Version:
New Version:
S
oftware u
pg
rade in
p
ro
g
ress. Please wait
.
v2.04
v2.05
Do not remove the USB storage device or turn TV off
while upgrade is in progress.
Features
8
Whenthesoftwareupgradeiscompleted,removetheUSB
MemoryStick,thenpressOKtoreboottheTV.
9
UnplugtheACpowercordforafewsecondsfromACoutletand
plugitagain.
10
Press
againtoturntheunitOn.
• TheTVstartsupwiththenewsoftware.
Forfurtherassistance,pleasecontactCallCenter.
Note
•Allsettingswillresettodefaultafteryouupdatethesoftwarever-
sion.
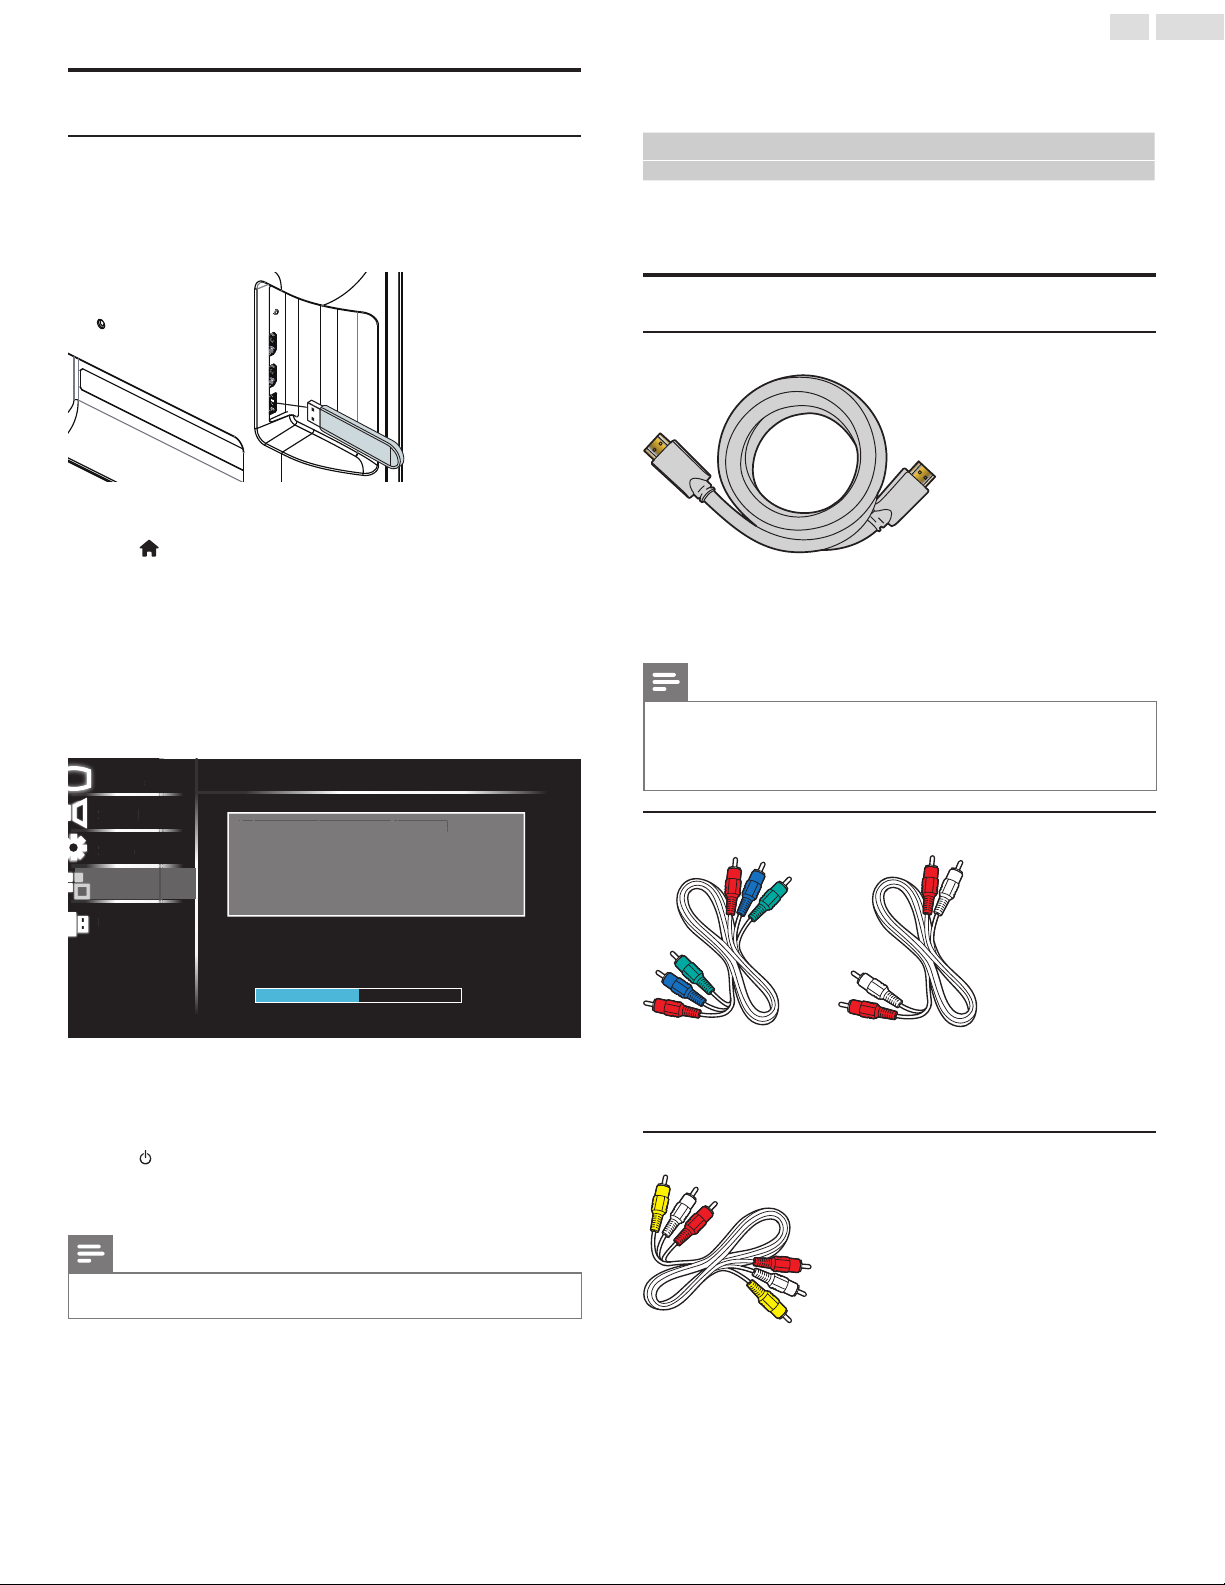
6 Connecting devices
No supplied cables are used with these connections:
• Pleasepurchasethenecessarycablesatyourlocalstore.
Before you connect AC power cord:
BesureotherdevicesareconnectedproperlybeforepluggingintheAC
powercord.
Selecting your connection quality
HDMI - Highest quality
Supportshigh-denitionDigitalsignalsandgiveshighestpictureand
soundquality.VideoandAudiosignalsarecombinedinonecable.You
mustuseHDMIforfullhigh-denitionvideoandtoenablePhilips
EasyLink.
Note
• PhilipsHDMIsupportsHDCP(High-bandwidthDigitalContentsProtection).HDCPisa
formofDigitalRightsManagementthatprotectshighdenitioncontentinBlu-raydiscs
orDVDs.
• TheHDMI-ARCconnectorontheTVfeaturesHDMI-ARCfunctionality.Thisallows
outputofTVAudiotoanHDMI-ARC-compliantdevice.
Component (Y Pb Pr) - High quality
Supportshigh-denitionAnalogsignalsbutgiveslowerpicturequality
thanHDMI.Component(Y/Pb/Pr)VideocablescombineRed/Green/
BluevideocableswithRed/WhiteAudio(L/R)cables.Matchthecable
colorswhenyouconnecttotheTV.
Composite - Basic quality
ForAnalogconnections.CompositeVideo/AudioAnalogcableusually
combineaYellowvideocablewithRed/WhiteAudio(L/R)cables.
Withthisunit,YellowcablemustbeconnectedtoY(Green)of
ComponentVideoInputjacks.
30
English
Connecting your devices
HDMI Digital connection
HDMIconnectionoffersthehighestpicturequality.
HDMI(High-DenitionMultimediaInterface)transportshighdenition
Digitalvideoandmulti-channelDigitalAudiothroughasinglecable.
set-top box
or
Blu-ray disc play
or
HD game console
HDMI cable
IN
OUT
HDMI-DVI connection
ThisunitcanbeconnectedtoyourdevicethathasaDVIterminal.
UseanHDMI-DVIconversioncableforthisconnectionanditrequires
AudiocableforAnalogAudiosignalaswell.
OUT
OUT
Audio dongle
cable receiver or
satellite box with
the DVI Output jack
IN
IN
Audio (L/R) cables
HDMI-DVI
conversion cable
Note
• UseanHDMIcablewiththeHDMIlogo(acertiedHDMIcable).HighSpeedHDMI
cableisrecommendedforthebettercompatibility.
For HDMI connection
• Theunitaccepts480i/480p/720p/1080i,1080p24/30/60Hzofvideosignals,32kHz
/44.1kHzand48kHzofAudiosignals.
• Thisunitaccepts2channelAudiosignal(LPCM)only.
• ThisunitacceptsonlysignalsincompliancewithEIA861.
For HDMI-DVI connection
• Theunitaccepts480i,480p,720p,1080iand1080pvideosignals.
• HDMI-DVIconnectionrequiresseparateAudioconnectionsaswellandtheAudio
signalsareoutputasAnalog(L/R)Audio.
• DVIdoesnotdisplay480iimagewhichisnotincompliancewithEIA/CEA-861/861B.
HDMI-ARC connection
HDMI-ARCallowsyoutouseEasyLinktooutputTVAudiodirectlyto
aconnectedAudiodevice,withouttheneedforanadditionalDigital
Audiocable.
OUT
HDMI-ARC
HDMI cable
Digital home theater
amplifer
Note
• TheHDMI1connectorisHDMIAudioReturnChannel(ARC)compliant.Useitto
outputDigitalAudiotoanHDMIhometheatersystem.
• BesurethatthedeviceisHDMICECandARCcompliantandthattheTVisconnected
tothedeviceusinganHDMIcableattachedtoHDMI-ARCconnectors.
Component Analog Video Connection
ComponentAnalogVideoconnectionoffersbetterpicturequalityfor
videodevicesconnectedtotheunit.
Ifyouconnecttotheunit’sComponentVideo(Y/Pb/Pr)Inputjacks,
connectAnalogAudiocablestotheAnalogAudio(L/R)Inputjacks.
set-top box
or
Blu-ray disc / DVD
recorder
OUT
OUT
Component (Y/Pb/Pr)
Video cables
Audio (L/R) cables
Note
• Theunitaccepts480i/480p/720pand1080i/pofvideosignalsforthisconnection.
Digital Audio Output Connection
IfyouconnectthisunittoanexternalDigitalAudiodevice,youcan
enjoymulti-channelAudiolike5.1chDigitalbroadcastingsound.
UseaDigitalAudiocoaxialcableorDigitalAudioopticalcabletocon-
necttheunittoexternalDigitalAudiodevices.
Digital home theater
amplifer
Digital Audio coaxial cable
OUT
IN
PC connection
HDMI connection
ThisunitcanbeconnectedtoyourPCthathasaHDMIterminal.Use
anHDMIcableforthisDigitalconnection.
OUTIN
HDMI cable
PC
HDMI-DVI connection
ThisunitcanbeconnectedtoyourPCthathasaDVIterminal.Usean
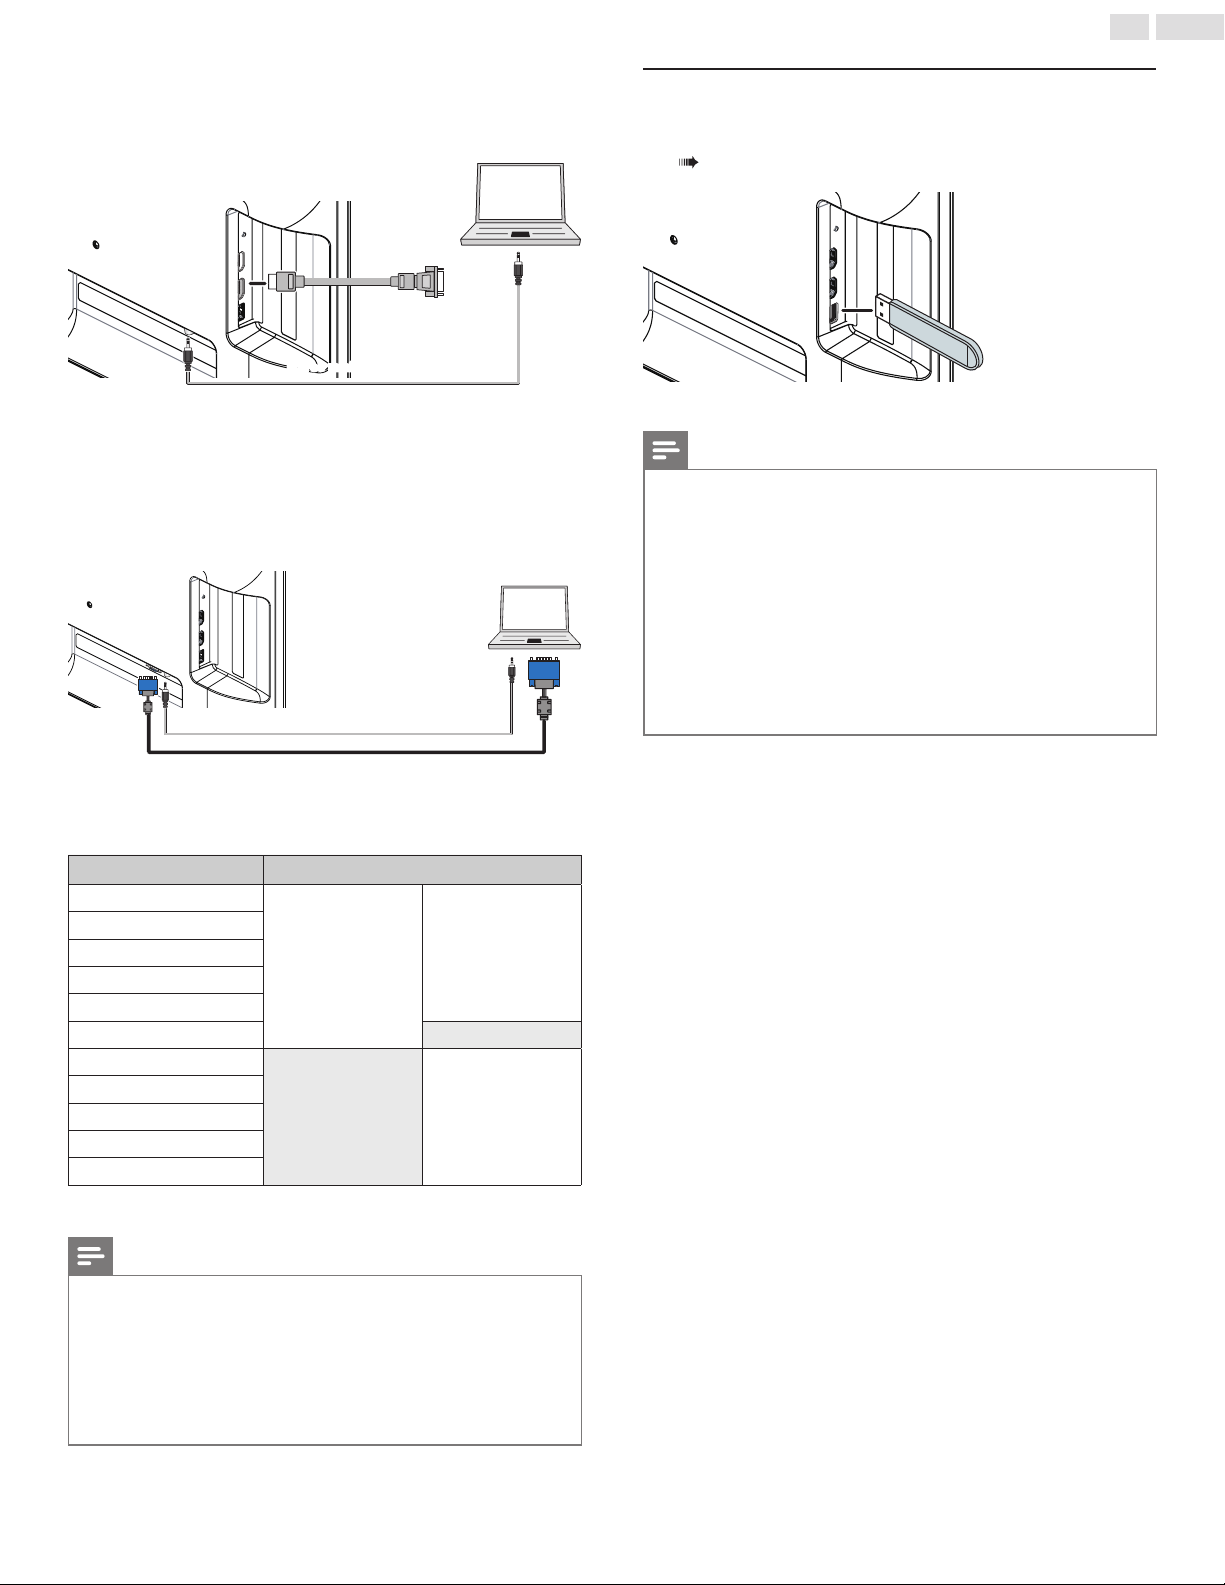
31
English
HDMI-DVIconversioncableforthisVideoDigitalconnectionandit
requiresStereomini3.5mmplugAudiocableforAnalogAudiosignalas
well.
OUT
IN
PC
OUT
IN
Stereo mini 3.5 mm plug Audio cable
VGA connection
ThisunitisequippedwithaPCInputjack.Ifyouconnectthisunitto
yourPC,youcanusethisunitasaPCmonitor.
UseaVGAcableforthisVideoconnectionanditrequiresaStereomini
3.5mmplugAudiocableforAnalogAudiosignalaswell.
OUT
IN
PC
OUT
IN
Stereo mini 3.5 mm plug Audio cable
VGA cable
-Thefollowingvideosignalscanbedisplayed:
Resolution Model
720x400@70Hz
23PFL4509/F7
32PFL4709/F7
640x480@60Hz
800x600@60Hz
1024x768@60Hz
1280x720@60Hz
1360x768@60Hz
1280x1024@60Hz
32PFL4709/F7
1280x768@60Hz
1600x900@60Hz
1680x1050@60Hz
1920x1080@60Hz
Otherformatsornon-standardsignalswillnotbedisplayedcorrectly.
Note
• PleasepurchasetheVGAcableorHDMI-DVIconversioncablethathasaferritecore.
• Thefollowingoperationsmayreducenoise.
–AttachaferritecoretotheACpowercordofyourPC.
–UnplugtheACpowercordandusethebuilt-inbatteryofyourPC.
• UseanHDMIcablewiththeHDMIlogo(acertiedHDMIcable).HighSpeedHDMI
cableisrecommendedforthebettercompatibility.
• Theunitaccepts480i,480p,720p,1080iand1080pvideosignals.
• HDMI-DVIconnectionrequiresseparateAudioconnectionsaswellandtheAudio
signalsareoutputasAnalog(L/R)Audio.
• DVIdoesnotdisplay480iimagewhichisnotincompliancewithEIA/CEA-861/861B.
USB Memory Stick
Thisunitofferseasyplaybackofpicture,musicandmovieles.
InserttheUSBMemoryStickintotheUSBterminalshownbelow.
USB p. 27
Note
• TheunitrecognizesonlyaUSBMemoryStick.
• DonotuseaUSBhuboranextensioncabletoconnectanexternalharddiskdriveto
theunit.(Notsupported.)
• AUSBMemoryStickisalwaysinsertedtothisunitdirectly.
• AUSBMemoryStickisnotsuppliedwiththisunit.
• WedonotguaranteethatallUSBMemoryStickscanbesupportedbythisunit.
• Besuretokeepabackupcopyoftheoriginallesonyourdevicebeforeyouplaythem
backonthisunit.Wehavenoresponsibilitiesfordamageorlossofyourstoreddata.
• ToprotectyourUSBMemorySticklesfrombeingerasedplacethewriteprotectslid-
ingtabintheprotectposition.
• WhenyouarereadytoremoveaUSBMemoryStick,settheunittogointoStandby
modetoavoidanydamagetoyourdataandtheunit.
• AUSBMemoryStickthatrequiresitsowndriverorthedevicewithaspecialsystem
suchasngerprintrecognitionarenotsupported.
• ThisunitisnotallowedtousetheUSBMemoryStickwhichrequiresanexternalpower
supply(500mAormore).
32
English
7 Useful tips
FAQ
Question Answer
My remote control does not
work.
What should I do?
• Checktheantennaorcableconnectiontothemainunit.
• Checkthebatteriesoftheremotecontrol.
• Checkifthereisanobstaclebetweentheinfraredsensorwindowandtheremotecontrol.
• TestthesignalOutputuseIR Signal Check. p. 36Ifokay,thenpossibleinfraredsensortrouble.
• Aimtheremotecontroldirectlyattheinfraredsensorwindowonthefrontoftheunit.
• Reducethedistancetotheunit.
• Re-insertthebatterieswiththeirpolarities(+/–)asindicated.
• Whenthereisaninfrared-equippeddevicesuchasPCnearthisunit,itmayinterrupttheremotecontrolsignalofthis
unit.Movetheinfrared-equippeddeviceawayfromthisunit,changetheangleoftheinfraredsensororTurnOffthe
infraredcommunicationfunction.
How come the initial setup
appears every time I Turn
On this unit?
• MakesuretocompletetheinitialsetupbeforetheunitgoesintoStandbymode.
Why can I not watch some
RF signal TV programs.
• Autoprogrammustbecompletedwhenyousetuptheunitforthersttimeormoveittoalocationwhere
previouslyunavailablechannelsarebroadcast.
• MakesureAutoprogramhasbeencompleted. p. 21
• Theselectedchannelmaynotbebroadcasting.
• WhenAutoprogramisinterruptedandnotcompleted,somechannelswillnotbereceived.Makesuretocomplete
theAutoprogram. p. 21
• TheselectedchannelcannotbeviewedbytheChild locksetting. p. 23
• TheunitrequiressomekindofantennaInput.Anindoorantenna(DigitalorVHF/UHF),anexternalantenna(Digital
orVHF/UHF)oranRFcoaxialcablefromyourwallcable/satelliteboxneedstobepluggedintotheunit.
How come there is no image
from the connected external
devices?
• CheckifthecorrectInputmodeisselectedbypressing
SOURCE.Watching channels from an external device
p. 16
• Checktheantenna,cableorotherInputconnectiontotheunit.
• WhenusingtheComponentVideoConnectioncheckthattheGreen(Y),Blue(Pb/Cb)andRed(Pr/Cr)connectors
areconnectedtotheircorrespondingcoloredjacksontheunit.
When I enter a channel
number, it changes
automatically.
• ManyDigitalchannelshavealternatechannelnumbers.Theunitchangesthenumbersautomaticallytotheones
signifyingthebroadcastingstationchannelnumber.ThesebasicnumbersusedforpreviousAnalogbroadcasts.(e.g.,
Inputch#30automaticallychangestoch#6.1)
Why are captions not
displayed entirely? Or,
captions are delayed behind
the dialog.
• Captionsthataredelayedafewsecondsbehindtheactualdialogarecommonforlivebroadcasts.Mostcaptioning
productioncompaniescandisplayadialogtomaximumof220wordsperminute.Ifadialogexceedsthatrate,
selectiveeditingisusedtoinsurethatthecaptionsremainup-todatewiththecurrentTVscreendialog.
How can I set the clock ? • Thereisnoclockfunctiononthisunit.
I cannot change the Child
lock setting because my PIN
code no longer works.
• AlthoughthedefaultPINcode(0000)issuppliedwiththeunit,thePINcodewillberequiredonceyousetaPIN
codeinChild lock. p. 23WhenyouforgetyourPINcode,enter9999inChange PINtoresetthePINcode.
p. 25
33
English
Troubleshooting
IftheunitdoesnotperformproperlywhenoperatedasinstructedinthisUserManual,
check the following chart and all connections once before calling for service.
Symptom Remedy
No power • MakesurethattheACoutletsuppliesthepropervoltage,pluganotherelectricalapplianceintotheACoutletto
ensurethatACoutletoperatesnormally.
• Ifapowerfailureoccurs,unplugtheACpowercordfor1minutetoallowtheunittoresetitself.
Remote control buttons do
not work.
• Re-insertthebatterieswiththeirpolarities(+/−signs)asindicated.
• Whenthereisaninfrared-equippeddevicesuchasaPCisnearthisunit,itmayinterrupttheremotecontrolsignalof
thisunit.
Power is ON but no screen
image.
• Checkwhethertheconnectionoftheantenna,cablereceiverorsatelliteboxisconnectedcorrectly.
• CheckwhetherallthecablestotheunitareconnectedtothecorrectOutputjackofyourdevicelikeBlu-ray/DVD
recorder.
• CheckifyourcomputerisNOTinsleepmodewhentheInputmodeofthisunitisinPCmode.Tapanykeyonthe
keyboardtowakeupyourcomputer.
• CheckifthecorrectInputmodeisselectedbypressing
SOURCE.
No picture or sound • ViewotherTVchannels.Theproblemmightbelimitedtothebroadcastingstationorweaksignalstrength.
• UnplugtheACpowercordandwaitforabout1minute,thenplugtheACpowercordandturnOntheunitagain.
• Autoprogrammustbecompletedwhenyousetuptheunitforthersttimeormoveittoalocationwhere
previouslyunavailablechannelsarebroadcast.
• TheselectedchannelcannotbeviewedbytheChild lock setting. p. 23
• TheunitrequiressomekindofInputsignal.Anindoorantenna(VHF/UHF),anexternalantenna(VHF/UHF)oranRF
coaxialcablefromyourwallorcable/satelliteboxsignalneedstobepluggedintotheunit.
No color
• AdjustColorinPicturesettings. p. 18
No sound, distorted sound
or incorrect Audio Sound
is heard when using the
HDMI-DVI connections.
• MakesurethattheAnalogAudiosignalsfromtheHDMI-DVIdeviceareconnectedtotheAnalogAudioInputL/R
jacks.
Adjusted Picture or Sound
settings are not effective
every time the unit is Turned
On.
• YoumustsettoHomeinLocation. p. 26
Otherwise,thesettingsyouadjustedwillnotbememorizedaftertheunitgoesintoStandbymode.
Forgotten PIN code.
• Enter“9999”toclearyourpassword.
Sound OK, picture poor
• Electricalinterferencefromnearbyappliancesmayaffectpicturequality.
• AdjustContrastandBrightnessinPicturesettings. p. 18
• Forthebestpicturequality,watch"HighDenition"widescreenprograms.
IftheHDcontentisnotavailable,watch"StandardDenition"programsinstead.
Picture OK, sound poor
• Checkiftheaudiocableisconnectedincorrectly.
• NoaudioinUSBVideoplayback,checkifaudiostreaminvideoleissupportedbyTVbyreferringtotableon.
p. 2 7
You see a distorted picture
or hear an unusual sound.
• YoumaybegettingNTSCTVsignal(notHDTVsignal)interferencefromelectricalappliances,automobiles,motorcycles
oruorescentlights.
• Trymovingtheunittoanotherlocationtoseeifthisisthecauseoftheproblem.
You see noise or trash on
the screen.
• Whenthecapabilitiesoftheunitexceedthecapabilitiesofthedigitalbroadcasting,thesignalwillbeincreasedto
matchthecapabilitiesofthedisplayoftheunit.Thismaycausenoiseortrash.
You switch to a different
Input and the volume
changes.
• Thisunitwillmemorizethevolumelevelfromthelasttimeyouadjustedit.
• Ifthevolumeofthesoundfromanotherdeviceishigherorlower,thentheloudnesswillchange.
You switch to a different
Input and the screen size
changes.
• ThisunitwillmemorizetheviewingmodefromthelasttimeyouusedtheparticularInputmodes.
The display image does not
cover the entire screen.
• IfyouareusingtheunitasaPCmonitor,makesurethatHorizontal positionandVertical positioninPC settingsare
setcorrectly.
• IfyouarewatchingTVorusingtheCompositeVideo,ComponentVideoorHDMIwith480iInput,press
FORMAT
repeatedlytoswitchvariousscreenmodes.

34
English
Captions are displayed as
a white box. No caption
is displayed in the closed
caption-supported program.
• Interferencefrombuildingsorweatherconditionsmaycausecaptioningtobeincomplete.(forAnalogonly)
• Broadcastingstationmayshortentheprogramtoinsertadvertisement.
Theclosedcaptiondecodercannotreadtheinformationoftheshortenedprogram.
• Captionsthataredelayedafewsecondsbehindtheactualdialogarecommonforlivebroadcasts.Mostcaptioning
productioncompaniescandisplayadialogtomaximumof220wordsperminute.Ifadialogexceedsthatrate,
selectiveeditingisusedtoinsurethatthecaptionsremainup-todatewiththecurrentTVscreendialog.
Black box is displayed on the
TV screen.
• Thetextmodeisselectedforcaption.
• SelectCC-1,CC-2,CC-3orCC-4. p. 25

35
English
8 Information
Glossary
Analog TV (NTSC)
AcronymthatstandsforNationalTelevisionSystemsCommitteeandthenameofAnalogbroadcastingstandards.
Off-the-airNTSCsignalsarenolongerbeingsentbymajorbroadcastingstationsintheUSA.
ARC (Audio Return Channel) (HDMI 1 only)
HDMI-ARCallowsyoutousePhilipsEasyLinktooutputTVaudiodirectlytoaconnectedAudiodevice,withouttheneedforanadditionalDigitalAudio
cable.BesurethatthedeviceisHDMICECandARCcompliant,andthattheTVisconnectedtothedeviceusinganHDMIcableattachedtoboth
HDMI-ARCconnectors.
Aspect ratio
ThewidthofaTVscreenrelativetoitsheight.ConventionalTVsare4:3(inotherwords,theTVscreenisalmostsquare);widescreenmodelsare16:9(the
TVscreenisalmosttwiceaswideasitsheight).
CEC (Consumer Electronics Control)
ThisallowsyoutooperatethelinkedfunctionsbetweenourbranddeviceswithCECfeatureandthisunit.Wedonotguarantee100%interoperability
withotherbrandsofCECcompliantdevices.
Component Video
Thisisavideosignalformatthatconveyseachof3principalcolorsoflight(red,blueandgreen)throughdifferentsignallines.Thisallowstheviewersto
experiencepicturecolorsasoriginalasitis.Thereareseveralsignalformats,includingY/Pb/PrandY/Cb/Cr.
Dolby Digital
ThesystemdevelopedbyDolbyLaboratoriestocompressDigitalsound.Itoffersstereosound(2ch)ormulti-channelAudio.
DTV (ATSC)
AcronymthatstandsforAdvancedTelevisionSystemsCommitteeandthenameoftheDigitalbroadcastingstandards.
E-sticker
E-stickerisshowingsetfeatures,technicalinformation,etconthisTVsetthatisdisplayedontheTVscreenmainlyusedbyTVretailers.Previouslythe
informationwasonaprintedstickerthatwasputonthedisplay.
HDMI(High-DenitionMultimediaInterface)
Interfacethatsupportsalluncompressed,DigitalAudio/Videoformatsincludingset-topbox,Blu-ray/DVDrecorderorDigitaltelevision,overasingle
cable.
HDTV(HighDenitionTV)
UltimateDigitalformatthatproduceshighresolutionandhighpicturequality.
PIN code
Astored4-digitnumberthatallowsaccesstoparentalcontrolfeatures.
SAP (Secondary Audio Program)
Second-Audiochanneldeliveredseparatelyfrommain-Audiochannel.ThisAudiochannelisusedasanalternateinbilingualbroadcasting.
SDTV(StandardDenitionTV)
StandardDigitalformatthatissimilartotheAnalogTV(NTSC)picturequality.
DTS TruSurround
EnableDTSTruSurroundtoenhanceyouraudioexperience.
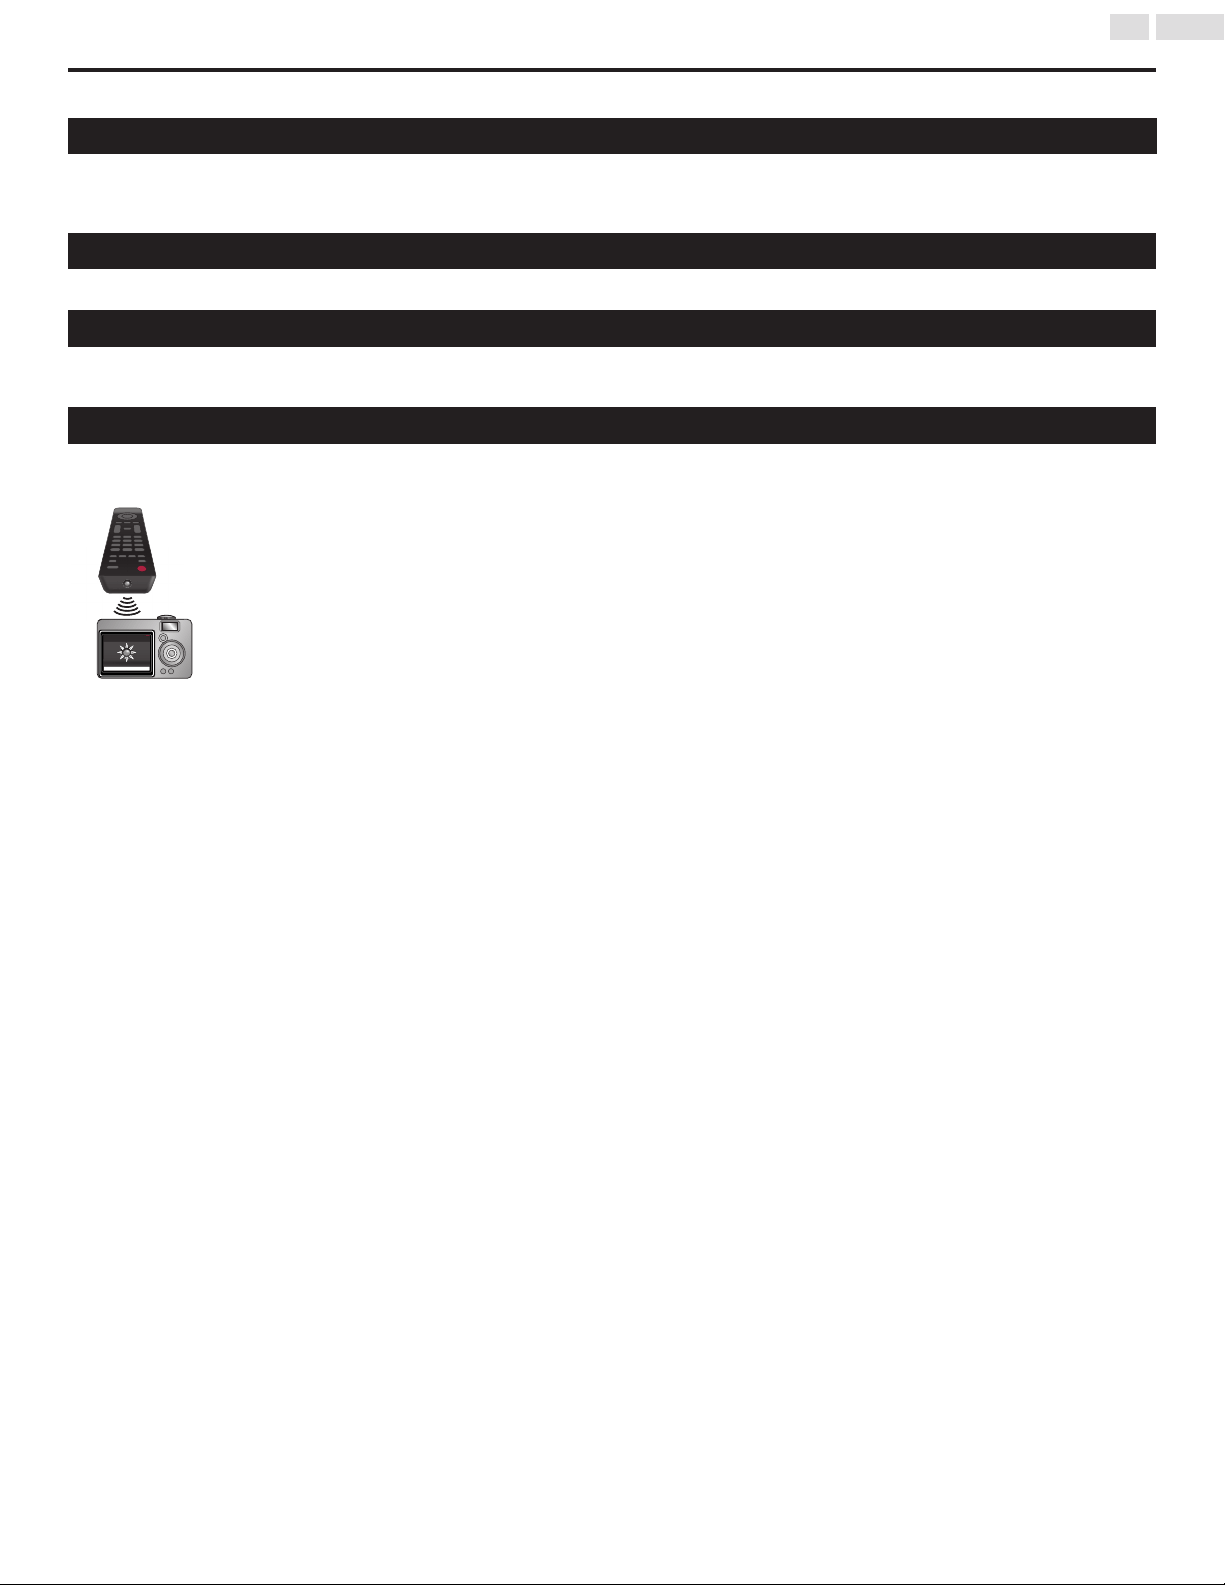
36
English
Maintenance
Cabinet Cleaning
• Wipethefrontpanelandotherexteriorsurfacesoftheunitwithasoftcloth.
• Neveruseasolventoralcohol.Donotsprayinsecticideliquidneartheunit.Suchchemicalsmaycausedamageanddiscolorationtotheexposed
surfaces.
Panel Cleaning
Wipethepaneloftheunitwithasoftcloth.Beforecleaningthepanel,disconnecttheACpowercord.
Servicing
Shouldyourunitbecomeinoperative,donottrytocorrecttheproblemyourself.Therearenouserserviceablepartsinside.Callourtollfreecustomer
supportlinefoundonthecoverofthisUserManualtolocateanauthorizedservicecenter.
IR Signal Check
Iftheremotecontrolisnotworkingproperly,youcanuseaDigitalcamera(includingacellularphonewithbuilt-incamera)toseeifitissendingoutan
infraredsignal.
WithaDigitalcamera
(includingbuilt-incellphonecameras):
PointtheDigitalCameratowardstheremotecontrolinfrareddiodeatthefrontoftheremotecontrol.Pressanybuttononthe
remotecontrolandlookthroughthecameradisplay.Iftheinfraredpulsatinglightappearsthroughthecamera,theremotecontrolis
sendingoutanIRsignal.
37
English
9 Specications
Model #
23PFL4509/F7
32PFL4709/F7
Picture enhancement
Type
HD(1366x768pixels60Hz)(23PFL4509/F7)
FHD(1920x1080pixels60Hz)(32PFL4709/F7)
Aspect ratio 4:3/16:9
Viewing angles 178°(V)by178°(H)
Built-in Digital tuner ATSC/NTSC
Sound enhancement
Mono / Stereo Mono,Stereo,DTSTruSurround
Power output (RMS watts)
2.5Wx2(23PFL4509/F7);
5Wx2(32PFL4709/F7)
Equalizer 5band
Ease of use
Picture format
SD(4:3Source) :Normal/Zoom/Wide/Cinema/Auto
HD(16:9Source) :Normal/Zoom/Wide/Cinema/Auto
HDMIAV(4:3Source) :Normal/Zoom/Wide/Cinema/Auto
HDMIAV(16:9Source) :Normal/Zoom/Wide/Cinema/Auto
PCSource :(RefertoHDMIAV(16:9Source)aboveifPChasHDMIOutput.)
Photo Slide show JPEGlesonly
Video playback
MPEG1(.dat/.mpg/.mpeg/.mkv),MPEG2(.dat/.mpg/.mpeg/.avi),MPEG2-PS(.vob/),MPEG2-TS(.ts/.trp/.tp/.
m2ts),
MPEG4SP/ASP(.avi),MPEG4(.mp4/.avi),MP4(.mp4),JPEG(MotionJPEG)
Music
MPEG1Layer2:32Kbps~448Kbps(Bitrate)
32KHz~48KHz(Samplingrate)
MPEG1Layer3:32Kbps~320Kbps(Bitrate)
32KHz~48KHz(Samplingrate)
MPEG2Layer3:32Kbps~320Kbps(Bitrate)
32KHz~48KHz(Samplingrate)
Connections
Component Video Input (Y/Pb/Pr)
1
supportingvideosignals:480i/p,720p,1080i/p60Hz
Component Audio L/R Input 1
Composite Video / Audio Input 1sharedwithComponentYandL/R
HDMI Input 2
PC Input viaVGA,HDMIandHDMI-DVI+PCAudio
USB 1
Digital Audio Output
1
supportingDolbyDigital
Headphone Output
1
1/8inches(3.5mm)
Power
Power requirements 120V~AC+/−10%,60Hz+/−0.5%
Temperature
Operating temperature 41°F(5°C)to104°F(40°C)
• Specicationsaresubjecttochangewithoutpriornotice.

38
English
10 Warranty
LIMITED WARRANTY
ONE (1) YEAR
WARRANTY COVERAGE:
This warranty obligation is limited to the terms as set forth below.
WHO IS COVERED:
This product warranty is issued to the original purchaser or the person receiving the product as a gift against defects in materials and workmanship
as based on the date of original purchase (“Warranty Period”) from an Authorized Dealer. The original sales receipt showing the product name and
the purchase date from an authorized retailer is considered such proof.
WHAT IS COVERED:
This warranty covers new products if a defect in material or workmanship occurs and a valid claim is received within the Warranty Period. At its
option, the company will either (1) repair the product at no charge, using new or refurbished replacement parts, or (2) exchange the product with a
product that is new or which has been manufactured from new, or serviceable used parts and is at least functionally equivalent or most comparable
to the original product in current inventory, or (3) refund the original purchase price of the product.
Replacement products or parts provided under this warranty are covered against defects in materials and workmanship from the date of the
replacement or repair for ninety (90) days or for the remaining portion of the original product’s warranty, whichever provides longer coverage for
you. When a product or part is exchanged, any replacement item becomes your property and the replaced item becomes company property. When
a refund is given, your product becomes company property.
Note:Anyproductsoldandidentiedasrefurbishedorrenewedcarriesaninety(90)daylimitedwarranty.
Replacement product can only be sent if all warranty requirements are met. Failure to follow all requirements can result in delay.
WHAT IS NOT COVERED - EXCLUSIONS AND LIMITATIONS:
ThisLimitedWarrantyappliesonlytonewcompanymanufacturedproductsthatcanbeidentiedbythetrademark,tradename,orlogoafxedto
it. This Limited Warranty does not apply to any hardware product or any software, even if packaged or sold with the product, as manufacturers,
suppliers, or publishers may provide a separate warranty for their own products packaged with the bundled product.
The company is not liable for any damage to or loss of any programs, data, or other information stored on any media contained within the product,
or other additional product or part not covered by this warranty. Recovery or reinstallation of programs, data or other information is not covered
under this Limited Warranty.
This warranty does not apply (a) to damage caused by accident, abuse, misuse, neglect, misapplication, or non-supplied product, (b) to damage caused
byserviceperformedbyanyoneotherthancompanyapprovedAuthorizedServiceLocation,(c)toaproductorapartthathasbeenmodied
without written company permission, or (d) if any serial number has been removed or defaced, or (e) product, accessories or consumables sold “AS
IS” without warranty of any kind by including refurbished product sold “AS IS” by some retailers.
This Limited Warranty does not cover:
• ShippingchargestoreturndefectiveproductapprovedAuthorizedServiceLocation,(c)toaproductorapartthathasbeenmodiedwithout
written company permission, or (d) if any serial number has been removed or defaced, or (e) product, accessories or consumables sold “AS IS”
without warranty of any kind by including refurbished product sold “AS IS” by some retailers.
This Limited Warranty does not cover:
• Shipping charges to return defective product..
• Labor charges for installation or setup of the product, adjustment of customer controls on the product, and installation or repair of antenna/
signal source systems outside of the product.
• Product repair and/or part replacement because of improper installation or maintenance, connections to improper voltage supply, power line
surge,lightningdamage,retainedimagesorscreenmarkingsresultingfromviewingxedstationarycontentforextendedperiods,product
cosmetic appearance items due to normal wear and tear, unauthorized repair or other cause not within the control of the company.
• Damage or claims for products not being available for use, or for lost data or lost software.
• Damage from mishandled shipments or transit accidents when returning product.
• Aproductthatrequiresmodicationoradaptationtoenableittooperateinanycountryotherthanthecountryforwhichitwasdesigned,
manufactured,approvedand/orauthorized,orrepairofproductsdamagedbythesemodications.
• A product used for commercial or institutional purposes (including but not limited to rental purposes).
• Productlostinshipmentandnosignaturevericationreceiptcanbeprovided.
• Failure to operate per Owner’s Manual.

39
English
TO OBTAIN ASSISTANCE…
Contact the Customer Care Center at:
1 866 309 8147
REPAIR OR REPLACEMENT AS PROVIDED UNDER THIS WARRANTY IS THE EXCLUSIVE REMEDY FOR THE CONSUMER, WITH THE
ISSUING COMPANY NOT LIABLE FOR ANY INCIDENTAL OR CONSEQUENTIAL DAMAGES FOR BREACH OF ANY EXPRESS OR
IMPLIED WARRANTY ON THIS PRODUCT. EXCEPT TO THE EXTENT PROHIBITED BY APPLICABLE LAW, ANY IMPLIED WARRANTY OF
MERCHANTABILITY OR FITNESS FOR A PARTICULAR PURPOSE ON THIS PRODUCT IS LIMITED IN DURATION TO THE DURATION OF
THIS WARRANTY.
Some states do not allow the exclusions or limitation of incidental or consequential damages, or allow limitations on how long an implied warranty
lasts, so the above limitations or exclusions may not apply to you.
Thiswarrantygivesyouspeciclegalrights.Youmayhaveotherrightswhichvaryfromstate/provincetostate/province.
P&F USA, Inc. PO Box 2248, Alpharetta, GA 30023-2248
061708

P&F USA, Inc.
PO Box 2248, Alpharetta, GA 30023-2248
P&F Mexicana, S.A. de C.V.
Av. La Palma No. 6, Col. San Fernando La Herradura,
Huixquilucan, Edo. de México. C.P. 52787
Philips and Philips Shield are used under license of
Koninklijke Philips N.V.