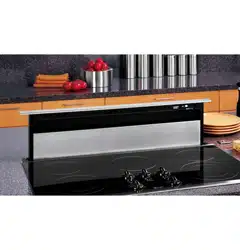
Specifications
Indexed Terms: Downdraft, Telescopic
GE - General Electric JVB67A2CC Questions and Answers

Operating Instructions Safety Instructions Installation Instructions Troubleshooting Tips Consumer Support
IMPORTANT SAFETY INFORMATION.
READ ALL INSTRUCTIONS BEFORE USING.
WARNING! TO REDUCE THE RISK OF A RANGE TOP GREASE FIRE:
I Never leave surface units unattended at high settings. Boilovers cause smoking and greasy spillovers that may ignite. Heat oils slowly on low or medium settings.
I Always turn hood ON when cooking at high heat or when cooking flaming foods.
I Clean ventilating fans frequently. Grease should not be allowed to accumulate on fan or filter.
I Use proper pan size. Always use cookware appropriate for the size of the surface element.
PLEASE NOTE: The downdraft vent system you have purchased was designed to be used with GE. GE Profile and GE Profile Performance cooktops listed in this manual.
WARNING!
For your safety. the information in this manual must be followed to minimize the risk of fire or explosion. electric shock. or to prevent property damage. personal injury. or loss of life.
A. Use this unit only in the manner intended by the manufacturer. If you have questions. contact the manufacturer.
B. Before servicing or cleaning unit. switch power off at service panel and lock the service disconnecting means to prevent power from being switched on accidentally. When the service disconnecting means cannot be locked. securely fasten a prominent warning device. such as a tag. to the service panel.
CAUTION: For general ventilating use only.
Do not use to exhaust hazardous or explosive materials and vapors.
I Installation work and electrical wiring must be done by qualified person(s) in accordance with all applicable codes and standards. including fire-rated construction.
I Sufficient air is needed for proper combustion and exhausting of gases through the flue (chimney) of fuel-burning equipment to prevent back drafting. Follow the heating equipment manufacturer’s guideline and safety standards such as those published by the National Fire Protection Association (NFPA). and the American Society for Heating. Refrigeration and Air Conditioning Engineers (ASHRAE). and the local code authorities.
I When cutting or drilling into wall or ceiling. do not damage electrical wiring and other hidden utilities.
I Ducted fans must always be vented to the outdoors.
I To reduce the risk of fire. use only metal ductwork.
I PVC sewer pipe can be used as duct under concrete slab if allowed by local code board.
I This unit must be grounded.
WARNING: TO REDUCE THE RISK OF FIRE.
ELECTRIC SHOCK. OR INJURY TO PERSONS.
OBSERVE THE FOLLOWING:
Consumer Support Operating Instructions Safety Instructions Installation Instructions Troubleshooting Tips
WARNING! TO REDUCE THE RISK OF A INJURY TO PERSONS IN THE EVENT OF A RANGE TOP GREASE FIRE. OBSERVE THE FOLLOWING:*
A. SMOTHER FLAMES with a close-fitting lid. cookie sheet. or metal tray. then turn off the burner. BE CAREFUL TO PREVENT BURNS.
If the flames do not go out immediately.
EVACULATE AND CALL THE FIRE DEPARTMENT.
B. NEVER PICK UP A FLAMING PAN—You may be burned.
C. DO NOT USE WATER. including wet dishcloths or towels–a violent steam explosion will result.
D. Use an extinguisher ONLY if:
1. You know you have a Class ABC extinguisher. and you already know how to operate it.
2. The fire is small and contained in the area where it started.
3. The fire department is being called.
4. You can fight the fire with your back to an exit.
+Based on “Kitchen Fire safety Tips” published by NFPA.
CAUTION: For general ventilating use only.
Do not use to exhaust hazardous or explosive materials and vapors.
Make sure all fingers are away from the downdraft top when it is lowered.
If You Need Service…
Do not attempt to repair or replace any part of the downdraft system unless it is specifically recommended in this guide. All other servicing should be referred to a qualified technician.
SAFETY PRECAUTIONS
READ AND FOLLOW THIS SAFETY INFORMATION CAREFULLY.
SAVE THESE INSTRUCTIONS
Be sure electrical power is off before servicing the unit.
It may be necessary to remove the downdraft blower system in order to service components such as the blower motor or air vent mechanism.
Disconnect power to the cooktop and remove it first. Reverse the steps in the Install the Downdraft section to remove the blower.
Service parts are available from a GE Service and Parts Center.
SERVICING
Using the Cooktop CAUTION: Be careful when raising or lowering the downdraft. Be sure pots. pot handles and other objects are clear of the downdraft and cannot be struck or tipped by the downdraft being raised.
NOTE: There is a slight trim overhang at each end of the vent.
I To avoid injury. be sure fingers are clear of the downdraft cover when it is being lowered.
I Keep hands and fingers away from all downdraft parts.
Operating Instructions Safety Instructions Installation Instructions Troubleshooting Tips Consumer Support
Using the downdraft system.
Raise/Lower Switch (30″ models only)
Turn the downdraft blower ON by pressing the raise/lower switch located at the top right of the vent. Place your finger on the “center” of the switch and hold until you observe the vent moving. then release.
The air vent will rise. Use the selector switch to turn the blower ON. OFF or to change the blower speed.
The vent may be lowered by again pressing the raise/lower switch at the top right side of the vent. The blower. if left on. will automatically go off when the vent is lowered.
NOTE: For most convenient operation. set the blower to the speed you use most often. The blower will come on to this speed whenever the unit is raised.
Remote Raise/Lower Switch (36″ models only)
The 36″ models have a remote raise/lower switch. It operates in the same manner as the switch located on the vent. This switch may be located beside the cooktop or in a convenient location.
Raise/Lower switch location may vary.
On some models. the Raise/Lower switch is located at the top right of the vent.
Use the selector switch to turn the blower ON. OFF or to change the blower speed.
Do not use a steel-wool pad; it will scratch the surface.
Shake bottle well.
Place a small amount of CERAMA BRYTE Stainless Steel Appliance Cleaner on a damp cloth or damp paper towel.
Clean a small area (approximately 8″ x 8″). rubbing with the grain of the stainless steel if applicable.
Dry and buff with a clean. dry paper towel or soft cloth.
Repeat as necessary.
NOTE: If a mineral oil-based stainless steel appliance cleaner has been used before to clean the appliance. wash the surface with
To order CERAMA BRYTE Stainless Steel Appliance Cleaner. please call our toll-free number:
National Parts Center 800.626.2002 www.GEAppliances.com CERAMA BRYTE Stainless Steel Appliance Cleaner . . . . . . . . . . . . . . . . . . . . . . .# PM10X311
Consumer Support Operating Instructions Safety Instructions Installation Instructions Troubleshooting Tips
Cooking Tips
The high air movement of this downdraft system can increase the cooking times for some foods. It may take longer to reach high cooking temperatures if the downdraft is turned to high right away. Adjust the fan speed for best cooking results.
For best results when heating oil for deep frying or when boiling water. use the front surface units or wait until the water is boiling or the oil is at frying temperatures before turning on the downdraft.
The downdraft may not completely capture all the steam from pans on the front burners.
Canning
When canning foods in a water-bath canner. a gentle but steady boil must be maintained continuously for the required time.
When canning foods in a pressure canner. the pressure must be maintained continuously for the required time.
Use of the blower at HIGH speed when canning may reduce the temperature enough to stop boiling. While canning. we recommend using the downdraft at LOW speed and using the front surface unit.
Painted or Metal Surfaces
Clean greasy surfaces frequently. using a mild detergent.
Do not use abrasive cloth. steel wool pads or scouring powder because they will mar the surface.
Care and cleaning of the downdraft system.
Grease Filters
The efficiency of your downdraft depends on a clean filter. Frequency of cleaning depends on the type of cooking you do.
Grease filters should be cleaned at least once a month. Never operate the downdraft without the filters in place.
To remove: Pull the filters out by grasping them and pulling straight up.
To clean: Soak and then agitate in a hot detergent solution. Light brushing may
Filters may also be cleaned in the dishwasher.
With careful handling. the filter will last for years. If replacement becomes necessary. order the part from your dealer.
Stainless Steel Surfaces (on some models)
If you have questions. call 800.GE.CARES or visit our Website at: www.GEAppliances.com
REMOVE PACKAGING
Open the carton and remove parts package.
Check contents to be sure all pieces are present. (The parts package may be attached to the power cord.)
Remove the shipping materials. Remove the carton and set aside. The carton can be used as a pad when changing or adjusting vent direction.
Installation Downdraft Vent Instructions System
Read these instructions completely and carefully.
• IMPORTANT — Save these instructions for local inspector’s use.
• IMPORTANT — Observe all governing codes and ordinances.
• Note to Installer – Be sure to leave these instructions with the Consumer.
• Note to Consumer – Keep these instructions for future reference.
• Note – This appliance must be properly grounded.
• Proper installation is the responsibility of the installer.
• Product failure due to improper installation is not covered under the Warranty.
Flat-blade screwdriver
Jig saw
Ductwork to suit the installation
Carpenter square
PARTS INCLUDED
Remote raise/lower assembly (for 36″ models only)
Stabilizing brackets (all models) (4)
Wire box (2) and screws (4)
Plastic strain relief (2)
Wire and white connector (1)
Switch cover plate (1)
Attachment bracket (1)
Pliers
Duct tape
Installation Instructions
DIMENSIONS AND CLEARANCES CAUTION — Wall coverings. countertops and cabinets should withstand 200°F. heat generated by any cooktop.
30″ Models 281⁄4″
36″ Models 333⁄4″
81⁄2″
31⁄8″
33⁄8″
101⁄2″
71⁄8″
71⁄2″
33⁄4″
21⁄4″
61⁄4″
WARNING!
TO REDUCE THE RISK OF FIRE. ELECTRIC SHOCK. OR INJURY TO PERSONS. OBSERVE THE FOLLOWING:
Installation work and electric wiring must be done by qualified person(s) in accordance with all applicable codes and standards. including fire-rated construction.
Ducted fans must always be vented to the outdoors.
When cutting or drilling into wall or ceiling. do not damage electrical wiring and other hidden utilities.
WARNING — To reduce the risk of fire. use only metal ductwork.
IMPORTANT: These vents are recommended for island installations.
Against-the-wall installations are limited due to countertop depth requirements. The vent and cooktop combined depth requires an extra deep flat countertop surface.
The countertop must be at least 26″ deep with a flat surface area of 231⁄2″ or more. front to back. (NOTE: JGP932S. JP350SC. JP930SC and JP938SC require 235⁄8″ flat surface area.) In addition. other clearances to the front edge of the countertop must be considered.
• See specific cutout illustrations with your cooktop model to determine requirements.
• A countertop with a raised lip or rolled front edge may not allow enough flat area for installation.
Flat surface area
Installation Instructions
ADVANCE PLANNING
DUCTWORK
Prepare ductwork to vent to the outdoors.
• Use the shortest and straightest duct run possible.
The maximum permissible length for duct run is 150 feet.
Refer to Duct Fittings chart to calculate equivalent length for various duct configurations.
• The downdraft blower system is designed to use 31⁄4″ x 10″ ductwork. It can be transitioned to 6″ round.
• Ductwork MUST be vented to the outside— never into a crawl space. attic or other enclosed space.
• Determine the need for a wall cap or roof cap. Purchase the cap in advance from your home building center or plumbing supply.
• Installation must conform with local codes.
• The downdraft system with blower. motor and duct work will occupy the cabinet below the countertop and cooktop.
• The blower/motor assembly can be located below the cabinet floor. The assembly will fit between 16″ floor joists.
In this installation a transition to 6 ″ round is required.
• The blower motor assembly can also be installed outdoors. Order JXBC67 for remote blower installations outdoors.
• Refer to Dimensions and Clearances for information on appropriate placement and necessary clearances when planning installation.
• Refer to your specific cooktop installation instruction for other appropriate clearances.
• Avoid placing cabinetry directly above the cooking surface when possible.
• If cabinetry is used above the cooking surface: Installation must conform with local codes.
Use cabinets no more than 13″ deep.
Maintain 30″ minimum clearance between cooktop and unprotected cabinets directly above cooktop.
If clearance is less than 30″. protect cabinet bottoms with flame-retardant millboard at least 1/4″ thick or gypsum board at least 3/16″ thick covered with 28 gauge sheet steel or .02″ thick copper.
Clearance between cooktop and protected cabinetry must not be less than 24″.
EXCEPTION: Installation of a listed microwave oven or cooking appliance over the cooktop shall conform to the installation instructions packed with that appliance.
• Working areas adjacent to the cooktop should maintain 18″ minimum clearance between countertop and cabinet bottom.
Plan the placement of the electrical outlet and gas (if used) carefully. Gas or electrical outlets cannot be placed on the back wall of the cabinet because it may interfere with the downdraft plenum.
Install a standard electrical outlet within reach of the vents’ 2 foot long power cord.
• The vent and a gas cooktop combination can operate from the same 120V standard duplex outlet.
• Electric cooktops must operate from a separate 240V junction box.
REMOTE SWITCH (for 36″ models only)
The downdraft vent has a separate raise/lower switch. Plan to install the switch in a convenient location outside of the vent/cooktop cutout.
Installation Instructions
Base cabinet
INSTALLATION POSSIBILITIES
When the kitchen design calls for an against the wall installation. move 24″ deep base cabinet forward. 3″ to 5″. Filler panels can be angled or flat to fill the space between adjacent cabinets.
Maintain cutout clearances to front edge as specified.
In an island or peninsula. the countertop can be extra deep to provide seating opposite of the cooktop. Adding base cabinets on each side of the cooktop provides extra storage and countertop work space.
Filler panel
Filler panel
Base sink 30″ Min. for JVB37 36″ Min. for JVB67
Base to sink 30″ to 42″
Cover panel
Countertop overhang per cooktop clearances must be maintained
End panel
Installation Instructions
INSTALLING THE DOWNDRAFT VENT SYSTEM
POWER SUPPLY
This downdraft vent must be supplied with V. 60Hz. and connected to an individual. properly grounded branch circuit. protected by a 15 or 20 ampere circuit breaker or time delay fuse.
Gas Cooktops If this vent is installed in combination with a gas cooktop. it may operate from the same duplex outlet.
Electric Cooktops If this vent is installed in combination with an electric cooktop. the vent must operate from a separate 120V outlet.
A properly grounded 3-prong receptacle should be located within reach of the vents’ 2 foot power cord.
• Locate the receptacle inside the cabinet on the right side wall. The receptacle cannot be placed on the back of the cabinet wall where it may interfere with the downdraft plenum. See illustration.
NOTE: Do not use an extension cord or adapter plug with this appliance. Follow National electrical codes or prevailing local codes and ordinances.
Electrical outlet 12″ above cabinet floor
34″ for 36″ models 281⁄2″ for 30″ models
Do not leave gas or electrical connections within shaded area.
291⁄2″
Installation Instructions
DUCTWORK LENGTH AND DUCT FITTINGS
NOTE: Do not exceed 150 foot maximum permissible equivalent lengths!
Flexible ducting: If flexible metal ducting is used. all equivalent feet values in the table should be doubled. The flexible metal duct should be straight and smooth and extended as much as possible.
DO NOT use flexible plastic ducting.
Add equivalent lengths for all duct pieces and transitions used to ensure that the duct run does not exceed the maximum 150 feet.
Duct Equivalent Duct Equivalent Duct Equivalent
Pieces Length* Pieces Length* Pieces Length*
31⁄4″ x 10″ to 6″ Round 6″ Round 1 ft. (per 31⁄4″ x 10″ Transition 12 ft.
Straight foot length) 45° Elbow 5 ft.
90° Elbow
6″ Round 31⁄4″ x 10″ 1 ft. (per 31⁄4″ x 10″ Wall Cap 21 ft.
Straight foot length) 90° Flat Elbow 24 ft. with Damper
6″ Round 31⁄4″ x 10″ 15 ft. to 31⁄4″ x 10″ 7 ft.
Wall Cap 27 ft.
90° Elbow Transition with Damper
31⁄4″ x 10″ to 6″ Round 5 ft.
6″ Round
45° Elbow 9 ft.
Transition Roof Cap 20 ft.
6″ Round to 31⁄4″ x 10″ 31⁄4″ x 10″ Transition 20 ft.
6″ Round
90° Elbow 16 ft.
90° Elbow Roof Vent 24 ft.
SHOULD NOT EXCEED 150 EQUIVALENT FEET
+Equivalent lengths of duct pieces are based on actual tests conducted by GE Evaluation Engineering and reflect requirements for good venting performance. See chart for CFM Duct Length.
Installation Instructions
INSTALLING THE DOWNDRAFT VENT SYSTEM
VENTING OPTIONS
Side-to-Side Adjustments The entire blower mounting plate can be adjusted 31⁄2″ to the left or right. This will help to align vent discharge to house ductwork.
Discharge Direction The blower assembly may be removed and turned 90° for a left or right side discharge.
• The downdraft vent is shipped with the discharge outlet pointing straight down and can be changed to the left or right side.
• A left or right 90° direction adjustment should be performed before dropping into the countertop opening.
• Flatten the shipping box to use as a pad.
• Lay the vent on its back onto the pad.
To Change to a Left or Right Discharge
Remove the 4 screws holding the blower to the mounting plate assembly. Retain screws.
Remove the blower assembly. turn it over to access the 4 nuts holding the blower to the mounting plate. Remove the nuts.
IMPORTANT: Do not lift the motor by the power cable.
Turn the blower to the left or right discharge direction and reinstall the 4 nuts.
Reinstall the blower and mounting plate with original screws.
To Locate the Ductwork Holes in the Cabinet Floor or Side Walls
Temporarily. put vent into the countertop opening.
Push the vent all the way to the back of the opening.
If you are transitioning to 6″ round. place transition (obtained locally) over the discharge outlet.
• Mark the location and remove the assembly.
• Cut holes and install ductwork connections.
Order JXRB67 for installation of the blower and motor below the floor.
Order JXBC67 for installation of the blower and motor outdoors.
Loosen screws to adjust blower left to right
Discharge down (as supplied)
Discharge right Discharge left
Installation Instructions
INSTALL THE DUCTWORK
Use minimum 26″ gauge galvanized or 24 gauge aluminum duct 3 1⁄4″ x 10″ or 6″ round. PVC duct should be used if installing under a poured concrete slab.
DO NOT USE flexible ducting.
• Always use appropriate roof or wall cap with damper. Laundry type wall caps should never be used. See the Ductwork Length and Duct Fittings chart.
• Use the straightest duct run possible.
• For satisfactory performance the duct run should not exceed 150 feet or its equivalent length when bends or various fittings are used. Refer to the table of equivalent lengths to calculate your installation.
• Install ductwork so the piece of duct nearest the downdraft unit slots INTO the next piece of the duct. Secure the joints with self-tapping screws and apply duct tape around the joints to ensure an airtight seal.
Place the downdraft vent into the countertop cutout. against the back side.
Secure the downdraft to the countertop supplied brackets. See illustration.
Fasten 2 brackets to vent side and secure to cabinet back wall.
Install 2 brackets on the bottom of the vent. Attach brackets to slide screws on the vent and to the floor using wood screws (not supplied).
When installing in a tile countertop surface. it may be necessary to apply a locally approved caulking to cover any gaps.
Airflow
Screw
Duct tape over seam and screw
Secure the lower brackets to blower housing
Preferred method Secure the upper brackets with screws located on the side of case and attach to back of cabinet
NOTE: Step 3 is for 36″ models only.
Skip this step if installing a 30″ model.
NOTE: Determine the location for the Raise/Lower switch. The wiring lead is 68″ long.
Drill a 3/8″ hole into the desired location. Use the mounting bracket as a template to locate the hole accurately. Check for interference between the switch cover. adjacent objects and cooktop/vent overlaps.
If switch is mounted into a tile surface. drill the hole between tiles.
Use locally approved caulking to cover any gaps.
Center the mounting bracket over the hole and mark pilot holes. Remove and drill holes according to type of countertop.
Mount the metal switch bracket with screws (not provided). Choose screws for your type of countertop or use locally approved adhesive.
Installation Instructions
WARNING — Disconnect electrical power from the unit before beginning switch installation. Failure to do so could result in personal injury or damage to the electrical controls.
Remove protective film from the top of the switch trim.
Peel film from the adhesive strips on the back of the switch trim. Thread the wire lead through the mounting bracket and countertop. Press trim over the mounting bracket to set the adhesive.
Connect Raise/Lower Wire Lead to Wire Box
Thread wire end with the connector through the hole on the end of a wire box. Pull approximately 3″ additional wire length beyond the open end of the box.
Connect the mating wire connectors.
Install the wire box onto the bottom of the countertop or directly behind the switch. Use screws or adhesive appropriate for the type of countertop.
Place plastic strain relief over the wire. just outside of the hole at the end of the wire box. Do not pinch or twist the wire.
Snap the strain relief closed and press into the hole.
Connect Wire Lead to Control Box
Thread the long 68″ wire lead through the end of the other wire box.
Push wire leads into the white connector provided.
Push wire connector into the mating connector on the control box. Install the wire box onto the end of the control box with screws provided.
Place plastic strain relief over the wire. just outside of the hole at the end in the wire box. Do not pinch or twist the wire.
Snap the strain relief closed and press into the hole.
Coil the excess wire and position away from moving parts and cabinet contents.
Trim
Mounting bracket
3/8″ Hole
Raise/Lower switch
2 Pin connector
Strain relief
Pull 3″ length out of box Control box
JXRB67 optional accessory for indoor remote location of the blower/motor assembly. Use this kit when the blower and motor assembly will be located below the cabinet floor.
JXBC67 optional outdoor cover accessory for remote installation of blower and motor assembly on an outside wall.
Installation Instructions
CONNECT THE POWER
Plug power cord into a properly grounded receptacle.
• With the downdraft in the “down” position. place the cooktop into the cutout.
• Push the cooktop back until the back edge of the cooktop just barely touches the front edge of the downdraft cover.
• Using a dime as a thickness gauge. align the cooktop so that there is a minimum uniform gap of 0.05″ (the thickness of a dime) between the cooktop and the downdraft cover.
NOTE: Do not force the downdraft cover to move rearward when aligning the cooktop.
This may cause the downdraft cover to impact and damage the cooktop when the vent is raised and lowered.
NOTES:
• Accurate alignment of cooktop and downdraft is necessary to ensure that there is no interference when air vent is raised and lowered. There should be a gap of 0.05″ (the thickness of a dime) between the back edge of the cooktop and the front edge of the downdraft cover.
• Radiant cooktop cannot be flush mounted when using this downdraft vent.
Mounting brackets
Operating Instructions Safety Instructions Installation Instructions Troubleshooting Tips Consumer Support
Troubleshooting Tips Save time and money! Review the chart below first and you may not need to call for service.
Problem Possible Causes What To Do
Fan does not work The vent is not fully extended.
• Press the Raise/Lower switch.
The blower control switch
• Slide it to the right.
Vent does not rise Vent not plugged into an outlet.
• Plug vent into a 120V power outlet.
Raise/Lower switch did not
• Hold switch down for a couple of seconds to
Circuit breaker may have
• Check circuit breaker. Reset if necessary.
Remote switch not plugged in.
• Check all connections between the remote switch and vent body.
Before you call for service…
Consumer Support Operating Instructions Safety Instructions Installation Instructions Troubleshooting Tips
IService trips to your home to teach you how to use the product.
IImproper installation. delivery or maintenance.
IFailure of the product if it is abused. misused. or used for other than the intended purpose or used commercially.
IReplacement of the replaceable filters.
IReplacement of house fuses or resetting of circuit breakers.
IDamage to the product caused by accident. fire. floods or acts of God.
IIncidental or consequential damage caused by possible defects with this appliance.
IDamage caused after delivery.
What GE Will Not Cover:
This warranty is extended to the original purchaser and any succeeding owner for products purchased for home use within the USA. In Alaska. the warranty excludes the cost of shipping or service calls to your home.
Some states do not allow the exclusion or limitation of incidental or consequential damages. This warranty gives you specific legal rights. and you may also have other rights which vary from state to state. To know what your legal rights are. consult your local or state consumer affairs office or your state’s Attorney General.
If you have an installation problem. contact your dealer or installer. You are responsible for providing adequate electrical. gas. exhausting and other connecting facilities as described in the Installation Instructions provided with the product.
Warrantor: General Electric Company. Louisville. KY 40225
For The Period Of: GE Will Replace:
One Year Any part of the downdraft system which fails due to a defect in materials or workmanship.
From the date of the During this full one-year warranty. GE will also provide. free of charge. all labor and in-home original purchase service to replace the defective part.
GE Downdraft System Warranty.
All warranty service provided by our Factory Service Centers. or an authorized Customer Care technician. To schedule service. on-line. 24 hours a day. visit us at www.GEAppliances.com. or call 800.GE.CARES (800.432.2737).
Staple your receipt here.
Proof of the original purchase date is needed to obtain service under the warranty.
Consumer Support.
Printed in the United States
GE Appliances Website www.GEAppliances.com
Have a question or need assistance with your appliance? Try the GE Appliances Website 24 hours a day. any day of the year! For greater convenience and faster service. you can now download Owner’s Manuals. order parts. catalogs. or even schedule service on-line. You can also “Ask Our Team of Experts” your questions. and so much more
Schedule Service www.GEAppliances.com
Expert GE repair service is only one step away from your door. Get on-line and schedule your service at your convenience 24 hours any day of the year! Or call 800.GE.CARES (800.432.2737) during normal business hours.
Real Life Design Studio www.GEAppliances.com
GE supports the Universal Design concept–products. services and environments that can be used by people of all ages. sizes and capabilities. We recognize the need to design for a wide range of physical and mental abilities and impairments. For details of GE’s Universal Design applications. including kitchen design ideas for people with disabilities. check out our Website today. For the hearing impaired. please call 800.TDD.GEAC (800.833.4322).
Extended Warranties www.GEAppliances.com
Purchase a GE extended warranty and learn about special discounts that are available while your warranty is still in effect. You can purchase it on-line anytime. or call 800.626.2224 during normal business hours.
GE Consumer Home Services will still be there after your warranty expires.
Parts and Accessories www.GEAppliances.com
Individuals qualified to service their own appliances can have parts or accessories sent directly to their homes (VISA. MasterCard and Discover cards are accepted). Order on-line today. 24 hours every day or by phone at 800.626.2002 during normal business hours.
Instructions contained in this manual cover procedures to be performed by any user. Other servicing generally should be referred to qualified service personnel. Caution must be exercised. since improper servicing may cause unsafe operation.
Contact Us www.GEAppliances.com
If you are not satisfied with the service you receive from GE. contact us on our Website with all the details including your phone number. or write to: General Manager. Customer Relations GE Appliances. Appliance Park Louisville. KY 40225
Register Your Appliance www.GEAppliances.com
Register your new appliance on-line–at your convenience! Timely product registration will allow for enhanced communication and prompt service under the terms of your warranty. should the need arise.
You may also mail in the pre-printed registration card included in the packing material.