Loading ...
Loading ...
Loading ...
3
HOW TO
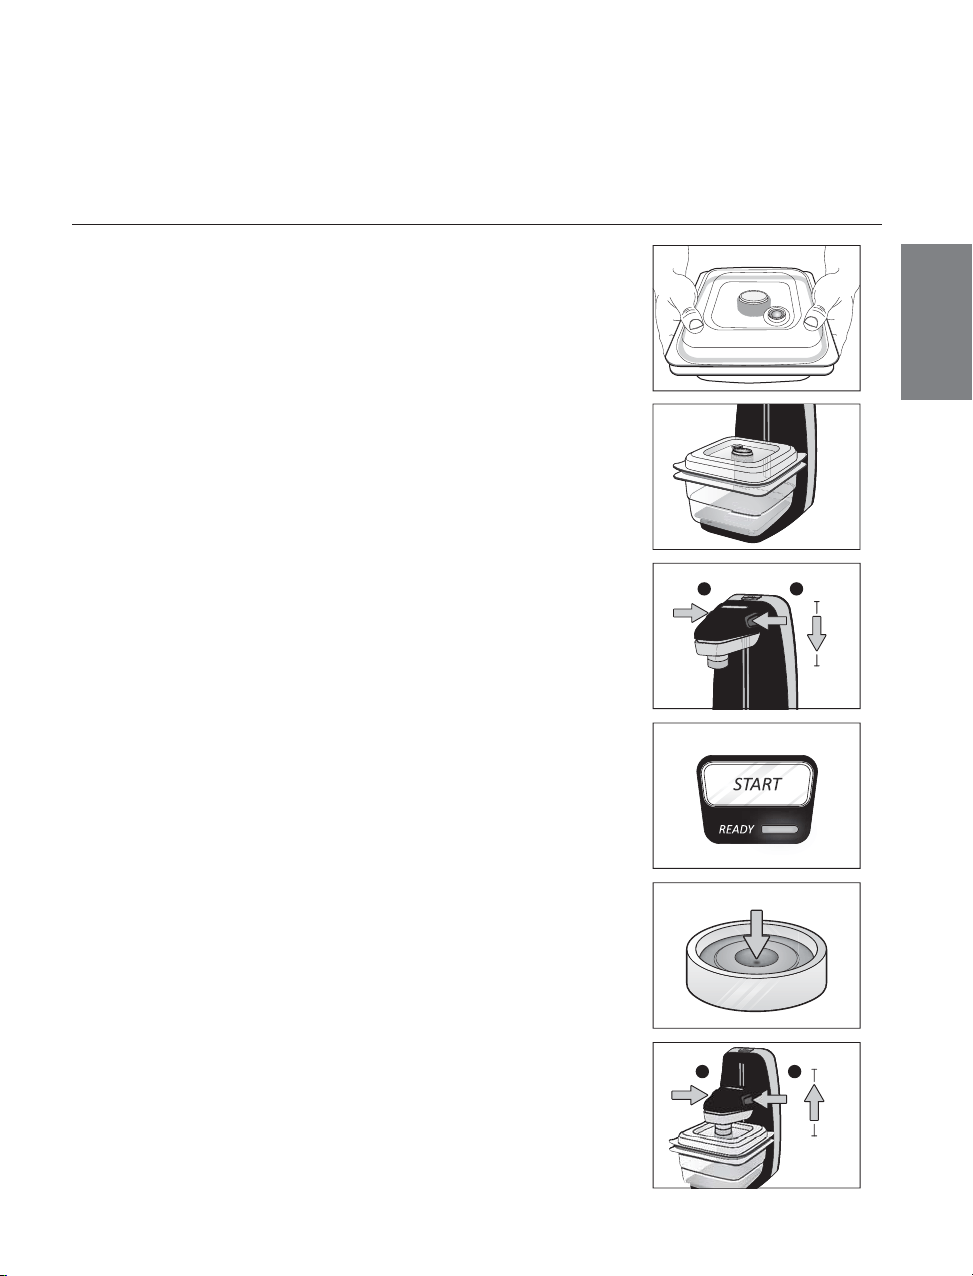
STEP 1
Place food or item to be vacuum sealed inside a FoodSaver
®
Fresh
Container. Press firmly on all sides to ensure lid is properly closed
(Fig. 1).
STEP 2
Place container on unit base using platform as a guide (Fig. 2).
STEP 3
Simultaneously press both release buttons at the vacuum head to
adjust its height (Fig. 3). Press the vacuum head on the container
until it clicks, the green ready indicator will turn on.
NOTE: The green light will only illuminate if the vacuum head has
made secure contact with the top of the container.
STEP 4
Push start button to initiate vacuum sealing process (Fig. 4).
STEP 5
The vacuum indicator on the container “dimple” will form early
during the vacuum sealing process. Do not stop the process. Allow
the vacuum to complete the cycle before removing the container from
the machine. The unit will stop automatically once the container is
vacuum sealed (Fig. 5).
NOTE: If the food you are vacuum sealing flour, bread crumbs or other
powdery foods, some may be sucked out of the container into the
reservoir under the vacuum head. Please make sure to empty it out
and clean after each use.
STEP 6
Simultaneously press both release buttons again to lift vacuum head
up and remove fresh container (Fig. 6). Now you can store your fresh
container in refrigerator, pantry or take on the go.
NOTE: Let appliance cool down for 20 seconds after each use.
How to...
Vacuum Seal with FoodSaver
®
Fresh Containers
Go to www.foodsaver.com for additional hints,
tips, instructional videos and information.
Fig. 4
Fig. 3
1
2
Fig. 2
Fig. 1
1
2
Fig. 5
Fig. 6
Loading ...
Loading ...
Loading ...