Loading ...
Loading ...
Loading ...
47
Runtime
Like every other Li-Ion battery the Power for ALL bat-
tery is subject to natural wear as well. That means the
battery capacity and thus runtime decrease over time.
This is a natural aging process and not the result of a
material/production failure or a product defect.
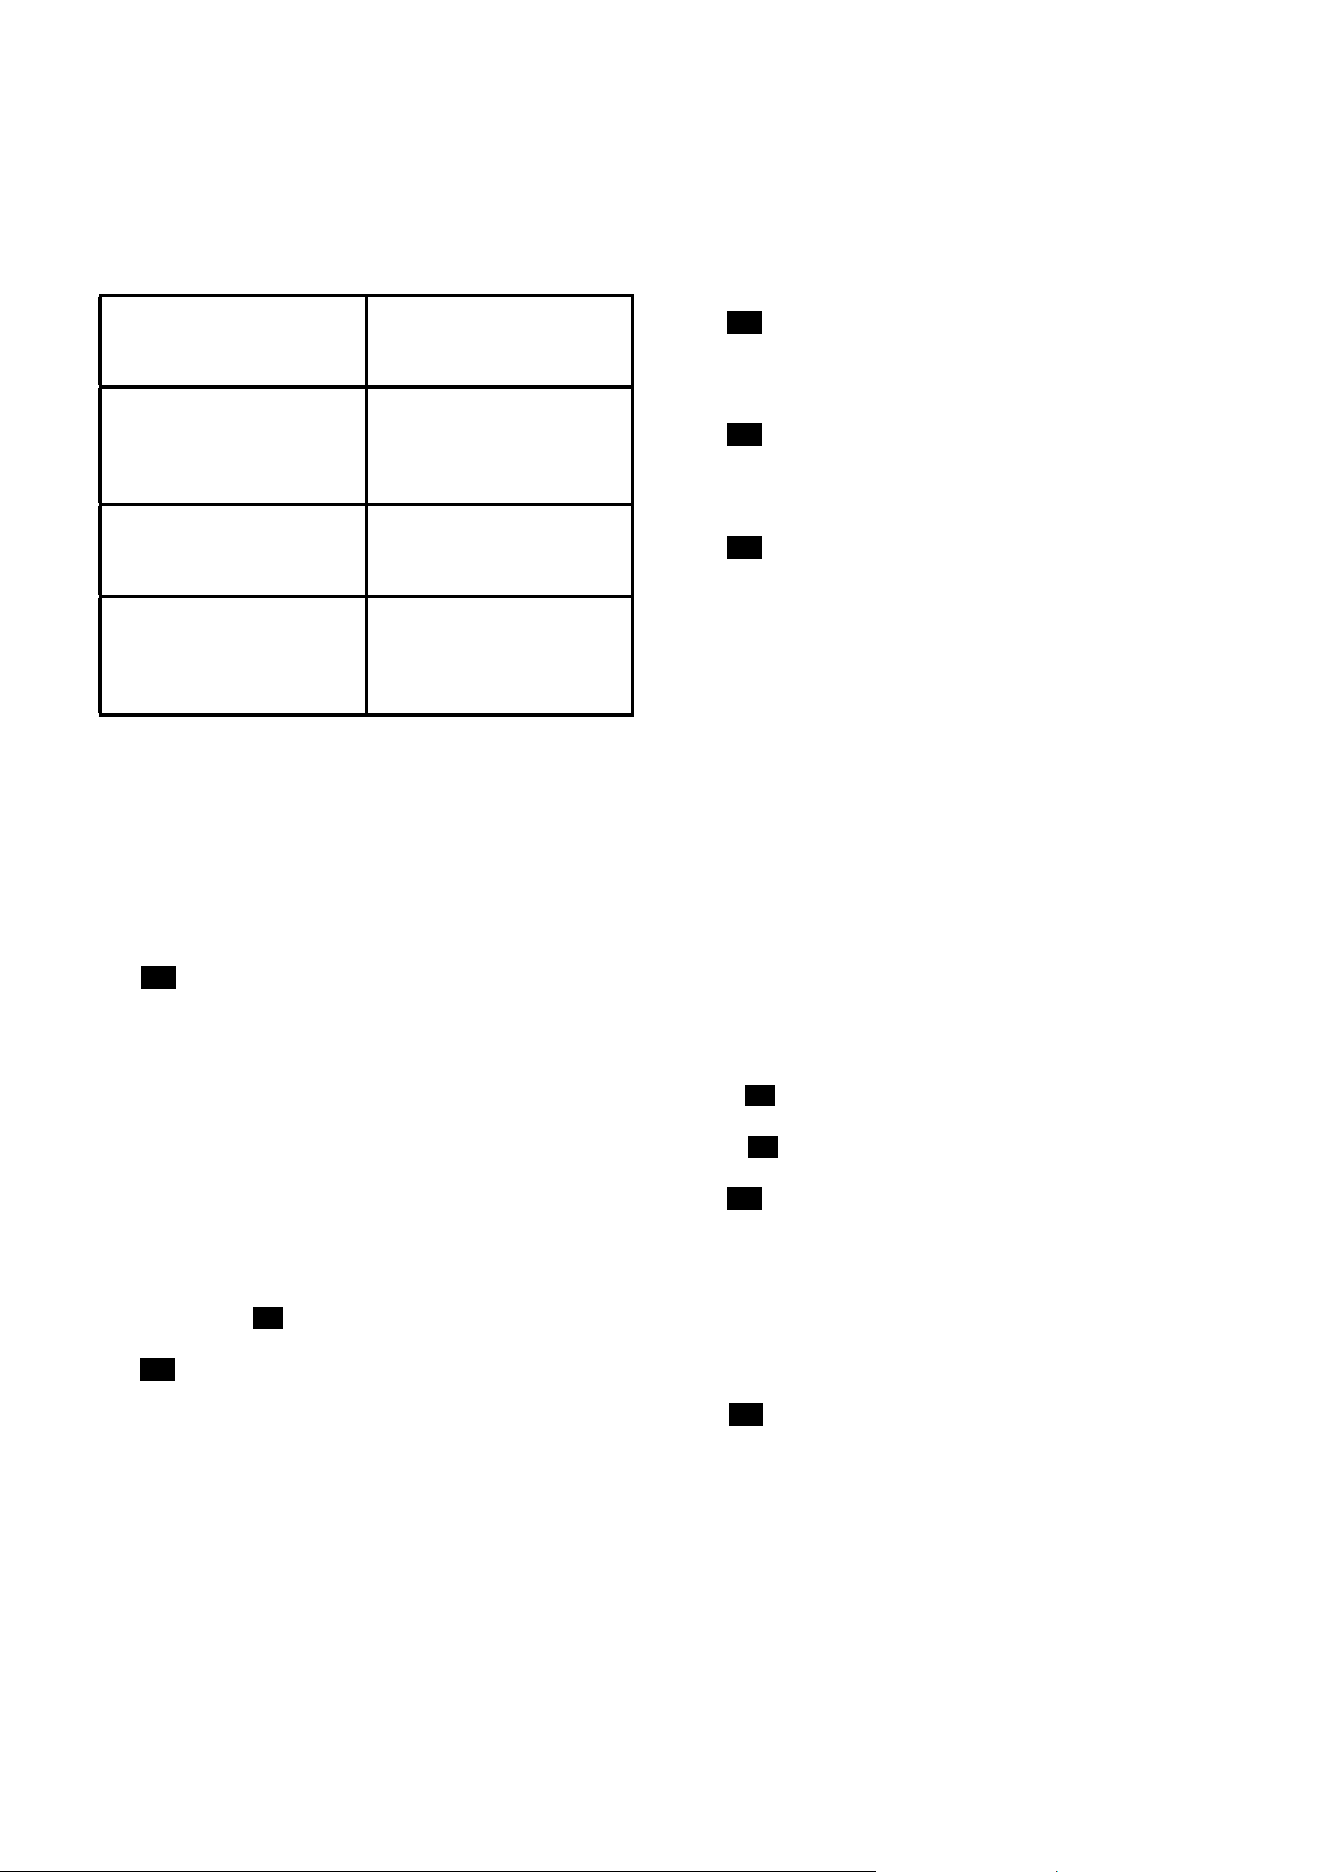
For one 3,0Ah Bosch
Power for ALL battery
On normal mode with
non-electrical accesso-
ries for cleaning furniture
etc.
Up to 60 min.
On normal mode with
electrical nozzle for
normal cleaning tasks
Up to 45 min.
Turbo mode with elec-
trical floor nozzle and
for demanding cleaning
tasks
Up to 7 min.
The natural wear can be prolonged with the following
measures:
•
Charge the battery only within a temperature range
between 0 °C and 45 °C.
•
Store the battery only within a temperature range
between -20 °C and 50 °C.
•
Do not store the battery fully-charged or completely
discharged over a long period of time.
Fig.
9
Vacuum-cleaning with accessories
Attach the nozzles to the suction tube or the appliance's
connection port as required:
a) Crevice nozzle for vacuuming crevices and corners, etc.
b) 2-in-1 furniture brush with upholstery nozzle for vacu-
um-cleaning window frames, cupboards, furniture, etc.
•
After use, reinsert the crevice nozzle and 2-in-1 fur-
niture brush with upholstery nozzle into the acces-
sories holder.
After using the appliance
•
Switch off the appliance once you have finished va-
cuuming.
Fig.
7
Fig.
10
Emptying the dust container
In order to achieve the best possible vacuuming re-
sults, the dust container should be emptied after every
use or, at the latest, when dust at one point in the dust
container has reached the mark.
We recommend that you do not fill the dust container
beyond the mark as this may lead to the filter becoming
clogged with dust.
* Depending on model
When emptying the dust container, always check how
much dust there is in the filter unit and, if necessary,
clean it as detailed in the "Filter care" instructions.
!
Caution: The filter can only be cleaned if the appli-
ance is switched off.
Never vacuum-clean without the filter unit in place.
Fig.
11
•
Use the release button to release the dust container,
and remove the dust container from the appliance.
Fig.
12
•
Take the filter unit out of the dust container
•
Empty the dust container.
Fig.
13
•
Remove any dirt that may have been lodged under-
neath the container ejector opening.
•
Insert the filter unit into the dust container, making
sure it is correctly seated.
•
Insert the dust container into the appliance, so that
it clicks audibly into place.
!
Caution: If you notice any resistance when inserting
the dust container, check that the filter is complete
and that the filter unit and dust container are correct-
ly seated.
Filter care
The filters should be cleaned at regular intervals in or-
der to ensure that the vacuum cleaner operates opti-
mally.
•
Please switch off the appliance to clean the filters.
!
Caution: The filter can only be cleaned if the appli-
ance is switched off.
•
Remove the dust container from the appliance.
Fig.
11
•
Take the filter unit out of the dust container.
Fig
.
12
Fig.
14
Cleaning the plate filter
•
To clean the plate filter, turn the knob at least three
turns through 180°.
•
Then remove the plate filter from the outer filter unit
and empty the dirt.
We recommend that you clean the plate filter each time
you empty the dust container.
Fig.
15
Tapping the dirt out of the plate filter
If the plate filter is particularly dirty, the dirt can also
be tapped out.
•
To do this, remove the plate filter from the outer fil-
ter unit and tap it out over a dustbin.
•
Once you have cleaned the plate filter, it is ready for
use immediately.
!
Please note: The filter does not need to be rinsed
out.
Loading ...
Loading ...
Loading ...