Loading ...
Loading ...
Loading ...
ENGLISH
33
HOW TO USE
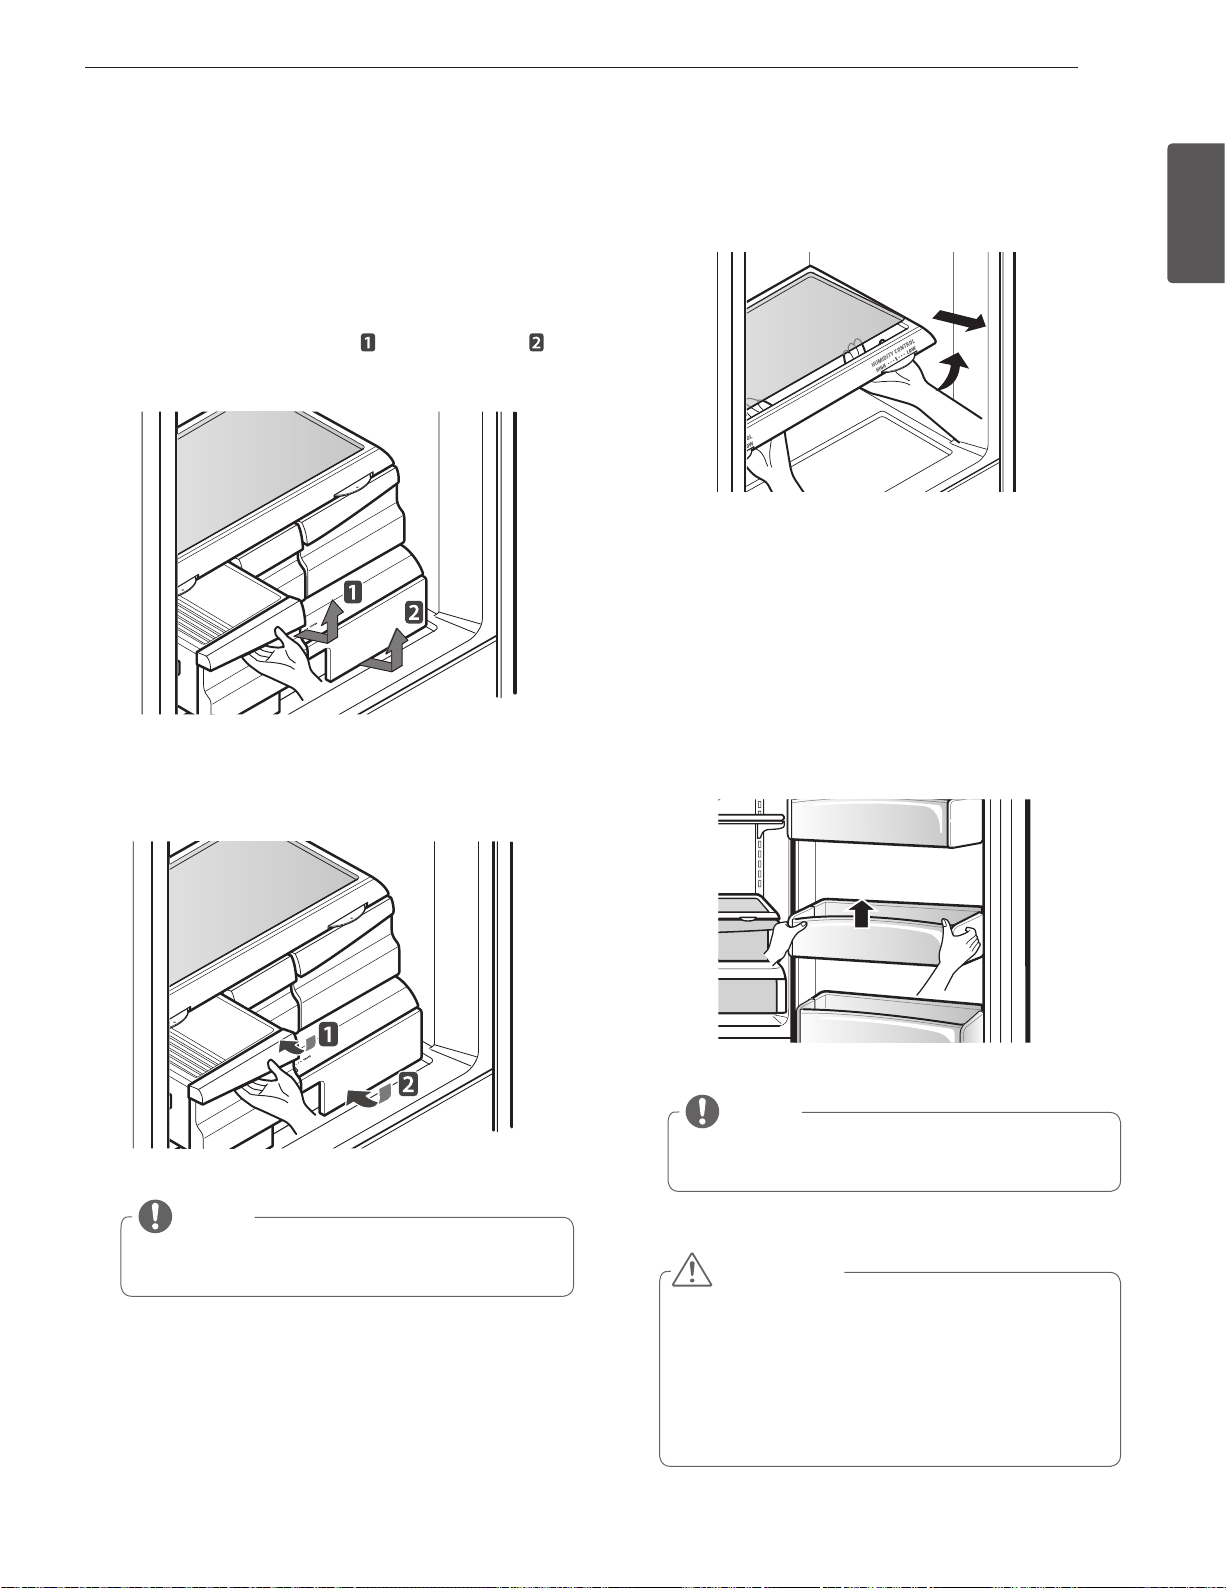
Door Bins
Detaching and Assembling the
Storage Bins
Glide’N’Serve and Humidity Controlled
Crisper
To remove the Humidity Controlled Crisper and the
Glide’N’Server,
pull out the Crisper and Glide’N’Server to
full extension, lift the front up, and pull straight out.
CAUTION
Do not apply excessive force while detatching or
y
assembling the storage bins.
Do not use the dishwasher to clean the storage bins
y
and shelves.
Regularly detach and wash the storage bins and
y
shelves; they can become easily contaminated by
the food.
To Remove the Glass
(Pantry drawer not shown for clarity)
Lift up the glass under the crisper cover, and pull up and out.
To install, slightly tilt up the front, insert the drawer into the
frame and push it back into place.
The door bins are removable for easy cleaning and
adjustment.
1
To remove the bin, simply lift the bin up and pull
straight out.
2
To replace the bin, slide it in above the desired support and
push down until it snaps into place.
NOTE
Some bins may vary in appearance and will only fit in
one location.
32
REMOVING AND REPLACING COMPONENTS
NOTE: When reinstalling components, reverse
the order of steps for removal. To prevent damage,
never use excessive force when removing or
reinstalling components.
wCAUTION
• Personal injury can occur if the door bins are not
firmly assembled.
NOTE: DO NOT adjust a loaded bin.
• DO NOT allow children to play with baskets.
The sharp corners on the baskets could cause
injury.
Dairy Bin Gallon Storage Bins
To remove the dairy bin, simply lift it and pull
straight out. To replace the dairy bin, slide it into
place and push down until it stops.
NOTE: The dairy bin will only fit in the top space
on the right-hand door.
The door bins are removable for easy cleaning
and adjusting. Simply lift the bin and pull it straight
out to remove it. To replace the bin, slide it in
above the desired support button and push down
until it stops.
Dispenser Drip Tray
The dispenser drip tray has no self-draining function. It should be cleaned regularly. Remove the cover by
pressing and pulling the tray. Dry it with a cloth. To reinstall the tray, slightly tilt the front of the tray and
snap the ribs into the holes.
NOTE
Storage Bins may vary in appearance, depending on
your model.
Loading ...
Loading ...
Loading ...