Loading ...
Loading ...
Loading ...
9
CAUTION
When lifting the hinge free of the latch, be careful
that the door does not fall forward.
6. Lift the door from the lower hinge pin being careful to
pull the water lines through the lower hinge pin.
7. Place the door, inside facing up, on a non scratching
surface.
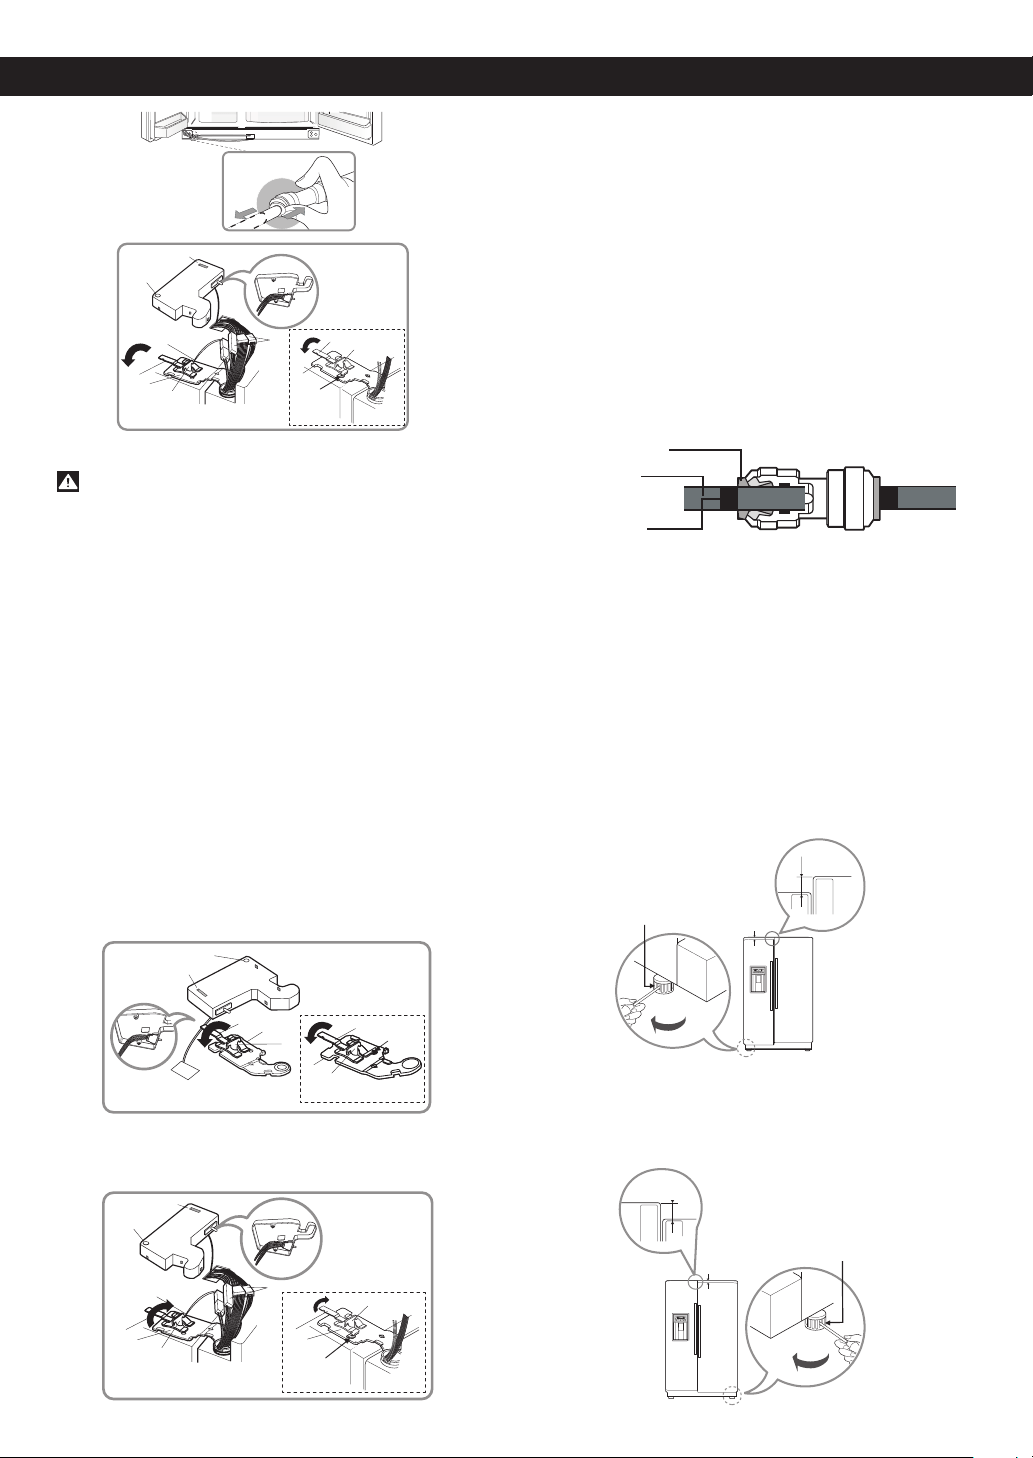
Reinstalling the right (refrigerator) door:
1. Place the door onto the lower hinge pin.
2. Fit top hinge (4) over hinge lever latch (5) into place.
Rotate lever (3) counterclockwise to secure hinge.
NOTE: Regardless of hinge lever type, reinstallation
process is the same.
3. Hook tab on switch side of corner under edge of wire
opening in cabinet top. Position cover (2) into place.
Insert and tighten cover screw (1).
Reinstalling the left (freezer) door:
1. Feed the water tubes through the lower hinge pin and
place the door onto the lower hinge pin.
2. Fit top hinge (6) over hinge lever latch (7) and into
place. Rotate lever (5) clockwise to secure hinge.
NOTE: Regardless of hinge lever type, reinstallation
process is the same.
3. Install the grounding screw (4) and connect all the wire
harnesses (3).
4. Hook tab on door switch side of cover (2) under edge
of wire opening in cabinet top. Position cover into place.
Insert and tighten cover screw (1).
5. Reconnect the water tubes by inserting the tubes into
the connectors.
DOOR ALIGNMENT
Remove the base grille before adjusting the doors. See
“Base Grille Installation” for reference. Two methods of
door alignment are available based on the amount of
adjustment needed and installation requirements.
Type 1
Adjusting tool: Flat blade screwdriver. If the freezer
compartment door is lower than the refrigerator
compartment door, level them by inserting a flat blade
screwdriver into the groove of the left leveling leg and
rotating it clockwise.
If the freezer compartment door is higher than the
refrigerator compartment door, level them by inserting a
flat blade screwdriver into the groove of the right leveling
leg and rotating it clockwise.
REFRIGERATOR INSTALLATION REFRIGERATOR INSTALLATION
(1)
(3)
(4)
(5)
Type 2
Type 1
(3
)
(4 )
(5 )
Rivet
(2 )
(1 )
(2 )
(3)
(5)
(6)
(7)
(4)
Type 2
Type 1
(5)
(6)
(7)
Rivet
Collet
Tube
Insert Line
Left
leveling leg
Height
Height
difference
difference
C
F
C
F
H
C
F
Right
Height
difference
C
F
C
F
H
C
F
Height
difference
leveling leg
Figure 1
(1 )
(2 )
(3)
(5)
(6)
(7)
(4)
Type 2
Type 1
(6)
(5)
Rivet
(7)
Loading ...
Loading ...
Loading ...