Loading ...
Loading ...
Loading ...
6
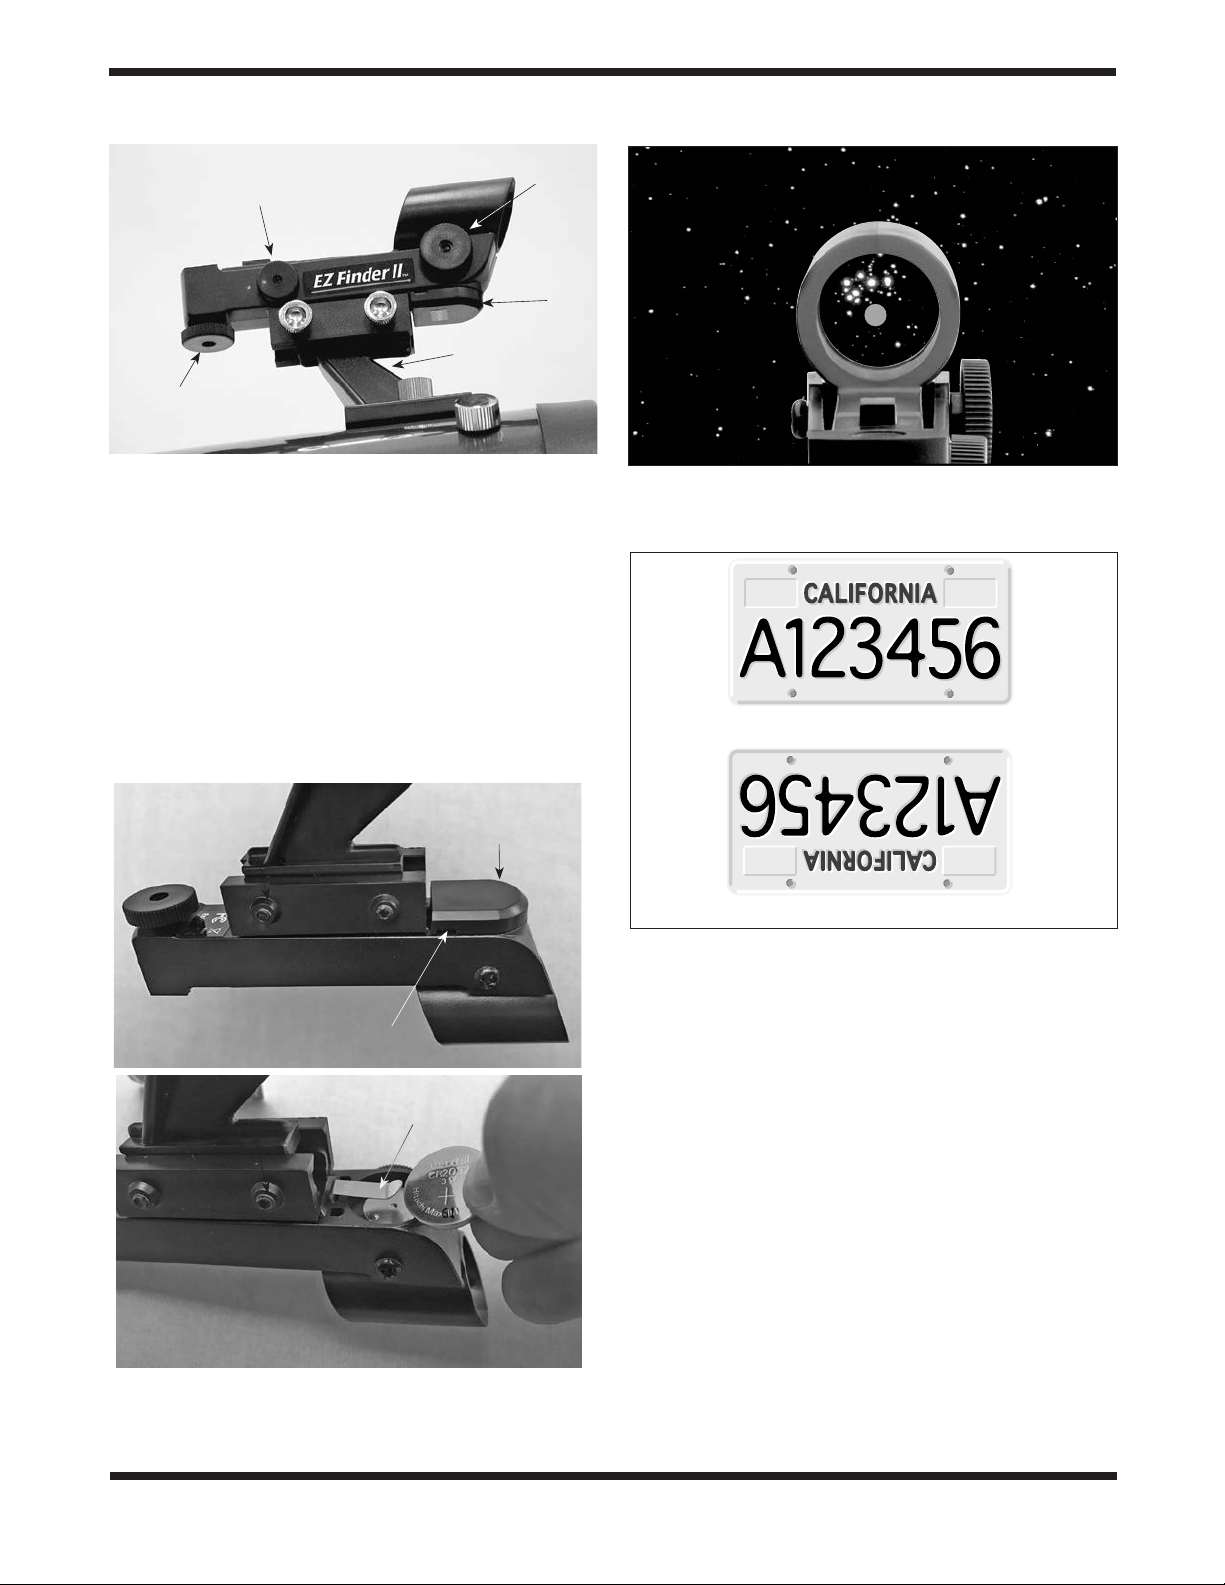
3. Slide the battery under the retaining clip with the positive (+)
side facing up (touching the clip) (6b).
4. Then press the battery compartment cover back on. Should
the battery die, replacement CR2032 batteries are available at
many stores where small batteries are sold or online.
The EZ Finder II works by projecting a tiny red dot (it’s not a
laser beam) onto a lens mounted in the front of the unit. When
you look through the EZ Finder II, the red dot will appear to
oat in space, helping you locate even the faintest of deep-sky
objects (Figure 7). The red dot is produced by a light-emitting
diode (LED) near the rear of the sight.
Turn the power knob clockwise until you hear the “click” indicat-
ing power has been turned on. Look through the rear of the
reex sight with both eyes open to see the red dot. Position your
eye at a comfortable distance from the rear of the sight. The
intensity of the dot is adjusted by turning the power knob. For
best results when stargazing, use the dimmest possible setting
that allows you to see the dot without difficulty. Typically a dimmer
setting is used under dark skies and a brighter setting is used
under light-polluted skies or daylight.
At the end of your observing session, be sure to turn the power
knob counterclockwise until it clicks off. When the white dots
on the reex sight’s body and power knob are lined up, the EZ
Finder II is turned off.
Aligning the EZ Finder II Reflex Sight
When the EZ Finder II is properly aligned with the telescope, an
object that is centered on the reex sight’s red dot should also
appear in the center of the eld of view of the telescope’s eye-
Retaining clip
Battery
compartment
cover
Notch
Naked-eye view
Figure 8. The view through a reector telescope is rotated 180°
View through telescope
Figure 5. The EZ Finder II reex sight.
Power Knob
Azimuth
adjustment
Knob
Battery
compartment
cover
Mounting bracket
Altitude
adjustment
Knob
Figure 6. a) To install the CR2032 battery in the EZ Finder II, rst
turn it upside-down and remove the battery compartment cover.
b) Install the battery with positive (+) side facing up, as shown.
Figure 7. The EZ Finder II superimposes a small red dot (it’s not
a laser!) on a non-magnied eld of view, which helps to center an
object in the telescope’s eld of view.
b.
a.
Loading ...
Loading ...
Loading ...